2019 NISSAN ROGUE SPORT maintenance
[x] Cancel search: maintenancePage 105 of 500
Remote start (if so equipped):
The “Remote start” feature allows user to
turn the remote engine start on or off.
When turned on, the engine can be
restarted remotely. For additional infor-
mation, refer to “Remote engine start”
(P.3-23).
Maintenance
The maintenance mode allows you to set
alerts for the reminding of maintenance
intervals. To change an item:
Select “Maintenance” using the
switchand press OK.
Oil and Filter:
This indicator appears when the custo-
mer set distance comes for changing the
engine oil and filter. You can set or reset
the distance for checking or replacing
these items. For scheduled maintenance
items and intervals, refer to the “9. Main-
tenance and schedules” section.
Tire:
This indicator appears when the custo-
mer set distance comes for replacing
tires. You can set or reset the distance
for replacing tires.
WARNING
The tire replacement indicator is not
a substitute for regular tire checks,
including tire pressure checks. See
“Changing wheels and tires” (P.8-37).
Many factors including tire inflation,
alignment, driving habits and road
conditions affect tire wear and when
tires should be replaced. Setting the
tire replacement indicator for a cer-
tain driving distance does not mean
your tires will last that long. Use the
tire replacement indicator as a guide
only and always perform regular tire
checks. Failure to perform regular
tire checks, including tire pressure
checks could result in tire failure.
Serious vehicle damage could occur
and may lead to a collision, which
could result in serious personal in-
jury or death.
Other:
This indicator appears when the custo-
mer set distance comes for checking or
replacing maintenance items other than
the engine oil, oil filter and tires. Other
maintenance items can include such
things as air filter or tire rotation. You
can set or reset the distance for checking or replacing the items.
Alarm (if so equipped)
This setting allows the customer to set
alarms.
Select “Alarm” using the
buttonand
press OK button.
Timer Alert (if so equipped):
This setting allows the customer to set an
alert to notify the driver that the set time
has been reached.
1. Use the
buttonto select “Timer
Alert”.
2. Press the OK button
.
3. To change the timer amount, use the
buttonand the OK buttonto
save the selected time amount.
Navigation (if so equipped):
This setting allows the customer to en-
able/disable the alert for navigation in the
vehicle information display.
1. Use the
buttonto select “Navi-
gation”.
2. Press the OK button
to turn ON/OFF
the alert.
Phone (if so equipped):
This setting allows the customer to en-
able/disable the alert for an incoming call
in the vehicle information display.
Instruments and controls2-25
Page 132 of 500
2-52Instruments and controls
JVS1079X
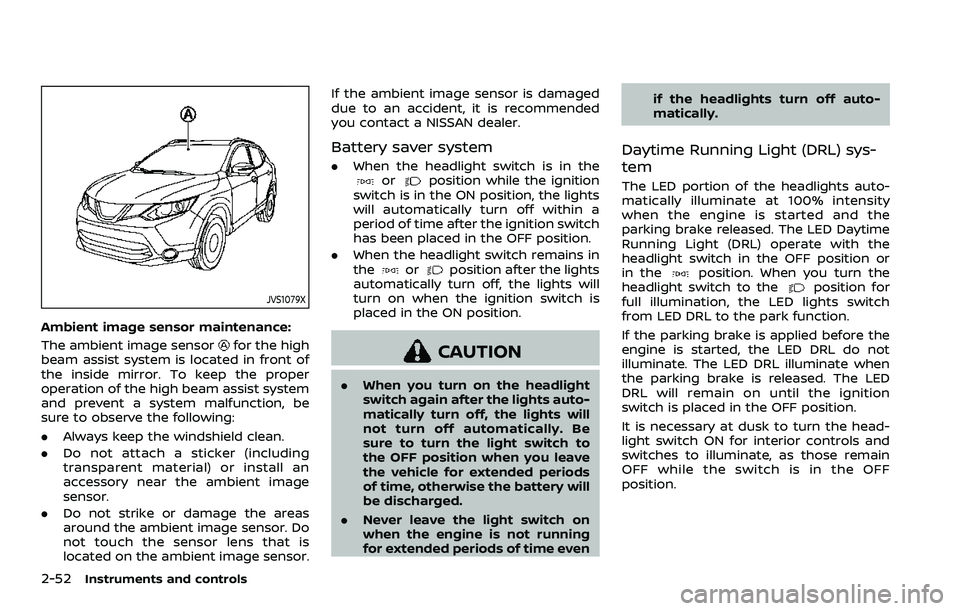
Ambient image sensor maintenance:
The ambient image sensor
for the high
beam assist system is located in front of
the inside mirror. To keep the proper
operation of the high beam assist system
and prevent a system malfunction, be
sure to observe the following:
. Always keep the windshield clean.
. Do not attach a sticker (including
transparent material) or install an
accessory near the ambient image
sensor.
. Do not strike or damage the areas
around the ambient image sensor. Do
not touch the sensor lens that is
located on the ambient image sensor. If the ambient image sensor is damaged
due to an accident, it is recommended
you contact a NISSAN dealer.
Battery saver system
.
When the headlight switch is in theorposition while the ignition
switch is in the ON position, the lights
will automatically turn off within a
period of time after the ignition switch
has been placed in the OFF position.
. When the headlight switch remains in
the
orposition after the lights
automatically turn off, the lights will
turn on when the ignition switch is
placed in the ON position.
CAUTION
. When you turn on the headlight
switch again after the lights auto-
matically turn off, the lights will
not turn off automatically. Be
sure to turn the light switch to
the OFF position when you leave
the vehicle for extended periods
of time, otherwise the battery will
be discharged.
. Never leave the light switch on
when the engine is not running
for extended periods of time even if the headlights turn off auto-
matically.
Daytime Running Light (DRL) sys-
tem
The LED portion of the headlights auto-
matically illuminate at 100% intensity
when the engine is started and the
parking brake released. The LED Daytime
Running Light (DRL) operate with the
headlight switch in the OFF position or
in the
position. When you turn the
headlight switch to theposition for
full illumination, the LED lights switch
from LED DRL to the park function.
If the parking brake is applied before the
engine is started, the LED DRL do not
illuminate. The LED DRL illuminate when
the parking brake is released. The LED
DRL will remain on until the ignition
switch is placed in the OFF position.
It is necessary at dusk to turn the head-
light switch ON for interior controls and
switches to illuminate, as those remain
OFF while the switch is in the OFF
position.
Page 195 of 500
4 Monitor, heater, air conditioner, audioand phone systems
NissanConnect® Owner’s Manual .................................... 4-2
RearView Monitor (if so equipped) ................................. 4-2
RearView Monitor system operation ..................... 4-3
How to read the displayed lines ................................ 4-4
Difference between predictive and
actual distances ...................................................................... 4-4
How to park with predictive course lines .......... 4-6
Adjusting the screen ........................................................... 4-7
How to turn ON and OFF predictive course
lines ........................................................................\
......................... 4-8
RearView Monitor system limitations .................... 4-8
System maintenance .......................................................... 4-9
Intelligent Around View® Monitor (if
so equipped) ........................................................................\
.......... 4-10 Intelligent Around View® Monitor
system operation ................................................................ 4-11
Difference between predictive and
actual distances ................................................................... 4-14
How to park with predictive course lines ....... 4-16
How to switch the display ........................................... 4-17
Adjusting the screen ........................................................ 4-18 Intelligent Around View® Monitor
system limitations ............................................................ 4-18
System maintenance .................................................... 4-20
Moving Object Detection (MOD) (if
so equipped) ........................................................................\
......... 4-21 MOD system operation ................................................ 4-22
Turning MOD on and off ............................................ 4-23
MOD system limitations .............................................. 4-23
System maintenance .................................................... 4-24
Ventilators ........................................................................\
.............. 4-25
Center ventilators ............................................................ 4-25
Side ventilators .................................................................. 4-25
Rear ventilators (if so equipped) .......................... 4-25
Heater and air conditioner ................................................ 4-26 Manual air conditioner and heater .................... 4-27
Automatic air conditioner and heater ............ 4-30
Operating tips (for automatic
air conditioner) ................................................................... 4-33
Servicing air conditioner ............................................. 4-33
Antenna ........................................................................\
.................... 4-33
Car phone or CB radio ......................................................... 4-34
Page 203 of 500
.Objects on the monitor may not be
clear in a dark environment.
. There may be a delay when switching
between views.
. If dirt, rain or snow accumulates on
the camera, the RearView Monitor
may not display objects clearly. Clean
the camera.
. Do not use wax on the camera lens.
Wipe off any wax with a clean cloth
dampened with a diluted mild clean-
ing agent, then wipe with a dry cloth.
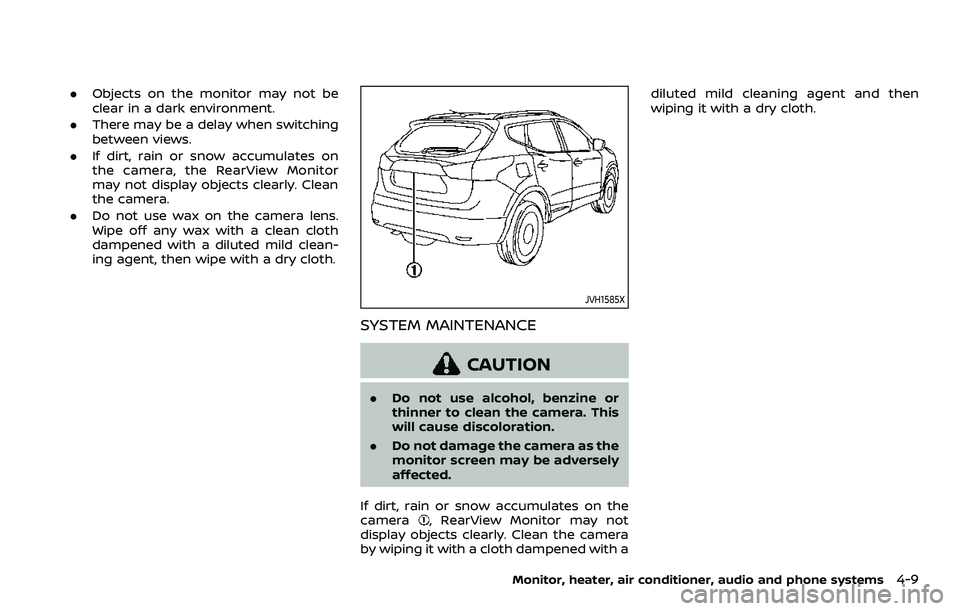
JVH1585X
SYSTEM MAINTENANCE
CAUTION
.Do not use alcohol, benzine or
thinner to clean the camera. This
will cause discoloration.
. Do not damage the camera as the
monitor screen may be adversely
affected.
If dirt, rain or snow accumulates on the
camera
, RearView Monitor may not
display objects clearly. Clean the camera
by wiping it with a cloth dampened with a diluted mild cleaning agent and then
wiping it with a dry cloth.
Monitor, heater, air conditioner, audio and phone systems4-9
Page 214 of 500
4-20Monitor, heater, air conditioner, audio and phone systems
WAE0057X
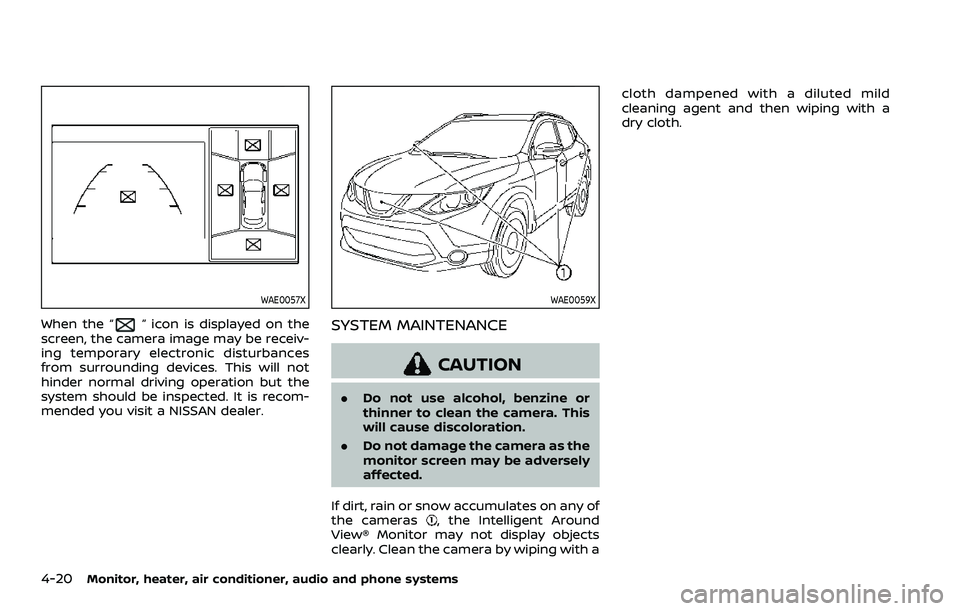
When the “” icon is displayed on the
screen, the camera image may be receiv-
ing temporary electronic disturbances
from surrounding devices. This will not
hinder normal driving operation but the
system should be inspected. It is recom-
mended you visit a NISSAN dealer.
WAE0059X
SYSTEM MAINTENANCE
CAUTION
. Do not use alcohol, benzine or
thinner to clean the camera. This
will cause discoloration.
. Do not damage the camera as the
monitor screen may be adversely
affected.
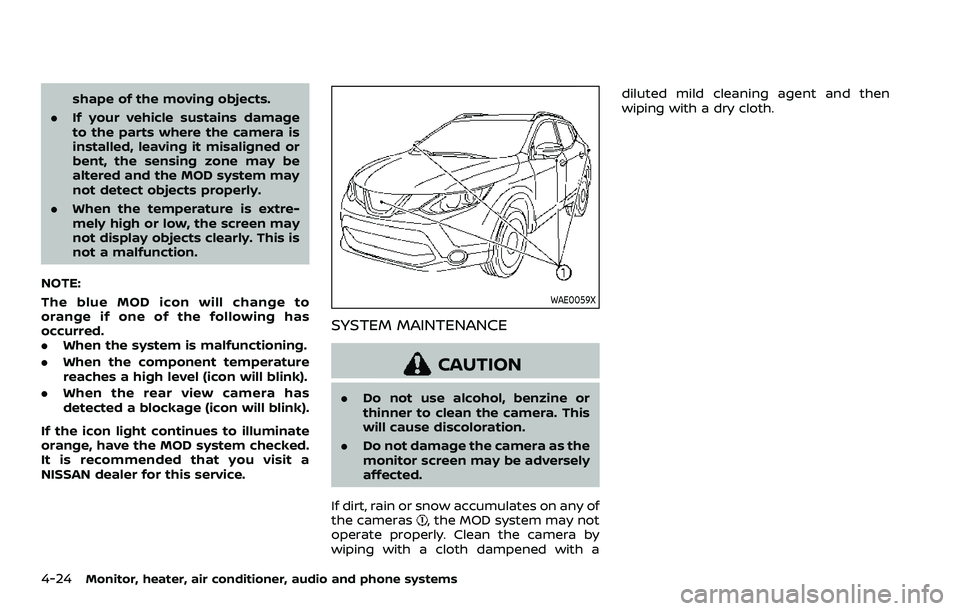
If dirt, rain or snow accumulates on any of
the cameras
, the Intelligent Around
View® Monitor may not display objects
clearly. Clean the camera by wiping with a cloth dampened with a diluted mild
cleaning agent and then wiping with a
dry cloth.
Page 218 of 500
4-24Monitor, heater, air conditioner, audio and phone systems
shape of the moving objects.
. If your vehicle sustains damage
to the parts where the camera is
installed, leaving it misaligned or
bent, the sensing zone may be
altered and the MOD system may
not detect objects properly.
. When the temperature is extre-
mely high or low, the screen may
not display objects clearly. This is
not a malfunction.
NOTE:
The blue MOD icon will change to
orange if one of the following has
occurred.
. When the system is malfunctioning.
. When the component temperature
reaches a high level (icon will blink).
. When the rear view camera has
detected a blockage (icon will blink).
If the icon light continues to illuminate
orange, have the MOD system checked.
It is recommended that you visit a
NISSAN dealer for this service.
WAE0059X
SYSTEM MAINTENANCE
CAUTION
. Do not use alcohol, benzine or
thinner to clean the camera. This
will cause discoloration.
. Do not damage the camera as the
monitor screen may be adversely
affected.
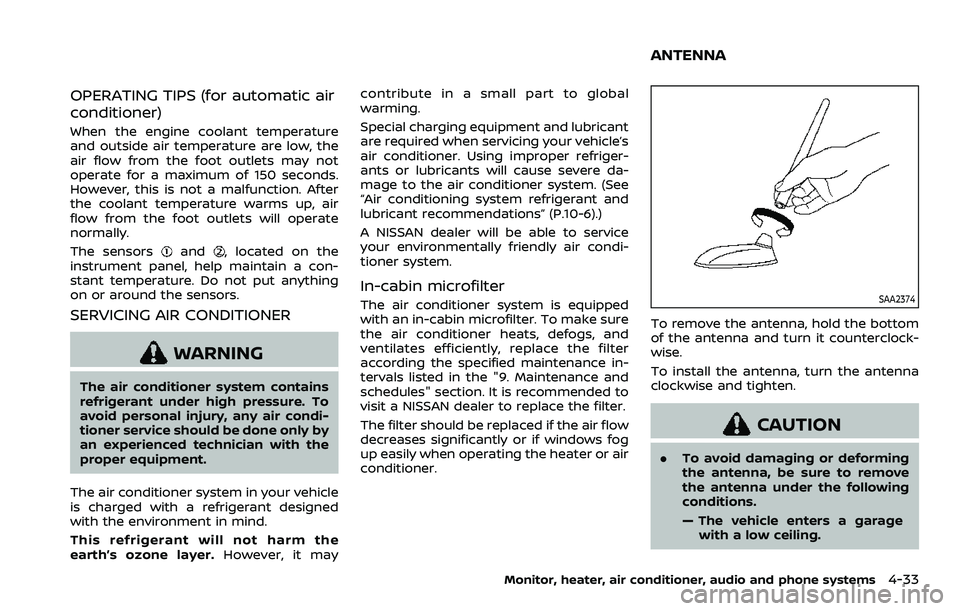
If dirt, rain or snow accumulates on any of
the cameras
, the MOD system may not
operate properly. Clean the camera by
wiping with a cloth dampened with a diluted mild cleaning agent and then
wiping with a dry cloth.
Page 227 of 500
OPERATING TIPS (for automatic air
conditioner)
When the engine coolant temperature
and outside air temperature are low, the
air flow from the foot outlets may not
operate for a maximum of 150 seconds.
However, this is not a malfunction. After
the coolant temperature warms up, air
flow from the foot outlets will operate
normally.
The sensors
and, located on the
instrument panel, help maintain a con-
stant temperature. Do not put anything
on or around the sensors.
SERVICING AIR CONDITIONER
WARNING
The air conditioner system contains
refrigerant under high pressure. To
avoid personal injury, any air condi-
tioner service should be done only by
an experienced technician with the
proper equipment.
The air conditioner system in your vehicle
is charged with a refrigerant designed
with the environment in mind.
This refrigerant will not harm the
earth’s ozone layer. However, it maycontribute in a small part to global
warming.
Special charging equipment and lubricant
are required when servicing your vehicle’s
air conditioner. Using improper refriger-
ants or lubricants will cause severe da-
mage to the air conditioner system. (See
“Air conditioning system refrigerant and
lubricant recommendations” (P.10-6).)
A NISSAN dealer will be able to service
your environmentally friendly air condi-
tioner system.
In-cabin microfilter
The air conditioner system is equipped
with an in-cabin microfilter. To make sure
the air conditioner heats, defogs, and
ventilates efficiently, replace the filter
according the specified maintenance in-
tervals listed in the "9. Maintenance and
schedules" section. It is recommended to
visit a NISSAN dealer to replace the filter.
The filter should be replaced if the air flow
decreases significantly or if windows fog
up easily when operating the heater or air
conditioner.SAA2374
To remove the antenna, hold the bottom
of the antenna and turn it counterclock-
wise.
To install the antenna, turn the antenna
clockwise and tighten.
CAUTION
.
To avoid damaging or deforming
the antenna, be sure to remove
the antenna under the following
conditions.
— The vehicle enters a garage
with a low ceiling.
Monitor, heater, air conditioner, audio and phone systems4-33
ANTENNA
Page 230 of 500
LDW system limitations .................................................. 5-38
System temporarily unavailable ............................. 5-39
System malfunction .......................................................... 5-39
System maintenance ....................................................... 5-39
Intelligent Lane Intervention (I-LI) (if
so equipped) ........................................................................\
.......... 5-40 I-LI system operation ....................................................... 5-41
How to enable/disable the I-LI system ............. 5-42
I-LI system limitations ..................................................... 5-43
System temporarily unavailable ............................. 5-44
System malfunction .......................................................... 5-45
System maintenance ....................................................... 5-45
Blind Spot Warning (BSW) ................................................... 5-46 BSW system operation ................................................... 5-48
How to enable/disable the BSW system .......... 5-49
BSW system limitations .................................................. 5-50
BSW driving situations .................................................... 5-51
System temporarily unavailable ............................. 5-54
System malfunction .......................................................... 5-55
System maintenance ....................................................... 5-55
Rear Cross Traffic Alert (RCTA) ....................................... 5-56
RCTA system operation ................................................. 5-57
How to enable/disable the RCTA system ....... 5-59
RCTA system limitations ............................................... 5-60
System temporarily unavailable ............................. 5-63
System malfunction .......................................................... 5-63
System maintenance ....................................................... 5-63
Cruise control (if so equipped) ....................................... 5-64 Precautions on cruise control .................................. 5-65 Cruise control operations .......................................... 5-65
Intelligent Cruise Control (ICC) (models without
ProPILOT assist) (if so equipped) .................................. 5-66 How to select the cruise control mode ......... 5-68
Vehicle-to-vehicle distance
control mode ....................................................................... 5-68
Conventional (fixed speed) cruise
control mode ....................................................................... 5-82
ProPILOT assist (if so equipped) ................................... 5-86 ProPILOT assist system operation ..................... 5-88
ProPILOT assist switches ........................................... 5-89
ProPILOT assist system display
and indicators ..................................................................... 5-90
Turning the conventional (fixed speed)
cruise control mode ON ............................................. 5-91
Operating ProPILOT assist ........................................ 5-91
How to enable/disable the
steering assist ..................................................................... 5-95
How to cancel the ProPILOT
assist system ....................................................................... 5-97
Intelligent Cruise Control (ICC)
(models with ProPILOT assist) ............................... 5-97
Steering assist ................................................................ 5-106
Conventional (fixed speed) cruise
control mode ................................................................... 5-112
Automatic Emergency Braking (AEB) (if
so equipped) ........................................................................\
..... 5-115
AEB system operation .............................................. 5-116
Turning the AEB system ON/OFF ................... 5-118
AEB system limitations ............................................ 5-119