Page 395 of 507

4. Lower the vehicle slowly until the tiretouches the ground. Then, with the
wheel nut wrench, tighten the wheel
nuts securely in the sequence illus-
trated (
�A,�B,�C,�D,�E). Lower the ve-
hicle completely.
5. Securely store the jack and tools back in their storage compartment. Ensure
the jack is expanded and tools
snapped into place to prevent rattle
noise from happening while driving.
WARNING
∙ Incorrect wheel nuts or improperlytightened wheel nuts can cause the
wheel to become loose or come off.
This could cause an accident.
∙ Do not use oil or grease on the wheel studs or nuts. This could cause the
nuts to become loose.
∙ Retighten the wheel nuts when the vehicle has been driven for 621 miles
(1,000 km) (also in cases of a flat tire,
etc.). As soon as possible, tighten the wheel
nuts to the specified torque with a
torque wrench.
Wheel nut tightening torque:
83 f t-lb (113 N·m)
The wheel nuts must be kept tightened
to specification at all times. It is recom-
mended that wheel nuts be tightened to
specifications at each lubrication inter-
val.
Adjust tire pressure to the COLD pres-
sure.
COLD pressure: Af ter vehicle has been
parked for 3 hours or more or driven less
than 1 mile (1.6 km).
COLD tire pressures are shown on the tire
and loading information label affixed to
the driver side center pillar. To start your engine with a booster battery,
the instructions and precautions below
must be followed.
WARNING
∙ If done incorrectly, jump starting can
lead to a battery explosion, resulting
in severe injury or death. It could also
damage your vehicle.
∙ Explosive hydrogen gas is always present in the vicinity of the battery.
Keep all sparks and flames away from
the battery.
∙ Do not allow battery fluid to come into contact with eyes, skin, clothing or
painted surfaces. Battery fluid is a
corrosive sulfuric acid solution which
can cause severe burns. If the fluid
should come into contact with any-
thing, immediately flush the con-
tacted area with water.
∙ Keep battery out of the reach of children.
∙ The booster battery must be rated at 12 volts. Use of an improperly rated
battery can damage your vehicle.
JUMP STARTING
In case of emergency6-9
Page 420 of 507

CAUTION
Be sure to remove any old gasket mate-
rial remaining on the sealing surface of
the engine. Failure to do so could lead to
an oil leak and engine damage.
∙ The dipstick must be inserted in placeto prevent oil spillage from the dip-
stick hole when filling the engine with
oil.
6. Coat the gasket on the new filter with clean engine oil.
7. Screw in the oil filter clockwise until a slight resistance is felt, then tighten ad-
ditionally more than 2/3 turn.
Oil filter tightening torque: 11 to 15 f t-lb (14.7 to 20.6 N·m)
8. Clean and re-install the drain plug with a new washer. Securely tighten the
drain plug with a wrench. Do not use
excessive force.
Drain plug tightening torque: 22 to 29 f t-lb (29.4 to 39.2 N·m)
9. Refill the engine with the recom- mended oil through the oil filler open-
ing, and install the oil filler cap securely.
For additional information about drain and
refill capacity, refer to “Recommended
fluids/lubricants and capacities” in the “Tech-
nical and consumer information” section of
this manual. The drain and refill capacity de-
pends on the oil temperature and drain time.
Use these specifications for reference only.
Always use the dipstick to determine the
proper amount of oil in the engine.
10. Start the engine and check for leakage around the drain plug and the oil filter.
Correct as required. Turn the engine off
and wait more than 15 minutes. Check
the oil level with the dipstick. Add en-
gine oil if necessary.
Af ter the operation
1. Reinstall engine protectors in reverseorder of removal.
2. Lower the vehicle carefully to the ground.
3. Reset oil and oil filter maintenance re- minder. For additional information, re-
fer to “Vehicle information display” in
the “Instruments and controls” section
of this manual.
∙ Dispose of waste oil and filter properly.
∙ Check your local regulations.
CAUTION
∙ NISSAN recommends using Genuine NISSAN CVT Fluid NS-3 (or equivalent)
ONLY in NISSAN CVTs. Do not mix with
other fluids.
∙ Do not use Automatic Transmission Fluid (ATF) or manual transmission
fluid in a NISSAN CVT, as it may dam-
age the CVT. Damage caused by the
use of fluids other than as recom-
mended is not covered under
NISSAN’s New Vehicle Limited
Warranty.
∙ Using fluids that are not equivalent to Genuine NISSAN CVT Fluid NS-3 may
also damage the CVT. Damage caused
by the use of fluids other than as rec-
ommended is not covered under
NISSAN’s New Vehicle Limited
Warranty.
When checking or replacement of CVT fluid
is required, we recommend a NISSAN
dealer for servicing.
CONTINUOUSLY VARIABLE
TRANSMISSION (CVT) FLUID
8-10Do-it-yourself
Page 446 of 507

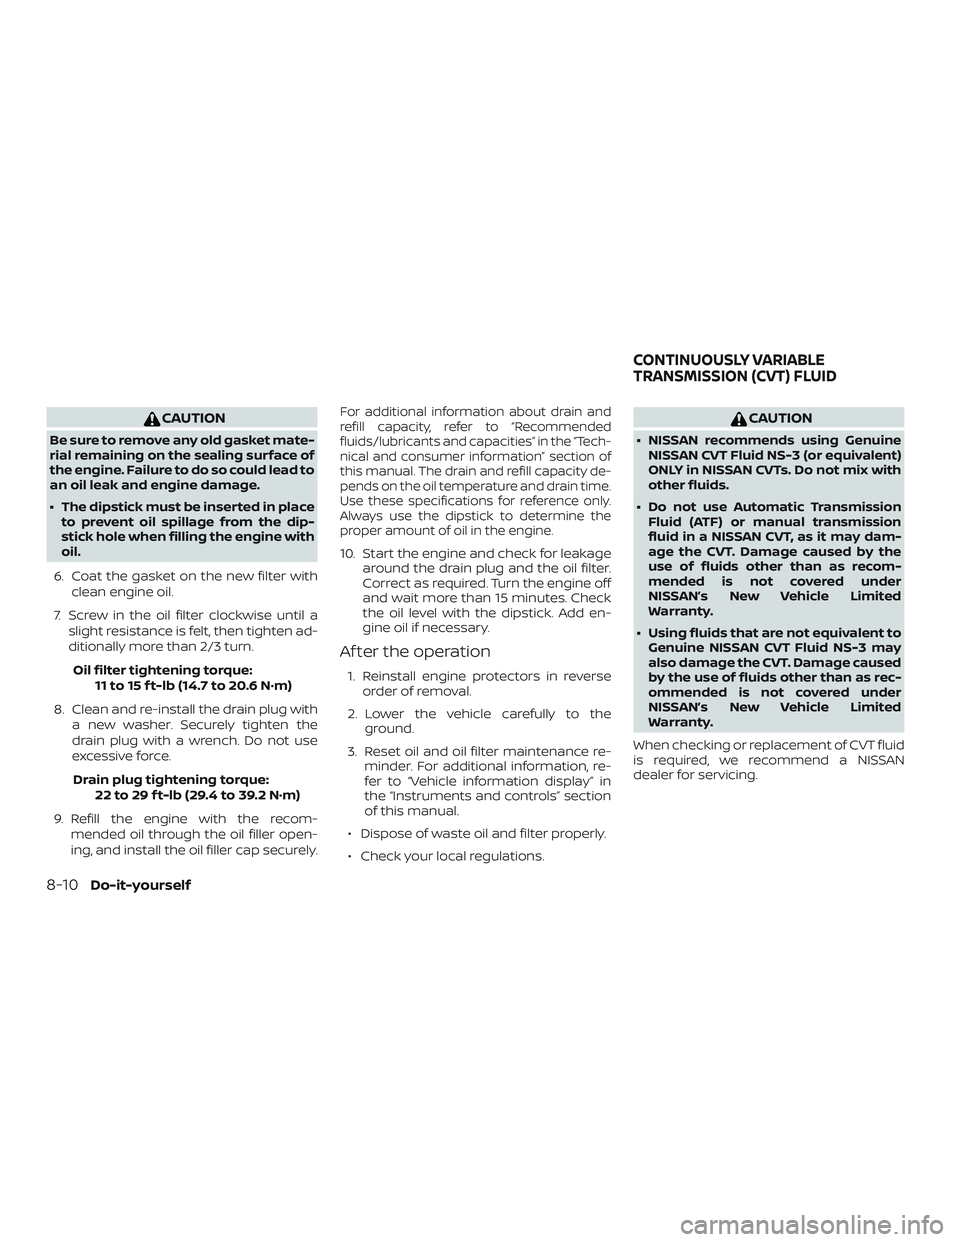
CHANGING WHEELS AND TIRES
Tire rotation
NISSAN recommends rotating the
tires every 5,000 miles (8,000 km).
For additional information on tire re-
placing procedures, refer to “Flat tire”
in the “In case of emergency” section
of this manual.
As soon as possible, tighten the
wheel nuts to the specified torque
with a torque wrench.Wheel nut tightening torque:
83 f t-lb (113 N·m)
The wheel nuts must be kept tight-
ened to specifications at all times.
It is recommended that wheel nuts
be tightened to specification at
each tire rotation interval.
WARNING
∙ Af ter rotating the tires, check and adjust the tire pressure.
∙ Retighten the wheel nuts when the vehicle has been driven for
600 miles (1,000 km) (also in
cases of a flat tire, etc.).
∙ Do not include the spare tire in the tire rotation.
∙ For additional information re- garding tires, refer to “Impor-
tant Tire Safety Information”
(US) or “Tire Safety Information”
(Canada) in the Warranty Infor-
mation Booklet.
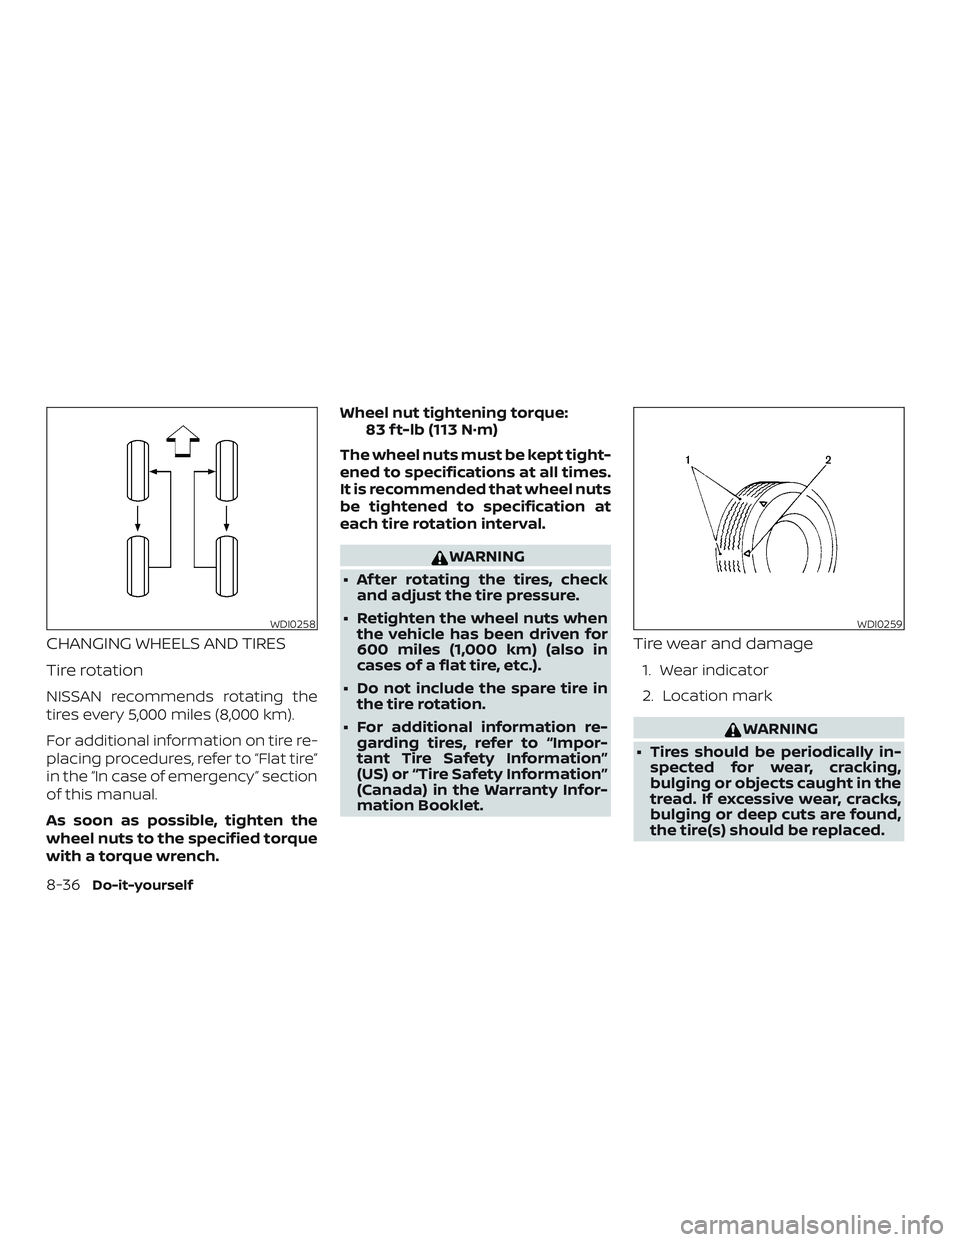
Tire wear and damage
1. Wear indicator
2. Location mark
WARNING
∙ Tires should be periodically in- spected for wear, cracking,
bulging or objects caught in the
tread. If excessive wear, cracks,
bulging or deep cuts are found,
the tire(s) should be replaced.
WDI0258WDI0259
8-36Do-it-yourself