Page 72 of 610
1. Push the P (Park) position switch to placethe vehicle in the P (Park) position and
apply the parking brake.
2. When charging the Li-ion battery, place the power switch in the OFF position.
When the power switch is in the ON po-
sition, the Li-ion battery will not start
charging.
3. Open the charge port lid. For additional information, refer to “Charge port lid” in
the “Pre-driving checks and adjust-
ments” section of this manual. 4. Take out the EVSE from the rear hatch.
5. Connect the electrical plug to the AC 110
- 120 volt, 15A dedicated electrical outlet
using a NISSAN Genuine Adapter. If it is
connected normally, the green light on
the EVSE control box indicator light
illuminates.
NOTE:
You can pass a rope through the holes
�Aon the control box to the holder in
order to hang it up while the Li-ion
battery is charging.
Use the EVSE with the plug in the up-
right position. (The cord should ex-
tend down from the outlet.)
ChargingCH-21
Page 73 of 610
6. Open the charge port cap. For additionalinformation, refer to “Charge port cap” in
the “Pre-driving checks and adjust-
ments” section of this manual. 7. Remove the safety cap from the charge
connector. 8. Connect the charge connector to the
charge port. If it is connected normally, a
beep will sound once.
9. If charging has started, or if the Li-ion battery is waiting for the charging timer,
a beep will sound twice and the charg-
ing status indicator light display will
change. For additional information, refer
to “Charging status indicator lights” in
this section.
CH-22Charging
Page 78 of 610
Precautions on storage
• Do not store the EVSE in a place exposedto direct sunlight.
• Do not store the EVSE in a place exposed to wind or rain.
•
Be sure to store the EVSE with the protec-
tive cap on to keep the terminal of the
charge connector away from dirt and dust.
•Do not store the EVSE with the cable and/or
cord wound around the control box.
• Do not store the EVSE in a condition in which the cable and/or cord are twisted.
• The control box will become hot while the EVSE is charging. This is not a malfunction.
• Normal charge (AC 220-240 volt) by L1 & L2 EVSE is performed using an AC 220 -
240 volt, 50A dedicated electrical outlet
using the L1 & L2 EVSE provided with the
vehicle.
ChargingCH-27
Page 81 of 610
Incorrect electric outlet connection
If EVSE is connected to this miswired outlet, EVSE does not work and the POWER indicator
light (orange) on the EVSE control box will blink.
CH-30Charging
Page 83 of 610
4. Take out the EVSE from the rear hatch.
5. Connect the electrical plug to the AC 220- 240 volt, 50A dedicated electrical outlet.
If it is connected normally, the green light
on the EVSE control box indicator light
illuminates.
NOTE:
You can pass a rope through the holes
�Aon the control box or place the con-
trol box to the holder in order to hang
it up while the Li-ion battery is charg-
ing.
Use the EVSE with the plug in an up-
right position. (The cord should extend
down from the outlet.)
6. Open the charge port cap. For additionalinformation, refer to “Charge port cap”
in the “Pre-driving checks and adjust-
ments” section of this manual.
CH-32Charging
Page 84 of 610
7. Remove the safety cap from the chargeconnector. 8. Connect the charge connector to the
charge port. If it is connected normally, a
beep will sound once.
9. If charging has started, or if the Li-ion battery is waiting for the charging timer,
a beep will sound twice and the charg-
ing status indicator light display will
change. For additional information, refer
to “Charging status indicator lights” in
this section. 10. When recharging outside, such as in
your driveway, use a commercially
available padlock attached in position
�Ato prevent thef t.
ChargingCH-33
Page 88 of 610
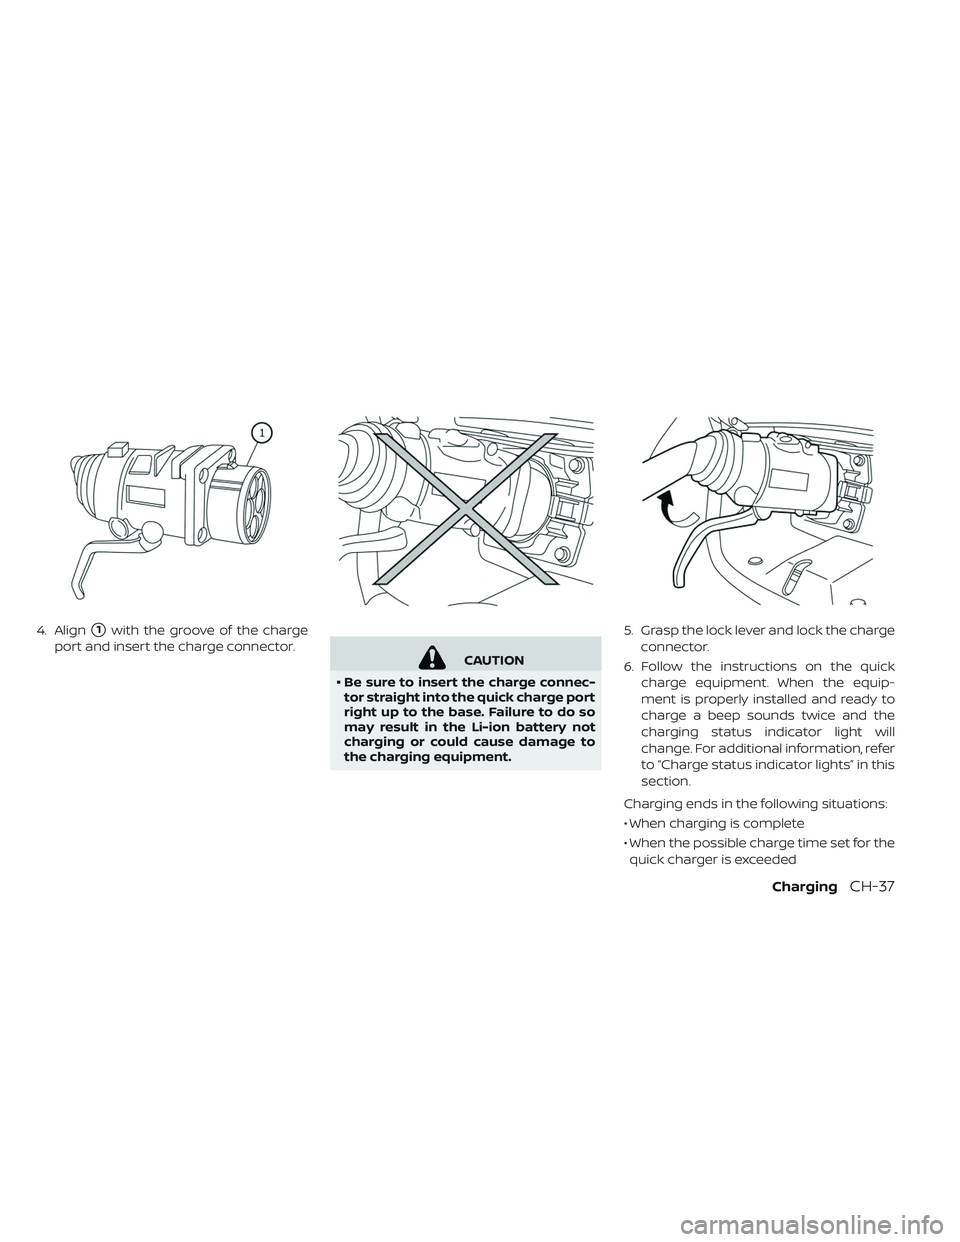
4. Align�1with the groove of the charge
port and insert the charge connector.
CAUTION
• Be sure to insert the charge connec-
tor straight into the quick charge port
right up to the base. Failure to do so
may result in the Li-ion battery not
charging or could cause damage to
the charging equipment. 5. Grasp the lock lever and lock the charge
connector.
6. Follow the instructions on the quick charge equipment. When the equip-
ment is properly installed and ready to
charge a beep sounds twice and the
charging status indicator light will
change. For additional information, refer
to “Charge status indicator lights” in this
section.
Charging ends in the following situations:
• When charging is complete
• When the possible charge time set for the quick charger is exceeded
ChargingCH-37
Page 91 of 610
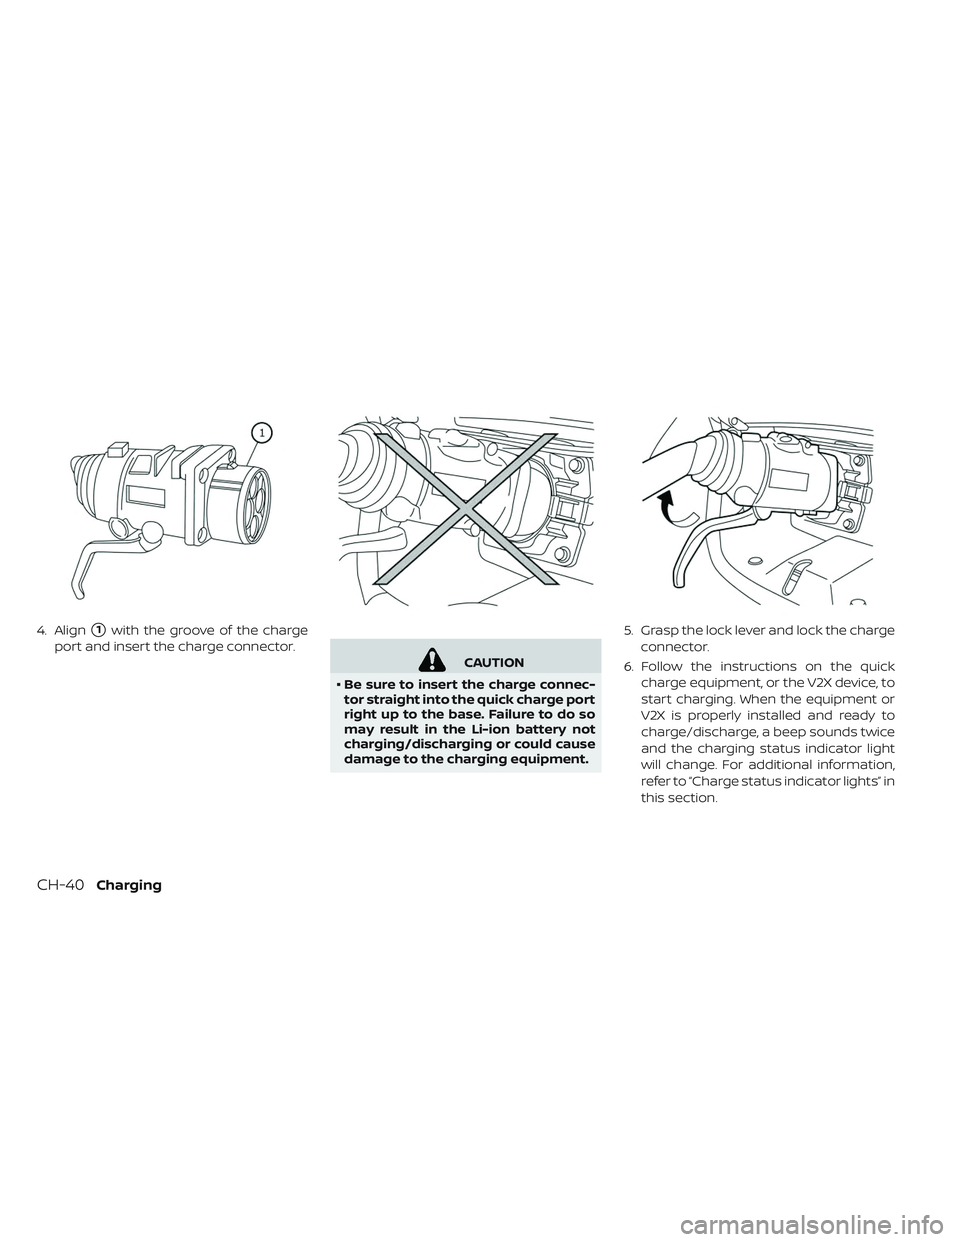
4. Align�1with the groove of the charge
port and insert the charge connector.
CAUTION
• Be sure to insert the charge connec-
tor straight into the quick charge port
right up to the base. Failure to do so
may result in the Li-ion battery not
charging/discharging or could cause
damage to the charging equipment. 5. Grasp the lock lever and lock the charge
connector.
6. Follow the instructions on the quick charge equipment, or the V2X device, to
start charging. When the equipment or
V2X is properly installed and ready to
charge/discharge, a beep sounds twice
and the charging status indicator light
will change. For additional information,
refer to “Charge status indicator lights” in
this section.
CH-40Charging
 position switch to placethe vehicle in the P (Park) position and
apply the parking brake.
2. When charging the Li-ion battery, place the power switch in the OFF position.
When the")


 on the EVSE control box will blink.
CH-30Charging")