Page 151 of 516
The E-Lock system can help provide added
traction if the vehicle is stuck or becoming
stuck.
To activate the E-Lock system:∙ The 4WD switch must be in the 4LO po- sition (4-Wheel Drive vehicles),
∙ The vehicle must be stopped or moving at 4 mph (7 km/h) or less, and
∙ The E-Lock system switch must be turned on. When the E-Lock switch is turned on, the
indicator light will flash until the system
engages. However, if all operation condi-
tions listed above are not met or the sys-
tem becomes disengaged, the indicator
light will continue to flash.
The Anti-lock Braking System (ABS) is dis-
abled and the ABS light illuminates when
the E-Lock system is on. Also, the Vehicle
Dynamic Control (VDC) system is disabled
and the VDC light illuminates when the
E-Lock system is on.
For additional information, refer to “Elec-
tronic locking rear differential (E-Lock) sys-
tem” in the “Starting and driving” section of
this manual for further explanation and
system limitations.
Page 324 of 516
Help prevent rapid air pressure loss by
maintaining the correct air pressure and
visually inspecting the tires for wear and
damage. For additional information, refer
to “Wheels and tires” in the “Do-it-yourself ”
section of this manual. If a tire rapidly loses
air pressure or “blows-out” while driving,
maintain control of the vehicle by following
the procedure below. Please note that this
procedure is only a general guide. The ve-
hicle must be driven as appropriate based
on the conditions of the vehicle, road and
traffic.
Page 325 of 516
DRIVING SAFETY PRECAUTIONS
Your NISSAN is designed for both normal
and off-road use. However, avoid driving in
deep water or mud as your NISSAN is
mainly designed for leisure use, unlike a
conventional off-road vehicle.
Remember that 2-Wheel Drive models are
less capable than 4–Wheel Drive (4WD)
models for rough road driving and extrica-
tion when stuck in deep snow or mud, or
the like.
Please observe the following precautions:
Page 326 of 516

∙ Before operating the vehicle, ensurethat the driver and all passengers
have their seat belts fastened.
∙ Always drive with the floor mats in place as the floor may become hot.
∙ Lower your speed when encountering strong crosswinds. With a higher cen-
ter of gravity, your NISSAN is more af-
fected by strong side winds. Slower
speeds ensure better vehicle control.
∙ Do not drive beyond the performance capability of the tires, even with 4WD
engaged (if so equipped).
∙ For 4WD equipped vehicles, do not at- tempt to raise two wheels off the
ground and shif t the transmission to
any drive or reverse position with the
engine running. Doing so may result
in drivetrain damage or unexpected
vehicle movement which could result
in serious vehicle damage or personal
injury. ∙ Do not attempt to test a 4WD
equipped vehicle on a 2-wheel dyna-
mometer (such as the dynamometers
used by some states for emissions
testing), or similar equipment even if
the other two wheels are raised off the
ground. Make sure you inform test fa-
cility personnel that your vehicle is
equipped with 4WD before it is placed
on a dynamometer. Using the wrong
test equipment may result in drive-
train damage or unexpected vehicle
movement which could result in seri-
ous vehicle damage or personal
injury.
∙ Accelerating quickly, sharp steering maneuvers or sudden braking may
cause loss of control.
∙ If at all possible, avoid sharp turning maneuvers, particularly at high
speeds. Your NISSAN 4WD vehicle has
a higher center of gravity than a pas-
senger car. The vehicle is not de-
signed for cornering at the same
speeds as passenger cars. Failure to
operate this vehicle correctly could
result in loss of control and/or a roll-
over accident. ∙ Always use tires of the same type,
size, brand, construction (bias, bias-
belted, or radial), and tread pattern on
all four wheels. Install tire chains on
the rear wheels when driving on slip-
pery roads and drive carefully.
∙ Be sure to check the brakes immedi- ately af ter driving in mud or water. For
additional information, refer to “Wet
brakes” in this section.
∙ Avoid parking your vehicle on steep hills. If you get out of the vehicle and it
rolls forward, backward or sideways,
you could be injured.
∙ Whenever you drive off-road through sand, mud or water as deep as the
wheel hub, more frequent mainte-
nance may be required. For additional
information, refer to “Maintenance
under severe operating conditions” in
the “Maintenance and schedules” sec-
tion of this manual.
5-10Starting and driving
Page 327 of 516

WARNING
∙ Never remove the ignition key or placethe ignition switch in the LOCK posi-
tion while driving. The steering wheel
will lock (for models with a steering
lock mechanism). This may cause the
driver to lose control of the vehicle
and could result in serious vehicle
damage or personal injury.
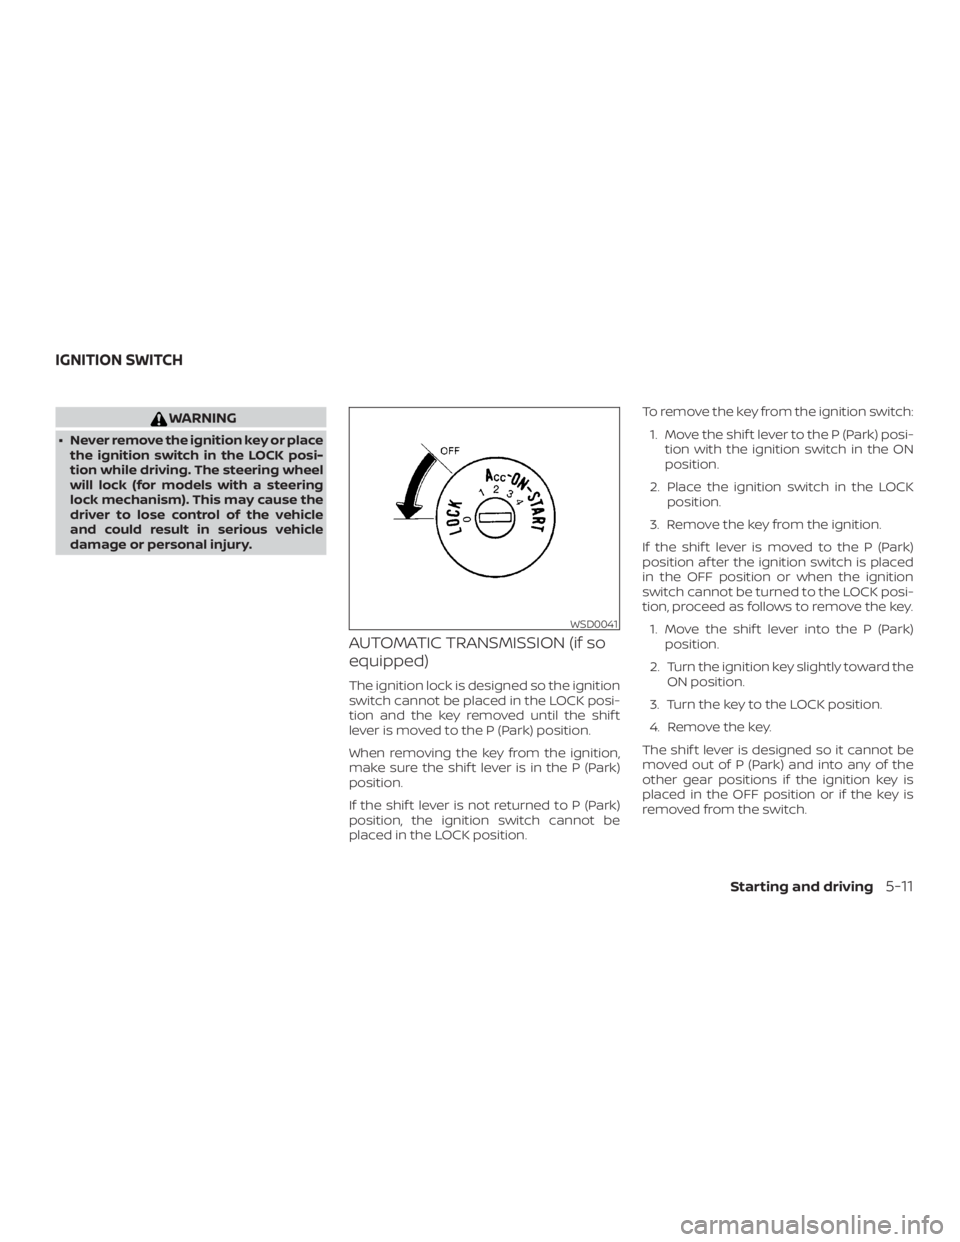
AUTOMATIC TRANSMISSION (if so
equipped)
The ignition lock is designed so the ignition
switch cannot be placed in the LOCK posi-
tion and the key removed until the shif t
lever is moved to the P (Park) position.
When removing the key from the ignition,
make sure the shif t lever is in the P (Park)
position.
If the shif t lever is not returned to P (Park)
position, the ignition switch cannot be
placed in the LOCK position. To remove the key from the ignition switch:
1. Move the shif t lever to the P (Park) posi- tion with the ignition switch in the ON
position.
2. Place the ignition switch in the LOCK position.
3. Remove the key from the ignition.
If the shif t lever is moved to the P (Park)
position af ter the ignition switch is placed
in the OFF position or when the ignition
switch cannot be turned to the LOCK posi-
tion, proceed as follows to remove the key. 1. Move the shif t lever into the P (Park) position.
2. Turn the ignition key slightly toward the ON position.
3. Turn the key to the LOCK position.
4. Remove the key.
The shif t lever is designed so it cannot be
moved out of P (Park) and into any of the
other gear positions if the ignition key is
placed in the OFF position or if the key is
removed from the switch.
Page 338 of 516
3. While pulling up on the parking brakelever slightly, press the button
�Band
lower the lever completely.
4. Before driving, be sure the brake warn- ing light goes out.
PRECAUTIONS ON CRUISE
CONTROL
1. ACCEL•RES switch
2. COAST•SET switch
3. CANCEL switch
4. ON•OFF switch
∙ If the cruise control system malfunc- tions, it cancels automatically. The SET
indicator light in the instrument panel
then blinks to warn the driver. ∙ If the SET indicator light blinks, turn the
ON•OFF switch off and have the system
checked. It is recommended that you
visit a NISSAN dealer for this service.
∙ The SET indicator light may blink when the ON•OFF switch is turned on while
pushing the ACCEL•RES, COAST•SET, or
CANCEL switch (located on the steering
wheel). To properly set the cruise con-
trol system, use the following proce-
dures.
Page 342 of 516
WARNING
∙ For 4WD equipped vehicles, do not at-tempt to raise two wheels off the
ground and shif t the transmission to
any drive or reverse position with the
engine running. Doing so may result
in drivetrain damage or unexpected
vehicle movement which could result
in serious vehicle damage or personal
injury.
∙ Do not attempt to test a 4WD equipped vehicle on a 2-wheel dyna-
mometer (such as the dynamometers
used by some states for emissions
testing), or similar equipment even if
the other two wheels are raised off the
ground. Make sure you inform test fa-
cility personnel that your vehicle is
equipped with 4WD before it is placed
on a dynamometer. Using the wrong
test equipment may result in drive-
train damage or unexpected vehicle
movement which could result in seri-
ous vehicle damage or personal
injury.
Page 348 of 516
A large difference between the diameters
of front and rear wheels will make the
warning light blink slowly (about once per
2 seconds). Change the 4WD shif t switch
into 2WD and do not drive fast.