2019 NISSAN ARMADA stop start
[x] Cancel search: stop startPage 86 of 536

1-66Safety — seats, seat belts and supplemental restraint system
the occupant classification sensor sys-
tem may recalculate the weight of the
occupant when the vehicle comes to a
stop (i.e. stop light, stop sign, etc.), so
the front passenger seat occupant
should continue to remain seated as
outlined above.
Troubleshooting:
If you think the front passenger air bag
status light is incorrect:
1. If the light is ON with no front passengerand no objects on the front passenger
seat:
This may be due to the following condi-
tions that may be interfering with the
weight sensors:
.An object weighing over 9.1 lbs (4 kg)
hanging on the seat or placed in the
seatback pocket.
. A child restraint or other object press-
ing against the rear of the seatback.
. A rear passenger pushing or pulling
on the back of the front passenger
seat.
. Forcing the front seat or seatback
against an object on the seat or floor
behind it.
. An object placed under the front
passenger seat.
. An object placed between the seat
cushion and center console or be- tween the seat cushion and the door.
If the vehicle is moving, please come to a
stop when it is safe to do so. Check and
correct any of the above conditions.
Restart the vehicle and wait 1 minute.
NOTE:
A system check will be performed dur-
ing which the front passenger air bag
status light will remain lit for about 7
seconds initially.
If the light is still ON after this, it is
recommended that the vehicle be
checked by a NISSAN dealer as soon as
possible.
2. If the light is ON with an adult occupying the front passenger seat:
.Occupant is a small adult — the front
passenger air bag status light is func-
tioning as intended. The front passen-
ger air bag is suppressed.
However, if the occupant is not a small
adult, then this may be due to the
following conditions that may be interfer-
ing with the weight sensors:
. Occupant is not sitting upright, lean-
ing against the seatback, and cen-
tered on the seat cushion with his/her
feet comfortably extended to the
floor. .
A child restraint or other object press-
ing against the rear of the seatback.
. A rear passenger pushing or pulling
on the back of the front passenger
seat.
. Forcing the front seat or seatback
against an object on the seat or floor
behind it.
. An object placed under the front
passenger seat.
. An object placed between the seat
cushion and center console or be-
tween the seat cushion and the door.
If the vehicle is moving, please come to a
stop when it is safe to do so. Check and
correct any of the above conditions.
Restart the vehicle and wait 1 minute.
NOTE:
A system check will be performed dur-
ing which the front passenger air bag
status light will remain lit for about 7
seconds initially.
If the light is still ON after this, the person
should be advised not to ride in the front
passenger seat and it is recommended
that the vehicle be checked by a NISSAN
dealer as soon as possible.
3. If the light is OFF with a small adult, child
or child restraint occupying the front
passenger seat.
This may be due to the following condi-
Page 87 of 536

tions that may be interfering with the
weight sensors:
.Small adult or child is not sitting
upright, leaning against the seatback,
and centered on the seat cushion with
his/her feet comfortably extended to
the floor.
. The child restraint is not properly
installed, as outlined. (See “Child re-
straints” (P.1-32).)
. An object weighing over 9.1 lbs (4 kg)
hanging on the seat or placed in the
seatback pocket.
. A child restraint or other object press-
ing against the rear of the seatback.
. A rear passenger pushing or pulling
on the back of the front passenger
seat.
. Forcing the front seat or seatback
against an object on the seat or floor
behind it.
. An object placed under the front
passenger seat.
. An object placed between the seat
cushion and center console.
If the vehicle is moving, please come to a
stop when it is safe to do so. Check and
correct any of the above conditions.
Restart the vehicle and wait 1 minute. NOTE:
A system check will be performed dur-
ing which the front passenger air bag
status light will remain lit for about 7
seconds initially.
If the light is still OFF after this, the small
adult, child or child restraint should be
repositioned in the rear seat and it is
recommended that the vehicle be
checked by a NISSAN dealer as soon as
possible.
Other supplemental front-impact
air bag precautions
WARNING
.
Do not place any objects on the
steering wheel pad or on the
instrument panel. Also, do not
place any objects between any
occupant and the steering wheel
or instrument panel. Such objects
may become dangerous projec-
tiles and cause injury if the front
air bags inflate.
. Do not place objects with sharp
edges on the seat. Also, do not
place heavy objects on the seat
that will leave permanent impres-
sions in the seat. Such objects
can damage the seat or occupant classification sensors (weight
sensors). This can affect the op-
eration of the air bag system and
result in serious personal injury.
. Do not use water or acidic clea-
ners (hot steam cleaners) on the
seat. This can damage the seat or
occupant classification sensors.
This can also affect the operation
of the air bag system and result in
serious personal injury.
. Immediately after inflation, sev-
eral front air bag system compo-
nents will be hot. Do not touch
them; you may severely burn
yourself.
. No unauthorized changes should
be made to any components or
wiring of the supplemental air
bag system. This is to prevent
accidental inflation of the supple-
mental air bag or damage to the
supplemental air bag system.
. Do not make unauthorized
changes to your vehicle’s electri-
cal system, suspension system or
front end structure. This could
affect proper operation of the
front air bag system.
. Tampering with the air bag sys-
tem may result in serious perso-
Safety — seats, seat belts and supplemental restraint system1-67
Page 107 of 536
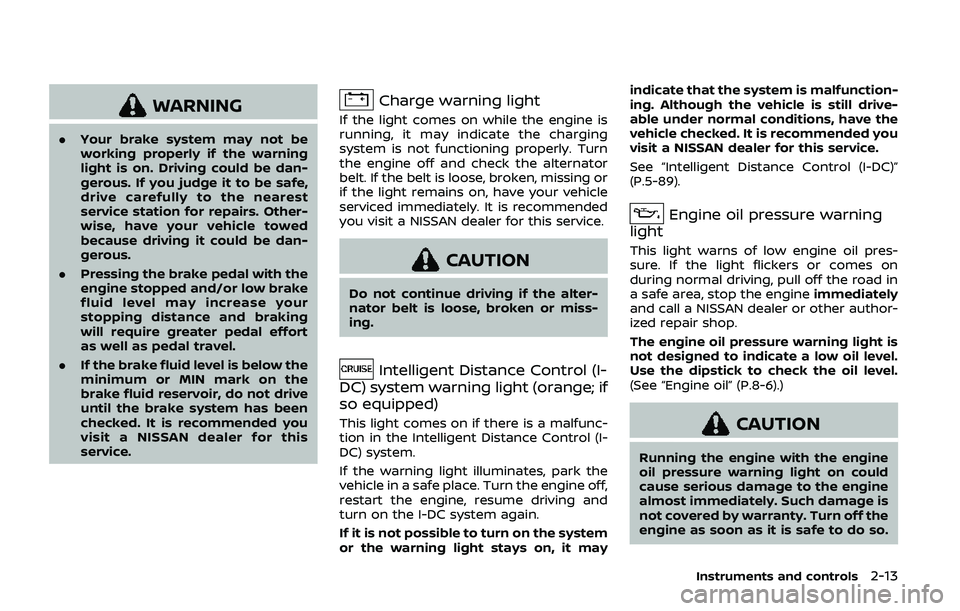
WARNING
.Your brake system may not be
working properly if the warning
light is on. Driving could be dan-
gerous. If you judge it to be safe,
drive carefully to the nearest
service station for repairs. Other-
wise, have your vehicle towed
because driving it could be dan-
gerous.
. Pressing the brake pedal with the
engine stopped and/or low brake
fluid level may increase your
stopping distance and braking
will require greater pedal effort
as well as pedal travel.
. If the brake fluid level is below the
minimum or MIN mark on the
brake fluid reservoir, do not drive
until the brake system has been
checked. It is recommended you
visit a NISSAN dealer for this
service.
Charge warning light
If the light comes on while the engine is
running, it may indicate the charging
system is not functioning properly. Turn
the engine off and check the alternator
belt. If the belt is loose, broken, missing or
if the light remains on, have your vehicle
serviced immediately. It is recommended
you visit a NISSAN dealer for this service.
CAUTION
Do not continue driving if the alter-
nator belt is loose, broken or miss-
ing.
Intelligent Distance Control (I-
DC) system warning light (orange; if
so equipped)
This light comes on if there is a malfunc-
tion in the Intelligent Distance Control (I-
DC) system.
If the warning light illuminates, park the
vehicle in a safe place. Turn the engine off,
restart the engine, resume driving and
turn on the I-DC system again.
If it is not possible to turn on the system
or the warning light stays on, it may indicate that the system is malfunction-
ing. Although the vehicle is still drive-
able under normal conditions, have the
vehicle checked. It is recommended you
visit a NISSAN dealer for this service.
See “Intelligent Distance Control (I-DC)”
(P.5-89).
Engine oil pressure warning
light
This light warns of low engine oil pres-
sure. If the light flickers or comes on
during normal driving, pull off the road in
a safe area, stop the engine immediately
and call a NISSAN dealer or other author-
ized repair shop.
The engine oil pressure warning light is
not designed to indicate a low oil level.
Use the dipstick to check the oil level.
(See “Engine oil” (P.8-6).)
CAUTION
Running the engine with the engine
oil pressure warning light on could
cause serious damage to the engine
almost immediately. Such damage is
not covered by warranty. Turn off the
engine as soon as it is safe to do so.
Instruments and controls2-13
Page 108 of 536

2-14Instruments and controls
Four-Wheel Drive (4WD) warn-
ing light (4WD models)
Thewarning light comes on when the
ignition switch is placed in the ON posi-
tion. It turns off soon after the engine is
started.
If the 4WD system malfunctions, or the
diameter of the front and the rear wheels
are different, the warning light will either
remain illuminated or blink. (See “NISSAN
all-mode 4WD®” (P.5-121).)
CAUTION
. If the warning light comes on
while driving there may be a
malfunction in the 4WD system.
Reduce the vehicle speed and
have your vehicle checked as
soon as possible. It is recom-
mended you visit a NISSAN dealer
for this service.
. If the 4WD warning light turns on
when driving on dry or hard
surfaced roads:
— in the 4H(I) position, shift the
4WD shift switch to AUTO
— in the 4L(O) position, stop the vehicle and shift the transmis- sion shift lever to the N (Neu-
tral) position and shift the
4WD shift switch to AUTO
. If the warning light is still on after
the above operations, have your
vehicle checked as soon as pos-
sible. It is recommended you visit
a NISSAN dealer for this service.
Intelligent Cruise Control (ICC)
system warning light (orange)
This light comes on if there is a malfunc-
tion in the Intelligent Cruise Control (ICC)
system.
If the warning light comes on, park the
vehicle in a safe place. Turn the engine off,
restart the engine, resume driving and set
the ICC system again.
If it is not possible to set the system or
the indicator stays on, it may indicate
that the system is malfunctioning.
Although the vehicle is still driveable
under normal conditions, have the ve-
hicle checked. It is recommended you
visit a NISSAN dealer for this service.
Intelligent Key warning light
After the ignition switch is placed in the
ON position, this light comes on for about
2 seconds and then turns off.
This light warns of a malfunction with the
Intelligent Key system.
If the light comes on while the engine is
stopped, it may be impossible to start the
engine. If the light comes on while the
engine is running, you can drive the
vehicle. However in these cases, have
the system checked as soon as possible.
It is recommended you visit a NISSAN
dealer for this service.
Lane Departure Warning (LDW)
indicator light (orange; if so
equipped)
When the ignition switch is placed in the
ON position, the light will come on in
orange, turn green, and then turn off. This
indicates that the Lane Departure Warn-
ing (LDW) and Intelligent Lane Interven-
tion (I-LI) systems are operational.
While the LDW and/or I-LI system is on,
the light will blink in orange and a
warning chime will sound if the vehicle is
traveling close to either the left or the
right of a traveling lane with detectable
lane markers.
Page 117 of 536
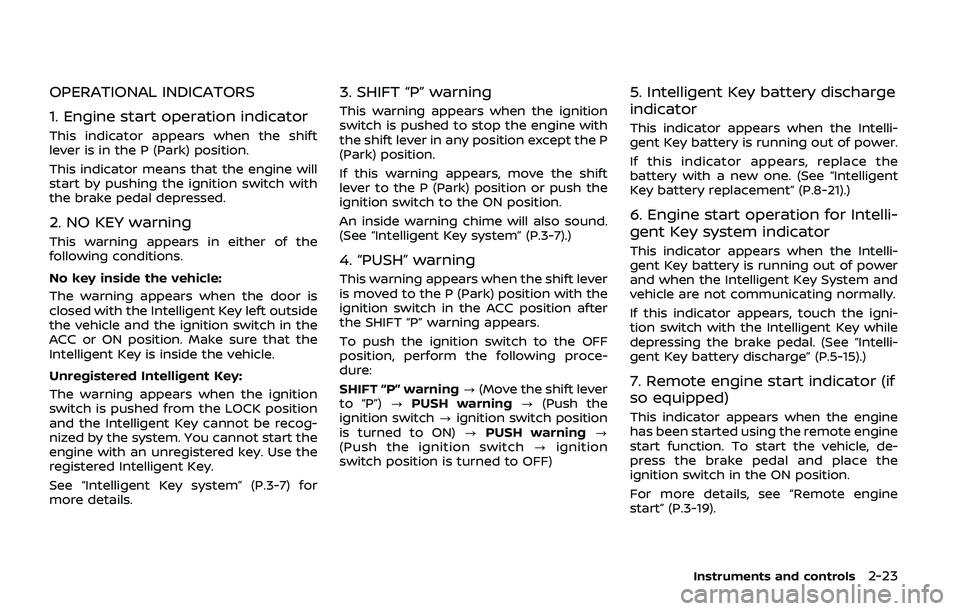
OPERATIONAL INDICATORS
1. Engine start operation indicator
This indicator appears when the shift
lever is in the P (Park) position.
This indicator means that the engine will
start by pushing the ignition switch with
the brake pedal depressed.
2. NO KEY warning
This warning appears in either of the
following conditions.
No key inside the vehicle:
The warning appears when the door is
closed with the Intelligent Key left outside
the vehicle and the ignition switch in the
ACC or ON position. Make sure that the
Intelligent Key is inside the vehicle.
Unregistered Intelligent Key:
The warning appears when the ignition
switch is pushed from the LOCK position
and the Intelligent Key cannot be recog-
nized by the system. You cannot start the
engine with an unregistered key. Use the
registered Intelligent Key.
See “Intelligent Key system” (P.3-7) for
more details.
3. SHIFT “P” warning
This warning appears when the ignition
switch is pushed to stop the engine with
the shift lever in any position except the P
(Park) position.
If this warning appears, move the shift
lever to the P (Park) position or push the
ignition switch to the ON position.
An inside warning chime will also sound.
(See “Intelligent Key system” (P.3-7).)
4. “PUSH” warning
This warning appears when the shift lever
is moved to the P (Park) position with the
ignition switch in the ACC position after
the SHIFT “P” warning appears.
To push the ignition switch to the OFF
position, perform the following proce-
dure:
SHIFT “P” warning?(Move the shift lever
to “P”) ?PUSH warning ?(Push the
ignition switch ?ignition switch position
is turned to ON) ?PUSH warning ?
(Push the ignition switch ?ignition
switch position is turned to OFF)
5. Intelligent Key battery discharge
indicator
This indicator appears when the Intelli-
gent Key battery is running out of power.
If this indicator appears, replace the
battery with a new one. (See “Intelligent
Key battery replacement” (P.8-21).)
6. Engine start operation for Intelli-
gent Key system indicator
This indicator appears when the Intelli-
gent Key battery is running out of power
and when the Intelligent Key System and
vehicle are not communicating normally.
If this indicator appears, touch the igni-
tion switch with the Intelligent Key while
depressing the brake pedal. (See “Intelli-
gent Key battery discharge” (P.5-15).)
7. Remote engine start indicator (if
so equipped)
This indicator appears when the engine
has been started using the remote engine
start function. To start the vehicle, de-
press the brake pedal and place the
ignition switch in the ON position.
For more details, see “Remote engine
start” (P.3-19).
Instruments and controls2-23
Page 130 of 536
2-36Instruments and controls
REAR WINDOW WIPER AND WASHER
OPERATION
If the rear window wiper operation is
interrupted by snow etc., the wiper may
stop moving to protect its motor. If this
occurs, turn the wiper switch to OFF and
remove the snow etc. on and around
the wiper arms. After about 1 minute,
turn the switch ON again to operate the
wiper.
The rear window wiper and washer
operate when the ignition switch is in
the ON position.
Turn the switch clockwise from the OFF
position to operate the wiper.
Intermittent (INT) — intermittent opera-
tion (not adjustable)
Low (ON) — continuous low speed opera-
tion
Push the switch forwardto operate the
washer. Then the wiper will also operate
several times.
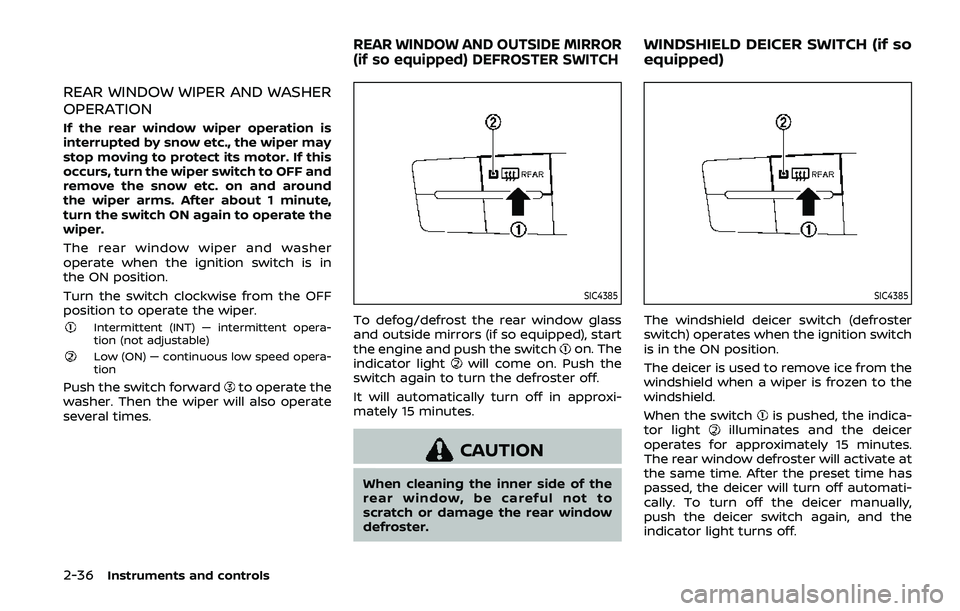
SIC4385
To defog/defrost the rear window glass
and outside mirrors (if so equipped), start
the engine and push the switch
on. The
indicator lightwill come on. Push the
switch again to turn the defroster off.
It will automatically turn off in approxi-
mately 15 minutes.
CAUTION
When cleaning the inner side of the
rear window, be careful not to
scratch or damage the rear window
defroster.
SIC4385
The windshield deicer switch (defroster
switch) operates when the ignition switch
is in the ON position.
The deicer is used to remove ice from the
windshield when a wiper is frozen to the
windshield.
When the switch
is pushed, the indica-
tor lightilluminates and the deicer
operates for approximately 15 minutes.
The rear window defroster will activate at
the same time. After the preset time has
passed, the deicer will turn off automati-
cally. To turn off the deicer manually,
push the deicer switch again, and the
indicator light turns off.
REAR WINDOW AND OUTSIDE MIRROR
(if so equipped) DEFROSTER SWITCHWINDSHIELD DEICER SWITCH (if so
equipped)
Page 190 of 536
3-16Pre-driving checks and adjustments
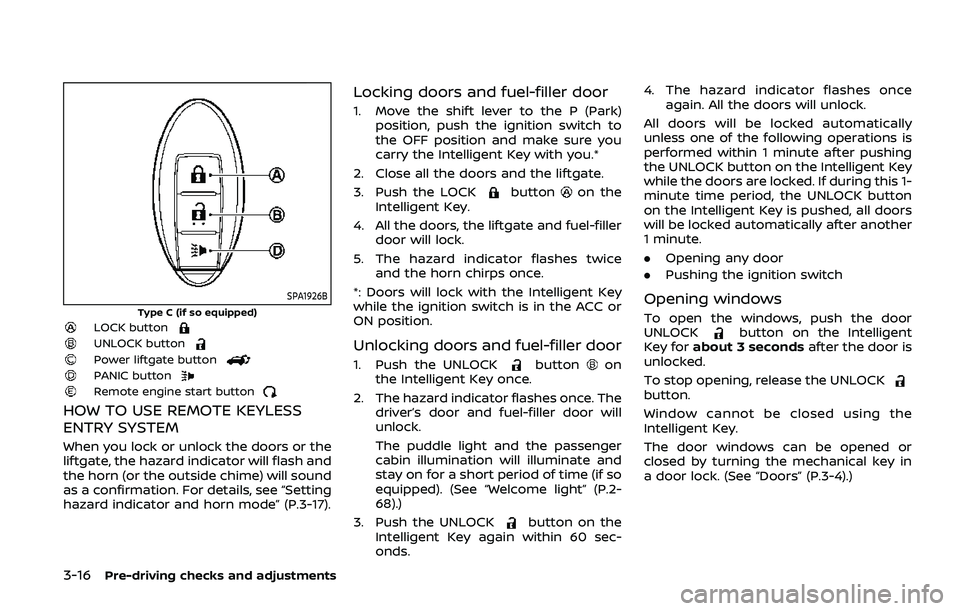
SPA1926B
Type C (if so equipped)LOCK buttonUNLOCK buttonPower liftgate buttonPANIC buttonRemote engine start button
HOW TO USE REMOTE KEYLESS
ENTRY SYSTEM
When you lock or unlock the doors or the
liftgate, the hazard indicator will flash and
the horn (or the outside chime) will sound
as a confirmation. For details, see “Setting
hazard indicator and horn mode” (P.3-17).
Locking doors and fuel-filler door
1. Move the shift lever to the P (Park)position, push the ignition switch to
the OFF position and make sure you
carry the Intelligent Key with you.*
2. Close all the doors and the liftgate.
3. Push the LOCK
buttonon the
Intelligent Key.
4. All the doors, the liftgate and fuel-filler door will lock.
5. The hazard indicator flashes twice and the horn chirps once.
*: Doors will lock with the Intelligent Key
while the ignition switch is in the ACC or
ON position.
Unlocking doors and fuel-filler door
1. Push the UNLOCKbuttonon
the Intelligent Key once.
2. The hazard indicator flashes once. The driver’s door and fuel-filler door will
unlock.
The puddle light and the passenger
cabin illumination will illuminate and
stay on for a short period of time (if so
equipped). (See “Welcome light” (P.2-
68).)
3. Push the UNLOCK
button on the
Intelligent Key again within 60 sec-
onds. 4. The hazard indicator flashes once
again. All the doors will unlock.
All doors will be locked automatically
unless one of the following operations is
performed within 1 minute after pushing
the UNLOCK button on the Intelligent Key
while the doors are locked. If during this 1-
minute time period, the UNLOCK button
on the Intelligent Key is pushed, all doors
will be locked automatically after another
1 minute.
. Opening any door
. Pushing the ignition switch
Opening windows
To open the windows, push the door
UNLOCKbutton on the Intelligent
Key for about 3 seconds after the door is
unlocked.
To stop opening, release the UNLOCK
button.
Window cannot be closed using the
Intelligent Key.
The door windows can be opened or
closed by turning the mechanical key in
a door lock. (See “Doors” (P.3-4).)
Page 191 of 536
Opening/closing liftgate (if so
equipped)
1. Push the power liftgate buttonfor more than 1 second.
2. The liftgate will automatically open.
The hazard indicator flashes 4 times and
the outside chime sounds for approxi-
mately 3 seconds.
To close the liftgate, push the power
liftgate button
for more than 1
second.
The liftgate will automatically close.
If the button
is pushed while the
liftgate is being opened or closed, the
liftgate will reverse.
Using panic alarm
If you are near your vehicle and feel
threatened, you may activate the alarm
to call attention as follows:
1. Push the PANIC
buttonon the
Intelligent Key for more than 1 sec-
ond.
2. The theft warning alarm and head- lights will stay on for 25 seconds.
3. The panic alarm stops when:
.It has run for 25 seconds, or.Any of the buttons on the Intelligent Key are pushed. (Note: Panic button
or power liftgate button should be pushed for more than 1 second.)
Remote engine start (if so
equipped)
The remote engine startbuttonis
on the Intelligent Key if the vehicle has
remote engine start function. This func-
tion allows the engine to start from
outside the vehicle. See “Remote engine
start” (P.3-19) for more details.
Setting hazard indicator and horn
mode
This vehicle is set in hazard indicator and
horn mode when you first receive the
vehicle.
In hazard indicator and horn mode, when
the LOCK
button is pushed, the
hazard indicator flashes twice and the
horn chirps once. When the UNLOCK
button is pushed, the hazard indicator
flashes once.
If horns are not necessary, the system
can be switched to the hazard indicator
mode.
In hazard indicator mode, when the LOCK
button is pushed, the hazard indica-
tor flashes twice. When the UNLOCK
button is pushed, neither the hazard
indicator nor the horn operates.
Pre-driving checks and adjustments3-17