2019 NISSAN ARMADA window
[x] Cancel search: windowPage 118 of 536
2-24Instruments and controls
8. Parking brake release warning
This warning appears when the vehicle
speed is above 4 MPH (7 km/h) and the
parking brake is applied.
9. Low fuel warning
This warning appears when the fuel level
in the tank is getting low. Refuel as soon
as it is convenient, preferably before the
fuel gauge reaches the 0 (Empty) position.
There is a small reserve of fuel remain-
ing in the tank when the fuel gauge
reaches the 0 (Empty) position.
10. Low washer fluid warning
This warning appears when the washer
tank fluid is at a low level. Add washer
fluid as necessary. (See “Window washer
fluid” (P.8-10).)
11. Door/liftgate open warning
(ignition switch is in the ON posi-
tion)
This warning appears if any of the doors
and/or the liftgate are open or not closed
securely. The vehicle icon indicates which
door or the liftgate is open on the display.
12. Loose fuel cap warning
This warning appears when the fuel-filler
cap is not tightened correctly after the
vehicle has been refueled. (See “Fuel-filler
cap” (P.3-27).)
13. Check tire pressure warning
This warning appears when the low tire
pressure warning light in the meter
illuminates and low tire pressure is de-
tected. The warning appears each time
the ignition switch is placed in the ON
position as long as the low tire pressure
warning light remains illuminated. If this
warning appears, stop the vehicle and
adjust the tire pressure to the recom-
mended COLD tire pressure shown on the
Tire and Loading Information label. (See
“Low tire pressure warning light” (P.2-15)
and “Tire Pressure Monitoring System
(TPMS)” (P.5-5).)
14. Extended storage fuse warning
(if so equipped)
This warning may appear if the extended
storage fuse switch is not pushed in
(switched on). When this warning ap-
pears, push in (switch on) the extended
storage fuse switch to turn off the warn-
ing. For more information, see “Extended
storage fuse switch” (P.8-21).
15. Intelligent Back-up Intervention
(I-BI) not available warning (if so
equipped)
This warning appears when the Intelli-
gent Back-up Intervention (I-BI) system is
temporarily not available.
For more details, see “Intelligent Back-up
Intervention (I-BI)” (P.5-57).
16. Intelligent Back-up Intervention
(I-BI) malfunction warning (if so
equipped)
This warning appears when the Intelli-
gent Back-up Intervention (I-BI) system is
not functioning properly.
For more details, see “Intelligent Back-up
Intervention (I-BI)” (P.5-57).
17. Headlight warning
This warning appears if the LED head-
lights are malfunctioning. It is recom-
mended you have the system checked
by a NISSAN dealer.
18. Front radar obstruction warning
This warning appears when the sensor
area of the front bumper is covered with
dirt or is obstructed, making it impossible
to detect a vehicle ahead.
The following systems will be automati-
cally canceled.
Page 125 of 536
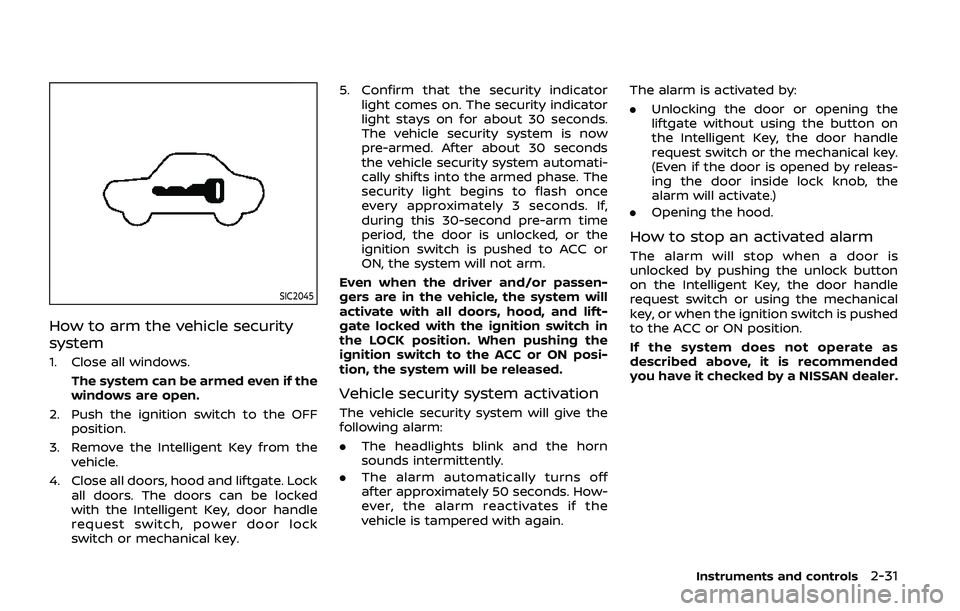
SIC2045
How to arm the vehicle security
system
1. Close all windows.The system can be armed even if the
windows are open.
2. Push the ignition switch to the OFF position.
3. Remove the Intelligent Key from the vehicle.
4. Close all doors, hood and liftgate. Lock all doors. The doors can be locked
with the Intelligent Key, door handle
request switch, power door lock
switch or mechanical key. 5. Confirm that the security indicator
light comes on. The security indicator
light stays on for about 30 seconds.
The vehicle security system is now
pre-armed. After about 30 seconds
the vehicle security system automati-
cally shifts into the armed phase. The
security light begins to flash once
every approximately 3 seconds. If,
during this 30-second pre-arm time
period, the door is unlocked, or the
ignition switch is pushed to ACC or
ON, the system will not arm.
Even when the driver and/or passen-
gers are in the vehicle, the system will
activate with all doors, hood, and lift-
gate locked with the ignition switch in
the LOCK position. When pushing the
ignition switch to the ACC or ON posi-
tion, the system will be released.
Vehicle security system activation
The vehicle security system will give the
following alarm:
. The headlights blink and the horn
sounds intermittently.
. The alarm automatically turns off
after approximately 50 seconds. How-
ever, the alarm reactivates if the
vehicle is tampered with again. The alarm is activated by:
.
Unlocking the door or opening the
liftgate without using the button on
the Intelligent Key, the door handle
request switch or the mechanical key.
(Even if the door is opened by releas-
ing the door inside lock knob, the
alarm will activate.)
. Opening the hood.
How to stop an activated alarm
The alarm will stop when a door is
unlocked by pushing the unlock button
on the Intelligent Key, the door handle
request switch or using the mechanical
key, or when the ignition switch is pushed
to the ACC or ON position.
If the system does not operate as
described above, it is recommended
you have it checked by a NISSAN dealer.
Instruments and controls2-31
Page 127 of 536
WARNING
In freezing temperatures the washer
solution may freeze on the window
and obscure your vision which may
lead to an accident. Warm the win-
dow with the defroster before you
wash the window.
CAUTION
.Do not operate the washer con-
tinuously for more than 30 sec-
onds.
. Do not operate the washer if the
reservoir tank is empty.
. Do not fill the window washer
reservoir tank with washer fluid
concentrates at full strength.
Some methyl alcohol based
washer fluid concentrates may
permanently stain the grille if
spilled while filling the window
washer reservoir tank.
. Pre-mix washer fluid concen-
trates with water to the manu-
facturer’s recommended levels
before pouring the fluid into the
window washer reservoir tank. Do not use the window washer re-
servoir tank to mix the washer
fluid concentrate and water.
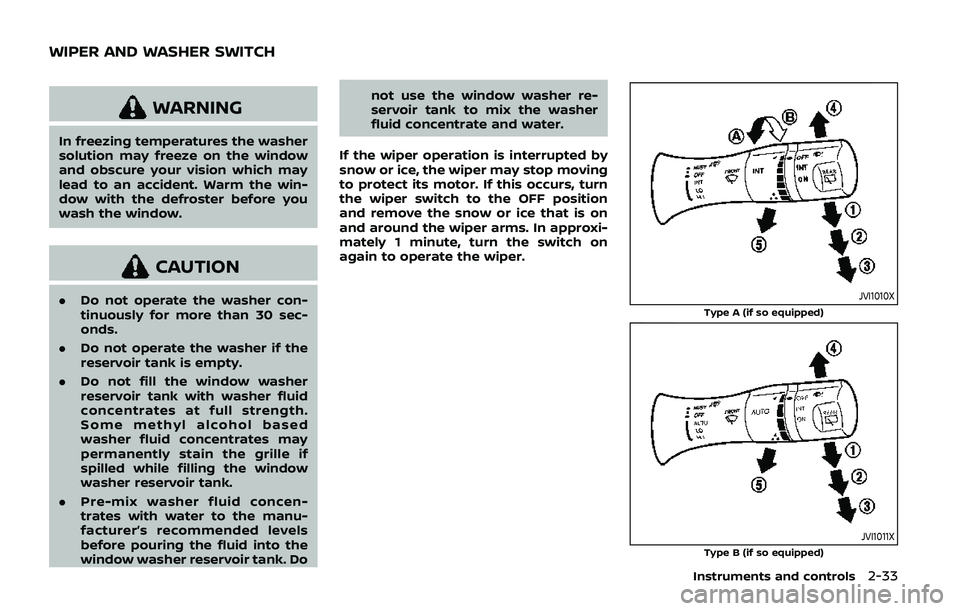
If the wiper operation is interrupted by
snow or ice, the wiper may stop moving
to protect its motor. If this occurs, turn
the wiper switch to the OFF position
and remove the snow or ice that is on
and around the wiper arms. In approxi-
mately 1 minute, turn the switch on
again to operate the wiper.JVI1010X
Type A (if so equipped)
JVI1011XType B (if so equipped)
Instruments and controls2-33
WIPER AND WASHER SWITCH
Page 130 of 536
2-36Instruments and controls
REAR WINDOW WIPER AND WASHER
OPERATION
If the rear window wiper operation is
interrupted by snow etc., the wiper may
stop moving to protect its motor. If this
occurs, turn the wiper switch to OFF and
remove the snow etc. on and around
the wiper arms. After about 1 minute,
turn the switch ON again to operate the
wiper.
The rear window wiper and washer
operate when the ignition switch is in
the ON position.
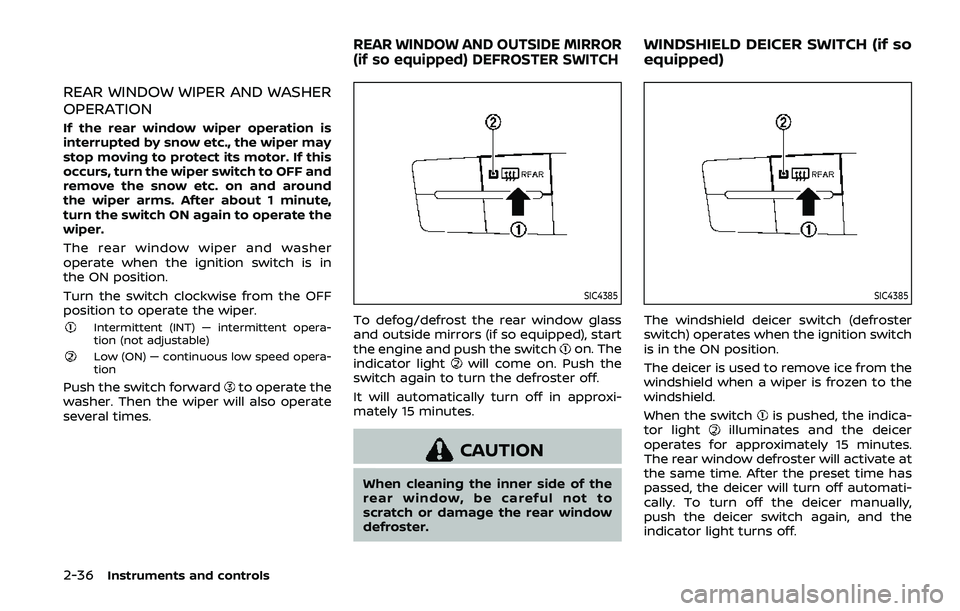
Turn the switch clockwise from the OFF
position to operate the wiper.
Intermittent (INT) — intermittent opera-
tion (not adjustable)
Low (ON) — continuous low speed opera-
tion
Push the switch forwardto operate the
washer. Then the wiper will also operate
several times.
SIC4385
To defog/defrost the rear window glass
and outside mirrors (if so equipped), start
the engine and push the switch
on. The
indicator lightwill come on. Push the
switch again to turn the defroster off.
It will automatically turn off in approxi-
mately 15 minutes.
CAUTION
When cleaning the inner side of the
rear window, be careful not to
scratch or damage the rear window
defroster.
SIC4385
The windshield deicer switch (defroster
switch) operates when the ignition switch
is in the ON position.
The deicer is used to remove ice from the
windshield when a wiper is frozen to the
windshield.
When the switch
is pushed, the indica-
tor lightilluminates and the deicer
operates for approximately 15 minutes.
The rear window defroster will activate at
the same time. After the preset time has
passed, the deicer will turn off automati-
cally. To turn off the deicer manually,
push the deicer switch again, and the
indicator light turns off.
REAR WINDOW AND OUTSIDE MIRROR
(if so equipped) DEFROSTER SWITCHWINDSHIELD DEICER SWITCH (if so
equipped)
Page 131 of 536
CAUTION
.When operating the deicer con-
tinuously, be sure to start the
engine. Otherwise, it may cause
the battery to discharge.
. When cleaning the inner side of
the window, be careful not to
scratch or damage the electrical
conductors on the surface of the
window.
SIC3668
Type A (if so equipped)
JVI1505XType B (if so equipped)
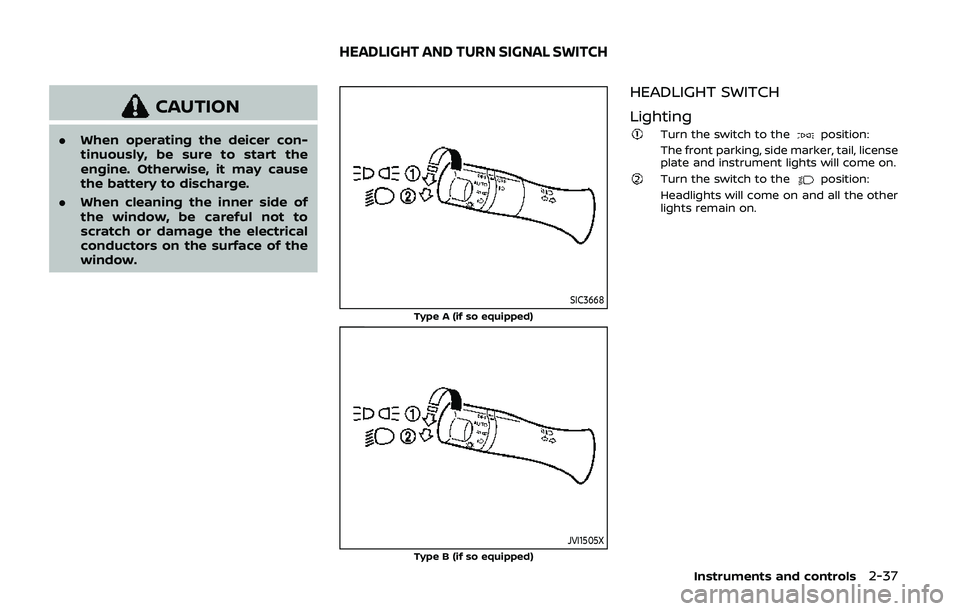
HEADLIGHT SWITCH
Lighting
Turn the switch to theposition:
The front parking, side marker, tail, license
plate and instrument lights will come on.
Turn the switch to theposition:
Headlights will come on and all the other
lights remain on.
Instruments and controls2-37
HEADLIGHT AND TURN SIGNAL SWITCH
Page 146 of 536
2-52Instruments and controls
CAUTION
.Use power outlet with the engine
running to avoid discharging the
vehicle battery.
. Avoid using power outlet when
the air conditioner, headlights or
rear window defroster is on.
. Before inserting or disconnecting
a plug, be sure the electrical
accessory being used is turned
OFF.
. When not in use, be sure to close
the cap. Do not allow water or any
liquid to contact the outlet.
SIC4389
Instrument panel
SIC4456Back side of front console
SIC4391
Luggage room
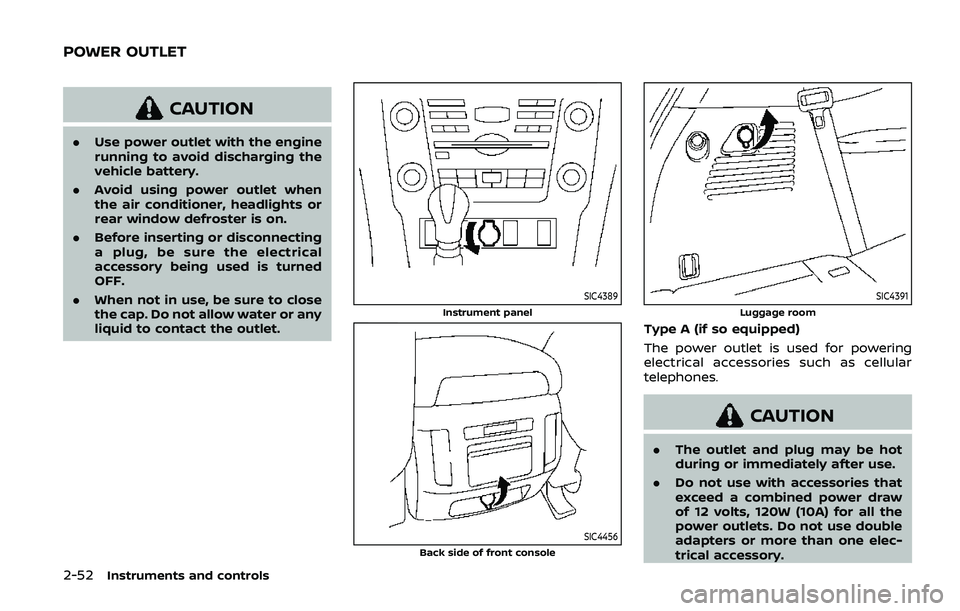
Type A (if so equipped)
The power outlet is used for powering
electrical accessories such as cellular
telephones.
CAUTION
.The outlet and plug may be hot
during or immediately after use.
. Do not use with accessories that
exceed a combined power draw
of 12 volts, 120W (10A) for all the
power outlets. Do not use double
adapters or more than one elec-
trical accessory.
POWER OUTLET
Page 158 of 536
2-64Instruments and controls
POWER WINDOWS
WARNING
.Make sure that all passengers
have their hands, etc. inside the
vehicle while it is in motion and
before closing the windows. Use
the window lock switch to pre-
vent unexpected use of the
power windows.
. To help avoid risk of injury or
death through unintended opera-
tion of the vehicle and or its
systems, including entrapment
in windows or inadvertent door
lock activation, do not leave chil-
dren, people who require the
assistance of others or pets un-
attended in your vehicle. Addi-
tionally, the temperature inside a
closed vehicle on a warm day can
quickly become high enough to
cause a significant risk of injury
or death to people and pets.
The power windows operate when the
ignition switch is in the ON position or for
about 45 seconds after the ignition
switch is pushed to the OFF position. If
the driver’s or front passenger’s door is
opened during this period of about 45 seconds, power to the windows is can-
celed.
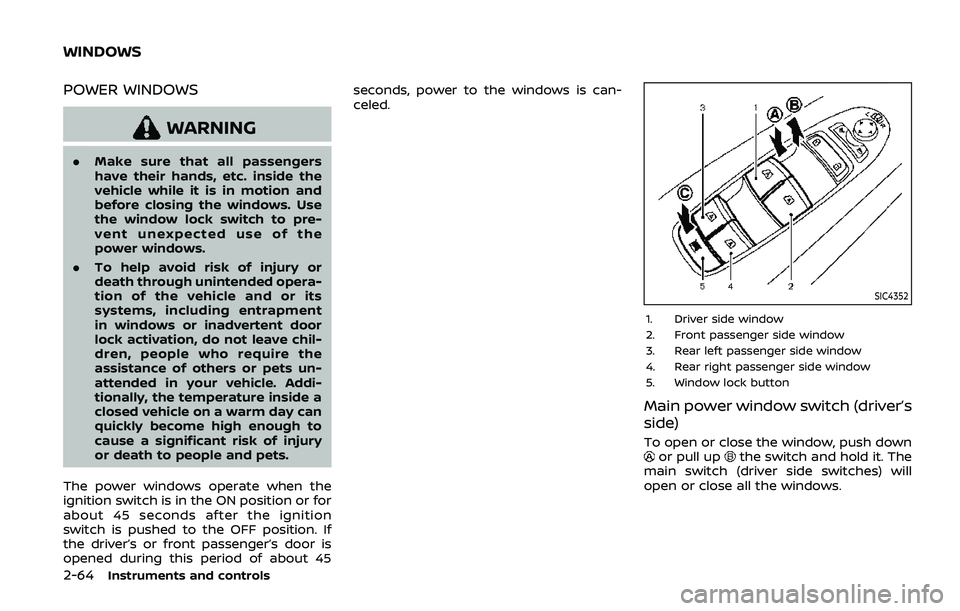
SIC4352
1. Driver side window
2. Front passenger side window
3. Rear left passenger side window
4. Rear right passenger side window
5. Window lock button
Main power window switch (driver’s
side)
To open or close the window, push downor pull upthe switch and hold it. The
main switch (driver side switches) will
open or close all the windows.
WINDOWS
Page 159 of 536
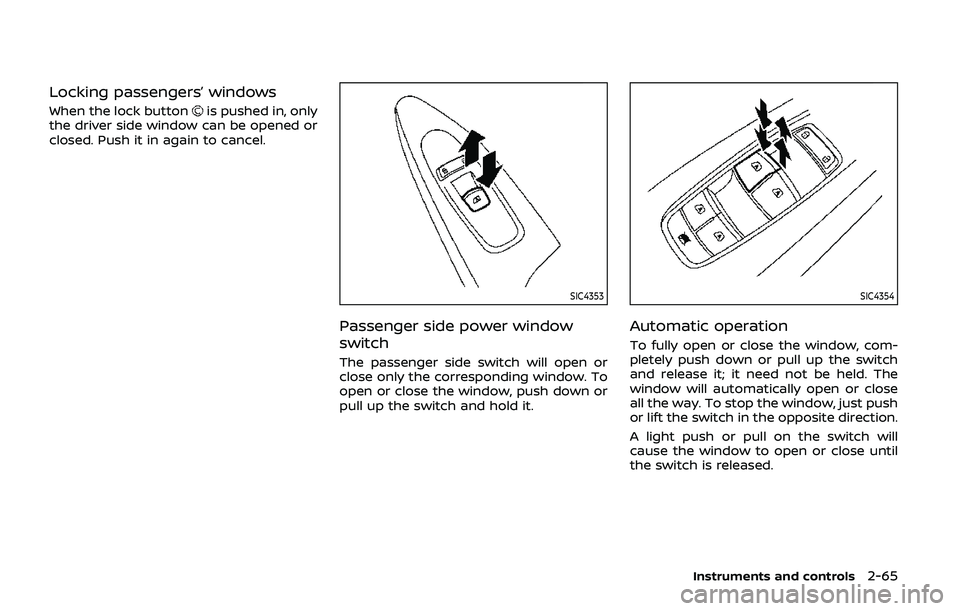
Locking passengers’ windows
When the lock buttonis pushed in, only
the driver side window can be opened or
closed. Push it in again to cancel.
SIC4353
Passenger side power window
switch
The passenger side switch will open or
close only the corresponding window. To
open or close the window, push down or
pull up the switch and hold it.
SIC4354
Automatic operation
To fully open or close the window, com-
pletely push down or pull up the switch
and release it; it need not be held. The
window will automatically open or close
all the way. To stop the window, just push
or lift the switch in the opposite direction.
A light push or pull on the switch will
cause the window to open or close until
the switch is released.
Instruments and controls2-65