2019 NISSAN ARMADA buttons
[x] Cancel search: buttonsPage 173 of 536
2. Release both buttons.
HomeLink® is now in the programming
mode and can be programmed at any
time beginning with “Programming
HomeLink®” - Step 1.
REPROGRAMMING A SINGLE
HomeLink® BUTTON
To reprogram a HomeLink® button, com-
plete the following.
1. Press and hold the desired HomeLink®button. DO NOT release the button.
2. The indicator light will illuminate in green, and after 20 seconds it will
begin to flash in orange and “TRAIN-
ING” is displayed on the mirror.
3. Release the HomeLink® button and proceed with “Programming
HomeLink®” — Step 3.
For questions or comments, contact
HomeLink® at: www.homelink.com/
nissan or 1-800-355-3515.
The HomeLink® button has now been
reprogrammed. The new device can be
activated by pressing the HomeLink®
button that was just programmed. This
procedure will not affect any other pro-
grammed HomeLink® buttons.
If a new device is not programmed to the
HomeLink® button, it will revert to the
previously stored programming.
USING THE GARAGE DOOR TWO-
WAY COMMUNICATION
HomeLink® has the function of commu-
nicating with garage door opener sys-
tems. If your garage door openers are
compatible with HomeLink®, the
HomeLink® can:
. receive and display “closing” or “open-
ing” status from your garage door
opener.
. recall and display the garage door
being “closed” or “opened”.
HomeLink® can receive the status from a
garage door opener at a range up to 820
ft (250 m), but it varies depending on the
environment. You may need to reduce
vehicle speed to successfully receive the
garage door opener communication.
Programming two-way communi-
cation
After programming a new HomeLink®
button, proceed with “Programming
HomeLink®” Step 6 to enable two-way
communication. If the garage door status
indicator appears on the left side on the
mirror when pressing the programmed
HomeLink® button, the two-way commu-
nication programming is complete.
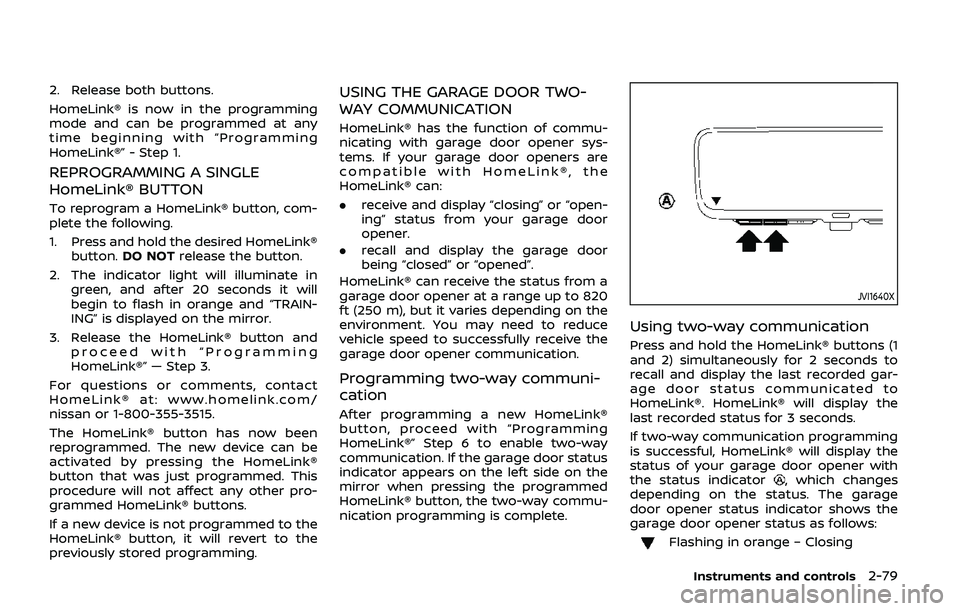
JVI1640X
Using two-way communication
Press and hold the HomeLink® buttons (1
and 2) simultaneously for 2 seconds to
recall and display the last recorded gar-
age door status communicated to
HomeLink®. HomeLink® will display the
last recorded status for 3 seconds.
If two-way communication programming
is successful, HomeLink® will display the
status of your garage door opener with
the status indicator
, which changes
depending on the status. The garage
door opener status indicator shows the
garage door opener status as follows:
Flashing in orange – Closing
Instruments and controls2-79
Page 181 of 536
WARNING
.Radio waves could adversely af-
fect electric medical equipment.
Those who use a pacemaker
should contact the electric med-
ical equipment manufacturer for
the possible influences before
use.
. The Intelligent Key transmits
radio waves when the buttons
are pushed. The FAA advises that
the radio waves may affect air-
craft navigation and communica-
tion systems. Do not operate the
Intelligent Key while on an air-
plane. Make sure the buttons are
not operated unintentionally
when the unit is stored during a
flight.
The Intelligent Key system can operate all
the door locks using the remote control-
ler function or pushing the request switch
on the vehicle without taking the key out
from a pocket or purse. The operating
environment and/or conditions may af-
fect the Intelligent Key system operation.
Be sure to read the following before using
the Intelligent Key system.
CAUTION
. Be sure to carry the Intelligent
Key with you when operating the
vehicle.
. Never leave the Intelligent Key in
the vehicle when you leave the
vehicle.
The Intelligent Key is always communi-
cating with the vehicle as it receives radio
waves. The Intelligent Key system trans-
mits weak radio waves. Environmental
conditions may interfere with the opera-
tion of the Intelligent Key system under
the following operating conditions.
. When operating near a location where
strong radio waves are transmitted,
such as a TV tower, power station and
broadcasting station.
. When in possession of wireless equip-
ment, such as a cellular telephone,
transceiver, and CB radio.
. When the Intelligent Key is in contact
with or covered by metallic materials.
. When any type of radio wave remote
control is used nearby.
. When the Intelligent Key is placed near
an electric appliance such as a perso-
nal computer. .
When the vehicle is parked near a
parking meter.
In such cases, correct the operating
conditions before using the Intelligent
Key function or use the mechanical key.
Although the life of the battery varies
depending on the operating conditions,
the battery’s life is approximately 2 years.
If the battery is discharged, replace it with
a new one.
Since the Intelligent Key is continuously
receiving radio waves, if the key is left
near equipment which transmits strong
radio waves, such as signals from a TV
and personal computer, the battery life
may become shorter.
For information regarding replacement of
a battery, see “Intelligent Key battery
replacement” (P.8-21).
As many as 4 Intelligent Keys can be
registered and used with one vehicle. For
information about the purchase and use
of additional Intelligent Keys, contact a
NISSAN dealer.
CAUTION
. Do not allow the Intelligent Key,
which contains electrical compo-
nents, to come into contact with
water or salt water. This could
Pre-driving checks and adjustments3-7
INTELLIGENT KEY SYSTEM
Page 189 of 536
WARNING
The Intelligent Key transmits radio
waves when the buttons are pushed.
The FAA advises that radio waves
may affect aircraft navigation and
communication systems. Do not op-
erate the Intelligent Key while on an
airplane. Make sure the buttons are
not operated unintentionally when
the unit is stored for a flight.
It is possible to lock/unlock all doors, fuel-
filler door, activate the panic alarm and
open the windows by pushing the but-
tons on the Intelligent Key from outside
the vehicle.
Before locking the doors, make sure the
Intelligent Key is not left in the vehicle.
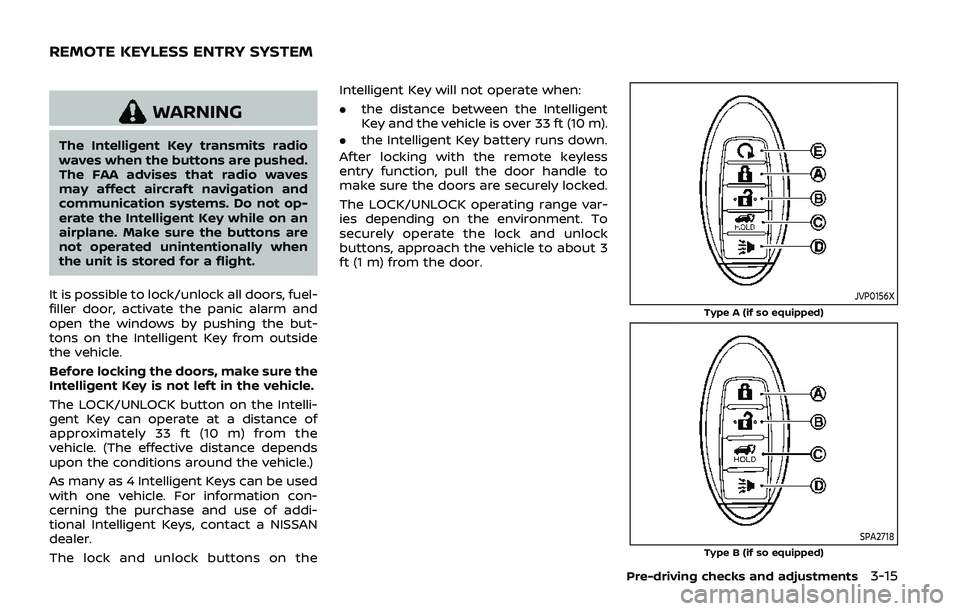
The LOCK/UNLOCK button on the Intelli-
gent Key can operate at a distance of
approximately 33 ft (10 m) from the
vehicle. (The effective distance depends
upon the conditions around the vehicle.)
As many as 4 Intelligent Keys can be used
with one vehicle. For information con-
cerning the purchase and use of addi-
tional Intelligent Keys, contact a NISSAN
dealer.
The lock and unlock buttons on the Intelligent Key will not operate when:
.
the distance between the Intelligent
Key and the vehicle is over 33 ft (10 m).
. the Intelligent Key battery runs down.
After locking with the remote keyless
entry function, pull the door handle to
make sure the doors are securely locked.
The LOCK/UNLOCK operating range var-
ies depending on the environment. To
securely operate the lock and unlock
buttons, approach the vehicle to about 3
ft (1 m) from the door.
JVP0156X
Type A (if so equipped)
SPA2718Type B (if so equipped)
Pre-driving checks and adjustments3-15
REMOTE KEYLESS ENTRY SYSTEM
Page 191 of 536
Opening/closing liftgate (if so
equipped)
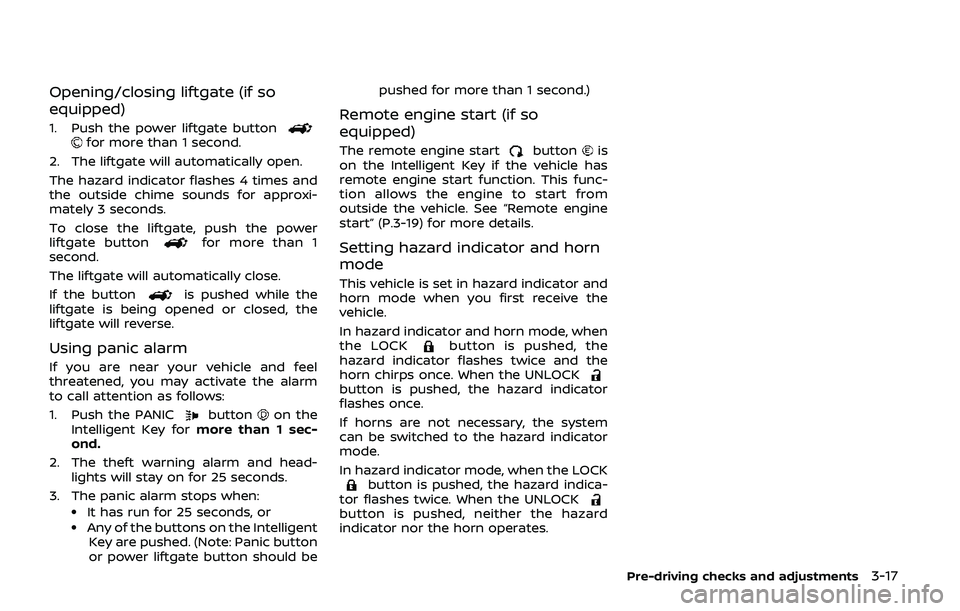
1. Push the power liftgate buttonfor more than 1 second.
2. The liftgate will automatically open.
The hazard indicator flashes 4 times and
the outside chime sounds for approxi-
mately 3 seconds.
To close the liftgate, push the power
liftgate button
for more than 1
second.
The liftgate will automatically close.
If the button
is pushed while the
liftgate is being opened or closed, the
liftgate will reverse.
Using panic alarm
If you are near your vehicle and feel
threatened, you may activate the alarm
to call attention as follows:
1. Push the PANIC
buttonon the
Intelligent Key for more than 1 sec-
ond.
2. The theft warning alarm and head- lights will stay on for 25 seconds.
3. The panic alarm stops when:
.It has run for 25 seconds, or.Any of the buttons on the Intelligent Key are pushed. (Note: Panic button
or power liftgate button should be pushed for more than 1 second.)
Remote engine start (if so
equipped)
The remote engine startbuttonis
on the Intelligent Key if the vehicle has
remote engine start function. This func-
tion allows the engine to start from
outside the vehicle. See “Remote engine
start” (P.3-19) for more details.
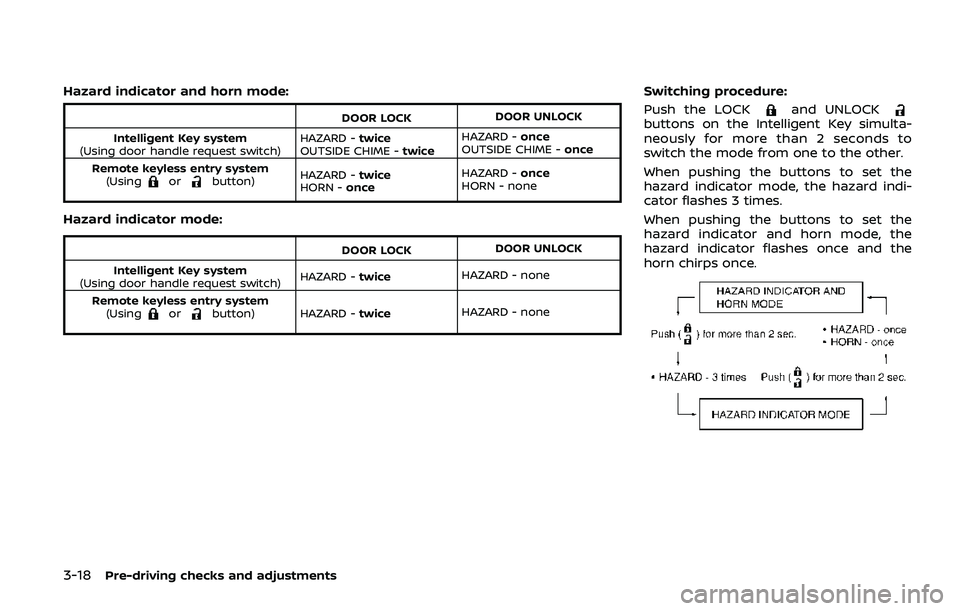
Setting hazard indicator and horn
mode
This vehicle is set in hazard indicator and
horn mode when you first receive the
vehicle.
In hazard indicator and horn mode, when
the LOCK
button is pushed, the
hazard indicator flashes twice and the
horn chirps once. When the UNLOCK
button is pushed, the hazard indicator
flashes once.
If horns are not necessary, the system
can be switched to the hazard indicator
mode.
In hazard indicator mode, when the LOCK
button is pushed, the hazard indica-
tor flashes twice. When the UNLOCK
button is pushed, neither the hazard
indicator nor the horn operates.
Pre-driving checks and adjustments3-17
Page 192 of 536
3-18Pre-driving checks and adjustments
Hazard indicator and horn mode:
DOOR LOCKDOOR UNLOCK
Intelligent Key system
(Using door handle request switch) HAZARD -
twice
OUTSIDE CHIME - twiceHAZARD -
once
OUTSIDE CHIME - once
Remote keyless entry system (Using
orbutton) HAZARD -
twice
HORN - once HAZARD -
once
HORN - none
Hazard indicator mode:
DOOR LOCK DOOR UNLOCK
Intelligent Key system
(Using door handle request switch) HAZARD -
twice HAZARD - none
Remote keyless entry system (Using
orbutton) HAZARD - twiceHAZARD - none
Switching procedure:
Push the LOCK
and UNLOCKbuttons on the Intelligent Key simulta-
neously for more than 2 seconds to
switch the mode from one to the other.
When pushing the buttons to set the
hazard indicator mode, the hazard indi-
cator flashes 3 times.
When pushing the buttons to set the
hazard indicator and horn mode, the
hazard indicator flashes once and the
horn chirps once.
Page 207 of 536
ering the camera can be cleaned.
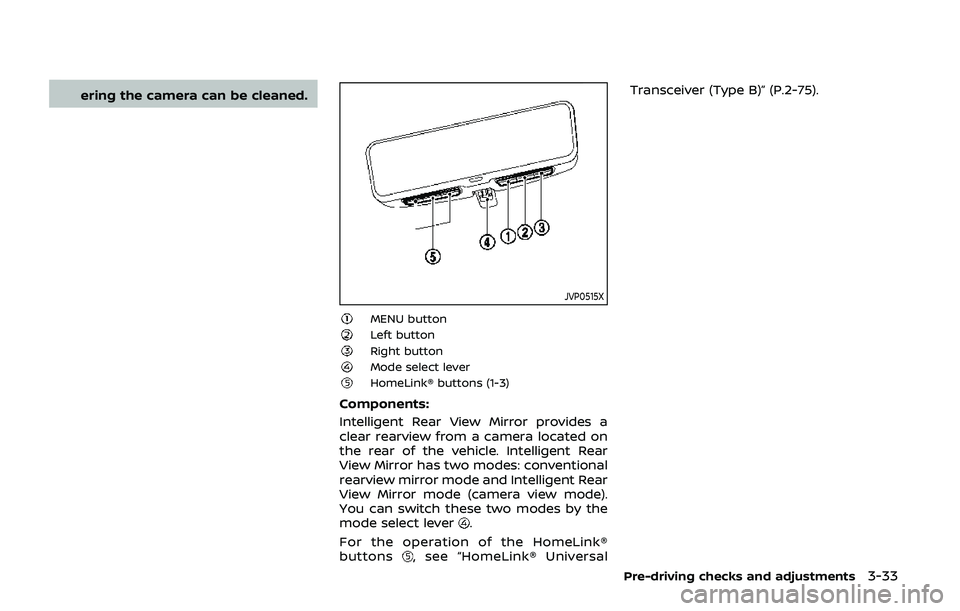
JVP0515X
MENU buttonLeft buttonRight buttonMode select leverHomeLink® buttons (1-3)
Components:
Intelligent Rear View Mirror provides a
clear rearview from a camera located on
the rear of the vehicle. Intelligent Rear
View Mirror has two modes: conventional
rearview mirror mode and Intelligent Rear
View Mirror mode (camera view mode).
You can switch these two modes by the
mode select lever
.
For the operation of the HomeLink®
buttons
, see “HomeLink® Universal Transceiver (Type B)” (P.2-75).
Pre-driving checks and adjustments3-33
Page 208 of 536
3-34Pre-driving checks and adjustments
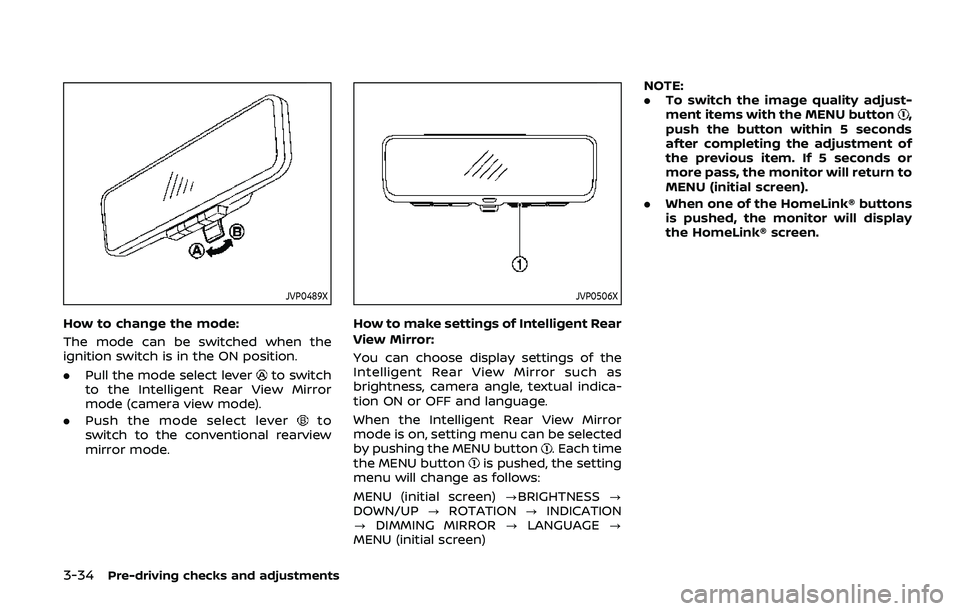
JVP0489X
How to change the mode:
The mode can be switched when the
ignition switch is in the ON position.
.Pull the mode select lever
to switch
to the Intelligent Rear View Mirror
mode (camera view mode).
. Push the mode select lever
to
switch to the conventional rearview
mirror mode.
JVP0506X
How to make settings of Intelligent Rear
View Mirror:
You can choose display settings of the
Intelligent Rear View Mirror such as
brightness, camera angle, textual indica-
tion ON or OFF and language.
When the Intelligent Rear View Mirror
mode is on, setting menu can be selected
by pushing the MENU button
. Each time
the MENU buttonis pushed, the setting
menu will change as follows:
MENU (initial screen) ?BRIGHTNESS ?
DOWN/UP ?ROTATION ?INDICATION
? DIMMING MIRROR ?LANGUAGE ?
MENU (initial screen) NOTE:
.
To switch the image quality adjust-
ment items with the MENU button
,
push the button within 5 seconds
after completing the adjustment of
the previous item. If 5 seconds or
more pass, the monitor will return to
MENU (initial screen).
. When one of the HomeLink® buttons
is pushed, the monitor will display
the HomeLink® screen.
Page 211 of 536
.Do not attach an antenna of wireless
device near the Intelligent Rear View
Mirror. Electric wave from wireless
device may cause disturbed image
in Intelligent Rear View Mirror.
. Do not push buttons excessively or
operating the lever roughly may
cause a system failure or the Intelli-
gent Rear View Mirror itself to drop.
. Never turn the body of Intelligent
Rear View Mirror by 90° or more. It
may damage the Intelligent Rear
View Mirror.
. Do not apply strong shocks to the
body of Intelligent Rear View Mirror.
It may cause a system failure.
. Do not apply heavy load to the
camera and camera-cover on the
rear of the vehicle. It may cause the
camera to be removed or may cause
a system failure.
. If it is difficult to see the Intelligent
Rear View Mirror display screen be-
cause of a strong external light,
switch the mode to the conventional
rearview mirror mode for better use.
. Close the sunshade (if so equipped)
when the Intelligent Rear View Mir-
ror display screen is unclear due to
strong external light.
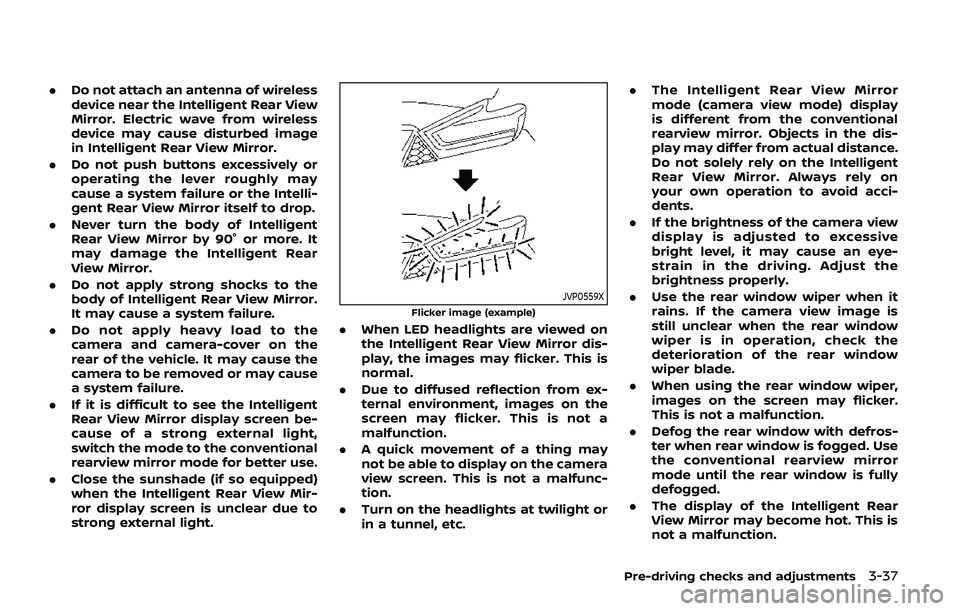
JVP0559X
Flicker image (example)
.When LED headlights are viewed on
the Intelligent Rear View Mirror dis-
play, the images may flicker. This is
normal.
. Due to diffused reflection from ex-
ternal environment, images on the
screen may flicker. This is not a
malfunction.
. A quick movement of a thing may
not be able to display on the camera
view screen. This is not a malfunc-
tion.
. Turn on the headlights at twilight or
in a tunnel, etc. .
The Intelligent Rear View Mirror
mode (camera view mode) display
is different from the conventional
rearview mirror. Objects in the dis-
play may differ from actual distance.
Do not solely rely on the Intelligent
Rear View Mirror. Always rely on
your own operation to avoid acci-
dents.
. If the brightness of the camera view
display is adjusted to excessive
bright level, it may cause an eye-
strain in the driving. Adjust the
brightness properly.
. Use the rear window wiper when it
rains. If the camera view image is
still unclear when the rear window
wiper is in operation, check the
deterioration of the rear window
wiper blade.
. When using the rear window wiper,
images on the screen may flicker.
This is not a malfunction.
. Defog the rear window with defros-
ter when rear window is fogged. Use
the conventional rearview mirror
mode until the rear window is fully
defogged.
. The display of the Intelligent Rear
View Mirror may become hot. This is
not a malfunction.
Pre-driving checks and adjustments3-37