Page 141 of 536
traveling lane with detectable lane mar-
kers. (See “Lane Departure Warning
(LDW)/Intelligent Lane Intervention (I-LI)”
(P.5-23).)
The BSW system will turn on the side
indicator lights, located next to the out-
side mirrors, if the radar sensors detect a
vehicle in the detection zone. If the turn
signal is activated in the direction of the
detected vehicle, a chime sounds twice
and the side indicator light will flash. (See
“Blind Spot Warning (BSW)” (P.5-33).)
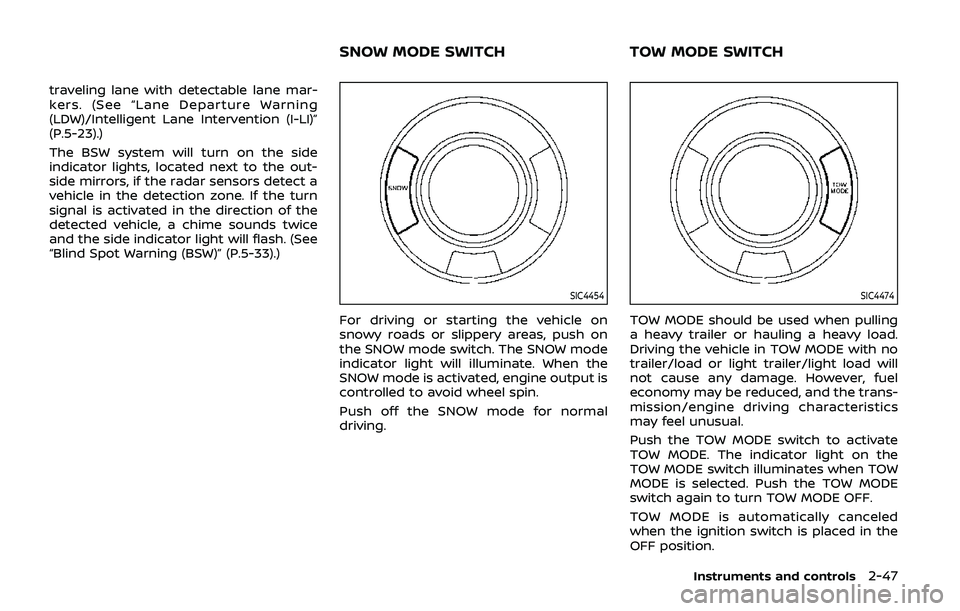
SIC4454
For driving or starting the vehicle on
snowy roads or slippery areas, push on
the SNOW mode switch. The SNOW mode
indicator light will illuminate. When the
SNOW mode is activated, engine output is
controlled to avoid wheel spin.
Push off the SNOW mode for normal
driving.
SIC4474
TOW MODE should be used when pulling
a heavy trailer or hauling a heavy load.
Driving the vehicle in TOW MODE with no
trailer/load or light trailer/light load will
not cause any damage. However, fuel
economy may be reduced, and the trans-
mission/engine driving characteristics
may feel unusual.
Push the TOW MODE switch to activate
TOW MODE. The indicator light on the
TOW MODE switch illuminates when TOW
MODE is selected. Push the TOW MODE
switch again to turn TOW MODE OFF.
TOW MODE is automatically canceled
when the ignition switch is placed in the
OFF position.
Instruments and controls2-47
SNOW MODE SWITCHTOW MODE SWITCH
Page 145 of 536
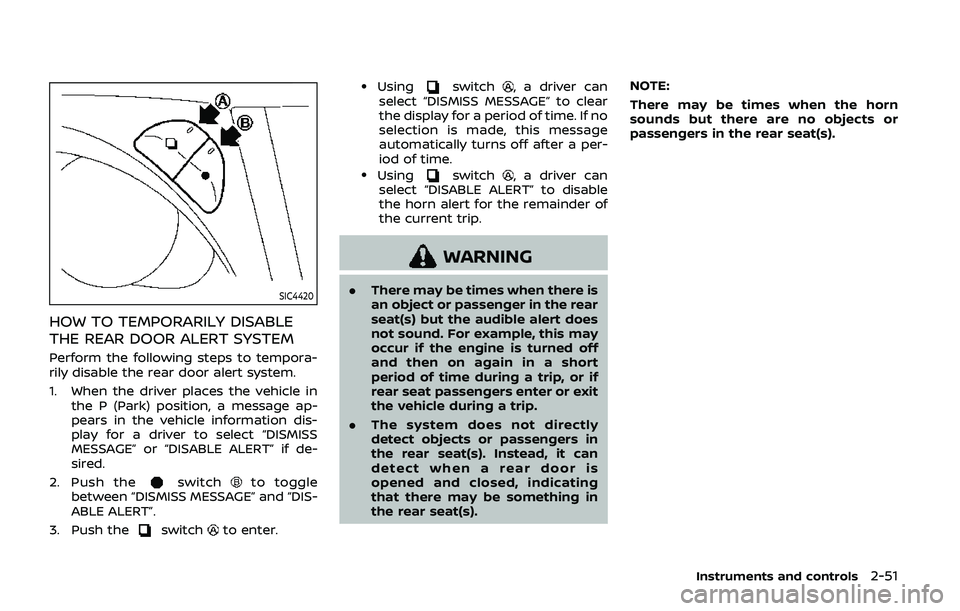
SIC4420
HOW TO TEMPORARILY DISABLE
THE REAR DOOR ALERT SYSTEM
Perform the following steps to tempora-
rily disable the rear door alert system.
1. When the driver places the vehicle inthe P (Park) position, a message ap-
pears in the vehicle information dis-
play for a driver to select “DISMISS
MESSAGE” or “DISABLE ALERT” if de-
sired.
2. Push the
switchto toggle
between “DISMISS MESSAGE” and “DIS-
ABLE ALERT”.
3. Push the
switchto enter.
.Usingswitch, a driver can
select “DISMISS MESSAGE” to clear
the display for a period of time. If no
selection is made, this message
automatically turns off after a per-
iod of time.
.Usingswitch, a driver can
select “DISABLE ALERT” to disable
the horn alert for the remainder of
the current trip.
WARNING
. There may be times when there is
an object or passenger in the rear
seat(s) but the audible alert does
not sound. For example, this may
occur if the engine is turned off
and then on again in a short
period of time during a trip, or if
rear seat passengers enter or exit
the vehicle during a trip.
. The system does not directly
detect objects or passengers in
the rear seat(s). Instead, it can
detect when a rear door is
opened and closed, indicating
that there may be something in
the rear seat(s). NOTE:
There may be times when the horn
sounds but there are no objects or
passengers in the rear seat(s).
Instruments and controls2-51
Page 150 of 536
2-56Instruments and controls
SIC4419
3rd row seat
SIC4501
Soft bottle holder
CAUTION
.Do not use bottle holder for any
other objects that could be
thrown about in the vehicle and
possibly injure people during
sudden braking or an accident.
. Do not use bottle holder for open
liquid containers.
JVI0619X
SUNGLASSES HOLDER
To open the sunglasses holder, push and
release. Only store one pair of sunglasses
in the holder.
WARNING
Keep the sunglasses holder closed
while driving to avoid obstructing
the driver’s view and to help prevent
an accident.
Page 151 of 536
CAUTION
.Do not use for anything other
than glasses.
. Do not leave glasses in the sun-
glasses holder while parking in
direct sunlight. The heat may
damage the glasses.
SIC4393
GLOVE BOX
WARNING
Keep glove box lid closed while driv-
ing to help prevent injury in an
accident or a sudden stop.
To open the glove box, pull the handle
.
To close, push the lid in until the lock
latches.
To lock
/unlockthe glove box, use the
mechanical key. For the mechanical key
usage, see “Keys” (P.3-2).
JVI1711X
CONSOLE BOX
Front
Type A (if so equipped):
To open the console box lid, push up the
knob
and pull up the lid.
To close, push the lid down until the lock
latches.
Instruments and controls2-57
Page 154 of 536
2-60Instruments and controls
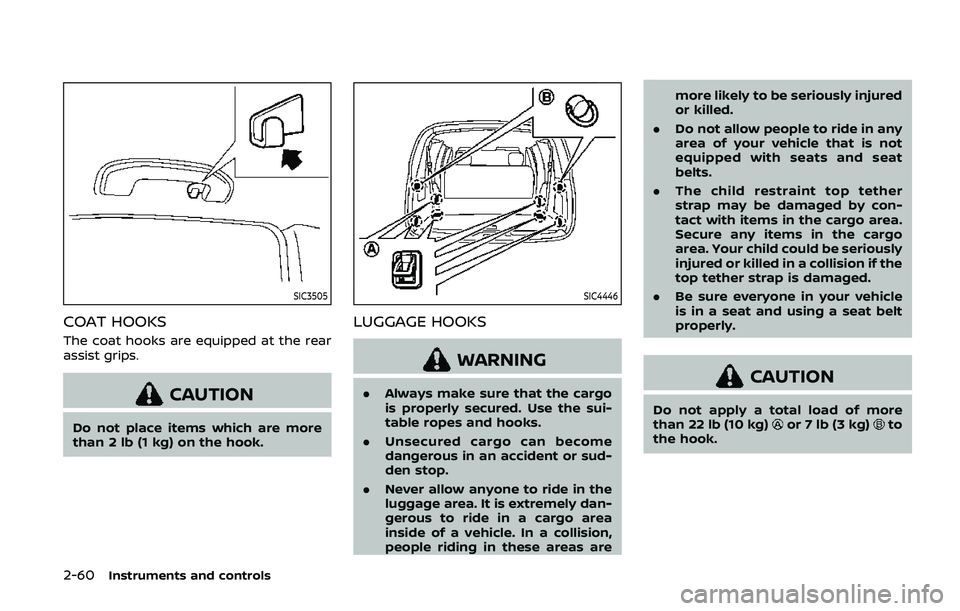
SIC3505
COAT HOOKS
The coat hooks are equipped at the rear
assist grips.
CAUTION
Do not place items which are more
than 2 lb (1 kg) on the hook.
SIC4446
LUGGAGE HOOKS
WARNING
.Always make sure that the cargo
is properly secured. Use the sui-
table ropes and hooks.
. Unsecured cargo can become
dangerous in an accident or sud-
den stop.
. Never allow anyone to ride in the
luggage area. It is extremely dan-
gerous to ride in a cargo area
inside of a vehicle. In a collision,
people riding in these areas are more likely to be seriously injured
or killed.
. Do not allow people to ride in any
area of your vehicle that is not
equipped with seats and seat
belts.
. The child restraint top tether
strap may be damaged by con-
tact with items in the cargo area.
Secure any items in the cargo
area. Your child could be seriously
injured or killed in a collision if the
top tether strap is damaged.
. Be sure everyone in your vehicle
is in a seat and using a seat belt
properly.CAUTION
Do not apply a total load of more
than 22 lb (10 kg)or 7 lb (3 kg)to
the hook.
Page 155 of 536
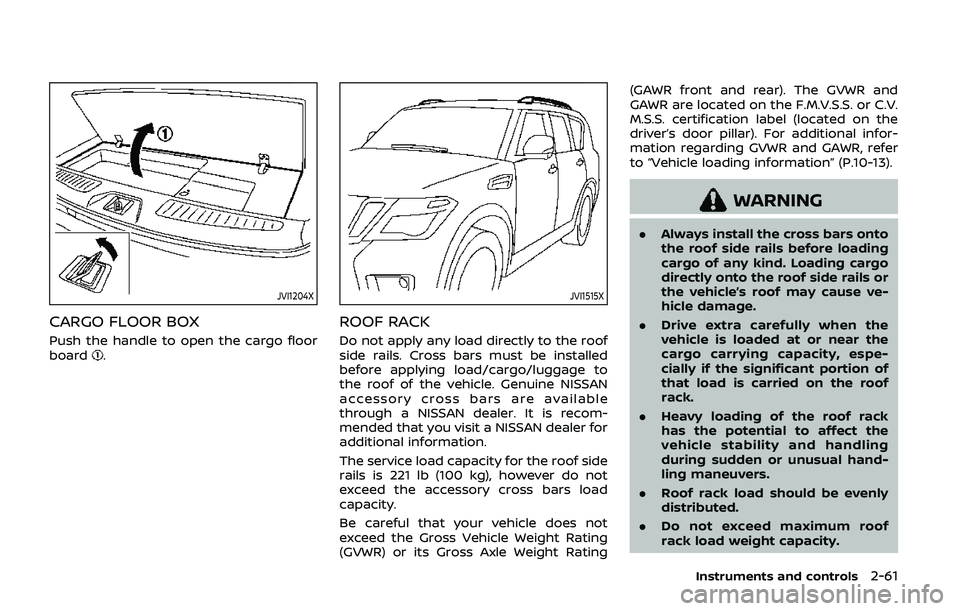
JVI1204X
CARGO FLOOR BOX
Push the handle to open the cargo floor
board.
JVI1515X
ROOF RACK
Do not apply any load directly to the roof
side rails. Cross bars must be installed
before applying load/cargo/luggage to
the roof of the vehicle. Genuine NISSAN
accessory cross bars are available
through a NISSAN dealer. It is recom-
mended that you visit a NISSAN dealer for
additional information.
The service load capacity for the roof side
rails is 221 lb (100 kg), however do not
exceed the accessory cross bars load
capacity.
Be careful that your vehicle does not
exceed the Gross Vehicle Weight Rating
(GVWR) or its Gross Axle Weight Rating(GAWR front and rear). The GVWR and
GAWR are located on the F.M.V.S.S. or C.V.
M.S.S. certification label (located on the
driver’s door pillar). For additional infor-
mation regarding GVWR and GAWR, refer
to “Vehicle loading information” (P.10-13).
WARNING
.
Always install the cross bars onto
the roof side rails before loading
cargo of any kind. Loading cargo
directly onto the roof side rails or
the vehicle’s roof may cause ve-
hicle damage.
. Drive extra carefully when the
vehicle is loaded at or near the
cargo carrying capacity, espe-
cially if the significant portion of
that load is carried on the roof
rack.
. Heavy loading of the roof rack
has the potential to affect the
vehicle stability and handling
during sudden or unusual hand-
ling maneuvers.
. Roof rack load should be evenly
distributed.
. Do not exceed maximum roof
rack load weight capacity.
Instruments and controls2-61
Page 157 of 536
JVI1517X
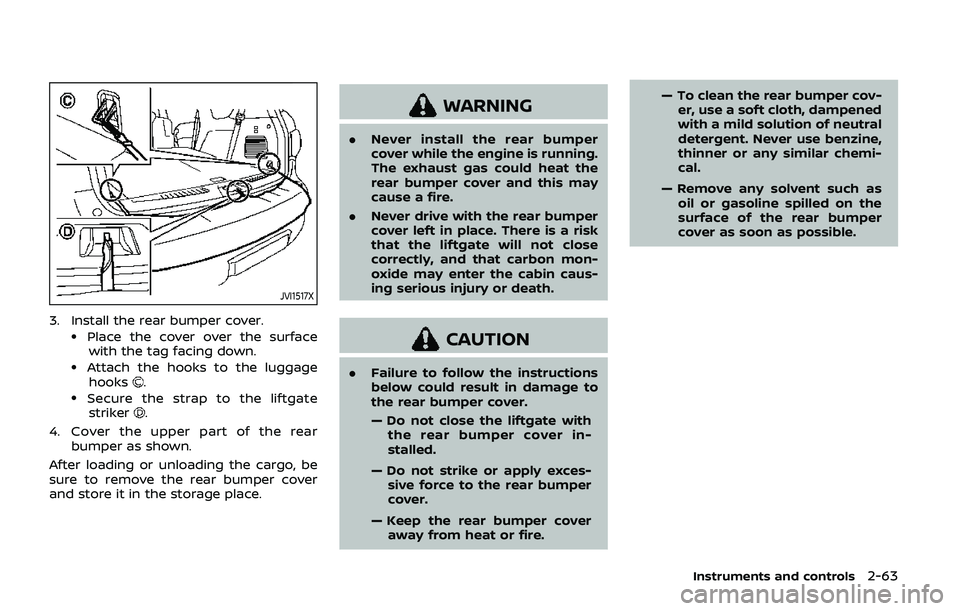
3. Install the rear bumper cover..Place the cover over the surfacewith the tag facing down.
.Attach the hooks to the luggage
hooks..Secure the strap to the liftgatestriker.
4. Cover the upper part of the rear bumper as shown.
After loading or unloading the cargo, be
sure to remove the rear bumper cover
and store it in the storage place.
WARNING
. Never install the rear bumper
cover while the engine is running.
The exhaust gas could heat the
rear bumper cover and this may
cause a fire.
. Never drive with the rear bumper
cover left in place. There is a risk
that the liftgate will not close
correctly, and that carbon mon-
oxide may enter the cabin caus-
ing serious injury or death.
CAUTION
.Failure to follow the instructions
below could result in damage to
the rear bumper cover.
— Do not close the liftgate with
the rear bumper cover in-
stalled.
— Do not strike or apply exces- sive force to the rear bumper
cover.
— Keep the rear bumper cover away from heat or fire. — To clean the rear bumper cov-
er, use a soft cloth, dampened
with a mild solution of neutral
detergent. Never use benzine,
thinner or any similar chemi-
cal.
— Remove any solvent such as oil or gasoline spilled on the
surface of the rear bumper
cover as soon as possible.
Instruments and controls2-63
Page 158 of 536
2-64Instruments and controls
POWER WINDOWS
WARNING
.Make sure that all passengers
have their hands, etc. inside the
vehicle while it is in motion and
before closing the windows. Use
the window lock switch to pre-
vent unexpected use of the
power windows.
. To help avoid risk of injury or
death through unintended opera-
tion of the vehicle and or its
systems, including entrapment
in windows or inadvertent door
lock activation, do not leave chil-
dren, people who require the
assistance of others or pets un-
attended in your vehicle. Addi-
tionally, the temperature inside a
closed vehicle on a warm day can
quickly become high enough to
cause a significant risk of injury
or death to people and pets.
The power windows operate when the
ignition switch is in the ON position or for
about 45 seconds after the ignition
switch is pushed to the OFF position. If
the driver’s or front passenger’s door is
opened during this period of about 45 seconds, power to the windows is can-
celed.
SIC4352
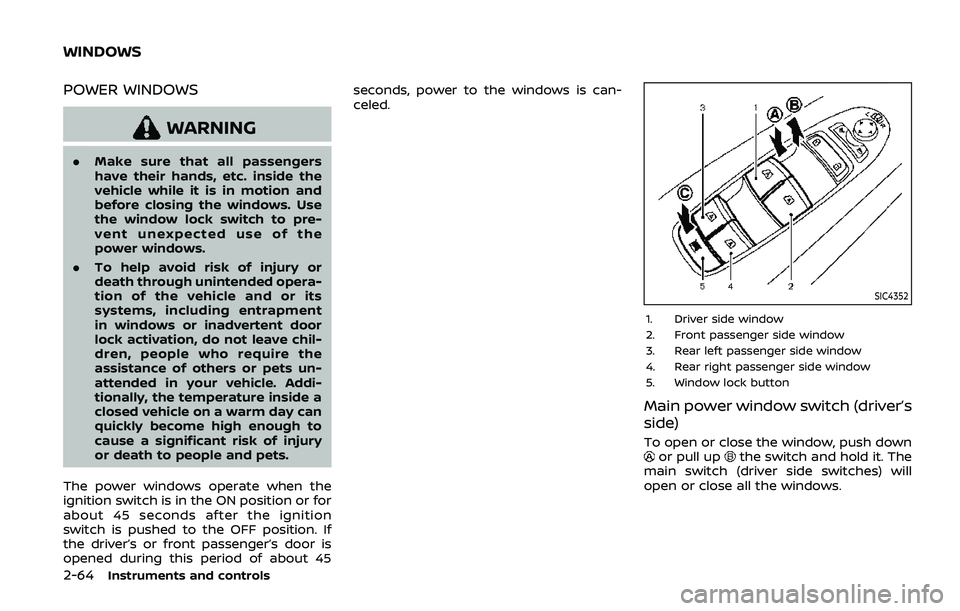
1. Driver side window
2. Front passenger side window
3. Rear left passenger side window
4. Rear right passenger side window
5. Window lock button
Main power window switch (driver’s
side)
To open or close the window, push downor pull upthe switch and hold it. The
main switch (driver side switches) will
open or close all the windows.
WINDOWS