Page 204 of 592

NOTE:
Request switches for all doors and trunk
can be deactivated when the I-Key Door
Lock setting is switched to OFF in the
“Vehicle Settings” of the vehicle informa-
tion display. For additional information,
refer to “Vehicle information display ” in
the “Instruments and controls” section
of the manual.
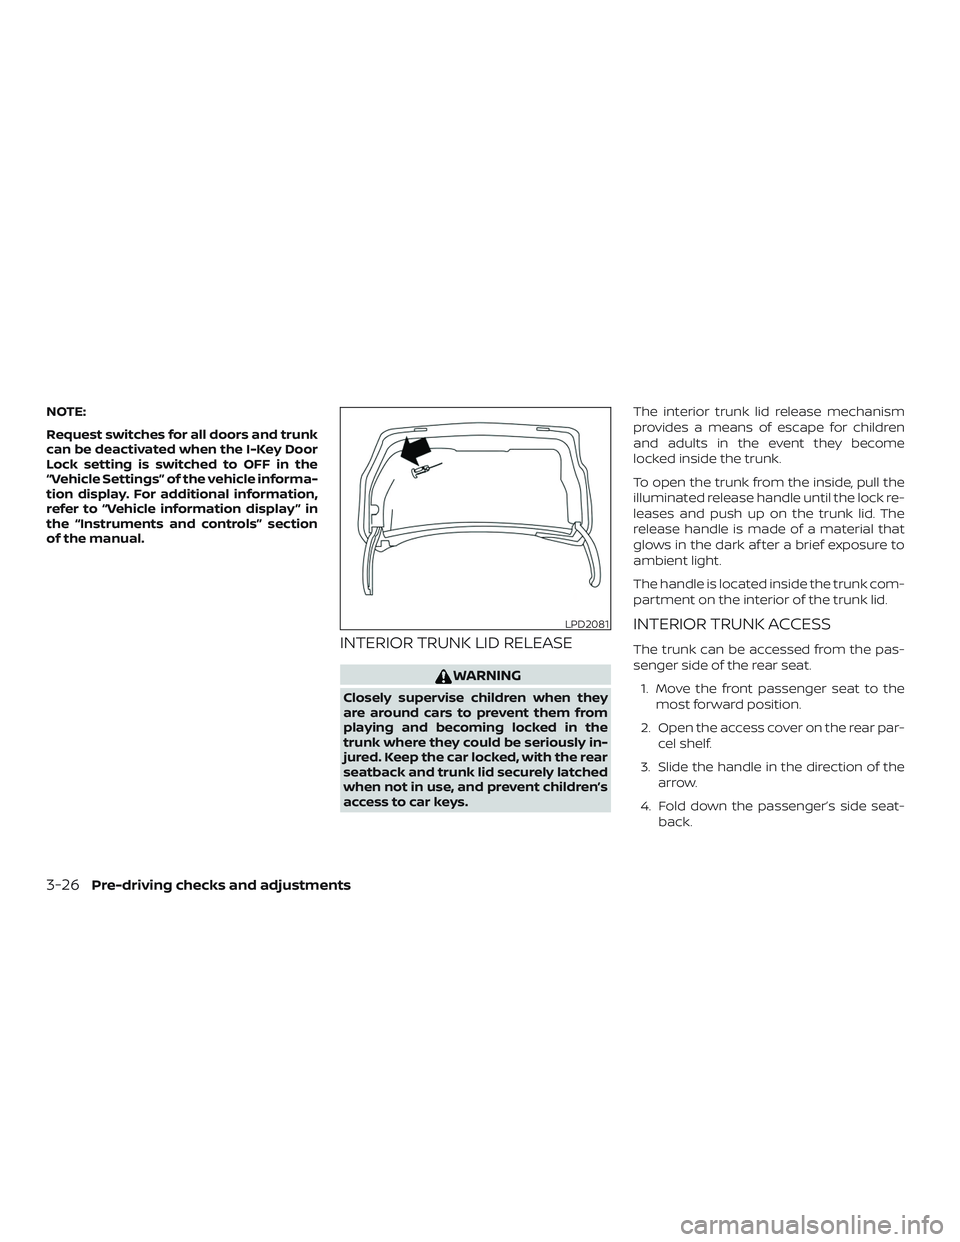
INTERIOR TRUNK LID RELEASE
WARNING
Closely supervise children when they
are around cars to prevent them from
playing and becoming locked in the
trunk where they could be seriously in-
jured. Keep the car locked, with the rear
seatback and trunk lid securely latched
when not in use, and prevent children’s
access to car keys.The interior trunk lid release mechanism
provides a means of escape for children
and adults in the event they become
locked inside the trunk.
To open the trunk from the inside, pull the
illuminated release handle until the lock re-
leases and push up on the trunk lid. The
release handle is made of a material that
glows in the dark af ter a brief exposure to
ambient light.
The handle is located inside the trunk com-
partment on the interior of the trunk lid.
INTERIOR TRUNK ACCESS
The trunk can be accessed from the pas-
senger side of the rear seat.
1. Move the front passenger seat to the most forward position.
2. Open the access cover on the rear par- cel shelf.
3. Slide the handle in the direction of the arrow.
4. Fold down the passenger’s side seat- back.
LPD2081
3-26Pre-driving checks and adjustments
Page 205 of 592

WARNING
∙ Never allow anyone to ride in thecargo area or on the rear seat when it
is in the fold-down position. Use of
these areas by passengers without
proper restraints could result in seri-
ous injury or death in an accident or
sudden stop.
∙ Properly secure all cargo with ropes or straps to help prevent it from sliding
or shif ting. Do not place cargo higher
than the seatbacks. In a sudden stop
or collision, unsecured cargo could
cause personal injury.
∙ When returning the seatbacks to the upright position, be certain they are
completely secured in the latched po-
sition. If they are not completely se-
cured, passengers may be injured in
an accident or sudden stop.
∙ Closely supervise children when they are around cars to prevent them from
playing and becoming locked in the
trunk where they could be seriously
injured. Keep the car locked, with the
rear seatback and trunk lid securely
latched when not in use, and prevent
children’s access to car keys.
OPENER OPERATION
The fuel-filler door release is located below
the instrument panel. To open the fuel-filler
door, pull the release. To lock, close the fuel-
filler door securely.
FUEL-FILLER CAP
WARNING
∙ Gasoline is extremely flammable andhighly explosive under certain condi-
tions. You could be burned or seri-
ously injured if it is misused or mis-
handled. Always stop the engine and
do not smoke or allow open flames
or sparks near the vehicle when
refueling.
∙ Do not attempt to top off the fuel tank af ter the fuel pump nozzle shuts off
automatically. Continued refueling
may cause fuel overflow, resulting in
fuel spray and possibly a fire.
∙ Use only an original equipment type fuel-filler cap as a replacement. It has
a built-in safety valve needed for
proper operation of the fuel system
and emission control system. An in-
correct cap can result in a serious mal-
function and possible injury. It could
also cause the
Malfunction Indi-
cator Light (MIL) to come on.
∙ Never pour fuel into the throttle body to attempt to start your vehicle.
LPD2869
FUEL-FILLER DOOR
Pre-driving checks and adjustments3-27
Page 207 of 592

To remove the fuel-filler cap:1. Turn the fuel-filler cap counterclock- wise to remove.
2. Put the fuel-filler cap on the cap holder
�1while refueling.
To install the fuel-filler cap: 1. Insert the fuel-filler cap straight into the fuel-filler tube.
2. Turn the fuel-filler cap clockwise until a single click is heard.
Loose Fuel Cap warning
The Loose Fuel Cap warning�Aappears in
the vehicle information display when the
fuel-filler cap is not tightened correctly af-
ter the vehicle has been refueled. It may
take a few driving trips for the message to
be displayed. To turn off the warning, per-
form the following:
1. Remove and install the fuel-filler cap as soon as possible. For additional infor-
mation, refer to “Fuel-filler cap” in this
section.
2. Tighten the fuel-filler cap until it clicks.
WARNING
∙ Do not adjust the steering wheel while driving. You could lose control of your
vehicle and cause an accident.
∙ Do not adjust the steering wheel any closer to you than is necessary for
proper steering operation and com-
fort. The driver’s air bag inflates with
great force. If you are unrestrained,
leaning forward, sitting sideways or
out of position in any way, you are at
greater risk of injury or death in a
crash. You may also receive serious or
fatal injuries from the air bag if you
are up against it when it inflates. Al-
ways sit back against the seatback
and as far away as practical from the
steering wheel. Always use the seat
belts.
LPD2870LPD2888
STEERING WHEEL
Pre-driving checks and adjustments3-29
Page 208 of 592
TILT OPERATION
Pull the lock lever down and hold on until
the end of the stroke
�1and adjust the
steering wheel up or down
�2to the de-
sired position.
Push the lock lever up
�1firmly and hold on
until end of stroke to lock the steering
wheel in place.
TELESCOPIC OPERATION
Pull the lock lever down�1and adjust the
steering wheel forward or backward
�3to
the desired position.
Push the lock lever up
�1firmly and hold on
until end of stroke to lock the steering
wheel in place.
LPD2871
WPD0344
SUN VISORS
3-30Pre-driving checks and adjustments
Page 209 of 592
1. To block glare from the front, swingdown the main sun visor
�1.
2. To block glare from the side, remove the main sun visor
�2from the center
mount and swing the visor to the side.
3. To extend the sun visor, slide in or out as needed
�3.
CAUTION
∙ Do not store the sun visor before re-turning the extension to its original
position.
∙ Do not pull the extension sun visor forcedly downward.
VANITY MIRRORS
To access the vanity mirror, pull the sun
visor down and flip open the mirror cover.
Some vanity mirrors are illuminated and
turn on when the mirror cover is open.
MANUAL ANTI-GLARE REARVIEW
MIRROR (if so equipped)
Use the night position�1to reduce glare
from the headlights of vehicles behind you
at night.
Use the day position
�2when driving in
daylight hours.
WARNING
Use the night position only when neces-
sary, because it reduces rear view
clarity.
LPD2589WPD0126
MIRRORS
Pre-driving checks and adjustments3-31
Page 212 of 592

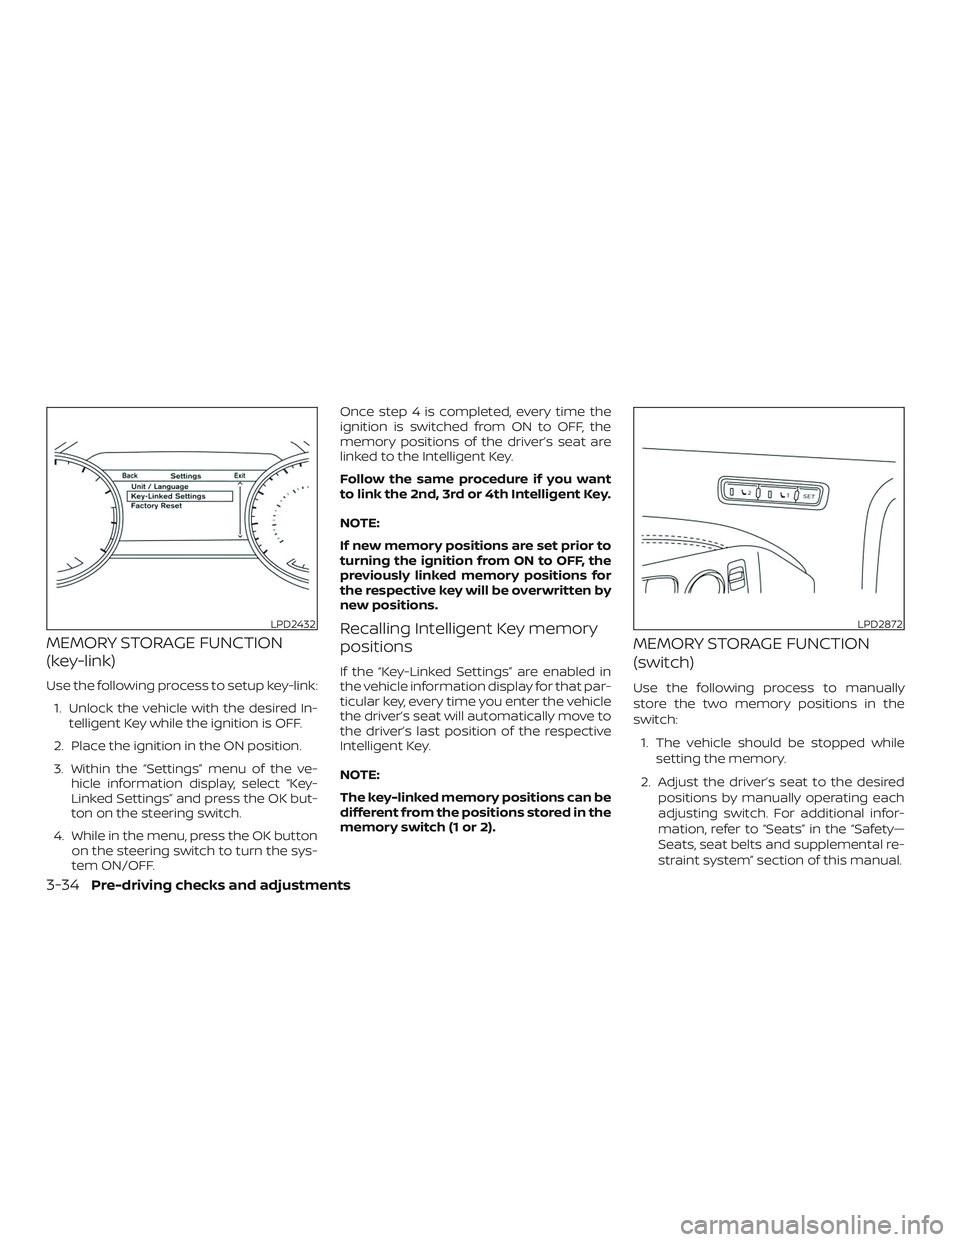
MEMORY STORAGE FUNCTION
(key-link)
Use the following process to setup key-link:1. Unlock the vehicle with the desired In- telligent Key while the ignition is OFF.
2. Place the ignition in the ON position.
3. Within the “Settings” menu of the ve- hicle information display, select “Key-
Linked Settings” and press the OK but-
ton on the steering switch.
4. While in the menu, press the OK button on the steering switch to turn the sys-
tem ON/OFF. Once step 4 is completed, every time the
ignition is switched from ON to OFF, the
memory positions of the driver’s seat are
linked to the Intelligent Key.
Follow the same procedure if you want
to link the 2nd, 3rd or 4th Intelligent Key.
NOTE:
If new memory positions are set prior to
turning the ignition from ON to OFF, the
previously linked memory positions for
the respective key will be overwritten by
new positions.
Recalling Intelligent Key memory
positions
If the “Key-Linked Settings” are enabled in
the vehicle information display for that par-
ticular key, every time you enter the vehicle
the driver’s seat will automatically move to
the driver’s last position of the respective
Intelligent Key.
NOTE:
The key-linked memory positions can be
different from the positions stored in the
memory switch (1 or 2).
MEMORY STORAGE FUNCTION
(switch)
Use the following process to manually
store the two memory positions in the
switch:
1. The vehicle should be stopped while setting the memory.
2. Adjust the driver’s seat to the desired positions by manually operating each
adjusting switch. For additional infor-
mation, refer to “Seats” in the “Safety—
Seats, seat belts and supplemental re-
straint system” section of this manual.
LPD2432LPD2872
3-34Pre-driving checks and adjustments
Page 221 of 592

Backing up behind a projecting
object
The position�Cis shown farther than the
position
�Bin the display. However, the po-
sition
�Cis actually at the same distance as
the position
�A. The vehicle may hit the object when backing up to the position
�A
if the object projects over the actual back-
ing up course.
HOW TO PARK WITH PREDICTED
COURSE LINES
WARNING
∙ If the tires are replaced with different
sized tires, the predicted course lines
may be displayed incorrectly.
∙ On a snow-covered or slippery road, there may be a difference between
the predicted course line and the ac-
tual course line.
∙ If the battery is disconnected or be- comes discharged, the predicted
course lines may be displayed incor-
rectly. If this occurs, please perform
the following procedures:
– Turn the steering wheel from lock to lock while the engine is running.
– Drive the vehicle on a straight road for more than 5 minutes.
∙ When the steering wheel is turned with the ignition switch in the ACC po-
sition, the predicted course lines may
be displayed incorrectly. 1. Visually check that the parking space is
safe before parking your vehicle.
2. The rear view of the vehicle is displayed on the screen
�Awhen the shif t lever is
moved to the R (Reverse) position.
LHA4945LHA5043
Monitor, climate, audio, phone and voice recognition systems4-7
Page 232 of 592

object when backing up to the position�A
if the object projects over the actual back-
ing up course.
HOW TO PARK WITH PREDICTED
COURSE LINES
WARNING
∙ If the tires are replaced with differentsized tires, the predicted course lines
may be displayed incorrectly.
∙ On a snow-covered or slippery road, there may be a difference between
the predicted course line and the ac-
tual course line.
∙ If the battery is disconnected or be- comes discharged, the predicted
course lines may be displayed incor-
rectly. If this occurs, please perform
the following procedures:
– Turn the steering wheel from lock to lock while the engine is running.
– Drive the vehicle on a straight road for more than 5 minutes.
∙ When the steering wheel is turned with the ignition switch in the ACC po-
sition, the predicted course lines may
be displayed incorrectly. 1. Visually check that the parking space is
safe before parking your vehicle.
2. The rear view of the vehicle is displayed on the screen
�Awhen the shif t lever is
moved to the R (Reverse) position. 3. Slowly back up the vehicle adjusting
the steering wheel so that the pre-
dicted course lines
�Benter the park-
ing space
�C.
4. Maneuver the steering wheel to make the vehicle width guide lines
�Dparallel
LHA5043LHA4770
4-18Monitor, climate, audio, phone and voice recognition systems