2019 MERCEDES-BENZ SLC ROADSTER flat tire
[x] Cancel search: flat tirePage 271 of 306
R
Do not drive with tire swh ich have too little
trea dde pth .Thi ssigni ficantl yred uce sthe
tra ctio non wetroa ds(hyd rop laning ).
R Re place thetiresaf ter six ye arsat the lat-
est, regardless ofwe ar. MOE
xtende dtire s(ti res with run-f lat
prope rties)
Wi th MOExte ndedtire s(ti res with runfla t
cha racteri stics) ,yo ucan conti nuetodrive your
veh icleeve nif the reisatota llo ss ofpre ssu re
in one ormor etire s.
MOExte ndedtire sma yonl ybe used incon-
juncti onwith an acti vetire pressu reloss wa rn-
ing system orwith an acti vetire pressu remon-
ito rand onwheelssp eci fically teste dby
Me rced es-Benz.
Note son drivin gwi th MOExte ndedtire swi th a
fla ttire (Ypage 253 ).
Veh icles equipp ed with MOExte ndedtire sar e
not equipp ed with aTIR EFIT kitatthe factory .
It is the refore reco mme ndedtha tyo uad ditio n-
al ly eq uip yo ur veh iclewi th aTIR EFIT kitifyo u
mou nttire stha tdo not featureru n-fl atcha rac-
teri stics, e.g.wi nter tires.ATIR EFIT kitcan be
ob tained fromaqu alifi ed speci alistwo rksh op. Win
terope ratio n Ge
neral notes
Hav eyo ur veh iclewi nter-p roofed ataqu alifi ed
sp eci alistwo rksh opatthe onse tof winter.
Ob ser vethe note sin the "Cha ngi ng awh eel"
sec tion(Y page 288 ). Dri
ving with summe rtire s
At temp eratures below 45 ‡(+7 †),su mme r
tire slo se elas tici tyand therefore tractio nand
bra king powe r.Ch ang ethe tireson your veh i-
cle toM+S tires.Us ing su mmer tiresatvery
cold tempera turescould cause cracks toform,
thereby damagingthetires perma nently.
Mercede s-Benzcannot acceptresponsi bility
for this type ofdama ge. G
WARNING
Damage dtires cancause tireinflati onpres-
sure loss. Asaresul t,you could losecontrol
of you rvehicl e.There isarisk ofaccide nt.
Check thetires regularlyforsigns ofdam-
age and repla ceany dama gedtires immedi -
ately . M+S
tires G
WARNING
M+S tireswithatire tread depth ofless than
00CF in(4 mm) arenot suitable foruse inwin-
ter and donot provid esuffici enttraction.
There isarisk ofan accide nt.
M+S tireswithatread depth ofless than 00CF
in (4 mm) must berepla cedimmedi ately.
At temperatu resbelo w45 ‡(+7 †), use win-
ter tires orall-season tires.Bothtypes oftire
are identifi edbythe M+S marking.
Only winter tiresbearing the004D snowfla ke
symbo lin add ition tothe M+S marking provide
the best possi blegrip inwintry roadcondi-
tions.
Only these tireswillall ow drivi ngsafety sys-
tems suchasABS andESP®
to function opti-
mall yin winter. Thesetireshave been devel-
oped specifi callyfor drivi nginsnow.
Use M+S tiresofthe same make andtread on
all whee lsto maintai nsafe handl ingcharacter-
istics.
Alwa ysobserve themaximu mpermis sible
speed specifiedfor the M+S tiresyouhave
mounted.
When youhave mounted theM+S tires:
X Check thetire pressu res(Ypage 273).
X Vehic lesforCanada: restartthetire pres-
sure losswarni ngsystem (Ypage 274).
X Resta rtthe tire pressu remonitor
(Y page 274).
Information aboutdrivi ngwith anemergency
spare wheel(Y page 293). Winter
operation
269Wheelsand tires Z
Page 272 of 306
Snow
chains G
WARNING
If snow chains areinstalled tothe front
wheels, theymaydrag against thevehicle
body orchassis componen ts.This could
cause damage tothe vehicle orthe tires.
There isarisk ofan accident.
To avoid hazardous situations:
R never install snowchains tothe front
wheels
R alwa ysinstall snowchains inpairs tothe
rear wheels.
For safety reasons, Mercedes-B enzrecom-
mends thatyouonly usesnow chains that
have been specially approved foryour vehicle
by Mercedes-B enz,orare ofacorrespondin g
standard ofquali ty.For more information ,
please contactaquali fiedspecialist workshop.
If you inten dto mount snowchains, please
bear thefollowing pointsinmind:
R Snow chains maynotbemounted onall
wheel/tire combinations .Permissible
wheel-tire combinations (Ypage 292).
R Only usesnow chains whendriving onroads
completely coveredbysnow. Remove the
snow chains assoon aspossible whenyou
come toaroad thatisnot snow-cov ered.
R Local regulations mayrestrict theuse of
snow chains. Observe theappropriate regu-
lations ifyou wish tomount snowchains.
R Do not exceed themaximum permissible
speed of30 mph (50km/h).
You may wish todeactivate ESP®
when pulling
away withsnow chains installed (Ypage 61).
You canthereby allowthewheels tospin ina
cont rolled manner, achieving anincreased
driving force(cuttin gaction).
Inform ationabout driving withanemergency
spare wheel (Ypage 293). Tire
pressur e Tire
pressur especifications
Import antsafety notes G
WARNING
Underinflated oroverinflated tirespose the
following risks:
R the tires mayburst, especially asthe load
and vehicle speedincrease.
R the tires maywear excessively and/or
unevenly, whichmaygreatly impairtire
tract ion.
R the driving characterist ics,aswell as
steering andbraking, maybegreatly
impaired.
There isarisk ofan accident.
Follow recommen dedtireinflation pressures
and check thepressure ofall the tires
including thespare wheel:
R mont hly,atleast
R ifthe load changes
R before beginning along journey
R under different operating conditions,e.g.
off-r oad driving
If necessary, correctthetire pressure.
The data onthe Tire andLoading Information
placard andtirepressure tableshown hereare
examples. Tirepressure specifications are
vehicle-specific andmay deviate fromthedata
shown here.Thetirepressure specifications
that arevalid foryour vehicle canbefound on
the Tire andLoading Informationplacard and
tire pressure tableonthe vehicle.
General notes The
recommen dedtirepressures forthe tires
mounted atthe factory canbefound onthe
labels described here.
Operat ionwith anemergency sparewheel:
information onoperation withanemergency
spare wheel canbefound inthe general notes
in the "Emergenc yspare wheel" section
(Y page 294).
Further information ontire pressures canbe
obtained ataquali fiedspecialist workshop. 270
Tire
pressureWheels andtires
Page 274 of 306
Imp
ortant noteson tire pressu re G
WAR
NING
If th etire pre ssur edro psrep eatedly, the
whee l,valv eor tire may bedamag ed.Tire
pre ssur eth at istoolow may result inatire
blow- out.Ther eis aris kof an acc iden t.
R Chec kth etire for foreign objects.
R Chec kwhet herthewhee lis losi ngair or
th evalv eis leak ing.
If you areunab leto rec tify thedamag e,con-
tac ta qualif iedspec ialist workshop. G
WAR
NING
If you fituns uitable accessories onto tire
valv es,thetire valv esmay beove rloaded
and malf unction ,whic hcan caus etire pre s-
sur eloss .Due totheir desi gn,ret rofitte dtire
pre ssur emon itors keep thetire valv eopen .
This canalso result intire pre ssur eloss .
Ther eis aris kof an acc iden t.
On lyscrew thest and ard valvecap orother
valv ecap sappr ovedby Mer cedes- Benzfor
your vehicleon to thetire valv e.
Use asuit able pressur egauge tocheckth e
ti re pre ssur e.The outerappear anceof atire
does notper mit any reliable conclusio nabout
th etire pre ssur e.On veh icles equipp edwith
th eelec tron ictire pre ssur emon itor, thetire
pre ssur ecan bechecke din theon -board com-
put er.
The tire tempe rature and pressur einc reas e
when theveh icleis in mot ion.This isdepe nd-
en ton thedriv ingspee dand theload.
Ther efore, you should onlyco rrec ttire pre s-
sur eswhen thetires are cold.
The tires are cold:
R ifth eveh iclehas been parkedwithth etires
out ofdire ctsun lightfor atleast three hour s
and
R ifth eveh iclehas notbeen drivenfurther
th an 1mile (1.6km)
The tire tempe rature chang esdepe nding on
th eout side tempe rature, theveh iclespee d
and thetire load. Ifth etire tempe rature
ch ang esby 18 ‡(10 †), thetire pre ssur e
ch ang esby appr oximat ely10kPa(0. 1bar/
1. 5psi) .Tak eth is int oacc oun twhen checkin g th
epre ssur eof warm tires .On lyco rrec tth e
ti re pre ssur eif it is toolow forthecur ren t
oper ating cond ition s.Ifyou checkth etire
pre ssur ewhen thetires are warm ,th eres ult-
ing value willbehigh erthan ifth etires were
co ld. This isno rm al. Do notred uce thetire
pre ssur eto thevalue specifiedfor cold tires .
The tire pre ssur ewould other wise betoolow.
Obs erveth erec omm ended tire pre ssur esfor
co ld tires :
R on theTir eand Load ingInfor mat ionplac ard
on theB- pillar onthedriv er'sside
R in thetire pre ssur etab leon theins ide ofthe
fuel filler flap
R prin tedin yellow ontherim oftheeme r-
gen cy/ collaps iblespar ewhee l(dep endin g
on veh icleequipm ent) Und
erinflated orover inflated tires
Und erinflated tires G
WAR
NING
Tir es wit hpre ssur eth at istoolow can over-
heat andburs tas aco nsequen ce.In addi-
ti on ,th ey also suffer from exce ssiv eand /or
irr egular wear,whic hcan severelyimpa irth e
brak ingproperties and thedriv ingcharac ter-
ist ics .Ther eis aris kof an acc iden t.
Av oid tire pre ssur esthat are toolow inall
th etires ,inc ludin gth espar ewhee l.
Un der inflat ed tires may:
R ove rheat,leadin gto tire def ects
R adve rselyaff ecthan dling
R wear exce ssiv elyand /orune venly
R hav ean adve rseeffecton fuel consumpt ion
Over inflated tires G
WAR
NING
Tir es wit hex ce ssiv elyhigh pressur ecan
burs tbec ause they are damag edmor eeas-
ily by road debris,pot hole set c. In addit ion,
th ey also suffer from irregular wear,whic h
can severelyimpa irth ebrak ingproperties
and thedriv ingcharac teris tics .Ther eis a
ris kof an acc iden t. 272
Ti
re pressu reWheels andtire s
Page 275 of 306
Avoi
dtire pressu res thatar etoo high inall
the tires,incl uding the sparewh eel.
Ove rinflated tiresma y:
R incr ease the braking dista nce
R ad ver selyaff ect handl ing
R we arexce ssivel yand /or unevenl y
R ha ve an adver seeffe cton ridecomf ort
R be more susce ptible to dama ge
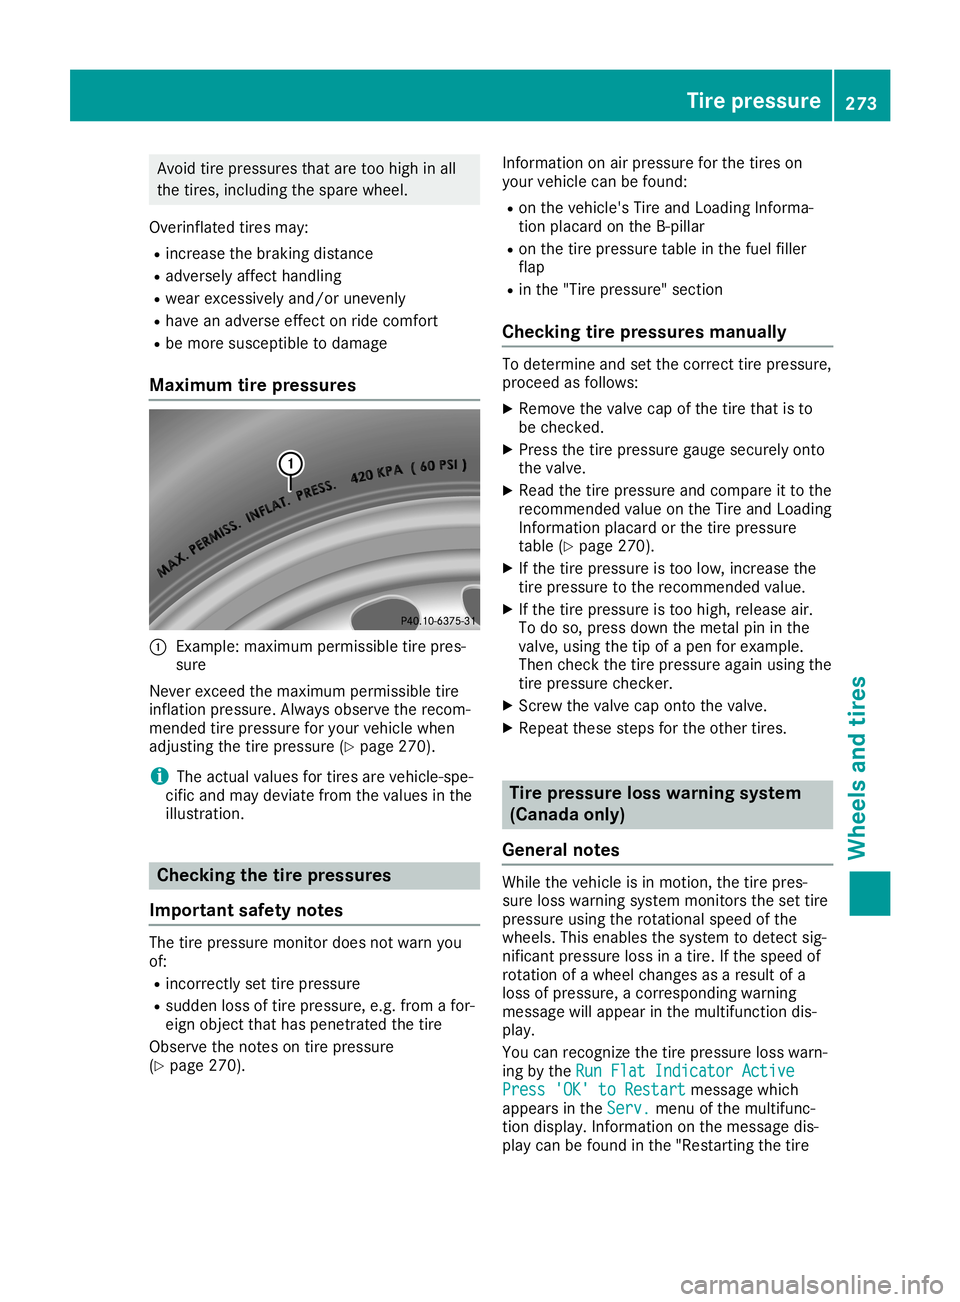
Maxi mum tirepres sure s 0043
Exam ple: ma ximu mpermi ssible tire pres-
su re
Nev erexce edthe maximu mpermi ssible tire
infl ation pre ssu re.Alw aysob ser vethe reco m-
mend edtire pressu refor your veh iclewh en
ad jus ting thetire pressu re(Y page 270) .
i The
actu alvalues for tiresar eveh icle-sp e-
cifi cand mayde via tefrom thevalues inthe
il lu stra tion. Che
ckingthe tire pres sure s
Impo rtant safetynotes The
tirepressu remoni tordoes not warnyou
of:
R inco rrectly settire pressu re
R sudd en loss oftire pressu re,e.g.from afor-
ei gn object thatha spe netra tedthetire
Obs ervethe notes ontire pressu re
(Y page 270 ). Info
rma tionon airpre ssu refor the tireson
yo ur veh iclecan befou nd:
R on the vehicle's Tire and Loading Info rma -
tio nplaca rdon the B-pi llar
R on the tire pressu retab lein the fuel filler
fla p
R in the "Tire pre ssu re" section
Che ckingtire pres sure smanua lly To
determ ineand setthe corr ecttire pressu re,
pro cee das follows :
X Re move thevalve cap ofthe tire thatis to
be che cked .
X Pre ssthe tire pressu regaug esec urelyonto
the valve .
X Re ad the tire pressu reand comp areit to the
reco mme ndedva lue on the Tire and Loading
Info rma tionplaca rdorthe tire pressu re
tab le(Y page 270 ).
X Ifthe tire pressu reistoo low, incr ease the
tire pressu reto the reco mme ndedva lue.
X Ifthe tire pressu reistoo high, release air.
To do so, pressdown the meta lpi n in the
va lve ,us ing the tipofape nfor exa mpl e.
The nche ckthe tire pressu reagain us ing the
tire pressu reche cker.
X Screw thevalve cap onto thevalve .
X Re peat thes estep sfor the othe rtire s. Tire
pres sure loss wa rning sys tem
(C anada only)
Ge neral notes Whi
lethe vehicleis in moti on,the tire pres-
su re loss wa rning system monitorsthesettire
pre ssu reusing the rota tional speedofthe
wh eels.Thi sena bles the system todetect sig-
nifi cant pressu reloss inatire .If the speedof
rota tionof awh eelcha nge sas ares ultof a
lo ss ofpre ssu re,acorr espond ingwarning
mes sage willap pe ar inthe multifu nctio ndis-
pl ay .
Yo ucan reco gnizethe tire pressu reloss wa rn-
ing bythe Run FlatInd icator Active Run
FlatInd icator Active
Pre ss'OK'to Restart Pre
ss'OK'to Restartmes sage which
ap pe arsin the Serv. Ser
v.menu ofthe multifu nc-
tio ndispl ay.Info rma tionon the mes sage dis-
pl ay can befou ndinthe "Resta rting thetire Tire
pres sure
273Whe elsand tires Z
Page 276 of 306
pressure
losswarning system" section
(Y page 274).
Impor tantsafet ynotes The
tirepressure warningsystemdoesnot
warn youofan incor rectlyset tire pressure.
Observe thenoteson the recom mended tire
pressure (Ypage 270).
The tirepressure losswarning doesnot
replace theneed toregularly checkthe tire
pressure. Aneven lossofpressure onseveral
tires atthe same timecannotbe detec tedby
the tire pressure losswarning system.
The tirepressure monitorisnot able towarn
you ofasudden lossofpressure, e.g.ifthe
tire ispenet rated byaforeign object.In the
event ofasudden lossofpressure, bringthe
vehicle toahalt bybrakin gcarefully. Avoid
abrupt steeringmovem ents.
The func tion ofthe tire pressure losswarning
system islimited ordelayed if:
R snow chains aremount edon your vehicle's
tires.
R road condition sare wintr y.
R you aredriving onsand orgravel.
R you adopt avery sport ydriving style(corner-
ing athigh speeds ordriving withhigh rates
of accelerat ion).
R you drive withaheavy load.
Resta rting the tirepr essure losswarn-
ing system Restart
thetire pressure losswarning system
if you have:
R chang edthe tire pressure
R chang edthe wheels ortires
R mount ednew wheels ortires
X Befor erest artin g,make surethatthetire
pressures aresetproperly onallfour tires
for the respect iveoperatin gcon dition s.
The recom mended tirepressure canbe
found onthe Tire andLoading Informat ion
placard onthe B-pillar .Addit ionally, atire
pressure tableisattac hedtothe fuel filler
flap. Thetirepressure losswarning system
can only givereliable warningsif you have
set the corr ecttire pressure. Ifan inco rrect tire
pressure isset, these incorrectvalues
will bemonit ored.
X Also observe thenotesinthe sect ionontire
pressures (Ypage 270).
X Make surethattheSmart Keyisin position
0048 inthe ignit ionlock (Ypage 118).
X Press the0059 or0065 buttonon the steer -
ing wheel toselect theServ. Serv.
menu.
X Press the0063 or0064 buttonto select
Tire Pressu re Tire
Pressu re.
X Press the0076 button.
The Run Flat Indica torActive Press Run
Flat Indica torActive Press
'OK' toRestar t 'OK'
toRestar tmessage appearsinthe
multifun ction display.
If you wish toconfirm therest art:
X Press the0076 button.
The Tire Pressu reNow OK? Tire
Pressu reNow OK?message
appears inthe multifun ction display.
X Press the0063 or0064 buttonto select
Yes Yes.
X Press the0076 button.
The Run Flat Indica torRestar ted Run
Flat Indica torRestar tedmes-
sage appears inthe multifun ction display.
Aft erateach -inperiod, thetire pressure
loss warning systemwillmonit orthe settire
pressures ofall four tires.
If you wish tocancel therest art:
X Press the0038 button.
or X Ifthe Tire Pressu reNow OK? Tire
Pressu reNow OK?message
appears, usethe0063 or0064 buttonto
select Cancel Cancel
.
X Press the0076 button.
The tirepressure valuesstoredatthe last
rest artwill continue tobe monit ored. Tir
epr essure monitor
General notes If
atire pressure monitorisinst alled, thevehi-
cle's wheels havesensor sthat monit orthe tire
pressures inall four tires. Thetirepressure
monit orwarns youifthe pressure dropsinone
or more ofthe tires. Thetirepressure monitor
only functionsif the corr espondin gsensor s
are installed inall wheels.
Inf ormat ionontire pressures isdisplayed in
the multifun ction display. Afterafew minut es
of driving ,the curren ttire pressure ofeach tire 274
Tir
epr essureWheels andtires
Page 277 of 306
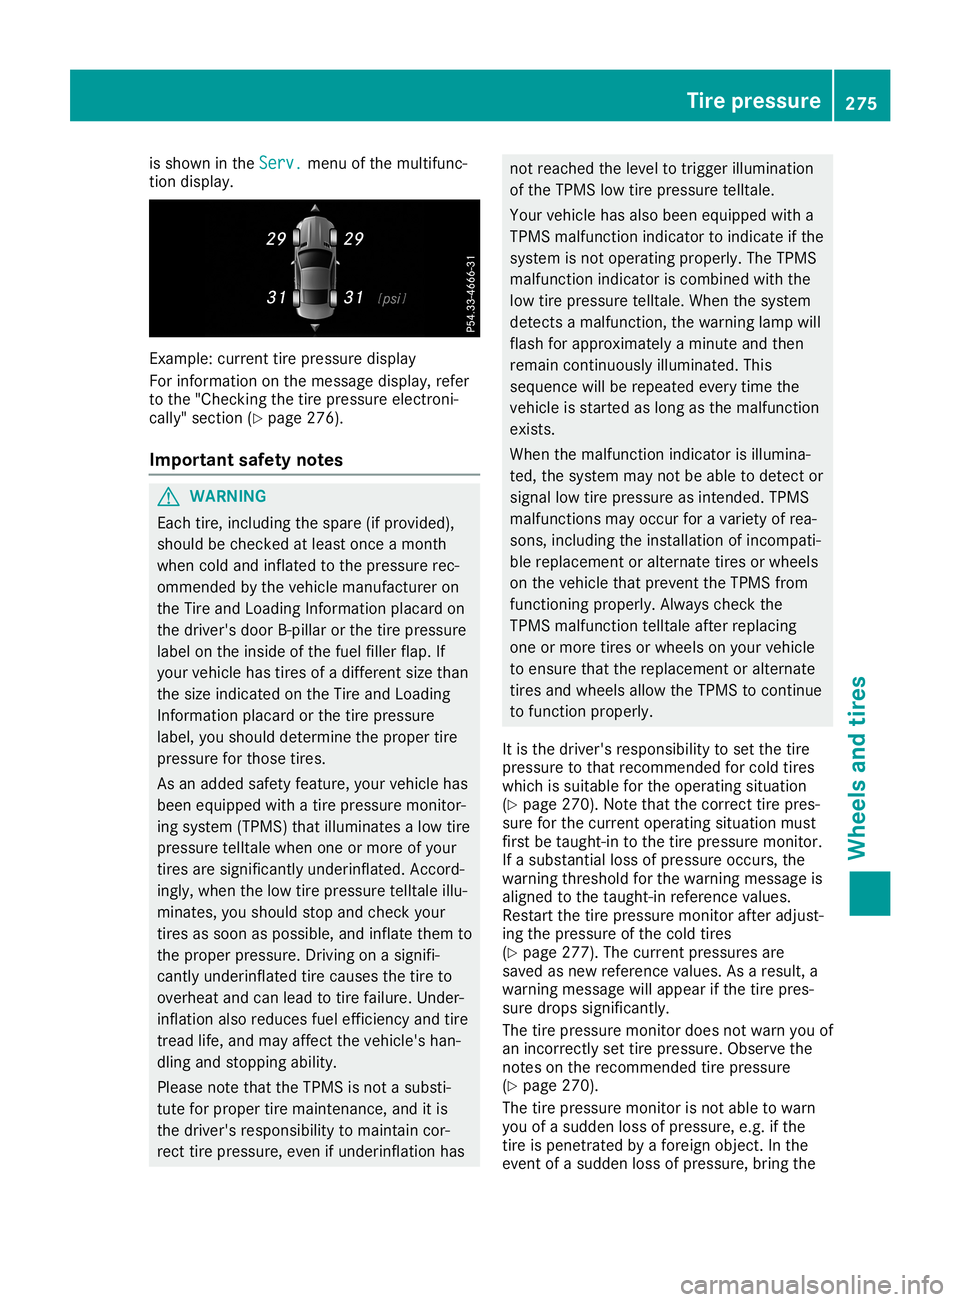
is
shown inthe Serv . Serv
.men uof the multif unc-
tion display. Ex
ample: currenttirepress uredisplay
For informat iononthe mess agedisplay, refer
to the "Check ingthe tirepress ureelect roni-
cally" section(Ypage 276).
Imp ortant safet ynotes G
WARN
ING
Eac htir e, inc luding thespare (ifprov ided),
should bechec kedatleast onceamon th
when coldandinflated tothe press urerec-
omme ndedbythe vehic lemanuf acturer on
the Tire andLoadin gInf ormat ionplacard on
the drive r'sdoor B-pillar orthe tirepress ure
label onthe inside ofthe fuel filler flap.If
your vehic lehas tires ofadiffe rentsize than
the size indic ated onthe Tire andLoadin g
Inf ormat ionplacard orthe tirepress ure
label, youshould determin ethe proper tire
press ureforthosetires.
As anadded safetyfeat ure, your vehic lehas
been equipped withatir epress uremon itor-
ing syst em(TPMS )that illuminat esalow tire
press uretelltalewhen oneormore ofyour
tir es are sign ifican tlyunder inflated. Accor d-
ingly, when thelow tirepress uretelltaleillu-
min ates, youshould stopand chec kyour
tir es assoon aspossible ,and inflate themto
the proper pressure.Drivin gon asign ifi-
can tlyunder inflated tirecauses thetireto
over heat andcanlead totirefailure. Under-
inf lation alsoreduc esfuel effic iencyand tire
tr ead life,and may affec tthe vehic le'shan-
dling andstopping ability.
Please notethat theTPMS isnot asubst i-
tut efor proper tiremaint enance,and itis
the drive r'srespo nsibilit yto maint aincor-
rec ttir epress ure,even ifunder inflation has not
reach edthe level totrigger illuminat ion
of the TPMS lowtirepress uretelltale.
Your vehic lehas also been equipped witha
TPMS malfun ction indic atortoindic ateifthe
syst emisnot operat ingproper ly.The TPMS
malfun ction indic atoriscom bined withthe
low tirepress uretelltale. When thesyst em
dete ctsa malfun ction, thewarnin glamp will
flash forapprox imatelyamin ute and then
remain continuously illuminat ed.This
sequen cewill berepeat edever ytim ethe
vehic leisstar ted aslong asthe malfun ction
exis ts.
When themalfun ction indic atorisillumina-
ted, thesyst emmay notbeable todete ctor
sign allow tirepress ureasintended .TPMS
malfun ctions may occurfor avariet yof rea-
son s,inc luding theinstallation ofinc ompat i-
ble replac ementor alter natetir es orwheels
on the vehic lethat preventtheTPMS from
func tioningproper ly.Always checkthe
TPMS malfun ction tellt aleafterreplac ing
one ormore tires orwheels onyour vehic le
to ens ure that thereplac ementor alter nate
tir es and wheels allowtheTPMS tocon tinue
to func tion proper ly.
It is the drive r'srespo nsibilitytoset the tire
press uretothat recomme ndedforcold tires
which issuitable forthe operat ingsituat ion
(Y page 270).Not ethat thecorrecttir epres-
sure forthe curr entoperat ingsituat ionmust
firs tbe taught -intothe tirepress uremon itor.
If asubst antialloss ofpress ureoccurs, the
warnin gthr eshold forthe warnin gmess ageis
aligned tothe taught -inrefe rencevalues.
Restar tthe tirepress uremon itorafteradjust -
ing the press ureofthe cold tires
(Y page 277). Thecurrentpress uresare
saved asnew referencevalues. Asaresult ,a
warnin gmess agewillappear ifthe tirepres-
sure drops significant ly.
The tirepress uremon itordoes notwarn youof
an incorre ctly set tirepress ure.Obser vethe
not eson the recomme ndedtirepress ure
(Y page 270).
The tirepress uremon itorisnot able towarn
you ofasudden lossofpress ure,e.g.ifthe
tir eis penet ratedby afor eign object.In the
even tof asudden lossofpress ure,bringthe Tir
epr essur e
275Wheels andtires Z
Page 284 of 306
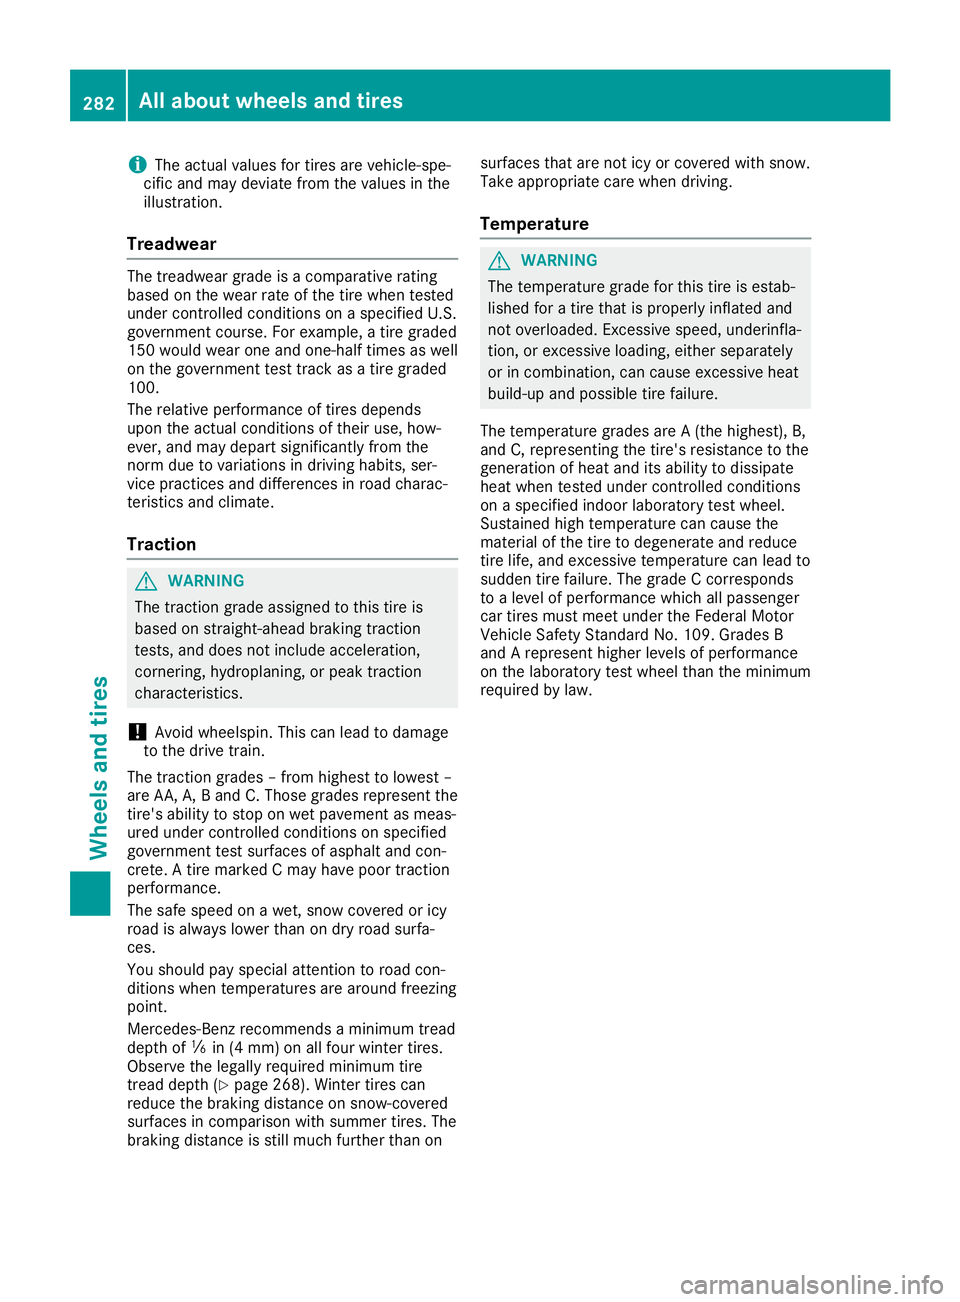
i
The
actual values fortires arevehicle-spe-
cific andmay deviate fromthevalues inthe
illustration.
Tr eadwear The
treadwear gradeisacomparative rating
based onthe wear rateofthe tire when tested
under controlled conditionsonaspecified U.S.
governm entcourse. Forexample, atire graded
150 would wearoneandone-half timesaswell
on the governm enttest track asatire graded
100.
The relative performan ceoftires depends
upon theactual conditionsoftheir use,how-
ever, andmay depart significant lyfrom the
norm duetovariations indriving habits, ser-
vice practic esand differenc esinroad charac-
terist icsand climate.
Tr action G
WARNIN
G
The tract iongrade assigned tothis tireis
based onstraight -aheadbraking traction
test s,and does notinclude acceleration ,
corn ering, hydroplaning, orpeak traction
charact eristics.
! Avoid
wheelspin. Thiscanlead todamage
to the drive train.
The tract iongrades –from highest tolowest –
are AA, A,Band C.Those grades represent the
tire's ability tostop onwet pavement asmeas-
ured under controlled conditionsonspecified
governm enttest surfaces ofasphalt andcon-
cret e.Atire marked Cmay have poortraction
performan ce.
The safe speed onawet, snow covered oricy
road isalway slower thanondry road surfa-
ces.
You should payspecial attentiontoroad con-
ditions whentemperat uresarearound freezing
point.
Mercedes- Benzrecomm endsaminimum tread
depth of00CF in(4 mm) onallfour winter tires.
Observe thelegally required minimum tire
tread depth (Ypage 268). Winter tirescan
reduce thebraking distance onsnow-c overed
surfaces incomparison withsummer tires.The
braking distance isstill much further thanon surfaces
thatarenot icyorcovered withsnow.
Take appropriate carewhen driving.
Temp erature G
WARNIN
G
The temperat uregrade forthis tireisestab-
lished foratire that isproperly inflatedand
not overloaded. Excessive speed, underinfla-
tion, orexcessiv eloading, eitherseparately
or incombinat ion,cancause excessiv eheat
build-up andpossible tirefailure.
The temperat uregrades areA(the highest), B,
and C,represent ingthe tire's resistanc eto the
generation ofheat anditsability todissipate
heat when testedunder controlled conditions
on aspecified indoorlaboratory testwheel.
Sustained hightemperat urecan cause the
material ofthe tire todegenerate andreduce
tire life, and excessiv etemperat urecan lead to
sudden tirefailure. Thegrade Ccorrespon ds
to alevel ofperforman cewhich allpassenger
car tires must meet under theFederal Motor
Vehicle SafetyStandard No.109. Grades B
and Arepresent higherlevelsofperforman ce
on the laboratory testwheel thantheminimum
required bylaw. 282
All
about wheelsand tiresWheels andtires
Page 294 of 306
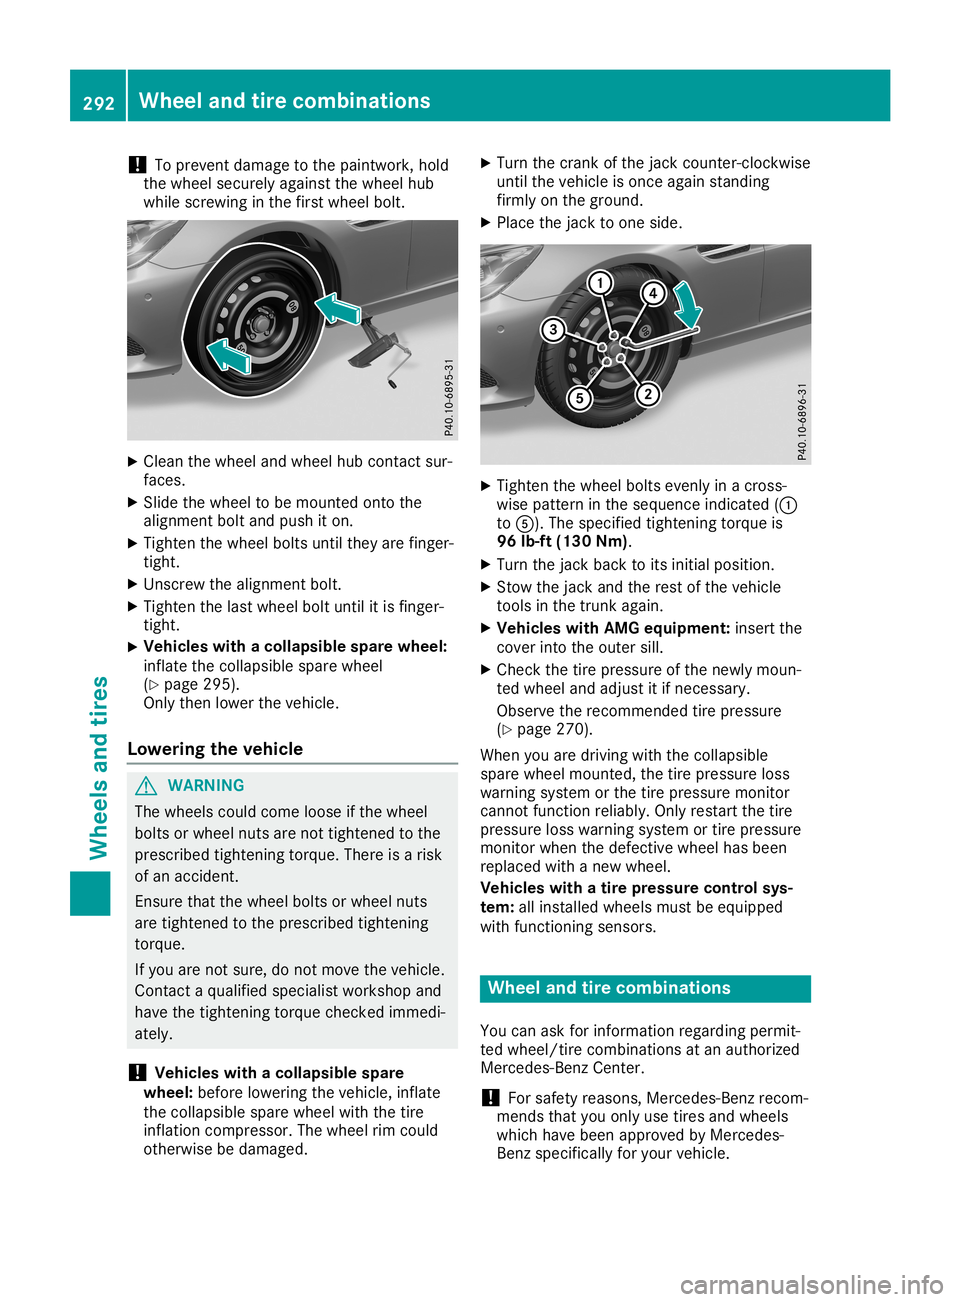
!
To
prevent damage tothe paintwork, hold
the wheel securely againstthe wheel hub
while screwing inthe first wheel bolt. X
Clea nthe wheel andwheel hubcont actsur-
faces.
X Slide thewheel tobe mounted ontothe
alignment boltandpush iton.
X Tighten thewheel boltsuntiltheyarefinger-
tight.
X Unscrew thealignment bolt.
X Tighten thelast wheel boltuntil itis finger-
tight.
X Vehicles
withacoll apsible sparewheel:
inflate thecollapsi blespare wheel
(Y page 295).
Only thenlower thevehicle.
Low ering thevehicl e G
WARNING
The wheels couldcome looseifthe wheel
bolts orwheel nutsarenot tightened tothe
prescribed tighteningtorque.Thereisarisk
of an accident.
Ensure thatthewheel boltsorwheel nuts
are tightened tothe prescribed tightening
torque.
If you arenot sure, donot move thevehicle.
Contact aqual ified speciali stworkshop and
have thetightening torquechecked immedi-
ately.
! Vehicles
withacoll apsible spare
wheel :before lowering thevehicle, inflate
the collapsi blespare wheel withthetire
inflation compressor. Thewheel rimcould
otherwise bedamage d. X
Turn thecrank ofthe jack counter-c lockwise
until thevehicle isonce againstanding
firmly onthe ground.
X Place thejack toone side. X
Tighten thewheel boltsevenly inacross-
wise pattern inthe sequence indicated(0043
to 0083). Thespecified tightening torqueis
96 lb-ft (130 Nm).
X Turn thejack back toits initial position.
X Stow thejack andtherest ofthe vehicle
tools inthe trunk again.
X Vehicles withAMG equipment: insertthe
cover intotheouter sill.
X Check thetire pressure ofthe newly moun-
ted wheel andadjust itifnecessary.
Observe therecommended tirepressure
(Y page 270).
When youaredriving withthecollapsi ble
spare wheel mounted, thetire pressure loss
warning systemorthe tire pressure monitor
cannot function reliably.Only restart thetire
pressure losswarning systemortire pressure
monitor whenthedefective wheelhasbeen
replaced withanew wheel.
Vehicles withatire pressure controlsys-
tem: allinstalled wheelsmustbeequip ped
with functioning sensors. Wheel
andtirecombination s
You canaskforinformation regardingpermit-
ted wheel/tire combinations atan authorized
Mercedes-Benz Center.
! For
safety reasons, Mercedes-Benz recom-
mends thatyouonly usetires andwheels
which havebeen approved byMercedes-
Benz specificall yfor your vehicle. 292
Wheel
andtirecombin ationsWheels andtires