Page 292 of 306

Raising the vehicle
GWARNING
If you do not position the jack correctly at
the appropriate jacking point of the vehicle,
the jack could tip over with the vehicle
raised. There is a risk of injury.
Only position the jack at the appropriate
jacking point of the vehicle. The base of the
jack must be positioned vertically, directly
under the jacking point of the vehicle.
!Only position the jack at the appropriatejacking point of the vehicle. Otherwise, youcould damage the vehicle.
Observe the following when raising the vehi-cle:
RTo raise the vehicle, only use the vehicle-specific jack that has been tested andapproved by Mercedes-Benz. If used incor-rectly, the jack could tip over with the vehi-cle raised.
RThe jack is designed only to raise and holdthe vehicle for a short time while a wheelis being changed. It must not be used forperforming maintenance work under thevehicle.
RAvoid changing the wheel on uphill anddownhill slopes.
RBefore raising the vehicle, secure it fromrolling away by applying the parking brakeand inserting wheel chocks. Do not disen-gage the parking brake while the vehicle israised.
RThe jack must be placed on a firm, flat andnon-slip surface. On a loose surface, a large,flat, load-bearing underlay must be used. Ona slippery surface, a non-slip underlay mustbe used, e.g. rubber mats.
RDo not use wooden blocks or similar objectsas a jack underlay. Otherwise, the jack willnot be able to achieve its load-bearing capa-city due to the restricted height.
RMake sure that the distance between theunderside of the tires and the ground doesnot exceed 1.2 in (3 cm).
RNever place your hands and feet under theraised vehicle.
RDo not lie under the vehicle.
RDo not start the engine when the vehicle israised.
RDo not open or close a door or the trunk lidwhen the vehicle is raised.
RMake sure that no persons are present inthe vehicle when the vehicle is raised.
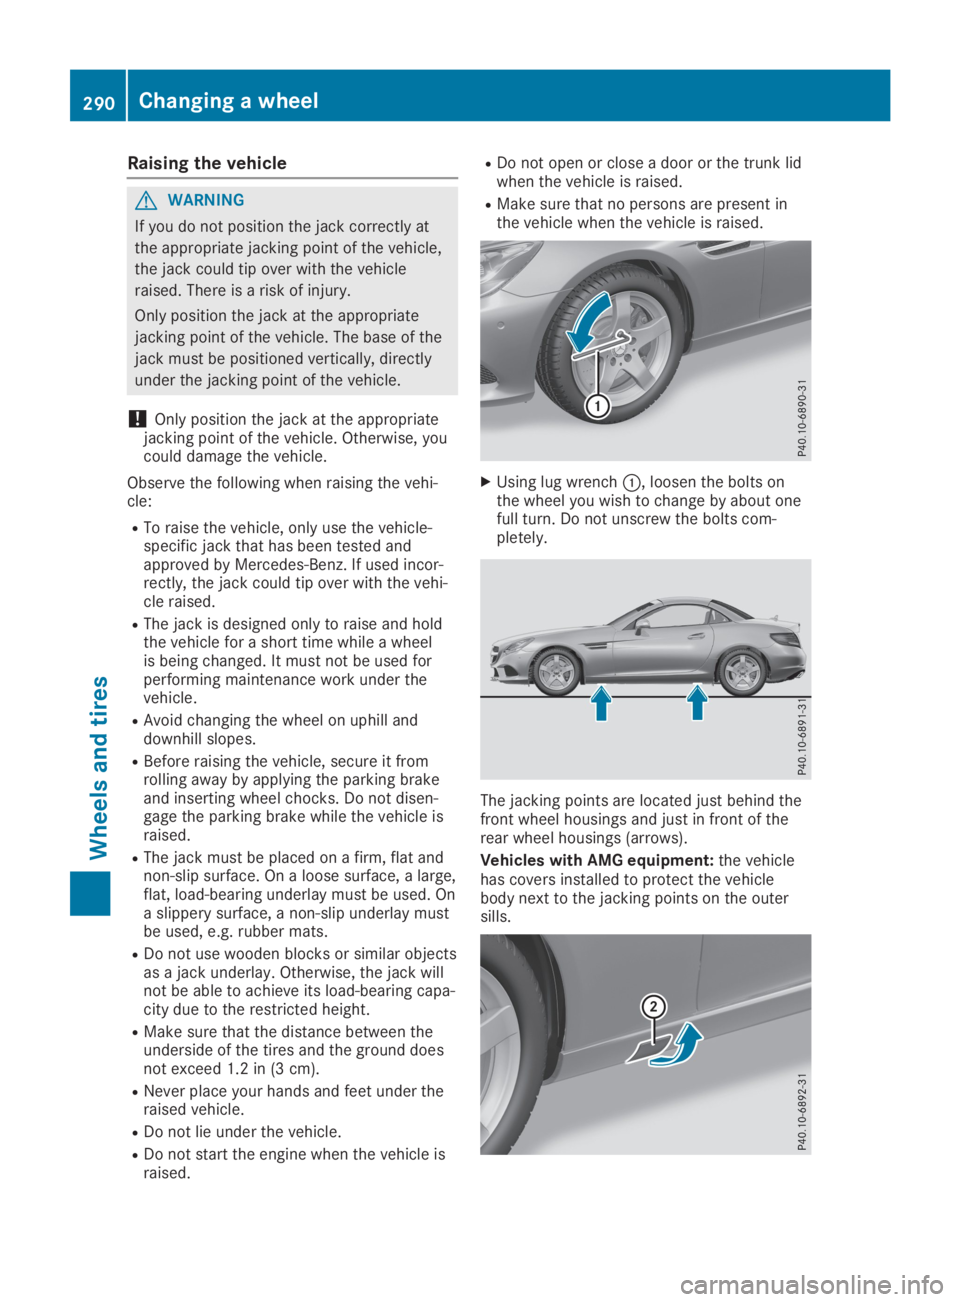
XUsing lug wrench�C, loosen the bolts onthe wheel you wish to change by about onefull turn. Do not unscrew the bolts com-pletely.
The jacking points are located just behind thefront wheel housings and just in front of therear wheel housings (arrows).
Vehicles with AMG equipment:the vehiclehas covers installed to protect the vehiclebody next to the jacking points on the outersills.
290Changing a wheel
Wheels and tires
Page 296 of 306

When using an emergency spare wheel orspare wheel of a different size, you must notexceed the maximum speed of 50 mph(80 km/h).
Snow chains must not be mounted on emer-gency spare wheels.
General notes
You can ask for information regarding permit-ted emergency spare wheels at an authorizedMercedes-Benz Center.
You should regularly check the pressure of theemergency spare wheel, particularly prior tolong trips, and correct the pressure as neces-sary (Ypage 270). The value on the wheel isvalid.
An emergency spare wheel may also be moun-ted against the direction of rotation. Observethe time restriction on use as well as thespeed limitation specified on the emergencyspare wheel.
Replace the tires after six years at the latest,regardless of wear. This also applies to theemergency spare wheel.
When you are driving with the collapsiblespare wheel mounted, the tire pressure losswarning system or the tire pressure monitorcannot function reliably. Only restart the tirepressure loss warning system or tire pressuremonitor when the defective wheel has beenreplaced with a new wheel.
Vehicles with tire pressure monitor:aftermounting an emergency spare wheel, the sys-tem may still display the tire pressure of theremoved wheel for a few minutes. The valuedisplayed for the mounted emergency sparewheel is not the same as the current tire pres-sure of the emergency spare wheel.
Removing the emergency spare
wheel
Vehicles with a collapsible spare
wheel
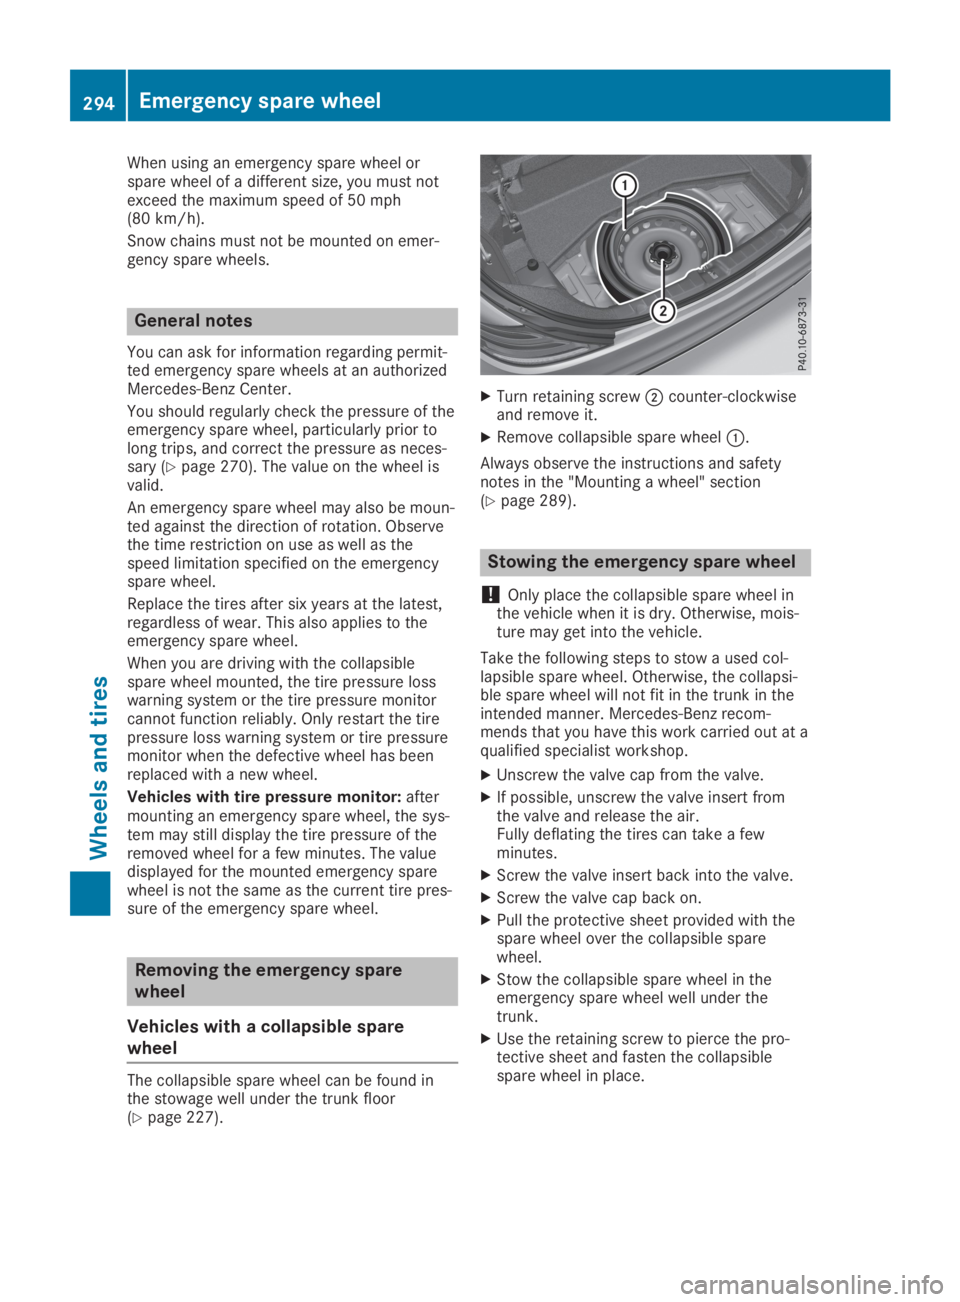
The collapsible spare wheel can be found inthe stowage well under the trunk floor(Ypage 227).
XTurn retaining screw�Dcounter-clockwiseand remove it.
XRemove collapsible spare wheel�C.
Always observe the instructions and safetynotes in the "Mounting a wheel" section(Ypage 289).
Stowing the emergency spare wheel
!Only place the collapsible spare wheel inthe vehicle when it is dry. Otherwise, mois-ture may get into the vehicle.
Take the following steps to stow a used col-lapsible spare wheel. Otherwise, the collapsi-ble spare wheel will not fit in the trunk in theintended manner. Mercedes-Benz recom-mends that you have this work carried out at aqualified specialist workshop.
XUnscrew the valve cap from the valve.
XIf possible, unscrew the valve insert fromthe valve and release the air.Fully deflating the tires can take a fewminutes.
XScrew the valve insert back into the valve.
XScrew the valve cap back on.
XPull the protective sheet provided with thespare wheel over the collapsible sparewheel.
XStow the collapsible spare wheel in theemergency spare wheel well under thetrunk.
XUse the retaining screw to pierce the pro-tective sheet and fasten the collapsiblespare wheel in place.
294Emergency spare wheel
Wheels and tires
Page 297 of 306
Inflating the collapsible spare wheel
!Inflate the collapsible spare wheel usingthe tire inflation compressor before loweringthe vehicle. The wheel rim could otherwisebe damaged.
!Do not operate the tire inflation compres-sor for longer than eight minutes at a timewithout a break. It may otherwise overheat.
The tire inflation compressor can be oper-ated again once it has cooled down.
XMount the collapsible spare wheel as descri-bed (Ypage 289).
The collapsible spare wheel must be moun-ted before it is inflated.
XRemove the tire inflation compressor fromthe stowage space under the trunk floor(Ypage 252).
XPull plug�
Page 299 of 306

basic wiring. Be sure to observe the manufac-turer's Supplement when installing.
Deviations with respect to frequency bands,maximum transmission outputs or antennapositions must be approved by Mercedes-Benz.
The maximum transmission output (PEAK) atthe base of the antenna must not exceed thefollowing values:
Frequency bandMaximumtransmissionoutput
Short wave
3 - 54 MHz
100 W
4 m waveband
74 - 88 MHz
30 W
2 m waveband
144 - 174 MHz
50 W
Trunked radio system/Tetra
380 - 460 MHz
10 W
70 cm waveband
400 - 460 MHz
35 W
Mobile communications(2G/3G/4G)10 W
The following can be used in the vehicle with-out restrictions:
RRF transmitters with a maximum transmis-sion output of up to 100 mW
RRF transmitters with transmitter frequenciesin the 380 - 410 MHz waveband and a maxi-mum transmission output of up to 2 W(trunked radio/Tetra)
RMobile phones (2G/3G/4G)
There is no restriction for antenna positions onthe outside of the vehicle for the following fre-quency bands:
RTrunked radio system/Tetra
R70 cm waveband
R2G/3G/4G
Identification plates
Vehicle identification plate with
vehicle identification number (VIN)
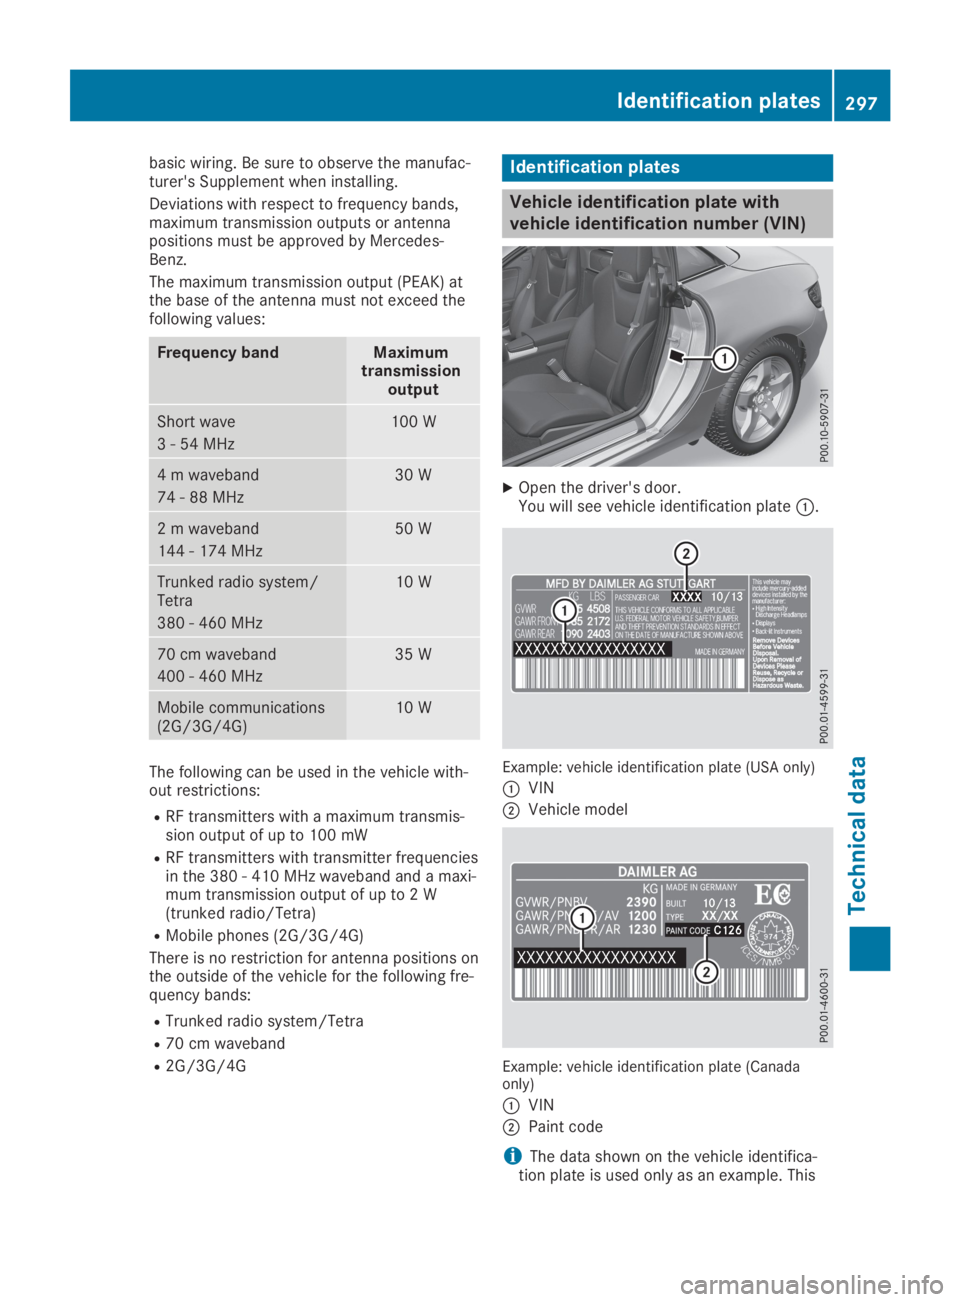
XOpen the driver's door.You will see vehicle identification plate�C.
Example: vehicle identification plate (USA only)
�CVIN
�DVehicle model
Example: vehicle identification plate (Canadaonly)
�CVIN
�DPaint code
iThe data shown on the vehicle identifica-tion plate is used only as an example. This
Identification plates297
Technical data
Z