2019 MERCEDES-BENZ GLS SUV change time
[x] Cancel search: change timePage 295 of 398
X
Authorization using Secure Simple Pair-
ing:
A code is displayed in the multimedia system
and on the mobile phone.
X Confirm code on the mobile phone. Depend-
ing on the mobile phone used, confirm the
connection to the multimedia system and for
the PBAP and MAP Bluetooth ®
profiles. The
prompt to confirm may take up to two
minutes to be displayed (see the manufactur-
er's operating instructions).
X If the codes are different: select No
No on the
multimedia system.
The process is canceled.
Repeat authorization.
or X Authorization by entering a passkey
(passcode):
enter any one- to sixteen-digit
number sequence which you have chosen
yourself into the passkey input menu.
X Press 0054to confirm.
X Enter and confirm the passkey on the mobile
phone. Depending on the mobile phone used,
confirm the connection to the multimedia sys-
tem and for the PBAP and MAP Bluetooth ®
profiles. The prompt to confirm may take up
to two minutes to be displayed (see the man- ufacturer's operating instructions).
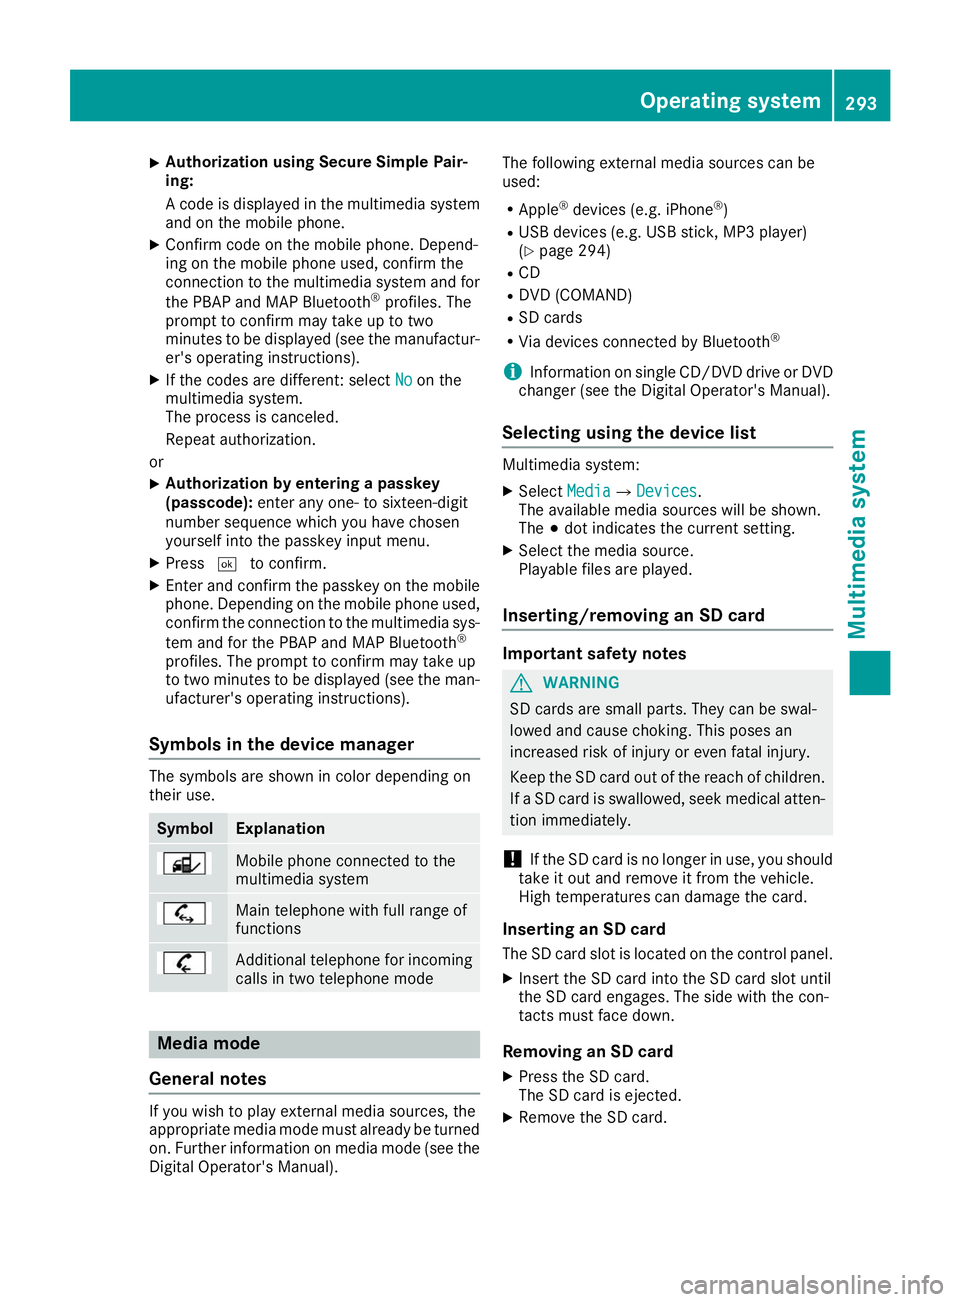
Symbols in the device manager The symbols are shown in color depending on
their use. Symbol Explanation
Mobile phone connected to the
multimedia system
Main telephone with full range of
functions
Additional telephone for incoming
calls in two telephone mode Media mode
General notes If you wish to play external media sources, the
appropriate media mode must already be turned
on. Further information on media mode (see the Digital Operator's Manual). The following external media sources can be
used:
R Apple ®
devices (e.g. iPhone ®
)
R USB devices (e.g. USB stick, MP3 player)
(Y page 294)
R CD
R DVD (COMAND)
R SD cards
R Via devices connected by Bluetooth ®
i Information on single CD/DVD drive or DVD
changer (see the Digital Operator's Manual).
Selecting using the device list Multimedia system:
X Select Media
Media007B Devices Devices.
The available media sources will be shown.
The 003Bdot indicates the current setting.
X Select the media source.
Playable files are played.
Inserting/removing an SD card Important safety notes
G
WARNING
SD cards are small parts. They can be swal-
lowed and cause choking. This poses an
increased risk of injury or even fatal injury.
Keep the SD card out of the reach of children. If a SD card is swallowed, seek medical atten-
tion immediately.
! If the SD card is no longer in use, you should
take it out and remove it from the vehicle.
High temperatures can damage the card.
Inserting an SD card
The SD card slot is located on the control panel. X Insert the SD card into the SD card slot until
the SD card engages. The side with the con-
tacts must face down.
Removing an SD card X Press the SD card.
The SD card is ejected.
X Remove the SD card. Operating system
293Multimedia system Z
Page 313 of 398
lished between the Customer Assistance Center
and the vehicle occupants.
R If the vehicle occupants respond, the
Mercedes-Benz Customer Assistance Center
attempts to get more information on the
emergency.
R If there is no response from the vehicle occu-
pants, an ambulance is immediately sent to
the vehicle.
R If the relevant mobile phone network is not
available, no emergency call can be initiated.
The indicator lamp in the SOS button flashes
continuously.
No voice connection can be established to the
Mercedes-Benz Customer Assistance Center.
The Call Call Failed
Failed message appears on the mul-
tifunction display and must be confirmed.
In this case, summon assistance by other
means.
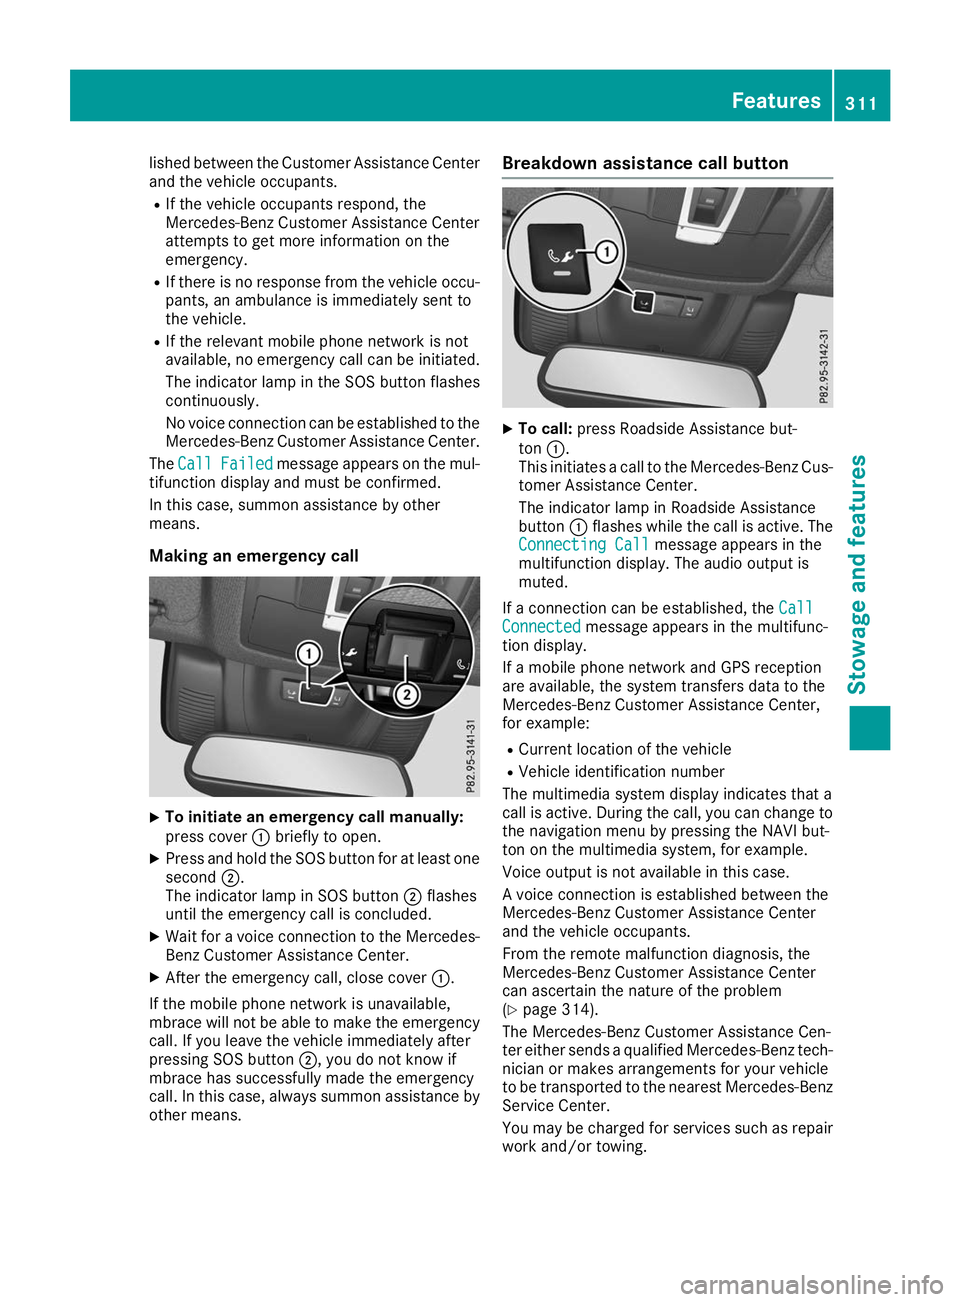
Making an emergency call X
To initiate an emergency call manually:
press cover 0043briefly to open.
X Press and hold the SOS button for at least one
second 0044.
The indicator lamp in SOS button 0044flashes
until the emergency call is concluded.
X Wait for a voice connection to the Mercedes-
Benz Customer Assistance Center.
X After the emergency call, close cover 0043.
If the mobile phone network is unavailable,
mbrace will not be able to make the emergency
call. If you leave the vehicle immediately after
pressing SOS button 0044, you do not know if
mbrace has successfully made the emergency
call. In this case, always summon assistance by other means. Breakdown assistance call button
X
To call: press Roadside Assistance but-
ton 0043.
This initiates a call to the Mercedes-Benz Cus-
tomer Assistance Center.
The indicator lamp in Roadside Assistance
button 0043flashes while the call is active. The
Connecting Call Connecting Call message appears in the
multifunction display. The audio output is
muted.
If a connection can be established, the Call Call
Connected Connected message appears in the multifunc-
tion display.
If a mobile phone network and GPS reception
are available, the system transfers data to the
Mercedes-Benz Customer Assistance Center,
for example:
R Current location of the vehicle
R Vehicle identification number
The multimedia system display indicates that a
call is active. During the call, you can change to
the navigation menu by pressing the NAVI but-
ton on the multimedia system, for example.
Voice output is not available in this case.
A voice connection is established between the
Mercedes-Benz Customer Assistance Center
and the vehicle occupants.
From the remote malfunction diagnosis, the
Mercedes-Benz Customer Assistance Center
can ascertain the nature of the problem
(Y page 314).
The Mercedes-Benz Customer Assistance Cen-
ter either sends a qualified Mercedes-Benz tech-
nician or makes arrangements for your vehicle
to be transported to the nearest Mercedes-Benz
Service Center.
You may be charged for services such as repair work and/or towing. Features
311Stowage and features Z
Page 314 of 398
You can find more information in the separate
mbrace manual.
The system has not been able to initiate a Road-
side Assistance call, if:
R the 0052 indicator lamp for the Roadside
Assistance call button is flashing continu-
ously.
R no voice connection to the Mercedes-Benz
Customer Assistance Center was estab-
lished.
This can occur if the relevant mobile phone net-
work is not available, for example.
The Call Failed Call Failed message appears in the mul-
tifunction display.
X To end a call: press the0076button on the
multifunction steering wheel.
or X Press the corresponding multimedia system
button for ending a phone call.
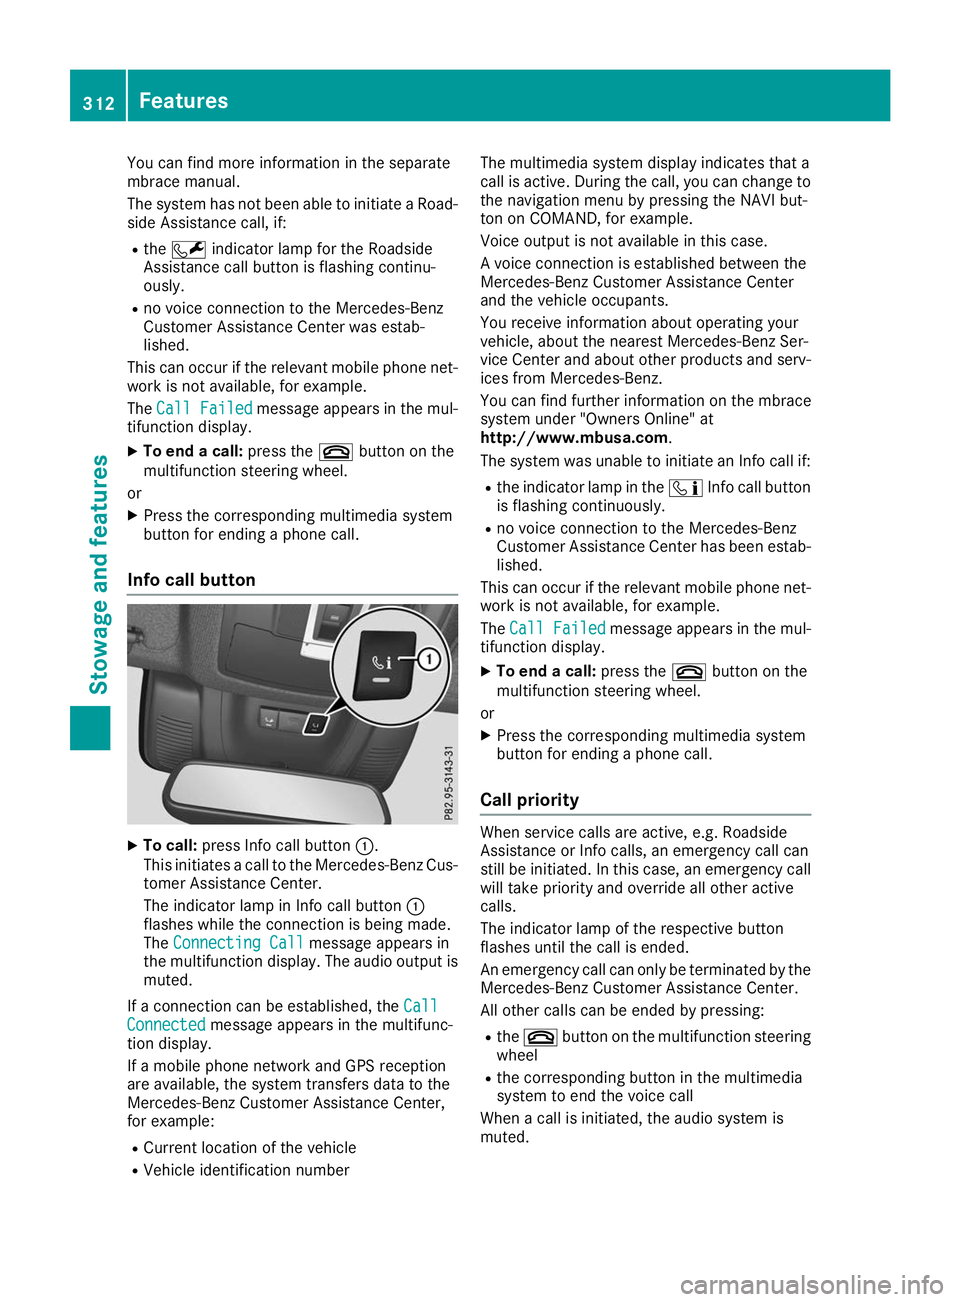
Info call button X
To call: press Info call button 0043.
This initiates a call to the Mercedes-Benz Cus-
tomer Assistance Center.
The indicator lamp in Info call button 0043
flashes while the connection is being made.
The Connecting Call
Connecting Call message appears in
the multifunction display. The audio output is muted.
If a connection can be established, the Call Call
Connected
Connected message appears in the multifunc-
tion display.
If a mobile phone network and GPS reception
are available, the system transfers data to the
Mercedes-Benz Customer Assistance Center,
for example:
R Current location of the vehicle
R Vehicle identification number The multimedia system display indicates that a
call is active. During the call, you can change to
the navigation menu by pressing the NAVI but-
ton on COMAND, for example.
Voice output is not available in this case.
A voice connection is established between the
Mercedes-Benz Customer Assistance Center
and the vehicle occupants.
You receive information about operating your
vehicle, about the nearest Mercedes-Benz Ser-
vice Center and about other products and serv- ices from Mercedes-Benz.
You can find further information on the mbrace
system under "Owners Online" at
http://www.mbusa.com.
The system was unable to initiate an Info call if:
R the indicator lamp in the 00D9Info call button
is flashing continuously.
R no voice connection to the Mercedes-Benz
Customer Assistance Center has been estab-
lished.
This can occur if the relevant mobile phone net-
work is not available, for example.
The Call Failed
Call Failed message appears in the mul-
tifunction display.
X To end a call: press the0076button on the
multifunction steering wheel.
or X Press the corresponding multimedia system
button for ending a phone call.
Call priority When service calls are active, e.g. Roadside
Assistance or Info calls, an emergency call can
still be initiated. In this case, an emergency call
will take priority and override all other active
calls.
The indicator lamp of the respective button
flashes until the call is ended.
An emergency call can only be terminated by the
Mercedes-Benz Customer Assistance Center.
All other calls can be ended by pressing:
R the 0076 button on the multifunction steering
wheel
R the corresponding button in the multimedia
system to end the voice call
When a call is initiated, the audio system is
muted. 312
FeaturesStowage and features
Page 327 of 398
Further information on windshield washer fluid
(Y page 388). ASSYST PLUS
Service message
i If the scheduled service intervals are excee-
ded, this may result in damage to the vehicle.
You can obtain up-to-date information concern-
ing the servicing of your vehicle from a qualified specialist workshop, e.g. an authorized
Mercedes-Benz Center or at
http://www.mbusa.com (USA only).
i The ASSYST PLUS service interval display
does not show any information on the engine
oil level. Observe the notes on the engine oil
level (Y page 322).
The multifunction display shows a service mes-
sage for several seconds, e.g.:
R Service A in .. Days Service A in .. Days
R Service A Due
Service A Due
R Service A Exceeded by .. Days
Service A Exceeded by .. Days
Depending on the operating conditions of the
vehicle, the remaining time or distance until the next service due date is displayed.
The letter A
A or B B, possibly in connection with a
number or another letter, shows the type of ser-
vice. A
A stands for a minor service and B
Bfor a
major service.
Further information can be obtained at a quali-
fied specialist workshop.
The ASSYST PLUS service interval display does
not take into account any periods of time during
which the battery is disconnected.
Maintaining the time-dependent service sched-
ule:
X Note down the service due date displayed in
the multifunction display before disconnect-
ing the battery.
or
X After reconnecting the battery, subtract the
battery disconnection periods from the ser-
vice date shown on the display. Hiding a service message
X Press the 0038or0076 button on the steering
wheel. Displaying service messages
X Switch on the ignition.
X Press the 0059or0065 button on the steering
wheel to select the Serv. Serv.menu.
X Press the 0063or0064 button to select the
ASSYST
ASSYST PLUS
PLUSsubmenu and confirm by press-
ing the 0076button.
The service due date appears in the multi-
function display. Information about Service
Resetting the ASSYST PLUS service
interval display !
If the ASSYST PLUS service interval display
has been inadvertently reset, this setting can
be corrected at a qualified specialist work-
shop.
Have service work carried out as described in the Maintenance Booklet. This may otherwise
lead to increased wear and damage to the
major assemblies or the vehicle.
A qualified specialist workshop will reset the
ASSYST PLUS service interval display after the
service work has been carried out. You can also obtain further information on maintenance
work, for example.
Special service requirements The specified maintenance interval takes only
the normal operation of the vehicle into
account. Under increased load on the vehicle,
maintenance work must be carried out more
frequently, for example:
R Regular city driving with frequent intermedi-
ate stops
R If the vehicle is primarily used to travel short
distances
R Use in mountainous terrain or on poor road
surfaces
R If the engine is often left idling for long periods
Under these or similar conditions, have, for
example, the air filter, engine oil and oil filter
replaced or changed more frequently. Under
arduous operating conditions, the tires must be checked more often. Further information can be
obtained at a qualified specialist workshop. ASSYST PLUS
325Maintenance and care Z
Page 334 of 398
X
Before cleaning the display, make sure that it
is switched off and has cooled down.
X Clean the display surface using a commer-
cially available microfiber cloth and TFT/LCD
display cleaner.
X Dry the display surface using a dry microfiber
cloth.
Cleaning the plastic trim G
WARNING
Care products and cleaning agents containing solvents cause surfaces in the cockpit to
become porous. As a result, plastic parts may
come loose in the event of air bag deploy-
ment. There is a risk of injury.
Do not use any care products and cleaning
agents to clean the cockpit.
! Never attach the following to plastic surfa-
ces:
R stickers
R films
R perfume oil container or similar
You could otherwise damage the plastic.
! Do not allow cosmetics, insect repellent or
sunscreen to come into contact with the plas-
tic trim. This maintains the high-quality look of the surfaces.
X Wipe the plastic trim with a damp, lint-free
cloth, e.g. a microfiber cloth.
X Heavy soiling: use care and cleaning prod-
ucts recommended and approved by
Mercedes-Benz.
The surface may change color temporarily.
Wait until the surface is dry again.
Cleaning the steering wheel and gear or selector lever X
Thoroughly wipe with a damp cloth or use
leather care agents that have been recom-
mended and approved by Mercedes-Benz.
Cleaning genuine wood and trim ele-
ments !
Do not use solvent-based cleaning agents
such as tar remover, wheel cleaners, polishes or waxes. There is otherwise a risk of damag-
ing the surface.
! Do not use chrome polish on trim pieces.
The trim pieces have a chrome look but are
mostly made of anodized aluminum and can
lose their shine if chrome polish is used. Use
a damp, lint-free cloth instead when cleaning the trim pieces.
If the chrome-plated trim pieces are very
dirty, you can use a chrome polish. If you are
unsure as to whether the trim pieces are
chrome-plated or not, consult an authorized
Mercedes-Benz Center.
X Wipe the wooden trim and trim pieces with a
damp, lint-free cloth, e.g. a microfiber cloth.
X Heavy soiling: use car care and cleaning
products recommended and approved by
Mercedes-Benz.
Cleaning the seat covers General notes
! Do not use a microfiber cloth to clean covers
made out of real leather, artificial leather or
DINAMICA. If used often, these can damage
the cover.
i Note that regular care is essential to ensure
that the appearance and comfort of the cov-
ers is retained over time.
Genuine leather seat covers ! To retain the natural appearance of the
leather, observe the following cleaning
instructions:
R Clean genuine leather covers carefully with
a damp cloth and then wipe the covers
down with a dry cloth.
R Make sure that the leather does not
become soaked. It may otherwise become
rough and cracked.
R Only use leather care agents that have
been tested and approved by Mercedes-
Benz. You can obtain these from a qualified
specialist workshop.
Leather is a natural product.
It exhibits natural surface characteristics, for
example:
R differences in the texture
R marks caused by growth and injury
R slight nuances of color 332
CareMaintenance and care
Page 339 of 398
be used as a temporary measure. Make sure
that you use the proper size and type (sum-
mer or winter tire).
i Vehicles equipped with MOExtended tires
are not equipped with a TIREFIT kit at the fac- tory. It is therefore recommended that you
additionally equip your vehicle with a TIREFIT
kit if you mount tires that do not feature run- flat characteristics, e.g. winter tires. A TIREFIT kit may be obtained from a qualified specialist
workshop.
Important safety notes G
WARNING
When you drive in emergency mode, the han- dling characteristics will be impaired. e.g.
when cornering, when accelerating heavily
and when braking. There is a risk of an acci-
dent.
Do not exceed the maximum permissible
speed for MOExtended tires. Avoid any abrupt
steering and driving maneuver as well as driv-
ing over obstacles (curbs, pot holes, off-road).
This applies, in particular, to laden vehicles.
Stop driving in emergency mode if you notice:
R banging noises
R vehicle vibration
R smoke and the smell of rubber
R continual ESP ®
intervention
R cracks in the tire sidewall
After driving in emergency mode, have the
rims checked by a qualified specialist work-
shop to determine whether they can continue
to be used. The defective tire must be
replaced in every case. TIREFIT kit
Important safety notes TIREFIT is a tire sealant.
You can use TIREFIT to seal punctures of up to
0.16 in (4 mm), particularly those in the tire
tread. You can use TIREFIT at outside tempera-
tures down to 00F84 ‡ (00F820 †). G
WARNING
In the following situations, the tire sealant is
unable to provide sufficient breakdown assis- tance, as it is unable to seal the tire properly:
R there are cuts or punctures in the tire larger
than those mentioned above.
R the wheel rim is damaged.
R you have driven at very low tire pressures or
on a flat tire.
There is a risk of an accident.
Do not drive the vehicle. Contact a qualified
specialist workshop. G
WARNING
The tire sealant is harmful and causes irrita-
tion. It must not come into contact with your
skin, eyes or clothing or be swallowed. Do not inhale TIREFIT fumes. Keep tire sealant away
from children. There is a risk of injury.
If you come into contact with the tire sealant,
observe the following:
R Rinse off the tire sealant from your skin
immediately with water.
R If the tire sealant comes into contact with
your eyes, immediately rinse them thor-
oughly with clean water.
R If tire sealant is swallowed, immediately
rinse your mouth out thoroughly and drink
plenty of water. Do not induce vomiting,
and seek medical attention immediately.
R Immediately change out of clothing which
has come into contact with tire sealant.
R If an allergic reaction occurs, seek medical
attention immediately.
! Do not operate the tire inflation compressor
for longer than eight minutes at a time without a break. It may otherwise overheat.
The tire inflation compressor can be operatedagain once it has cooled down.
Comply with the manufacturer’s safety instruc-
tions on the sticker on the tire inflation com-
pressor. Flat tire
337Breakdown assistance Z
Page 361 of 398
a corresponding warning message will appear in
the multifunction display.
You can recognize the tire pressure loss warning
by the Run Flat Indicator Active Press Run Flat Indicator Active Press
'OK' to Restart
'OK' to Restart message which appears in
the Service
Service menu of the multifunction display.
Information on the message display can be
found in the "Restarting the tire pressure loss
warning system" section (Y page 359).
Important safety notes The tire pressure warning system does not warn
you of an incorrectly set tire pressure. Observe
the notes on the recommended tire pressure
(Y page 355).
The tire pressure loss warning does not replace
the need to regularly check the tire pressure. An even loss of pressure on several tires at the
same time cannot be detected by the tire pres-
sure loss warning system.
The tire pressure monitor is not able to warn you of a sudden loss of pressure, e.g. if the tire is
penetrated by a foreign object. In the event of a
sudden loss of pressure, bring the vehicle to a
halt by braking carefully. Avoid abrupt steering
movements.
The function of the tire pressure loss warning
system is limited or delayed if:
R snow chains are mounted on your vehicle's
tires.
R road conditions are wintry.
R you are driving on sand or gravel.
R you adopt a very sporty driving style (corner-
ing at high speeds or driving with high rates of
acceleration).
R you are driving with a heavy load (in the vehi-
cle or on the roof).
Restarting the tire pressure loss warn-
ing system Restart the tire pressure loss warning system if
you have:
R changed the tire pressure
R changed the wheels or tires
R mounted new wheels or tires
X Before restarting, make sure that the tire
pressures are set properly on all four tires for
the respective operating conditions.
The recommended tire pressure can be found on the Tire and Loading Information placard on the B-pillar. Additionally, a tire pressure
table is attached to the fuel filler flap. The tire
pressure loss warning system can only give
reliable warnings if you have set the correct
tire pressure. If an incorrect tire pressure is
set, these incorrect values will be monitored.
X Also observe the notes in the section on tire
pressures (Y page 355).
X Make sure that the SmartKey is in position 0048
in the ignition lock (Y page 140).
X Press the 0059or0065 button on the steering
wheel to select the Service
Service menu.
X Press the 0063or0064 button to select
Tire Pressure Tire Pressure.
X Press the 0076button.
The Run Flat Indicator Active Press
Run Flat Indicator Active Press
'OK' to Restart
'OK' to Restart message appears in the
multifunction display.
If you wish to confirm the restart:
X Press the 0076button.
The Tire Pressure Now OK?
Tire Pressure Now OK? message
appears in the multifunction display.
X Press the 0063or0064 button to select Yes
Yes.
X Press the 0076button.
The Run Flat Indicator Restarted
Run Flat Indicator Restarted mes-
sage appears in the multifunction display.
After a teach-in period, the tire pressure loss
warning system will monitor the set tire pres-
sures of all four tires.
If you wish to cancel the restart: X Press the 0038button.
or
X When the Tire TirePressure
Pressure Now
NowOK?
OK?message
appears, press the 0063or0064 button to
select Cancel
Cancel .
X Press the 0076button.
The tire pressure values stored at the last
restart will continue to be monitored. Tire pressure monitor
General notes If a tire pressure monitor is installed, the vehi-
cle's wheels have sensors that monitor the tire
pressures in all four tires. The tire pressure mon-
itor warns you if the pressure drops in one or
more of the tires. The tire pressure monitor only functions if the corresponding sensors are
installed in all wheels. Tire pressure
359Wheels and tires Z
Page 363 of 398
sudden loss of pressure, bring the vehicle to a
halt by braking carefully. Avoid abrupt steering
movements.
The tire pressure monitor has a yellow warning
lamp in the instrument cluster for indicating
pressure loss or a malfunction. Whether the
warning lamp flashes or lights up indicates
whether a tire pressure is too low or the tire
pressure monitor is malfunctioning:
R if the warning lamp is lit continuously, the tire
pressure on one or more tires is significantly
too low. The tire pressure monitor is not mal- functioning.
R if the warning lamp flashes for approximately
a minute and then remains lit constantly, the
tire pressure monitor is malfunctioning.
In addition to the warning lamp, a message
appears in the multifunction display. Observe
the information on display messages
(Y page 268).
It may take up to ten minutes for a malfunction
of the tire pressure monitor to be indicated. A
malfunction will be indicated by the tire pres-
sure warning lamp flashing for approximately
one minute and then remaining lit. When the
malfunction has been rectified, the tire pressure warning lamp goes out after a few minutes of
driving.
The tire pressure values indicated by the on-
board computer may differ from those meas-
ured at a gas station with a pressure gauge. The
tire pressures shown by the on-board computer
refer to those measured at sea level. At high
altitudes, the tire pressure values indicated by a pressure gauge are higher than those shown by
the on-board computer. In this case, do not
reduce the tire pressures.
The operation of the tire pressure monitor can
be affected by interference from radio transmit- ting equipment (e.g. radio headphones, two-wayradios) that may be being operated in or near the
vehicle.
Checking the tire pressure electroni-
cally X
Make sure that the SmartKey is in position 0048
(Y page 140) in the ignition lock.
X Press the 0059or0065 button on the steering
wheel to select the Serv.
Serv. menu. X
Press the 0063or0064 button to select
Tire Pressure Tire Pressure.
X Press 0076.
The current tire pressure of each tire is shown in the multifunction display.
If the vehicle has been parked for longer than
20 minutes, the Tire pressure will be Tire pressure will be
displayed after driving a few minutes
displayed after driving a few minutes
message appears.
After a teach-in process, the tire pressure mon-
itor automatically detects new wheels or new
sensors. As long as a clear allocation of the tire
pressure value to the individual wheels is not
possible, the Tire
Tire Pressure Pressure Monitor
MonitorActive
Active
display message is shown instead of the tire
pressure display. The tire pressures are already being monitored.
If an emergency spare wheel is mounted, the
system may continue to show the tire pressure
of the wheel that has been removed for a few
minutes. Therefore, remember that the dis-
played tire pressure may not be the same as the
emergency spare wheel's current tire pressure.
Tire pressure monitor warning mes-
sages If the tire pressure monitor detects a pressure
loss in one or more tires, a warning message is
shown in the multifunction display. The yellow
tire pressure warning lamp then lights up.
R If the Please Correct Tire Pressure Please Correct Tire Pressure
message appears in the multifunction display, the tire pressure in at least one tire is too low.
The tire pressure must be corrected when the
opportunity arises.
R If the Check Tires Check Tires message appears in the
multifunction display, the tire pressure in at
least one tire has dropped significantly. The
tires must be checked.
R If the Warning Warning Tire
TireMalfunction
Malfunction message
appears in the multifunction display, the tire
pressure in at least one tire has dropped sud-
denly. The tires must be checked.
Be sure to observe the instructions and safety
notes in the display messages in the "Tires" sec-
tion (Y page 268).
If the positions of the wheels on the vehicle are changed, the tire pressures may be displayed in
the wrong positions for a short time. This is rec-
tified after a few minutes of driving, and the tire pressures are displayed for the correct posi-
tions. Tire pressure
361Wheels and tires Z