2019 MERCEDES-BENZ GLE SUV fuse
[x] Cancel search: fusePage 6 of 681
Climate control
........................................ 16 5
Overview of climate contro l systems ..........1 65
Operating the climate control sy stem ......... 167 Driving and pa
rking .................................. 17 8
Driving ........................................................ 178
DY NA MIC SELECT switch ............................1 90
Au tomatic transmission .............................. 19 3
Tr ans fer case .............................................. 197
Fu nction of the 4MATIC .............................. 19 9
Re fuelling .................................................... 19 9
Pa rking ...................................................... .205
Driving and driving saf ety sy stems .............. 214
Tr ailer hit ch................................................. 291
Bicycle rack ................................................ 296
Ve hicle towing instructions ........................ .298 Instrument Display and on-board
comp uter.................................................. 299
Instrument display overview ...................... .299
Overview of the buttons on thesteering
wheel ..........................................................3 00
Operating the on-board computer .............. 300 Ad
justing the design of the instrument
display ........................................................ 302
Showing display conte nt onthe instru‐
ment clus ter ............................................... 303
Overview of displa yson the multifunc‐
tion display .................................................3 04
Ad justing the instrument lighting ............... 305
Menus and submenus ................................ 305
Head-up Display .......................................... 312 LINGU
ATRO NIC ......................................... 313
No tes on operating saf ety .......................... .313
Operation ....................................................3 13
Using LINGU ATRO NIC ef fectively ................ 316
Essential voice commands .......................... 317 MBUX multimedia sy
stem ...................... 332
Overview and operation .............................. 332
Sy stem settings .......................................... 366
Fit & Healt hy............................................... 376
Na vigation ................................................... 381
Te lephone .................................................. .423
Online and Internet functions ..................... 456
Media ........................................................ .465 Ra
dio .......................................................... 472
TV ............................................................... 475
Sound ......................................................... 483 Main
tenance and care ............................. 487
ASS YST PLUS service inter val display ........ 487
Engine compartment .................................. 488
Cleaning and care ...................................... .494 Breakdown assistance
............................503
Emergency .................................................. 503
Flat tyre ...................................................... 505
Battery (vehicle) .......................................... 512
To w- starting or towing away ........................ 517
Electrical fuses ........................................... 522 Wheels and tyres
..................................... 525
No tes on noise or unusual handling char‐
acteristics .................................................. .525
No tes on regularly inspecting wheels and
tyres ........................................................... 525
No tes on snow chains ................................ 525
Ty re pressure .............................................. 526 Contents
3
Page 525 of 681
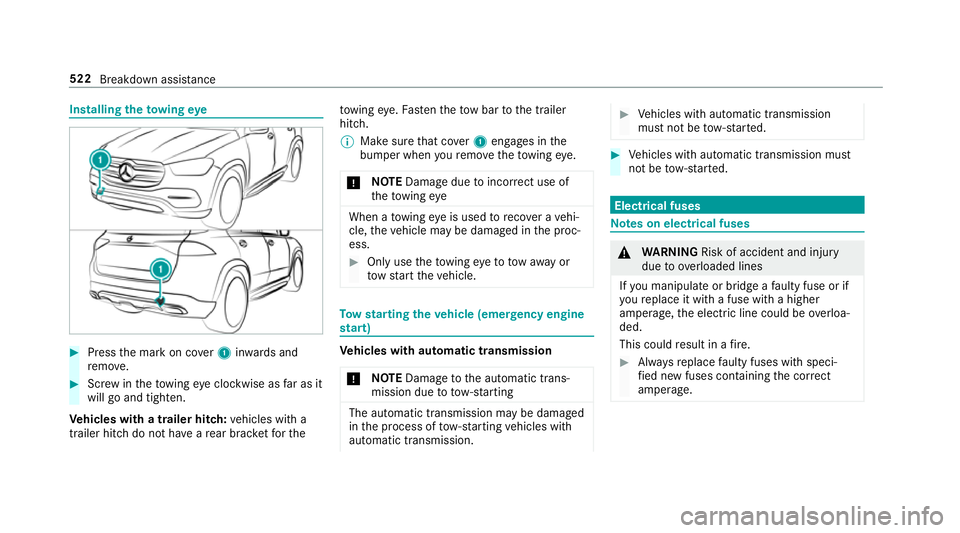
Installing
theto wing eye #
Press the mark on co ver1 inwa rds and
re mo ve. #
Screw intheto wing eyeclockwise as far as it
will go and tighten.
Ve hicles with a trailer hitch: vehicles with a
trailer hitch do not ha veare ar brac ketfo rthe to
wing eye. Fasten theto w bar tothe trailer
hitch.
% Make sure that co ver1 engages in the
bumper when youre mo vetheto wing eye.
* NO
TEDama gedue toincor rect use of
th eto wing eye When a
towing eye is used toreco ver a vehi‐
cle, theve hicle may be damaged in the proc‐
ess. #
Only use theto wing eyeto to waw ay or
to w start theve hicle. To
w starting theve hicle (eme rgency engine
st art) Ve
hicles with automatic transmission
* NO
TEDama getothe automatic trans‐
mission due to tow-starting The automatic transmission may be damaged
in the process of tow- starting vehicles with
automatic transmission. #
Vehicles with automatic transmission
must not be tow- star ted. #
Vehicles with automatic transmission must
not be tow- star ted. Electrical fuses
Note
s on electrical fuses &
WARNING Risk of accident and inju ry
due to ov erloaded lines
If yo u manipulate or bridge a faulty fuse or if
yo ure place it with a fuse with a higher
amperage, the electric line could be overloa‐
ded.
This could result in a fire. #
Alw aysre place faulty fuses with speci‐
fi ed new fuses conta iningthe cor rect
amperage. 522
Breakdown assis tance
Page 526 of 681
*
NO
TEDama gedue toincor rect fuses Electrical components or sy
stems may be
damaged byincor rect fuses, or their func‐
tionality may be significant lyimpaired. #
Only use fuses that ha vebeen appr oved
by Mercedes-Benz and which ha vethe
cor rect fuse rating. Blown fuses mu
stbe replaced with fuses of the
same rating, which you can recognise bythe col‐
our and fuse rating. The fuse ratings and fu rther
information tobe obser ved are lis ted in the fuse
assignment diagram.
Fu se assignment diag ram: onthe fuse box in
th e load compartment (→ page 524).
* NO
TEDama geor malfunctions caused
by moisture Moisture may cause dama
getothe electrical
sy stem or cause it tomalfunction. #
When the fuse box is open, make sure
th at no moisture can enter the fuse
box. #
When closing the fuse box, make sure
th at the seal of the lid is positioned cor‐
re ctly on the fuse box. If
th e newly inser ted fuse also blo ws, ha vethe
cause traced and rectified at a qualified special‐
ist workshop, e.g. a Mercedes-Benz Service
Centre.
Ensure thefo llowing before replacing a fuse:
R The vehicle is secured against rolling away.
R All electrical consumers are switched off.
R The ignition is switched off.
The electrical fuses are located in various fuse
bo xes: Opening and closing
the fuse box in the
engine compa rtment Requ
irement:
R You need a dry clo thand a sc rewdriver. Obser
vethe no tes on electrical fuses
(→ page 522).
Opening &
WARNING Risk of inju ryfrom using the
windscreen wipers while the engine bon‐
net is open
When the engine bonn etis open, and the
windscreen wipers are set in motion, you can
be trapped bythe wiper linkage. #
Alw ays switch off the windscreen wip‐
ers and ignition before opening the
engine bonn et. Breakdown assis
tance 523
Page 527 of 681
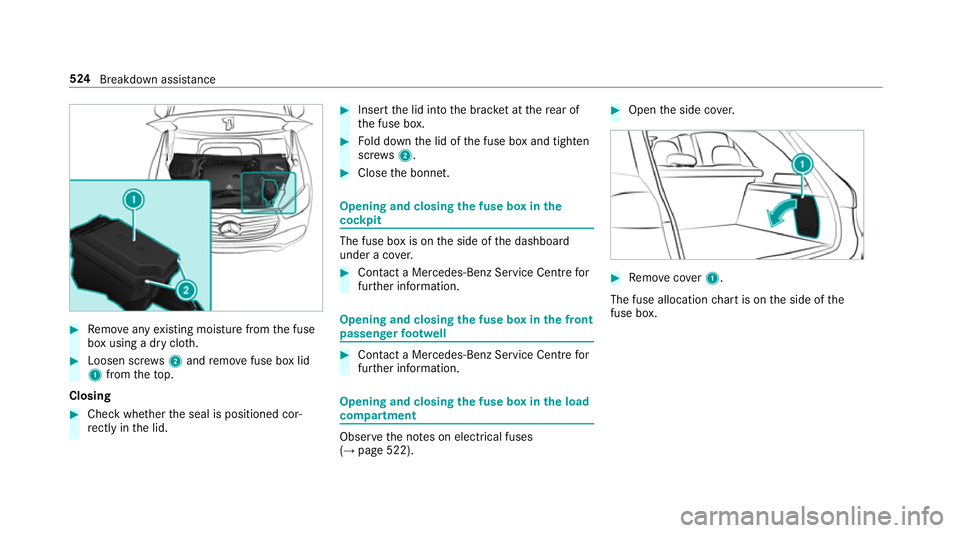
#
Remo veany existing moisture from the fuse
box using a dry clo th.#
Loosen scr ews2 and remo vefuse box lid
1 from theto p.
Closing #
Check whe ther the seal is positioned cor‐
re ctly in the lid. #
Insert the lid into the brac ket at there ar of
th e fuse box. #
Fold down the lid of the fuse box and tighten
scr ews2. #
Close the bonn et. Opening and closing
the fuse box in the
cockpit The fuse box is on
the side of the dashboard
under a co ver. #
Con tact a Mercedes-Benz Service Centre for
fur ther information. Opening and closing
the fuse box in the front
passenger foot we ll #
Contact a Mercedes-Benz Service Cent refor
fur ther information. Opening and closing
the fuse box in the load
compa rtment Obse
rveth e no tes on electrical fuses
(→ page 522). #
Open the side co ver. #
Remo vecover1.
The fuse allocation chart is on the side of the
fuse box. 524
Breakdown assi stance
Page 618 of 681
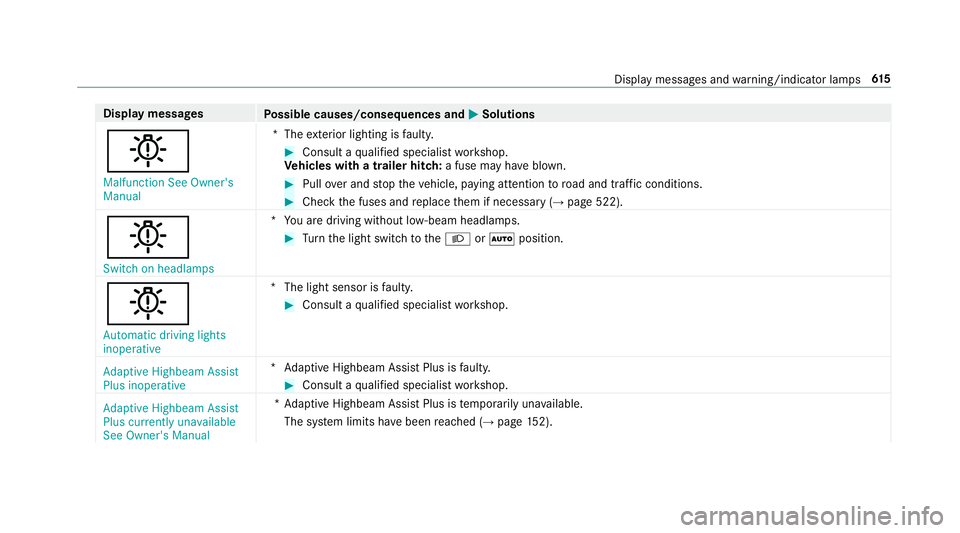
Display messages
Possible causes/consequences and M
MSolutions
b Malfunction See Owner's
Manual *T
heexterior lighting is faulty. #
Consult a qualified specialist workshop.
Ve hicles with a trailer hitch: a fuse may haveblown. #
Pull over and stop theve hicle, paying attention toroad and traf fic conditions. #
Check the fuses and replace them if necessary (→ page 522).
b Switch on headlamps *Y
ou are driving without lo w-beam headlamps. #
Turn the light switch totheL orà position.
b
Automatic driving lights
inoperative *T
he light sensor is faulty. #
Consult a qualified specialist workshop.
Adaptive Highbeam Assist
Plus inoperative *A
daptive Highbeam Assist Plus is faulty. #
Consult a qualified specialist workshop.
Adaptive Highbeam Assist
Plus currently unavailable
See Owner's Manual *A
daptive Highbeam Assist Plus is temp orarily una vailable.
The sy stem limits ha vebeen reached (→ page152). Displ
aymessa ges and warning/indicator lamps 61 5
Page 648 of 681
ECO Assist
Function/no tes ................................... 188
ECO display Function .............................................. 188
Re setting ............................................. 307
ECO start/s top function ................. 187, 188
Au tomatic engine start ........................ 187
Au tomatic engine stop .........................1 87
Operation ............................................ 187
Switching off/on ................................. 188
Electric pa rking brake ............................ .211
App lying automatically ........................ .211
App lying or releasing manually ............ 212
Emergency braking .............................. 212
Re leasing automatically ...................... .211
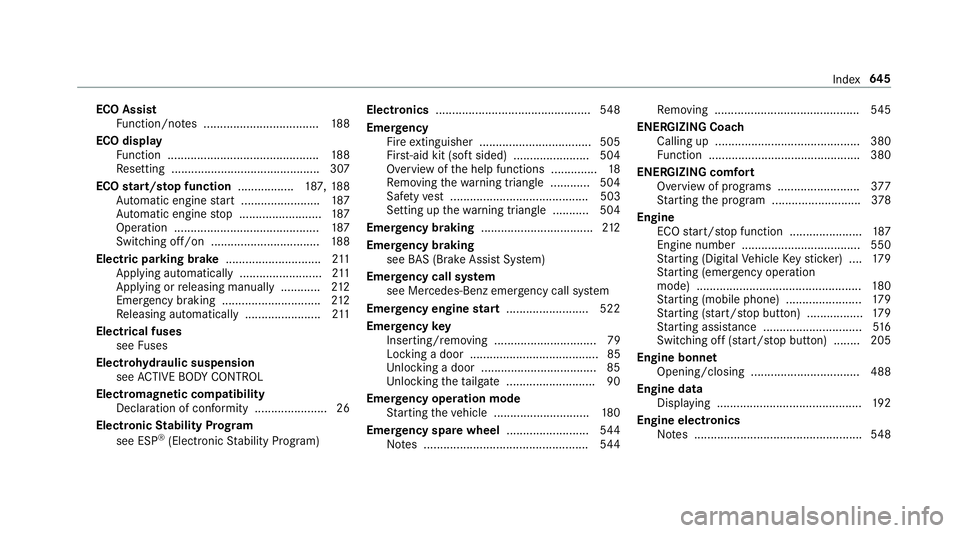
Electrical fuses see Fuses
Electrohydraulic suspension see ACTIVE BODY CONTROL
Electromagnetic compatibility Declaration of conformity ...................... 26
Electronic Stability Prog ram
see ESP ®
(Electronic Stability Prog ram) Electronics
............................................... 548
Emer gency
Fire extinguisher ................................. .505
Fir st-aid kit (so ftsided) ....................... 504
Overview of the help functions .............. 18
Re moving thewa rning triangle ............ 504
Saf etyve st .......................................... 503
Setting up thewa rning triangle .......... .504
Emer gency braking ..................................2 12
Emer gency braking
see BAS (Brake Assi stSystem)
Emer gency call sy stem
see Mercedes-Benz emer gency call sy stem
Emer gency engine start ......................... 522
Emer gency key
Inserting/removing ............................... 79
Locking a door .......................................85
Un locking a door .................................. .85
Un locking theta ilgate .......................... .90
Emer gency operation mode
St arting theve hicle ............................. 180
Emer gency spare wheel .........................5 44
No tes .................................................. 544Re
moving ............................................ 545
ENERGIZING Coach Calling up ............................................ 380
Function .............................................. 380
ENE RGIZING comfort
Overview of programs ........................ .377
St arting the program ........................... 378
Engine ECO start/ stop function ......................1 87
Engine number .................................... 550
St arting (Digital Vehicle Keyst icke r) .... 17 9
St arting (eme rgency operation
mode) .................................................. 180
St arting (mobile phone) ...................... .179
St arting (s tart/s top button) .................1 79
St arting assis tance .............................. 516
Switching off (s tart/s top button) ........ 205
Engine bonnet Opening/closing .................................4 88
Engine data Displ aying ............................................ 19 2
Engine electronics Notes ................................................... 548 Index
645
Page 650 of 681
Fo
il co vering ............................................. 214
Fo rw arding e-mails
see In Car Of fice
Fr ag rance
see Fragrance sy stem
Fr ag rance sy stem .................................... 16 9
Inserting/removing theflacon ............ .169
Setting ................................................. 16 9
Fr ee driving mode
St arting .............................................. .262
Fr ee software ............................................ 32
Fr equencies
Mobile phone ...................................... 549
Tw o-w ayradio ...................................... 549
Fr equency band
Dialling (on-board computer) .............. .309
Fr ont airbag (driver, front passenger) .....40
Fr ont passenger seat
Ad justing from the driver's seat ..........1 08
Fu el .......................................................... .554
Ad ditives .............................................5 54
Diesel .................................................. 554 Low outside
temp eratures ...................5 54
Quality (diesel) .................................... 554
Re fuelling ............................................. 19 9
Re ser vefuel le vel ................................ 555
Ta nk capacity ...................................... 555
Fu el consum ption
On-board computer ............................ .306
Fu el consum ption indicator
Calling up ............................................ 19 2
Fu nction seat
see Door cont rol panel
Fu nction seat (rear)
see Seat (rear)
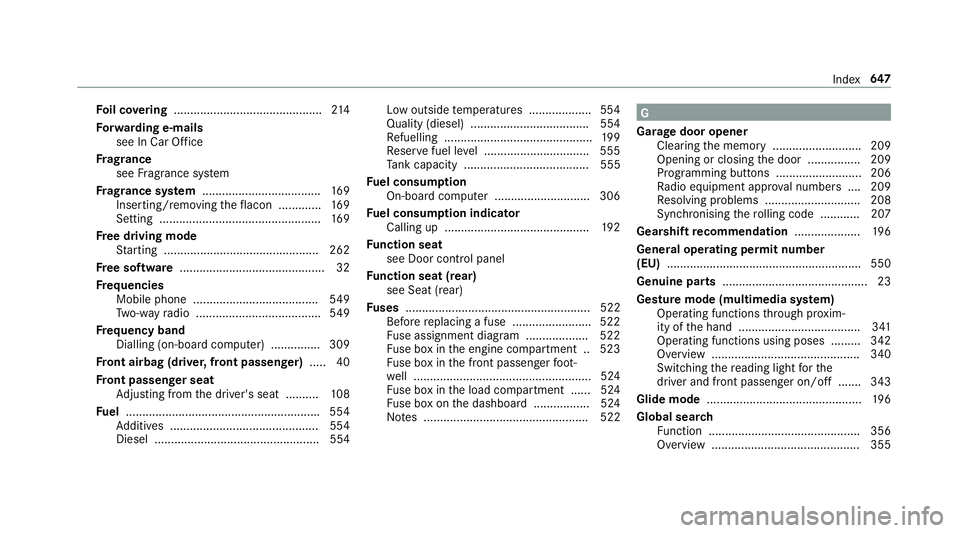
Fu ses ........................................................ 522
Before replacing a fuse ........................ 522
Fu se assignment diagram ...................5 22
Fu se box in the engine compartment .. 523
Fu se box in the front passenger foot‐
we ll ...................................................... 524
Fu se box in the load compartment ...... 524
Fu se box on the dashboard ................. 524
No tes .................................................. 522 G
Garage door opener Cleari ngthe memory ........................... 209
Opening or closing the door ................2 09
Programming buttons .......................... 206
Ra dio equipment appr oval numbers .... 209
Re solving problems ............................. 208
Synchronising thero lling code ............ 207
Gearshift recommendation ....................19 6
Genera l operating permit number
(EU) .......................................................... .550
Genuine parts ............................................ 23
Gesture mode (multimedia sy stem)
Operating functions thro ugh pr oxim‐
ity of the hand .....................................3 41
Operating functions using poses ......... 342
Overview ............................................. 340
Switching there ading light forthe
driver and front passenger on/off .......3 43
Glide mode ............................................... 19 6
Global sear ch
Fu nction .............................................. 356
Overview ............................................. 355 Index
647