2019 MERCEDES-BENZ GLE SUV battery
[x] Cancel search: batteryPage 261 of 398

Display messages
Possible causes/consequences and
0050
0050Solutions 003D
Stop Vehicle See Stop Vehicle See
Operator's Manual Operator's Manual The battery is no longer being charged and the condition of charge is
too low.
A warning tone also sounds.
X Pull over and stop the vehicle safely and switch off the engine, pay-
ing attention to road and traffic conditions.
X Secure the vehicle against rolling away (Y page 156).
X Observe the instructions in the 003DSee Operator's Manual See Operator's Manual
display message.
X Consult a qualified specialist workshop. 00B2
Check Check
Engine
Engine Oil
OilAt
At
Next Refueling
Next Refueling The engine oil level has dropped to the minimum level.
A warning tone also sounds.
! Avoid long journeys with too little engine oil. The engine will oth-
erwise be damaged.
X Check the oil level when next refueling, at the latest (Y page 323).
X If necessary, add engine oil (Y page 323).
If the engine oil needs topping up more often: X Contact a qualified specialist workshop and have the engine
checked.
Information on approved engine oils can be obtained from any quali-
fied specialist workshop or on the Internet at http://bevo.mercedes- benz.com. 00B2
Check Engine Oil Check Engine Oil
Level (Add 1 quart) Level (Add 1 quart) Mercedes-AMG vehicles: the engine oil level is too low.
! Avoid long journeys with too little engine oil. The engine will oth-
erwise be damaged.
X Check the oil level when next refueling, at the latest (Y page 323).
X If necessary, add engine oil (Y page 323).
If the engine oil needs topping up more often: X Contact a qualified specialist workshop and have the engine
checked.
Information on approved engine oils can be obtained from any quali-
fied specialist workshop or on the Internet at http://bevo.mercedes- benz.com. 00B2
Engine Oil Level Engine Oil Level
Low Stop Vehicle Low Stop Vehicle
Turn Engine Off Turn Engine Off Mercedes-AMG vehicles: the engine oil level is too low.
There is a risk of engine damage.
X Pull over and stop the vehicle safely and switch off the engine, pay-
ing attention to road and traffic conditions.
X Secure the vehicle against rolling away (Y page 156).
X Check the engine oil level (Y page 323).
X If necessary, add engine oil (Y page 323).00B6
Fuel Level Low Fuel Level Low The fuel level has dropped into the reserve range.
X Refuel at the nearest gas station. Display
messages
259On-board computer and displays Z
Page 273 of 398

Display messages
Possible causes/consequences and
0050
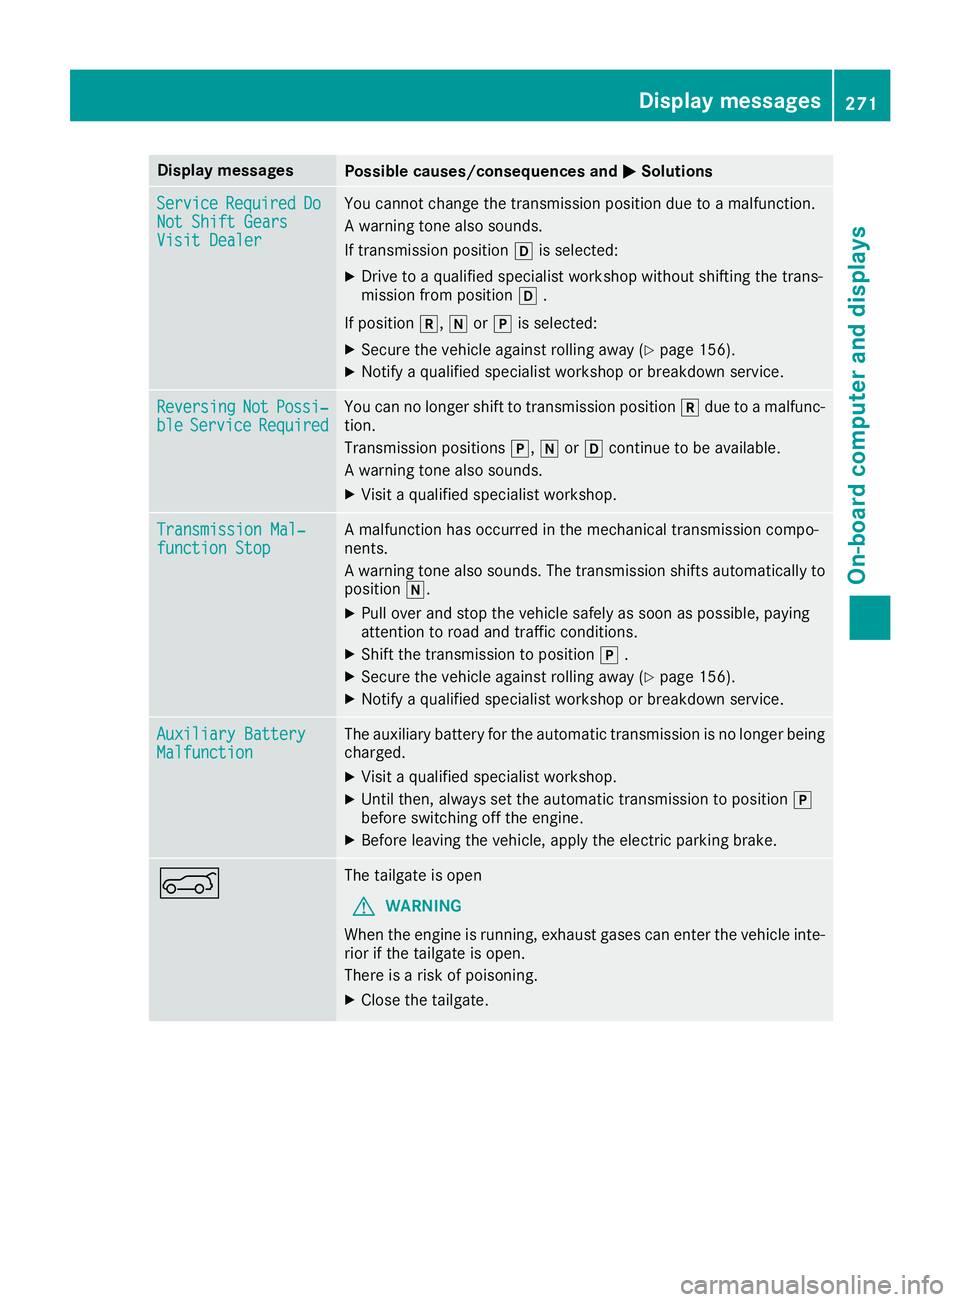
0050Solutions Service
Service
Required
Required Do
Do
Not Shift Gears
Not Shift Gears
Visit Dealer Visit Dealer You cannot change the transmission position due to a malfunction.
A warning tone also sounds.
If transmission position
005Bis selected:
X Drive to a qualified specialist workshop without shifting the trans-
mission from position 005B.
If position 005E,005Cor005D is selected:
X Secure the vehicle against rolling away (Y page 156).
X Notify a qualified specialist workshop or breakdown service. Reversing Reversing
Not
NotPossi‐
Possi‐
ble
ble Service
Service Required
Required You can no longer shift to transmission position
005Edue to a malfunc-
tion.
Transmission positions 005D,005Cor005B continue to be available.
A warning tone also sounds.
X Visit a qualified specialist workshop. Transmission Mal‐ Transmission Mal‐
function Stop function Stop A malfunction has occurred in the mechanical transmission compo-
nents.
A warning tone also sounds. The transmission shifts automatically to position 005C.
X Pull over and stop the vehicle safely as soon as possible, paying
attention to road and traffic conditions.
X Shift the transmission to position 005D.
X Secure the vehicle against rolling away (Y page 156).
X Notify a qualified specialist workshop or breakdown service. Auxiliary Battery Auxiliary Battery
Malfunction Malfunction The auxiliary battery for the automatic transmission is no longer being
charged.
X Visit a qualified specialist workshop.
X Until then, always set the automatic transmission to position 005D
before switching off the engine.
X Before leaving the vehicle, apply the electric parking brake. 0065 The tailgate is open
G WARNING
When the engine is running, exhaust gases can enter the vehicle inte- rior if the tailgate is open.
There is a risk of poisoning.
X Close the tailgate. Display
messages
271On-board computer and displays Z
Page 275 of 398

SmartKey
Display messages
Possible causes/consequences and
0050
0050Solutions 00AF
Key Key
Does
Does Not
NotBelong
Belong
to Vehicle
to Vehicle You have put the wrong SmartKey in the ignition lock.
X Use the correct SmartKey. 00AF
Take Your Key from Take Your Key from
Ignition Ignition The SmartKey is in the ignition lock.
A warning tone also sounds.
X Remove the SmartKey. 00AF
Obtain a New Key Obtain a New Key The SmartKey needs to be replaced.
X Visit a qualified specialist workshop. 00AF
Replace Key Battery Replace Key Battery The SmartKey battery is discharged.
X Change the battery (Y page 80).00AF
Don't Forget Your Don't Forget Your
Key Key The SmartKey is not in the ignition lock. You have opened the driver's
door with the engine switched off.
A warning tone also sounds.
This display message is displayed for a maximum of 60 seconds and is
simply a reminder.
X Take the SmartKey with you when you leave the vehicle. 00AF
Key Not Detected Key Not Detected
(white display message) The SmartKey is currently undetected.
X Change the location of the SmartKey in the vehicle.
If the SmartKey still cannot be detected:
X Operate the vehicle with the SmartKey in the ignition lock. 00AF
Key Not Detected Key Not Detected
(red display message) The SmartKey is not in the vehicle.
A warning tone also sounds.
If the engine is switched off, you can no longer lock the vehicle cen-
trally or start the engine.
X Pull over and stop the vehicle safely as soon as possible, paying
attention to road and traffic conditions.
X Secure the vehicle against rolling away (Y page 156).
X Locate the SmartKey. Display messages
273On-board computer and displays Z
Page 310 of 398

X
Turn the SmartKey to position 0048in the igni-
tion lock (Y page 135).
X To open: slide cover 0043to its foremost posi-
tion.
X Press in cigarette lighter 0044.
Cigarette lighter 0044will pop out automatically
when the heating element is red-hot.
X To close: pull cover 0043back as far as it will go. 12 V sockets
General notes X
Turn the SmartKey to position 0047in the igni-
tion lock (Y page 135).
With the exception of the socket in the front
center console, all sockets can be used for
accessories with a maximum current draw of
240 W (20 A). The socket in the front center
console can be used for accessories with a max-
imum current draw of 180 W(15 A). Accessories
include such items as chargers for mobile
phones.
If you use the sockets for long periods when the engine is switched off, the battery may dis-
charge.
i An emergency cut-out ensures that the on-
board voltage does not drop too low. If the on-
board voltage is too low, the power to the
sockets is automatically cut. This ensures
that there is sufficient power to start the
engine.
Socket in the front center console !
The socket is not suitable for operating the
tire inflation compressor.
X To open: slide the cover to its foremost posi-
tion.
X Lift up the cover of the socket.
X To close: pull the cover back as far as it will
go.
Socket in the rear passenger compart-
ment center console Vehicles with the Rear Seat Entertainment Sys-
tem have two sockets in the center console in
the rear passenger compartment.
X Lift up the cover of the socket. Socket in the cargo compartment
X
Lift up the cover of socket 0043. 115 V socket
Important safety notes G
DANGER
When a suitable device is connected, the
115 V powe r socket will be carrying a high
voltage. You could receive an electric shock if the connector cable or the 115 V power
socket is pulled out of the trim or is damaged
or wet. There is a risk of fatal injury.
R Use only connector cables that are dry and
free of damage.
R When the ignition is off, make sure that the
115 V powe r socket is dry.
R Have the 115 V power socket checked or
replaced immediately at a qualified speci-
alized workshop if it is damaged or has been
pulled out of the trim.
R Never plug the connector cable into a 115 V
power socket that is damaged or has been pulled out of the trim. G
DANGER
If you reach into the power socket or plug
inappropriate devices into the power socket,
you could receive an electric shock. There is a risk of fatal injury.
Only connect appropriate devices to the
power socket. 308
FeaturesStowage and features
Page 311 of 398

!
Note that work and repairs on the 115 V
power socket should only be carried out by
qualified specialist personnel.
General notes The 115
Vpower socket provides an alternating
voltage of 115 V so that small electronic devices can be connected. These devices, such as
games consoles, chargers and laptops, must not
consume more than a maximum of 150 watts
altogether.
Requirements for operation of these devices:
R the electronic device that you connect has a
suitable connector and conforms to stand-
ards specific to the country you are in.
R the plug of the electronic device is plugged
correctly into 115 V power socket.
R the maximum wattage of the device to be
connected must not exceed 150 watts.
R the on-board power supply is within a permis-
sible voltage range.
R the 12 V sockets in the rear compartment and
the cargo compartment are operational. Using the 115 V power socket X
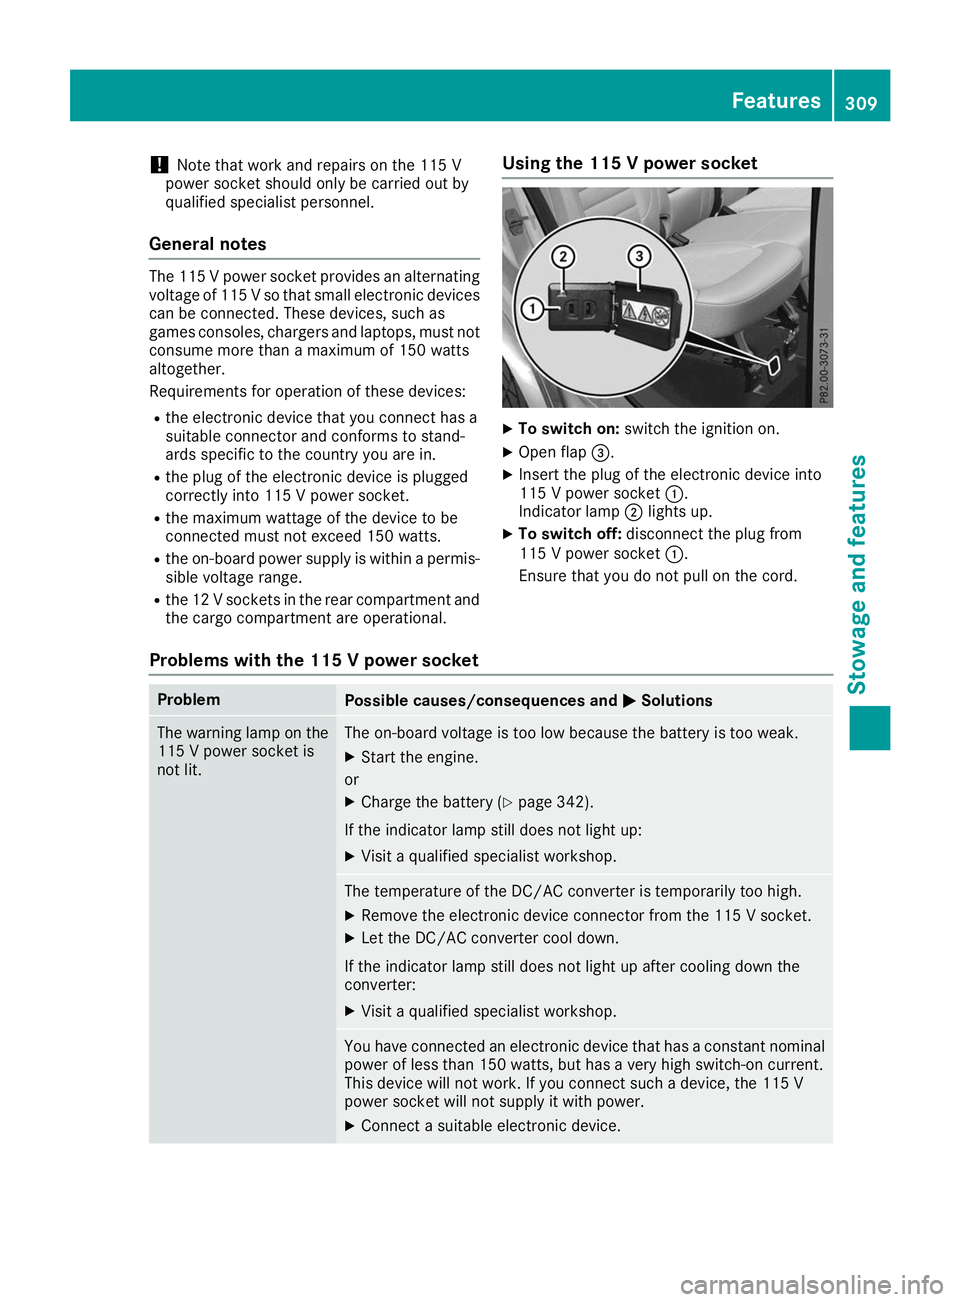
To switch on: switch the ignition on.
X Open flap 0087.
X Insert the plug of the electronic device into
115 V power socket 0043.
Indicator lamp 0044lights up.
X To switch off: disconnect the plug from
115 V power socket 0043.
Ensure that you do not pull on the cord.
Problems with the 115 V power socket Problem
Possible causes/consequences and
0050 0050Solutions The warning lamp on the
115 V power socket is
not lit. The on-board voltage is too low because the battery is too weak.
X Start the engine.
or X Charge the battery (Y page 342).
If the indicator lamp still does not light up: X Visit a qualified specialist workshop. The temperature of the DC/AC converter is temporarily too high.
X Remove the electronic device connector from the 115 V socket.
X Let the DC/AC converter cool down.
If the indicator lamp still does not light up after cooling down the
converter:
X Visit a qualified specialist workshop. You have connected an electronic device that has a constant nominal
power of less than 150 watts, but has a very high switch-on current.
This device will not work. If you connect such a device, the 115 V
power socket will not supply it with power.
X Connect a suitable electronic device. Features
309Stowage and features Z
Page 327 of 398

Adding washer fluid to the windshield
washer system
Example: washer fluid reservoir
X
To open: pull cap0043upwards by the tab.
X Add the premixed washer fluid.
X To close: press cap 0043onto the filler neck
until it engages.
If the washer fluid level drops below the recom- mended minimum of 1 liter, a message appears in the multifunction display prompting you to
add washer fluid (Y page 272).
Further information on windshield washer fluid
(Y page 389). ASSYST PLUS
Service message
i If the scheduled service intervals are excee-
ded, this may result in damage to the vehicle.
You can obtain up-to-date information concern-
ing the servicing of your vehicle from a qualified
specialist workshop, e.g. an authorized
Mercedes-Benz Center or at
http://www.mbusa.com (USA only).
i The ASSYST PLUS service interval display
does not show any information on the engine oil level. Observe the notes on the engine oil
level (Y page 322).
The multifunction display shows a service mes-
sage for several seconds, e.g.:
R Service A in .. Days
Service A in .. Days
R Service A Due Service A Due
R Service A Exceeded by .. Days
Service A Exceeded by .. Days
Depending on the operating conditions of the
vehicle, the remaining time or distance until the
next service due date is displayed. The letter
A Aor B
B, possibly in connection with a
number or another letter, shows the type of ser-
vice. A
Astands for a minor service and B
Bfor a
major service.
Further information can be obtained at a quali-
fied specialist workshop.
The ASSYST PLUS service interval display does
not take into account any periods of time during
which the battery is disconnected.
Maintaining the time-dependent service sched-
ule:
X Note down the service due date displayed in
the multifunction display before disconnect-
ing the battery.
or X After reconnecting the battery, subtract the
battery disconnection periods from the ser-
vice date shown on the display. Hiding a service message
X Press the 0038or0076 button on the steering
wheel. Displaying service messages
X Switch on the ignition.
X Press the 0059or0065 button on the steering
wheel to select the Serv. Serv.menu.
X Press the 0063or0064 button to select the
ASSYST
ASSYST PLUS
PLUSsubmenu and confirm by press-
ing the 0076button.
The service due date appears in the multi-
function display. Information about Service
Resetting the ASSYST PLUS service
interval display !
If the ASSYST PLUS service interval display
has been inadvertently reset, this setting can
be corrected at a qualified specialist work-
shop.
Have service work carried out as described in the Maintenance Booklet. This may otherwise
lead to increased wear and damage to the
major assemblies or the vehicle. ASSYST PLUS
325Maintenance and care Z
Page 330 of 398

tires or chassis components replaced imme-
diately.
! Always maintain a distance of at least 12 in
(30 cm) between the vehicle and the power
washer nozzle. Information about the correct
distance is available from the equipment
manufacturer.
Move the power washer nozzle around when
cleaning your vehicle.
Do not aim directly at any of the following:
R Tires
R Door gaps, roof gaps, joints, etc.
R Electrical components
R Battery
R Plug-type couplings
R Light bulbs
R Seals
R Trim elements
R Ventilation slots
Damaged seals or electrical components can
lead to leaks or failures.
! Vehicles with decorative foil: parts of your
vehicle are covered with decorative foil. Main- tain a distance of at least 27.5 in (70 cm)
between the foil-wrapped parts of the vehicle and the nozzle of the high pressure cleaner.
Information about the correct distance is
available from the equipment manufacturer.
Move the power washer nozzle around when
cleaning your vehicle.
The water temperature of the high-pressure
cleaner must not exceed 140 °F (60 °C).
Cleaning the paintwork !
Do not affix:
R stickers
R films
R magnetic plates or similar items
to painted surfaces. You could otherwise
damage the paintwork.
Scratches, corrosive deposits, areas affected by
corrosion and damage caused by inadequate
care cannot always be completely repaired. In
such cases, visit a qualified specialist workshop. X
Remove dirt immediately, where possible,
while avoiding rubbing too hard.
X Soak insect remains with insect remover and
rinse off the treated areas afterwards.
X Soak bird droppings with water and rinse off
the treated areas afterwards.
X Remove tree resin, oils, fuels and greases by
rubbing gently with a cloth soaked in petro-
leum ether or lighter fluid
X Remove coolant and brake fluid with a moist
cloth and clear water.
X Use tar remover to remove tar stains.
X Use silicone remover to remove wax.
If water no longer forms "beads" on the paint
surface, use the paint care products recommen-
ded and approved by Mercedes-Benz. This is the
case approximately every three to five months,
depending on the climate conditions and the
care product used.
If dirt has penetrated the paint surface or if the
paint has become dull, the paint cleaner recom-
mended and approved by Mercedes-Benz
should be used.
Do not use these care products in the sun or on the hood while the hood is hot.
X Use a suitable touch-up stick, e.g. MB Touch-
Up Stick, to repair slight damage to the paint-
work quickly and provisionally.
Matte finish care !
Never polish the vehicle or the light alloy
wheels. Polishing causes the finish to shine.
! The following can give the paint a glossy
appearance and thus reduce the matt effect:
R Rubbing hard with unsuitable agents
R Washing the vehicle in direct sunlight
! Never use paint cleaner, buffing or polishing
products, or gloss preserver, e.g. wax, for the purpose of paintwork care. These products
are only suitable for high-gloss surfaces. Their
use on vehicles with matte paintwork leads to
considerable surface damage or, more spe-
cifically, to shiny, spotted areas.
Always have paintwork repairs carried out at a
qualified specialist workshop.
! Only use automatic car washes which cor-
respond to the latest technological stand-
ards. Never use wash programs which finish
by treating the vehicle with hot wax. 328
CareMaintenance and care
Page 342 of 398

X
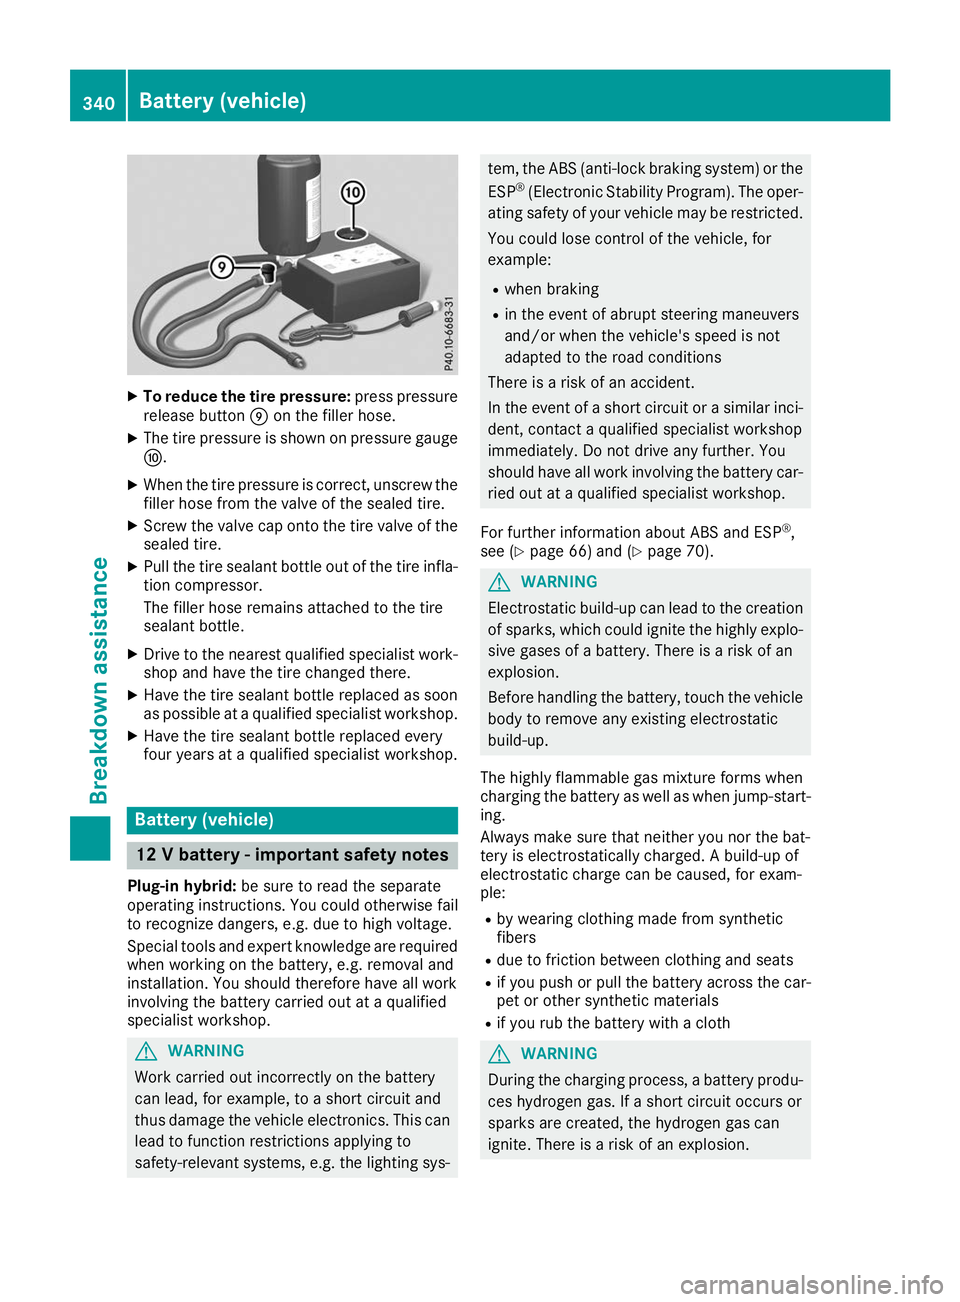
To reduce the tire pressure: press pressure
release button 006Don the filler hose.
X The tire pressure is shown on pressure gauge
006E.
X When the tire pressure is correct, unscrew the
filler hose from the valve of the sealed tire.
X Screw the valve cap onto the tire valve of the
sealed tire.
X Pull the tire sealant bottle out of the tire infla-
tion compressor.
The filler hose remains attached to the tire
sealant bottle.
X Drive to the nearest qualified specialist work-
shop and have the tire changed there.
X Have the tire sealant bottle replaced as soon
as possible at a qualified specialist workshop.
X Have the tire sealant bottle replaced every
four years at a qualified specialist workshop. Battery (vehicle)
12 V battery - important safety notes
Plug-in hybrid: be sure to read the separate
operating instructions. You could otherwise fail
to recognize dangers, e.g. due to high voltage.
Special tools and expert knowledge are required
when working on the battery, e.g. removal and
installation. You should therefore have all work
involving the battery carried out at a qualified
specialist workshop. G
WARNING
Work carried out incorrectly on the battery
can lead, for example, to a short circuit and
thus damage the vehicle electronics. This can lead to function restrictions applying to
safety-relevant systems, e.g. the lighting sys- tem, the ABS (anti-lock braking system) or the
ESP ®
(Electronic Stability Program). The oper-
ating safety of your vehicle may be restricted.
You could lose control of the vehicle, for
example:
R when braking
R in the event of abrupt steering maneuvers
and/or when the vehicle's speed is not
adapted to the road conditions
There is a risk of an accident.
In the event of a short circuit or a similar inci-
dent, contact a qualified specialist workshop
immediately. Do not drive any further. You
should have all work involving the battery car- ried out at a qualified specialist workshop.
For further information about ABS and ESP ®
,
see (Y page 66) and (Y page 70). G
WARNING
Electrostatic build-up can lead to the creation of sparks, which could ignite the highly explo-
sive gases of a battery. There is a risk of an
explosion.
Before handling the battery, touch the vehicle body to remove any existing electrostatic
build-up.
The highly flammable gas mixture forms when
charging the battery as well as when jump-start- ing.
Always make sure that neither you nor the bat-
tery is electrostatically charged. A build-up of
electrostatic charge can be caused, for exam-
ple:
R by wearing clothing made from synthetic
fibers
R due to friction between clothing and seats
R if you push or pull the battery across the car-
pet or other synthetic materials
R if you rub the battery with a cloth G
WARNING
During the charging process, a battery produ- ces hydrogen gas. If a short circuit occurs or
sparks are created, the hydrogen gas can
ignite. There is a risk of an explosion. 340
Battery (vehicle)Breakdo
wn assis tance