2019 MERCEDES-BENZ GLE change wheel
[x] Cancel search: change wheelPage 297 of 398
Stowage areas
Loading guidelines
G
WARNING
If objects, luggage or loads are not secured or not secured sufficiently, they could slip, tip
over or be flung around and thereby hit vehicle
occupants. There is a risk of injury, particu-
larly in the event of sudden braking or a sud-
den change in direction.
Always store objects so that they cannot be
flung around. Secure objects, luggage or
loads against slipping or tipping before the
journey. G
WARNING
Combustion engines emit poisonous exhaust
gases such as carbon monoxide. If the tailgate is open when the engine is running, particu-
larly if the vehicle is moving, exhaust fumes
could enter the passenger compartment.
There is a risk of poisoning.
Turn off the engine before opening the tail-
gate. Never drive with the tailgate open. G
WARNING
The exhaust tail pipe and tail pipe trim can
become very hot. If you come into contact
with these parts of the vehicle, you could burn
yourself. There is a risk of injury.
Always be particularly careful around the
exhaust tail pipe and the tail pipe trim. Allow
these components to cool down before touch-
ing them.
The gross vehicle weight (GVW) is the vehicle
weight including fuel, vehicle tool kit, spare
wheel, installed accessories, vehicle occupants and luggage/cargo.
Do not exceed the load limit or permitted grossvehicle weight rating (GVWR) for your vehicle.
The gross load limit and the GVWR are specified
on the vehicle identification plate on the B-pillar
of the driver's door (Y page 361).
The load must also be distributed so that the
weight on each axle never exceeds the gross
axle weight rating (GAWR) for the front and rear
axles. The specifications for GVWR and GAWR are on the vehicle identification plate on the B-
pillar of the driver's door (Y
page 361).
Observe the notes on loading the vehicle
(Y page 361).
The handling characteristics of a laden vehicle
are dependent on the distribution of the load
within the vehicle. For this reason, you should
observe the following notes when transporting a
load:
R Never exceed the maximum permissible
gross vehicle mass or the gross axle weight
rating for the vehicle (including occupants).
R The cargo compartment is the preferred place
to carry objects.
R Position heavy loads as far forward as possi-
ble and as low down in the cargo compart-
ment as possible.
R The load must not protrude above the upper
edge of the seat backrests.
R Always place the load against the rear or front
seat backrests. Make sure that the seat
backrests are securely locked into place.
R Always place the load behind unoccupied
seats if possible.
R Use the cargo tie-down rings and the parcel
nets to transport loads and luggage.
R Use cargo tie-down rings and fastening mate-
rials appropriate for the weight and size of the load.
R Secure the load with sufficiently strong and
wear-resistant tie-downs. Pad sharp edges for
protection. Stowage spaces
Important safety notes G
WARNING
If you transport objects in the vehicle interior and these are not adequately secured, they
could slip or be flung around and thereby
strike vehicle occupants. In addition, cup
holders, open stowage spaces and mobile
phone brackets may not always be able to
hold the objects placed in them in the event of an accident. There is a risk of injury, particu-
larly in the event of sharp braking or sudden
changes of direction. Stowage areas
295Stowage and features
Z
Page 314 of 398
The indicator lamp in Roadside Assistance
button 0043flashes while the call is active. The
Connecting Call
Connecting Call message appears in the
multifunction display. The audio output is
muted.
If a connection can be established, the Call
Call
Connected
Connected message appears in the multifunc-
tion display.
If a mobile phone network and GPS reception
are available, the system transfers data to the
Mercedes-Benz Customer Assistance Center,
for example:
R Current location of the vehicle
R Vehicle identification number
The multimedia system display indicates that a
call is active. During the call, you can change to
the navigation menu by pressing the NAVI but-
ton on the multimedia system, for example.
Voice output is not available in this case.
A voice connection is established between the
Mercedes-Benz Customer Assistance Center
and the vehicle occupants.
From the remote malfunction diagnosis, the
Mercedes-Benz Customer Assistance Center
can ascertain the nature of the problem
(Y page 315).
The Mercedes-Benz Customer Assistance Cen-
ter either sends a qualified Mercedes-Benz tech-
nician or makes arrangements for your vehicle
to be transported to the nearest Mercedes-Benz
Service Center.
You may be charged for services such as repair work and/or towing.
You can find more information in the separate
mbrace manual.
The system has not been able to initiate a Road- side Assistance call, if:
R the 0052 indicator lamp for the Roadside
Assistance call button is flashing continu-
ously.
R no voice connection to the Mercedes-Benz
Customer Assistance Center was estab-
lished.
This can occur if the relevant mobile phone net-
work is not available, for example.
The Call Failed
Call Failed message appears in the mul-
tifunction display. X
To end a call: press the0076button on the
multifunction steering wheel.
or X Press the corresponding multimedia system
button for ending a phone call.
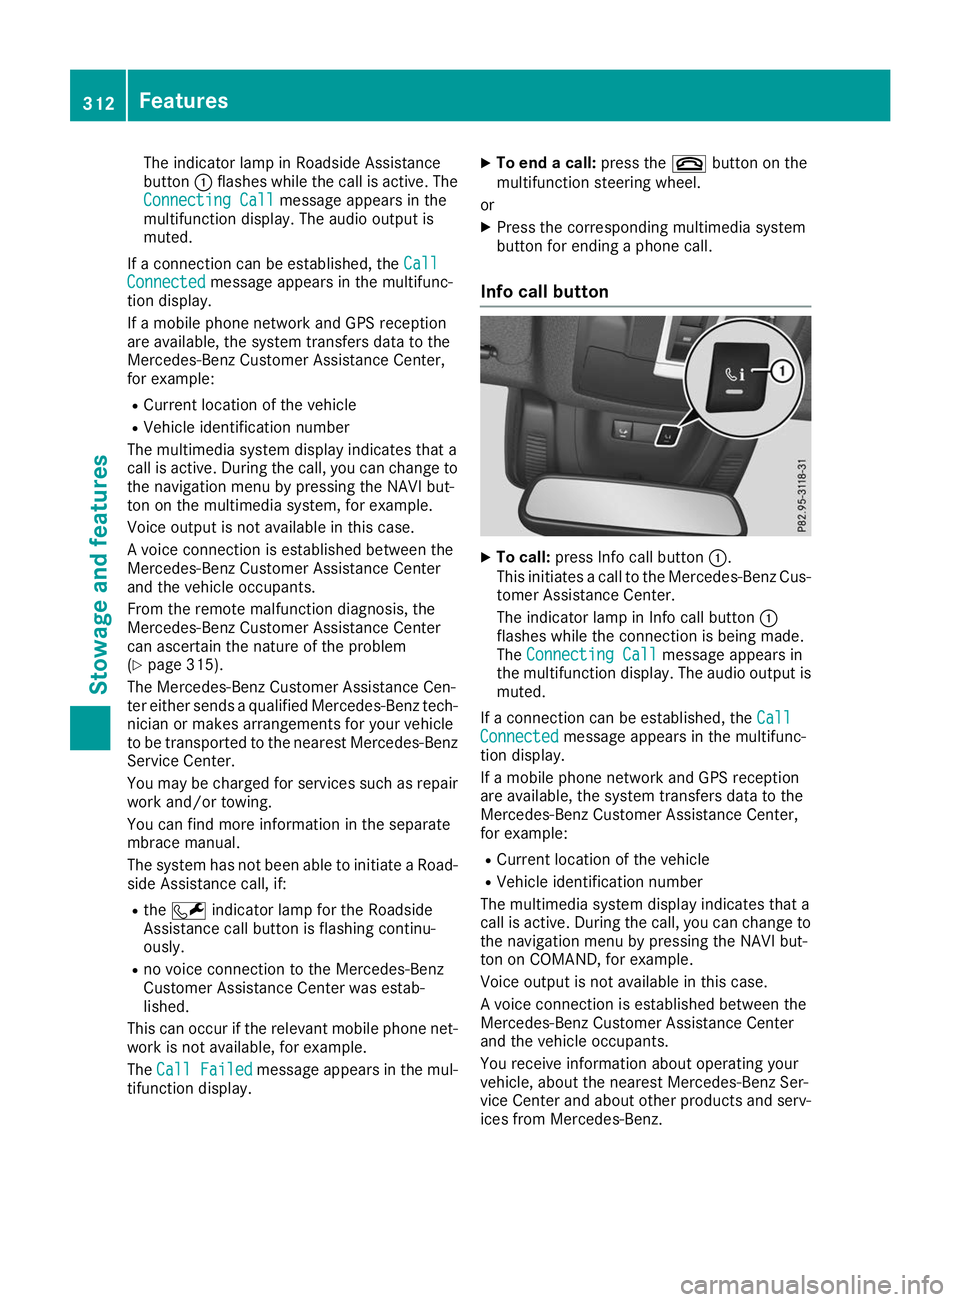
Info call button X
To call: press Info call button 0043.
This initiates a call to the Mercedes-Benz Cus-
tomer Assistance Center.
The indicator lamp in Info call button 0043
flashes while the connection is being made.
The Connecting Call Connecting Call message appears in
the multifunction display. The audio output is muted.
If a connection can be established, the Call
Call
Connected
Connected message appears in the multifunc-
tion display.
If a mobile phone network and GPS reception
are available, the system transfers data to the
Mercedes-Benz Customer Assistance Center,
for example:
R Current location of the vehicle
R Vehicle identification number
The multimedia system display indicates that a
call is active. During the call, you can change to
the navigation menu by pressing the NAVI but-
ton on COMAND, for example.
Voice output is not available in this case.
A voice connection is established between the
Mercedes-Benz Customer Assistance Center
and the vehicle occupants.
You receive information about operating your
vehicle, about the nearest Mercedes-Benz Ser-
vice Center and about other products and serv- ices from Mercedes-Benz. 312
FeaturesStowage and features
Page 328 of 398
A qualified specialist workshop will reset the
ASSYST PLUS service interval display after the
service work has been carried out. You can also obtain further information on maintenance
work, for example.
Special service requirements The specified maintenance interval takes only
the normal operation of the vehicle into
account. Under increased load on the vehicle,
maintenance work must be carried out more
frequently, for example:
R Regular city driving with frequent intermedi-
ate stops
R If the vehicle is primarily used to travel short
distances
R Use in mountainous terrain or on poor road
surfaces
R If the engine is often left idling for long periods
Under these or similar conditions, have, for
example, the air filter, engine oil and oil filter
replaced or changed more frequently. Under
arduous operating conditions, the tires must be
checked more often. Further information can be
obtained at a qualified specialist workshop.
Driving abroad An extensive Mercedes-Benz Service network is
also available in other countries. You can obtain further information from any authorized
Mercedes-Benz Center. Care
General notes
H
Environmental note
Dispose of empty packaging and cleaning
cloths in an environmentally responsible man-
ner.
! When cleaning your car, do not use:
R dry, coarse or hard cloths
R abrasive cleaning agents
R solvents
R cleaning agents containing solvents
Do not scrub.
Do not touch the surfaces and films with hard objects, e.g. rings or ice scrapers. Otherwise, you may scratch or damage the surfaces and
films.
! Do not park your vehicle for a long period of
time directly after cleaning, particularly after
cleaning the wheel rim with wheel cleaner.
Wheel cleaner can lead to the increased cor-
rosion of the brake discs and pads. Therefore,
drive for a few minutes after cleaning. By
heating up the brakes, the brake discs and
pads dry. The vehicle can then be parked for a
long period of time.
Regular care of your vehicle is a condition for
retaining the quality in the long term.
Use care products and cleaning agents recom-
mended and approved by Mercedes-Benz. Washing the vehicle and cleaning the
paintwork
Automatic car wash G
WARNING
Braking efficiency is reduced after washing
the vehicle. There is a risk of an accident.
After the vehicle has been washed, brake
carefully while paying attention to the traffic
conditions until full braking power is restored.
! Before driving into an automatic car wash,
make sure that it is suitable for the dimen-
sions of the vehicle. In particular, make sure
that:
R there is enough ground clearance between
the vehicle underbody and the guide rails of the automatic car wash.
R the clearance width of the automatic car
wash is sufficient, particularly the width of
the guide rails.
R you enter the automatic car wash straight
and in the center of the guide rails in order
to avoid damaging the tires or wheel rims.
Fold in the exterior mirrors before the vehicle
is washed. The exterior mirrors could other-
wise be damaged.
! When Active Distance Assist DISTRONIC or
the HOLD function is activated, the vehicle
brakes automatically in certain situations. 326
CareMaintenance and care
Page 334 of 398
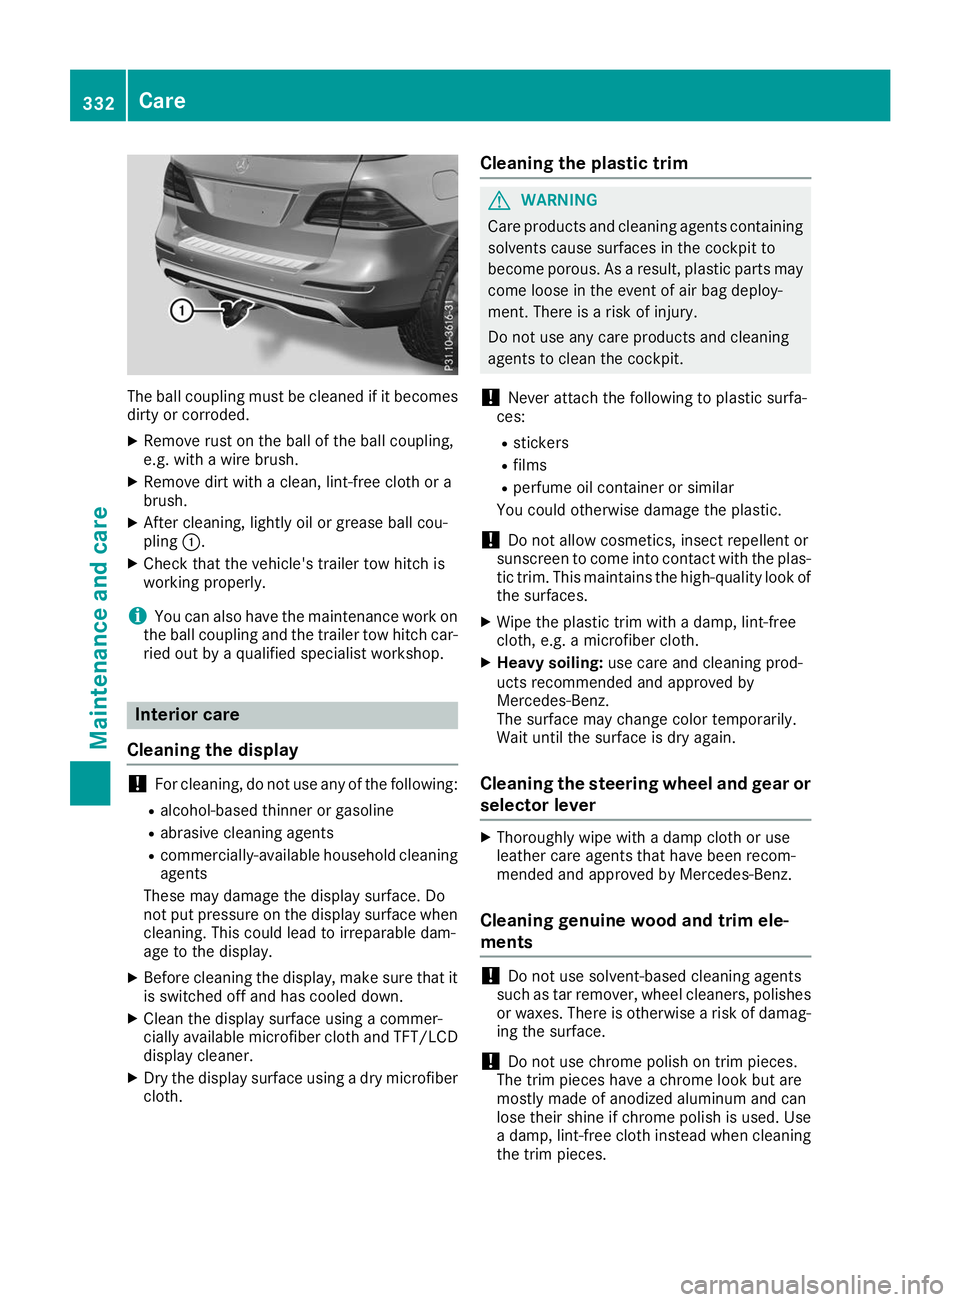
The ball coupling must be cleaned if it becomes
dirty or corroded.
X Remove rust on the ball of the ball coupling,
e.g. with a wire brush.
X Remove dirt with a clean, lint-free cloth or a
brush.
X After cleaning, lightly oil or grease ball cou-
pling 0043.
X Check that the vehicle's trailer tow hitch is
working properly.
i You can also have the maintenance work on
the ball coupling and the trailer tow hitch car-
ried out by a qualified specialist workshop. Interior care
Cleaning the display !
For cleaning, do not use any of the following:
R alcohol-based thinner or gasoline
R abrasive cleaning agents
R commercially-available household cleaning
agents
These may damage the display surface. Do
not put pressure on the display surface when
cleaning. This could lead to irreparable dam-
age to the display.
X Before cleaning the display, make sure that it
is switched off and has cooled down.
X Clean the display surface using a commer-
cially available microfiber cloth and TFT/LCD
display cleaner.
X Dry the display surface using a dry microfiber
cloth. Cleaning the plastic trim G
WARNING
Care products and cleaning agents containing solvents cause surfaces in the cockpit to
become porous. As a result, plastic parts may
come loose in the event of air bag deploy-
ment. There is a risk of injury.
Do not use any care products and cleaning
agents to clean the cockpit.
! Never attach the following to plastic surfa-
ces:
R stickers
R films
R perfume oil container or similar
You could otherwise damage the plastic.
! Do not allow cosmetics, insect repellent or
sunscreen to come into contact with the plas-
tic trim. This maintains the high-quality look of the surfaces.
X Wipe the plastic trim with a damp, lint-free
cloth, e.g. a microfiber cloth.
X Heavy soiling: use care and cleaning prod-
ucts recommended and approved by
Mercedes-Benz.
The surface may change color temporarily.
Wait until the surface is dry again.
Cleaning the steering wheel and gear or selector lever X
Thoroughly wipe with a damp cloth or use
leather care agents that have been recom-
mended and approved by Mercedes-Benz.
Cleaning genuine wood and trim ele-
ments !
Do not use solvent-based cleaning agents
such as tar remover, wheel cleaners, polishes
or waxes. There is otherwise a risk of damag- ing the surface.
! Do not use chrome polish on trim pieces.
The trim pieces have a chrome look but are
mostly made of anodized aluminum and can
lose their shine if chrome polish is used. Use
a damp, lint-free cloth instead when cleaning the trim pieces. 332
CareMaintenance and care
Page 337 of 398
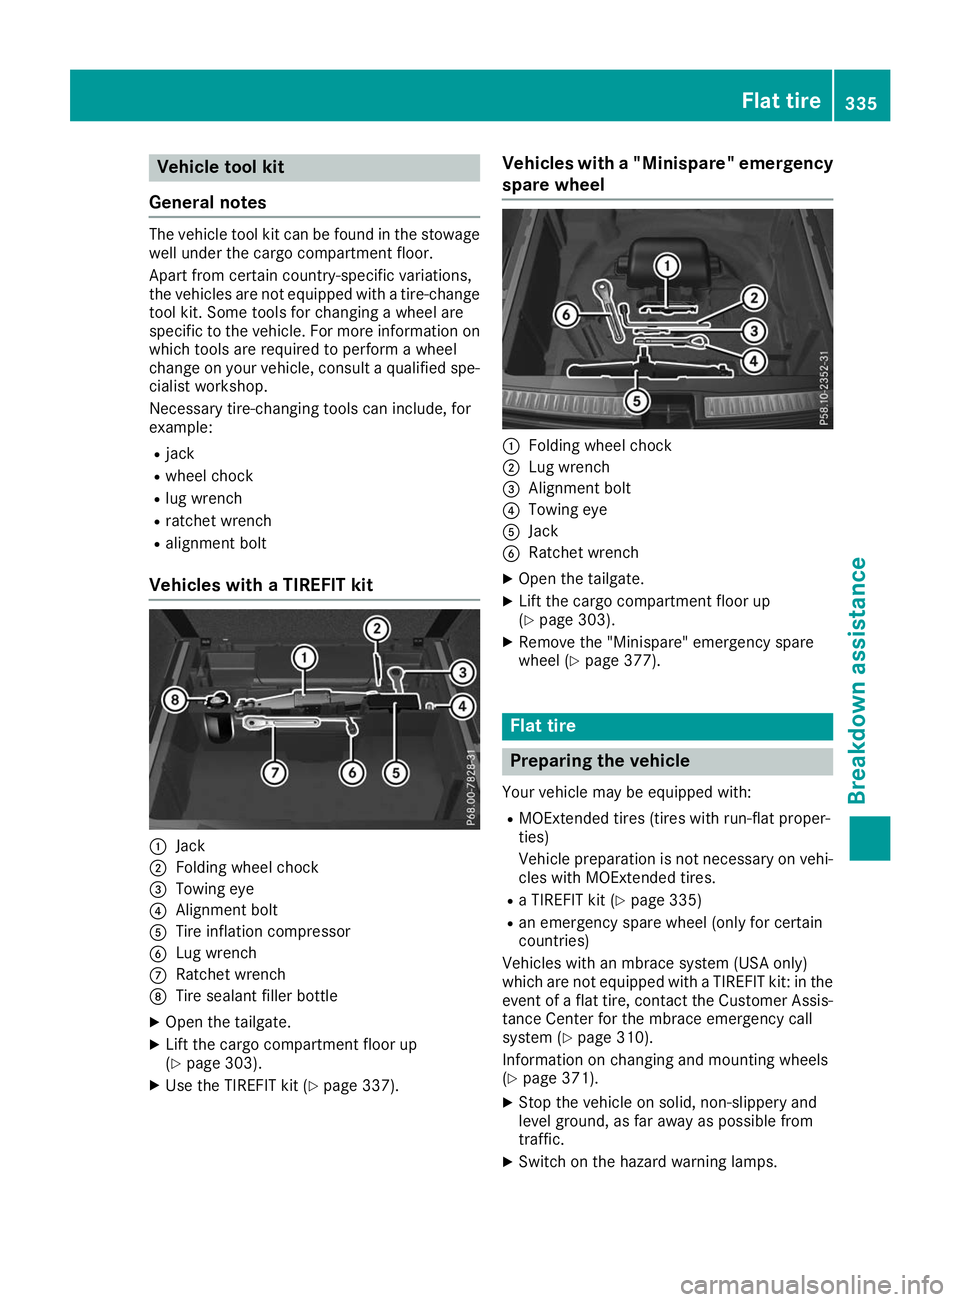
Vehicle tool kit
General notes The vehicle tool kit can be found in the stowage
well under the cargo compartment floor.
Apart from certain country-specific variations,
the vehicles are not equipped with a tire-change
tool kit. Some tools for changing a wheel are
specific to the vehicle. For more information on
which tools are required to perform a wheel
change on your vehicle, consult a qualified spe-
cialist workshop.
Necessary tire-changing tools can include, for
example:
R jack
R wheel chock
R lug wrench
R ratchet wrench
R alignment bolt
Vehicles with a TIREFIT kit 0043
Jack
0044 Folding wheel chock
0087 Towing eye
0085 Alignment bolt
0083 Tire inflation compressor
0084 Lug wrench
006B Ratchet wrench
006C Tire sealant filler bottle
X Open the tailgate.
X Lift the cargo compartment floor up
(Y page 303).
X Use the TIREFIT kit (Y page 337). Vehicles with a "Minispare" emergency
spare wheel 0043
Folding wheel chock
0044 Lug wrench
0087 Alignment bolt
0085 Towing eye
0083 Jack
0084 Ratchet wrench
X Open the tailgate.
X Lift the cargo compartment floor up
(Y page 303).
X Remove the "Minispare" emergency spare
wheel (Y page 377). Flat tire
Preparing the vehicle
Your vehicle may be equipped with: R MOExtended tires (tires with run-flat proper-
ties)
Vehicle preparation is not necessary on vehi-
cles with MOExtended tires.
R a TIREFIT kit (Y page 335)
R an emergency spare wheel (only for certain
countries)
Vehicles with an mbrace system (USA only)
which are not equipped with a TIREFIT kit: in the event of a flat tire, contact the Customer Assis-tance Center for the mbrace emergency call
system (Y page 310).
Information on changing and mounting wheels
(Y page 371).
X Stop the vehicle on solid, non-slippery and
level ground, as far away as possible from
traffic.
X Switch on the hazard warning lamps. Flat tire
335Breakdown assis tance
Page 338 of 398
X
Secure the vehicle against rolling away
(Y page 156).
X If possible, bring the front wheels into the
straight-ahead position.
X Vehicles with the AIRMATIC package:
make sure that the normal vehicle level is
selected (Y page 185).
X Vehicles with the Off-Road Engineering
package:
make sure that the normal vehicle
level is selected (Y page 179).
X Switch off the engine.
X Vehicles without KEYLESS-GO: remove the
SmartKey from the ignition lock.
X Vehicles with KEYLESS-GO: open the driv-
er's door.
The vehicle electronics are now in position
0092. This means no SmartKey is in the ignition
lock.
X Vehicles with KEYLESS-GO: remove the
Start/Stop button from the ignition lock
(Y page 135).
X Make sure that the engine cannot be started
via your smartphone (Y page 137).
X Make sure that the passengers are not endan-
gered as they do so. Make sure that no one is
near the danger area while a wheel is being
changed. Anyone who is not directly assisting
in the wheel change should, for example,
stand behind the barrier.
X Get out of the vehicle. Pay attention to traffic
conditions when doing so.
X Close the driver's door.
X Unload heavy luggage.
i Only operate the tire inflation compressor
using a 12 V socket, even if the ignition is
turned off (Y page 308).
An emergency cut-out ensures that the on-
board voltage does not drop too low. If the on-
board voltage is too low, the power to the
sockets is automatically cut. This ensures
that there is sufficient power to start the
engine. MOExtended tires (tires with run-flat
properties)
General notes With MOExtended tires (tires with run flat char-
acteristics), you can continue to drive your vehi- cle even if there is a total loss of pressure in one
or more tires. The affected tire must not show
any clearly visible damage.
You can recognize a MOExtended tire by the
MOExtended marking which appears on the
sidewall of the tire. You will find this marking
next to the tire size designation, the load-bear-
ing capacity and the speed index (Y page 366).
MOExtended tires may only be used in conjunc-
tion with an active tire pressure loss warning
system or with an active tire pressure monitor.
If a pressure loss warning message appears in the multifunction display:
R observe the instructions in the display mes-
sages (Y page 268).
R check the tire for damage
R if driving on, observe the following notes
The driving distance possible in run-flat mode is approximately 50 miles (80 km) when the vehi-
cle is partially laden and approximately 18 miles
(30 km) when the vehicle is fully laden.
In addition to the vehicle load, the driving dis-
tance possible depends upon:
R Vehicle speed
R Road condition
R Outside temperature
The driving distance possible in run-flat mode
may be reduced by extreme driving conditions
or maneuvers, or it can be increased through a
moderate style of driving.
The driving distance possible in run-flat mode is counted from the moment the tire pressure loss warning appears in the multifunction display.
You must not exceed a maximum permissible
speed of 50 mph (80 km/h).
i When replacing one or all tires, please
observe the following specifications for your
vehicle's tires:
R size
R type and
R the "MOExtended" mark
If a tire has gone flat and cannot be replaced with a MOExtended tire, a standard tire may 336
Flat tireBreakdown assistance
Page 339 of 398
be used as a temporary measure. Make sure
that you use the proper size and type (sum-
mer or winter tire).
i Vehicles equipped with MOExtended tires
are not equipped with a TIREFIT kit at the fac- tory. It is therefore recommended that you
additionally equip your vehicle with a TIREFIT
kit if you mount tires that do not feature run- flat properties, e.g. winter tires. A TIREFIT kit
may be obtained from a qualified specialist
workshop.
Important safety notes G
WARNING
When driving in emergency mode, the driving characteristics deteriorate, e.g. when corner-
ing, accelerating quickly and when braking.
There is a risk of an accident.
Do not exceed the stated maximum speed.
Avoid abrupt steering and driving maneuvers,
and driving over obstacles (curbs, potholes,
off-road). This applies in particular to a laden
vehicle.
Stop driving in emergency mode if:
R you hear banging noises.
R the vehicle starts to shake.
R you see smoke and smell rubber.
R ESP ®
is intervening constantly.
R there are tears in the sidewalls of the tire.
After driving in emergency mode, have the
wheel rims checked at a qualified specialist
workshop with regard to their further use. The defective tire must be replaced in every case. TIREFIT kit
Important safety notes TIREFIT is a tire sealant.
You can use TIREFIT to seal punctures of up to
0.16 in (4 mm), particularly those in the tire
tread. You can use TIREFIT at outside tempera-
tures down to 00F84 ‡ (00F820 †). G
WARNING
In the following situations, the tire sealant is
unable to provide sufficient breakdown assis- tance, as it is unable to seal the tire properly:
R there are cuts or punctures in the tire larger
than those mentioned above.
R the wheel rim is damaged.
R you have driven at very low tire pressures or
on a flat tire.
There is a risk of an accident.
Do not drive the vehicle. Contact a qualified
specialist workshop. G
WARNING
The tire sealant is harmful and causes irrita-
tion. It must not come into contact with your
skin, eyes or clothing or be swallowed. Do not inhale TIREFIT fumes. Keep tire sealant away
from children. There is a risk of injury.
If you come into contact with the tire sealant,
observe the following:
R Rinse off the tire sealant from your skin
immediately with water.
R If the tire sealant comes into contact with
your eyes, immediately rinse them thor-
oughly with clean water.
R If tire sealant is swallowed, immediately
rinse your mouth out thoroughly and drink
plenty of water. Do not induce vomiting,
and seek medical attention immediately.
R Immediately change out of clothing which
has come into contact with tire sealant.
R If an allergic reaction occurs, seek medical
attention immediately.
! Do not operate the tire inflation compressor
for longer than eight minutes at a time without a break. It may otherwise overheat.
The tire inflation compressor can be operatedagain once it has cooled down.
Comply with the manufacturer’s safety instruc-
tions on the sticker on the tire inflation com-
pressor. Flat tire
337Breakdown assistance Z
Page 355 of 398
MOExtended tires (tires with run-flat
properties)
With MOExtended tires (tires with run flat char-
acteristics), you can continue to drive your vehi- cle even if there is a total loss of pressure in one
or more tires.
MOExtended tires may only be used in conjunc-
tion with an active tire pressure loss warning
system or with an active tire pressure monitor
and on wheels specifically tested by Mercedes- Benz.
Notes on driving with MOExtended tires with a
flat tire (Y page 336).
i Vehicles equipped with MOExtended tires
are not equipped with a TIREFIT kit at the fac- tory. It is therefore recommended that you
additionally equip your vehicle with a TIREFIT
kit if you mount tires that do not feature run- flat properties, e.g. winter tires. A TIREFIT kit
may be obtained from a qualified specialist
workshop. Winter operation
General notes
Have your vehicle winter-proofed at a qualified
specialist workshop at the onset of winter.
Observe the notes in the "Changing a wheel"
section (Y page 371). Driving with summer tires
At temperatures below 45 ‡ (+7 †), the elas-
ticity of summer tires and therefore also the
traction and braking capability are reduced con-
siderably. Change the tires on your vehicle to
M+S tires. Using summer tires at very cold tem- peratures could cause cracks to form, thereby
damaging the tires permanently. Mercedes-
Benz cannot accept responsibility for this type
of damage. G
WARNING
Damaged tires can cause tire inflation pres-
sure loss. As a result, you could lose control of your vehicle. There is a risk of accident.
Check the tires regularly for signs of damage
and replace any damaged tires immediately. M+S tires
G
WARNING
M+S tires with a tire tread depth of less than
00CF in (4 mm) are not suitable for use in winter
and do not provide sufficient traction. There is
a risk of an accident.
M+S tires with a tread depth of less than 00CFin
(4 mm) must be replaced immediately.
At temperatures below 45 ‡(+7 †), use winter
tires or all-season tires. Both types of tire are
identified by the M+S marking.
Only winter tires bearing the 004Dsnowflake
symbol in addition to the M+S marking provide
the best possible grip in wintry road conditions.
Only these tires will allow driving safety systems
such as ABS and ESP ®
to function optimally in
winter. These tires have been developed specif-
ically for driving in snow.
Use M+S tires of the same make and tread on all wheels to maintain safe handling characteris-
tics.
Always observe the maximum permissible
speed specified for the M+S tires you have
mounted.
Once the winter tires are mounted:
X Check the tire pressures (Y page 357).
X Restart the tire pressure monitor
(Y page 358).
X Vehicles for Canada: restart the tire pres-
sure loss warning system (Y page 358).
Information about driving with an emergency
spare wheel (Y page 376). Snow chains
G
WARNING
If snow chains are installed to the front
wheels, they may drag against the vehicle
body or chassis components. This could
cause damage to the vehicle or the tires.
There is a risk of an accident. Winter operation
353Wheels and tires
Z