2019 MERCEDES-BENZ GLE COUPE phone
[x] Cancel search: phonePage 479 of 697
The multimedia sy
stem supports thefo llow‐
ing form ats and data media:
Pe rm issible
fi le sy stems FA
T32, exFA T,NTFS
Pe rm issible
data car riers USB devices, iPod
®
/iPhone ®
,
MTP devices, Blue tooth®
audio equipment
Suppor ted
audio form ats MP3, WMA, AAC,
WAV,FLAC,
AL AC
Suppor ted
video form ats MPEG,
AVI, DivX, MKV, MP4,
M4V, WMV %
Obser vethefo llowing no tes:
R The multimedia sy stem supports a total
of up to50,000 files.
R Data storage media up to2 TB are sup‐
por ted (32‑bit address space).
R Due tothe large variet y of available
music and video files rega rding encod‐
ers, sampling rates and data transfer
ra tes, playback cannot be guaranteed. R
Due tothe wide range of USB devices
av ailable on the mar ket, pl ayback cann ot
be guaranteed for all USB devices.
R Videos up toFullHD (1920x1080) are
suppor ted.
R Cop y-pr otected music and video files or
DRM (Digital Rights Management)
enc rypte dfiles cannot be pla yed bac k.
R MP3 pla yers must support Media Trans‐
fe r Pr otocol (MTP).
In fo rm ation on copy right pr otection and
tradema rks
Au dio files which you create yourself (e.g. copies
of data storage media you make yourself) are
ge neral lysubject tocopyright pr otection. In
many count ries, reproductions are not permitted
without the prior consent of the copyright
holder, evenfo r private use. Make sure that you
know about the applicable copyright regulations
and that you co mply wi th th ese. Manufactured under licence from Dolby Labora‐
to
ries. Dolb y,Dol byAudio and the double-D sym‐
bol are trademar ksof Dolby Laboratories. 476
MBUX multimedia sy stem
Page 483 of 697
#
Select an audio device.
Auth orisation starts. A code is displa yed on
th e multimedia sy stem and on the mobile
phone. #
Ifth e codes are identical, confi rmonthe
audio equipment. #
Select Only as Bluetooth audio device .
The Blue tooth®
audio equipment is connec‐
te d with the multimedia sy stem.
Connecting pr eviously authorised Blue tooth ®
audio equipment #
Select a Blue tooth®
audio device from the
list.
The connection is es tablished. St
arting media playback Re
quirements:
R A data storage medium is connected tothe
multimedia sy stem. Multimedia sy
stem:
4 © 5
Media #
Select USBorBluetooth asthe media
source. Controlling media playback
Multimedia sy
stem:
4 © 5
Media #
Topause playback: select8. #
Tocontinue playba ck:select 6. #
Torepeat a track: select:.
Fo rth ere peat function there are thefo llow‐
ing settings:
R Select once: the active pla ylist is repea‐
te d.
R Select twice: the cur rent track is repea‐
te d.
R Select three times: there peat function
is deactivated. #
Toplay back trac ksinrandom order:
select 9. #
Towind a track forw ards or backwards:
ta p on the desired point on the timeline. #
Toselect the next track: selectü. #
Toselect the pr evious track: selectû. #
Toscroll through trac ksquickl y:press and
hold û orü. #
Toshow the cur rent track lis t:select the
track image shown. Ad
ditional options for setting media play‐
back Multimedia sy
stem:
4 © 5
Media
Calling up additional options #
Select ß.
The additional options are shown.
The following options are available:
R Surprise mix
A playlist with randomly selected trac ksis
created.
R Add to favourite songs 480
MBUX multimedia sy stem
Page 491 of 697
Ad
justing the fader #
Movethevo lume distribution between the
front and rear of theve hicle in the grid
shown.
The volume is distributed between the speak‐
ers in the front and rear of theve hicle.
Selecting a sound profile in the Bu rmester ®
sur round sound sy stem
Multimedia sy stem:
4 © 5
Media 5
Z 5
Burmester
5 Sound profiles
The following profiles are available:
R Pure
R Surround #
Select a sound profile. Ad
justing the sound focus in the Bu rmester ®
sur round sound sy stem
Multimedia sy stem:
4 © 5
Media 5
Z 5
Burmester
5 Sound focus #
Select a position forth e sound focus or All
seats. Re
ar Seat Entertainment Sy stem Operating saf
ety &
WARNING Risk of inju ryfrom unsecu red
items in theve hicle
If objects such as headphones/headsets or
ex tern al audio/video sources are not
secured in theve hicle interior, they can be
fl ung around and hit vehicle occupants. #
Alw aysstow these items or similar
objects carefully so that they cannot be
fl ung around, forex ample in a loc kable
ve hicle stowage compartment. Obse
rveth e no tes on loading theve hicle. Re
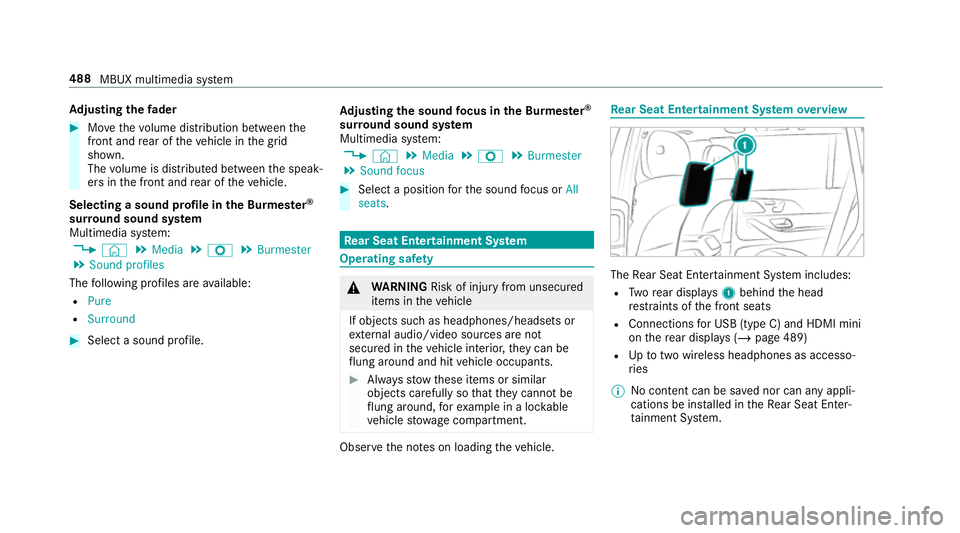
ar Seat Entertainment Sy stem overview The
Rear Seat En tertainment Sy stem includes:
R Twore ar displa ys1 behind the head
re stra ints of the front seats
R Connections for USB (type C) and HDMI mini
on there ar displa ys (/page 489)
R Uptotwo wi reless headphones as accesso‐
ri es
% No conte nt can be sa ved nor can any appli‐
cations be ins talled in theRe ar Seat En ter‐
ta inment Sy stem. 488
MBUX multimedia sy stem
Page 492 of 697
Re
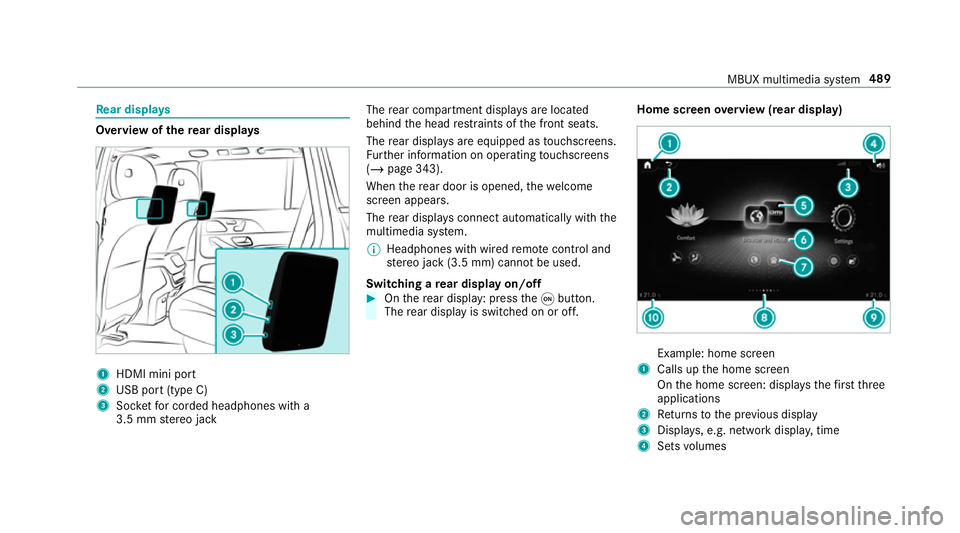
ar displa ys Overview of
there ar displa ys 1
HDMI mini port
2 USB port (type C)
3 Socketfo r corded headphones with a
3.5 mm stereo jack The
rear compartment displa ysare located
behind the head restra ints of the front seats.
The rear displa ysare equipped as touchsc reens.
Fu rther information on operating touchsc reens
(/ page 343).
When there ar door is opened, thewe lcome
screen appears.
The rear displa ysconnect au tomatical lywith the
multimedia sy stem.
% Headphones with wired remo tecontrol and
st ereo jack (3.5 mm) cann otbe used.
Switching a rear display on/off #
Onthere ar display: press theq button.
The rear display is swit ched on or off. Home screen
overview (rear display) Example: home screen
1 Calls up the home screen
On the home screen: displa ys thefirs tth ree
applications
2 Returns tothe pr evious display
3 Displa ys, e.g. network displa y,time
4 Sets volumes MBUX multimedia sy
stem 489
Page 493 of 697
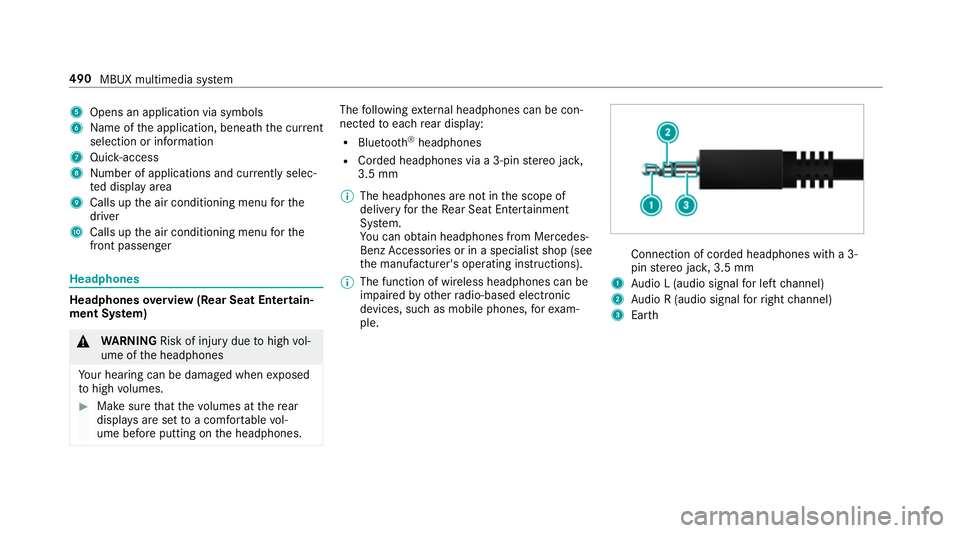
5
Opens an application via symbols
6 Name of the application, beneath the cur rent
selection or information
7 Quick-access
8 Number of applications and cur rently selec‐
te d display area
9 Calls up the air conditioning menu forthe
driver
A Calls up the air conditioning menu forthe
front passenger Headphones
Headphones
overview (Rear Seat Entertain‐
ment Sy stem) &
WARNING Risk of inju rydue tohigh vol‐
ume of the headphones
Yo ur hearing can be damaged when exposed
to high volumes. #
Make sure that thevo lumes at there ar
displa ysare set toa com fortable vol‐
ume before putting on the headphones. The
following extern al headphones can be con‐
nec tedto each rear display:
R Blue tooth ®
headphones
R Corded headphones via a 3-pin stereo jac k,
3.5 mm
% The headphones are not in the scope of
delivery forth eRe ar Seat En tertainment
Sy stem.
Yo u can obtain headphones from Mercedes-
Benz Accessories or in a speciali stshop (see
th e manufacturer's operating instructions).
% The function of wireless headphones can be
impaired by otherradio-based elect ronic
devices, su chas mobile phones, forex am‐
ple. Connection of corded headphones with a 3-
pin
stereo jac k,3.5 mm
1 Audio L (audio signal for left channel)
2 Audio R (audio signal forright channel)
3 Earth 490
MBUX multimedia sy stem
Page 496 of 697
Ac
tivating multi-coloured animation #
Activate Multi-colour animat..
The chosen colour programme will change at
predefined inter vals.
Ad justing the brightness #
Select Brightness . #
Toactivate brightness for zones: switch
Brightness zones on or off.
If Brightness zones is switched on,the zones
can be set individually. #
Set the zones.
Setting the colour ef fects #
Select Effects. #
Swit chWelcome orClimate on or off.
% Further information on theto pic of setting
ambiance light (/ page155). Se
tting the language in the rear passenger
comp artment Re
ar Seat En tertainment Sy stem:
4 © 5
Settings 5
System
5 Language #
Set the language. Selecting sy
stem settings in there ar com‐
partment Re
ar Seat En tertainment Sy stem:
4 © 5
Settings 5
System
Ad justing the brightness #
Select Display. #
Adjust the brightness.
Connecting a device in the device manager #
Select Device Manager. #
Select a device that is tobe connec ted.
Headphones and headsets are connec ted
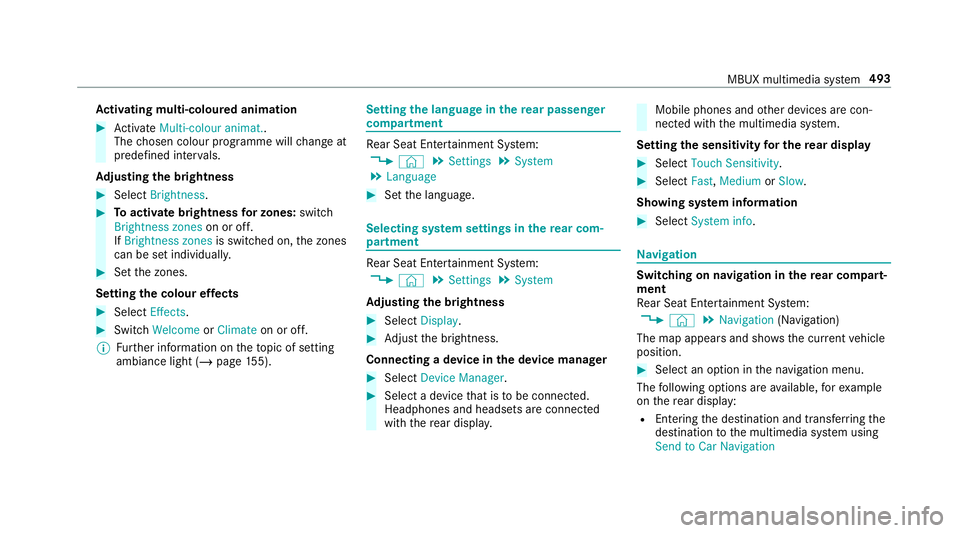
with there ar displa y. Mobile phones and
other devices are con‐
nected with the multimedia sy stem.
Setting the sensitivity for the rear display #
Select Touch Sensitivity. #
Select Fast,Medium orSlow.
Showing sy stem information #
Select System info. Na
vigation Switching on navigation in
there ar comp art‐
ment
Re ar Seat En tertainment Sy stem:
4 © 5
Navigation (Navigation)
The map appears and sho ws the current vehicle
position. #
Select an option in the navigation menu.
The following options are available, forex ample
on there ar display:
R Entering the destination and transfer ring the
destination tothe multimedia sy stem using
Send to Car Navigation MBUX multimedia sy
stem 493
Page 523 of 697
#
Unscr ew thefilling hose from theva lve of the
defective tyre. &
WARNING Risk of accident from driving
wi th sealed tyres
A tyre temp orarily sealed with tyre sealant
impairs driving characteristics and is not
suitable for higher speeds. #
Adapt your driving style according lyand
drive carefull y. #
Do not exceed the maximum speed
limit with a tyre that has been repaired
using tyre sealant. #
Obser vethe maximum permissible speed for
a tyre sealed with tyre sealant 80 km/h. #
Affix th e upper section of the TIREFIT sticker
to the instrument clus ter in a location where
it will be easi lyseen bythe driver.
* NO
TEStaining from leaking tyre sealant Af
ter use, excess tyre sealant may leak out
from thefilling hose. #
Therefore, place thefilling hose in the
plastic bag that con tained the TIREFIT
kit. +
ENVIRONMEN
TALNO TEEnvironmental
pollution caused byenvironmen tally ir re‐
sponsible disposal Ty
re sealant contains polluta nts. #
Have the tyre sealant bottle disposed of
professionall y,e.g. at a Mercedes-Benz
Service Centre. #
Stow th e tyre sealant bottle, the tyre inflation
compressor and thewa rning triangle. #
Pull away immediatel y. #
Stop driving af ter appro ximately ten minu tes
and check the tyre pressure using the tyre
inflation compressor.
The tyre pressure must now be at least
13 0 kPa (1.3 bar/19 psi). &
WARNING Risk of accident due tothe
specified tyre pressure not being ach‐
ie ved
If th e specified tyre pressure is not achie ved
af te r a brief drive, the tyre is too badly dam‐
aged. The tyre sealant cannot repair the tyre
in this ins tance.
Dama ged tyres and a tyre pressure that is
to o low can significantly impair braking and
handling characteristics. #
Do not drive on. #
Consult a qualified specialist workshop. Countries
that ha veMercedes-Benz
Service24h: you will find a sticke r with thete le‐
phone number, e.g. on the B‑pillar on the driver's
side. #
Toincrease the ty repressure: switch on
th e tyre inflation compressor. 520
Breakdown assis tance
Page 563 of 697
Fr
equency band and maximum transmission
output Fr
equency band Maximum transmis‐
sion output
Sho rtwa ve
3 - 54 MHz 10
0 W
4 m frequency band
74 - 88 MHz 30 W
2 m frequency band
14 4 - 174 MHz 50 W
Tr unked radio sys‐
te m/T etra
380 - 460 MHz 10 W
70 cm frequency
band
420 - 450 MHz 35 W
Tw o-w ayradio
(2G/3G/4G) 10 W The
following can be used in theve hicle without
re strictions:
R two-w ayradios with a maximum transmission
output of up to100 mW
R RF transmitters with transmitter frequencies
in the 380 - 410 MHz frequency band and a
maximum transmission output of up to2 W
(trunked radio sy stem/T etra)
R mobile phones (2G/3G/4G)
There are no restrictions when positioning the
aerial on the outside of theve hicle for some
wa vebands.
This applies tothefo llowing wavebands:
R trunked radio sy stem/T etra
R 70 cm frequency band
R 2G/3G/4G Ve
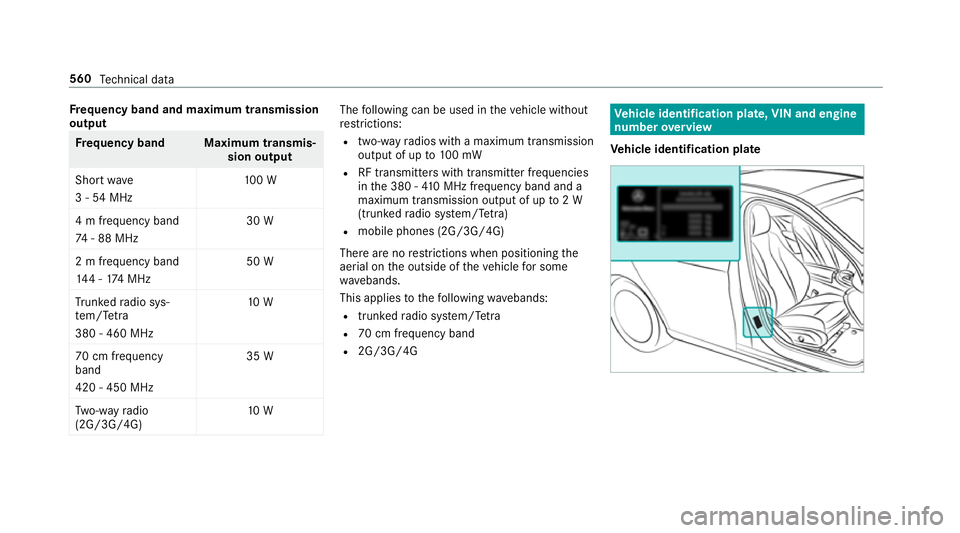
hicle identification plate, VIN and engine
number overview
Ve hicle identification plate 560
Tech nical da ta