2019 MERCEDES-BENZ GLC SUV rims
[x] Cancel search: rimsPage 120 of 673
&
WARNING Risk of inju ryfrom inade‐
qu ate stow age of objects
If yo u do not adequately stowobjects in the
ve hicle interior, they could slip or be tossed
around and thereby strike vehicle occupants.
In addition, cup holders, open stowage
spaces and mobile phone brac kets cann ot
alw aysre stra in the objects they contain in
th eev ent of an accident.
There is a risk of injur y,particularly in the
ev ent of sudden braking or a sudden change
in direction. #
Alw aysstow objects in such a wayth at
th ey cannot be tossed around in these
or similar situations. #
Alw ays make sure that objects do not
project from stowage spaces, luggage
nets or stowage nets. #
Close all sealable stowage spaces
before youstart your journe y. #
Stow and secure objects that are heavy,
hard, poin ted, sharp-edged, fragile or
to o lar geinthe load compartment. &
WARNING Risk of bu rning from theta il‐
pipe or tailpipe trim
The tailpipe and tailpipe trim can become
ve ry hot. If you come into contact with these
car parts, you could burn yourself. #
Alw ays be particular lycareful when in
th e vicinity of theta ilpipe and tailpipe
trims and supervise children very
closely when in this area. #
Before any con tact, allow the car parts
to cool down. The driving
characteristics of your vehicle are
dependent on the distribution of the load within
th eve hicle. You should bear thefo llowing in
mind when loading theve hicle:
R neverex ceed the permissible gross mass or
th e permissible axle loads forth eve hicle
(including occupants).
Information can be found on theve hicle iden‐
tification plate (/ page 539).
R the load must not pr otru de abo vethe upper
edge of the seat backrests. R
always use the partition net when transport‐
ing objects in the load compartment.
R always place the load behind unoccupied
seats if possible.
R secure the load using the tie-down eyes and
distribute the load evenl y. St
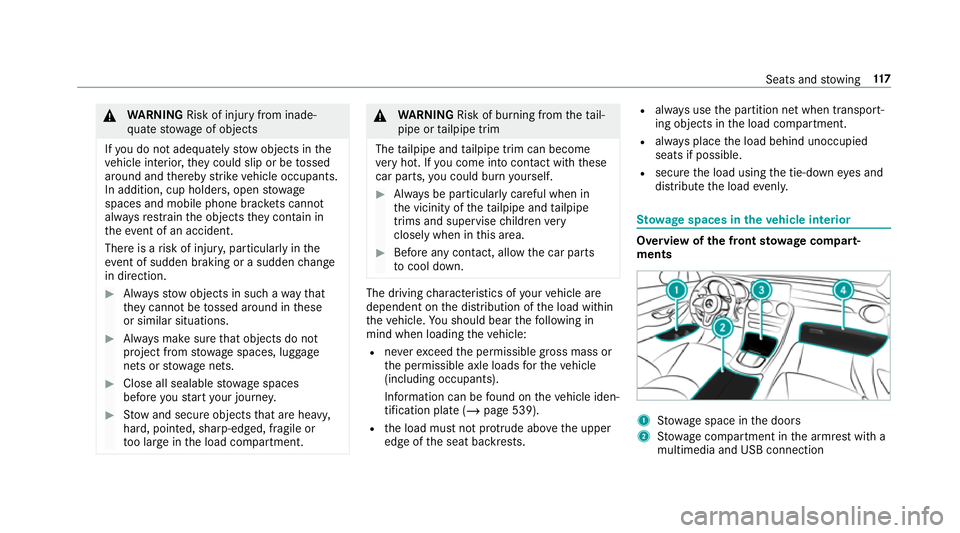
ow age spaces in theve hicle interior Overview of
the front stowage compa rt‐
ments 1
Stow age space in the doors
2 Stow age compartment in the armrest with a
multimedia and USB connection Seats and
stowing 117
Page 132 of 673
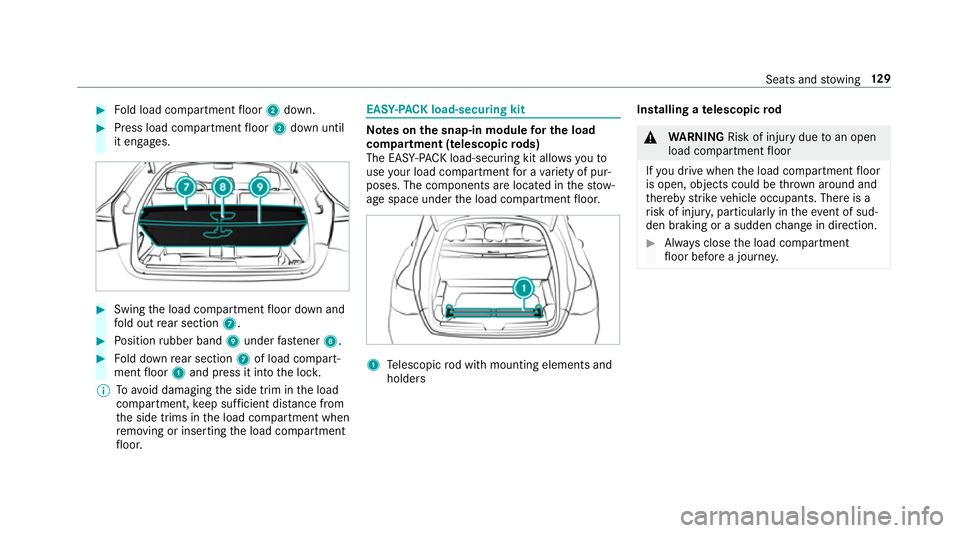
#
Fold load compartment floor 2down. #
Press load compartment floor 2down until
it engages. #
Swing the load compartment floor down and
fo ld out rear section 7. #
Position rubber band 9under fastener 8. #
Fold down rear section 7of load compart‐
ment floor 1and press it into the loc k.
% Toavo id damaging the side trim in the load
compartment, keep suf ficient di stance from
th e side trims in the load compartment when
re moving or inserting the load compartment
fl oor. EAS
Y-PA CK load-securing kit Note
s onthe snap-in module for the load
co mp artment (telescopic rods)
The EAS Y-PA CK load-securing kit allo wsyouto
use your load co mpartment for a variet y of pur‐
poses. The co mponents are located in thestow‐
age space under the load compartment floor. 1
Telescopic rod with mounting elements and
holders Installing a
telescopic rod &
WARNING Risk of inju rydue toan open
load compartment floor
If yo u drive when the load compartment floor
is open, objects could be thro wn around and
th ereby strike vehicle occupants. There is a
ri sk of injur y,particular lyin theeve nt of sud‐
den braking or a sudden change in direction. #
Alw ays close the load compartment
fl oor before a journe y. Seats and
stowing 12 9
Page 492 of 673
Note
s on care of car parts &
WARNING Risk of entrapment if the
windscreen wipers are swit ched on while
th e windscreen is being cleaned
If th e windscreen wipers are set in motion
while you are cleaning the windscreen or
wiper blades, you can be trapped bythe
wiper arm. #
Alw ays switch off the windscreen wip‐
ers and the ignition before cleaning the
windscreen or wiper blades. &
WARNING Risk of bu rning from theta il‐
pipe or tailpipe trim
The tailpipe and tailpipe trim can become
ve ry hot. If you come into contact with these
car parts, you could burn yourself. #
Alw ays be particular lycareful when in
th e vicinity of theta ilpipe and tailpipe
trims and supervise children very
closely when in this area. #
Before any con tact, allow the car parts
to cool down. Obser
vethefo llowing information: Note
s on cleaning and car eA voiding vehicle damage
Wheels/rims Usewate r and acid-free wheel cleaners. R
Do not use acidic wheel cleaners toremo vebrake dust.
This could damage wheel bolts and brake components.
R Toavoid cor rosion of the brake discs and brakepads, drive
th eve hicle for a few minutes af ter cleaning before parking
it. The brake discs and brakepads warm up and dry out.
Wi ndo ws
Cleanthe windo wsonthe inside and outside using a damp
clo thand cleaning agents recommended byMercedes-Benz. Do not use dry clo
ths or abrasive or sol vent-based cleaning
agents toclean the inside of windo ws.
Wi per blades
Fold out the wiper blades and clean them using a damp clo th.D o not clean the wiper blades too of ten. Maintenance and care
489
Page 499 of 673
In
theeve nt of a flat tyre, thefo llowing options
are available depending on your vehicle's equip‐
ment:
R Vehicles with MOExtended tyres: it is pos‐
sible tocontinue the journey for a short
period of time. Make sure you obse rvethe
no tes on MOExtended tyres (run-flat tyres)
(/ page 496).
R Vehicles with a TIREFIT kit: you can repair
th e tyre so that it is possible tocontinue the
jou rney for a short period of time. Todo this,
use the TIREFIT kit (/ page 497).
R Vehicles with Mercedes me connect: you
can make a call for breakdown assi stance via
th eove rhead control panel in the case of a
breakdown (/ page 434).
R Allvehicles: change the wheel
(/ page 530).
% The emer gency spa rewheel is only available
in cer tain countries. Note
s on MOExtended tyres (run-flat tyres) &
WARNING Risk of accident when driving
in eme rgency mode
When driving in emer gency mode, the han‐
dling characteristics are impaired. e.g. when
cornering, when accelerating stronglyand
when braking. #
Do not exceed the permissible maxi‐
mum speed. #
Avoid any abrupt steering and driving
maneuvers as well as driving over
obs tacles (curbs, pot holes, off-road).
This applies, in pa rticular, toa loaded
ve hicle. #
Stop driving in the emer gency mode if
yo u notice:
R banging noise
R vehicle vibration
R smoke which smells like rubber
R continuous ESP ®
inter vention
R crac ksin tire side walls #
After driving in emergency mode ha ve
th erims checkedby aqu alified special‐
ist workshop with rega rd totheir fur ther
use. #
The defective tire must be replaced in
eve rycase. Wi
th MOExtended tyres (run-flat tyres), you can
continue todrive your vehicle even if there is a
tot al loss of pressure in one or more tyres. How‐
eve r,th e tyre af fected must not show any clearly
visible damage.
Yo u can recognise MOExtended tyres bythe
MOExtended marking which appears onthe side
wa ll of the tyre.
Ve hicles with tyre pressure loss warning sys‐
te m: MOExtended tyres may only be used in
conjunction wi than activated tyre pressure loss
wa rning sy stem.
Ve hicles with tyre pressure monitoring sys‐
te m: MOExtended tyres may only be used in
conjunction wi than activated tyre pressure mon‐
itoring sy stem. 496
Breakdown assis tance
Page 519 of 673
Note
s on noise or unusual handling charac‐
te rist ics
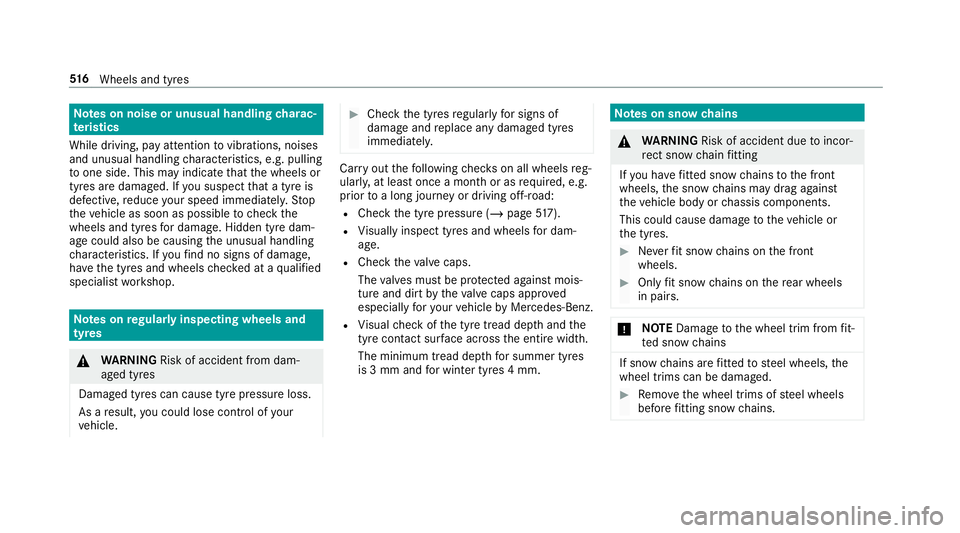
While driving, pay attention tovibrations, noises
and unusual handling characteristics, e.g. pulling
to one side. This may indicate that the wheels or
tyres are damaged. If you suspect that a tyre is
defective, reduce your speed immediatel y.Stop
th eve hicle as soon as possible tocheck the
wheels and tyres for dama ge. Hidden tyre dam‐
age could also be causing the unusual handling
ch aracteristics. If youfind no signs of damage,
ha ve the tyres and wheels checked at a qualified
specialist workshop. Note
s onregular lyinspecting wheels and
tyres &
WARNING Risk of accident from dam‐
aged tyres
Dama ged tyres can cause tyre pressure loss.
As a result, you could lose cont rol of your
ve hicle. #
Check the tyres regularly for signs of
dama geand replace any damaged tyres
immediatel y. Car
ryout thefo llowing checks on all wheels reg‐
ularly, at least once a month or as requ ired, e.g.
prior toa long journey or driving off- road:
R Check the tyre pressure (/ page517).
R Visually inspect tyres and wheels for dam‐
age.
R Check theva lve caps.
The valves must be pr otected against mois‐
ture and dirt bytheva lve caps appr oved
especially foryo ur vehicle byMercedes-Benz.
R Visual check of the tyre tread dep thand the
tyre contact su rface across the entire width.
The minimum tread dep thfor summer tyres
is 3 mm and for winter tyres 4 mm. Note
s on snow chains &
WARNING Risk of accident due toincor‐
re ct snow chain fitting
If yo u ha vefitted snow chains tothe front
wheels, the snow chains may drag against
th eve hicle body or chassis components.
This could cause damage totheve hicle or
th e tyres. #
Neverfit snow chains on the front
wheels. #
Only fit snow chains on there ar wheels
in pairs. *
NO
TEDama getothe wheel trim from fit‐
te d snow chains If sn
ow ch ains are fitted tosteel wheels, the
wheel trims can be damaged. #
Remo vethe wheel trims of steel wheels
before fitting snow chains. 516
Wheels and tyres
Page 633 of 673
Car
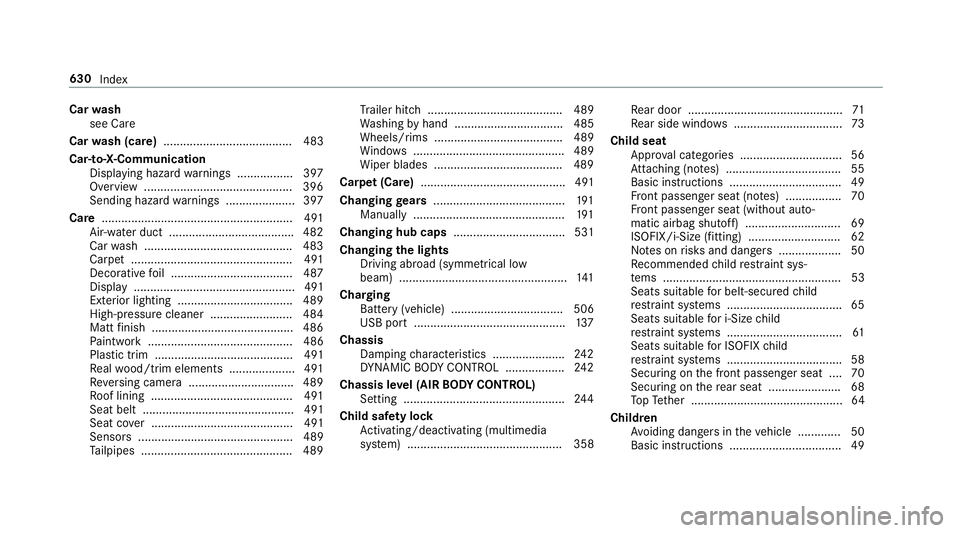
wash
see Care
Car wash (care) ....................................... 483
Car-to-X-Communication Displaying hazard warnings ................ .397
Overview ............................................. 396
Sending hazard warnings .................... .397
Care .......................................................... 491
Air-water duct ...................................... 482
Car wash ............................................. 483
Carpet .................................................4 91
Deco rative foil .................................... .487
Displ ay................................................. 491
Exterior lighting ................................... 489
High-pressure cleaner ......................... 484
Matt finish ........................................... 486
Pa int wo rk ............................................ 486
Plastic trim .......................................... 491
Re alwo od/trim elements .................... 491
Re versing camera ................................ 489
Ro of lining ...........................................4 91
Seat belt .............................................. 491
Seat co ver ........................................... 491
Sensors ............................................... 489
Ta ilpipes .............................................. 489 Tr
ailer hit ch......................................... 489
Wa shing byhand ................................. 485
Wheels/rims ....................................... 489
Wi ndo ws .............................................. 489
Wi per blades .......................................4 89
Carpet (Care) ............................................ 491
Changing gears ........................................ 191
Manually ..............................................1 91
Changing hub caps .................................. 531
Changing the lights
Driving abroad (symm etrical low
beam) ................................................... 141
Cha rging
Bat tery (vehicle) .................................. 506
USB port .............................................. 137
Chassis Damping characteristics ...................... 24 2
DY NA MIC BODY CONTROL .................. 24 2
Chassis le vel (AIR BODY CONT ROL)
Setting ................................................ .244
Child saf ety lock
Ac tivating/deactivating (multimedia
sy stem) ............................................... 358 Re
ar door .............................................. .71
Re ar side wind ows................................. 73
Child seat App rova l categories .............................. .56
At tach ing (no tes) ................................... 55
Basic instructions ..................................49
Fr ont passenger seat (no tes) ................. 70
Fr ont passenger seat (without auto‐
matic airbag shutoff) ............................. 69
ISOFIX/i-Size (fitting) ............................62
No tes on risks and dangers ...................50
Re commended child restra int sys‐
te ms ...................................................... 53
Seats suita blefor belt-secu redch ild
re stra int sy stems ................................... 65
Seats suitable for i‑Size child
re stra int sy stems ................................... 61
Seats suitable for ISOFIX child
re stra int sy stems ................................... 58
Securing on the front passenger seat ....70
Secu ring on there ar seat ...................... 68
To pTe ther ..............................................64
Child ren
Av oiding dangers in theve hicle .............50
Basic instructions .................................. 49 630
Index
Page 658 of 673
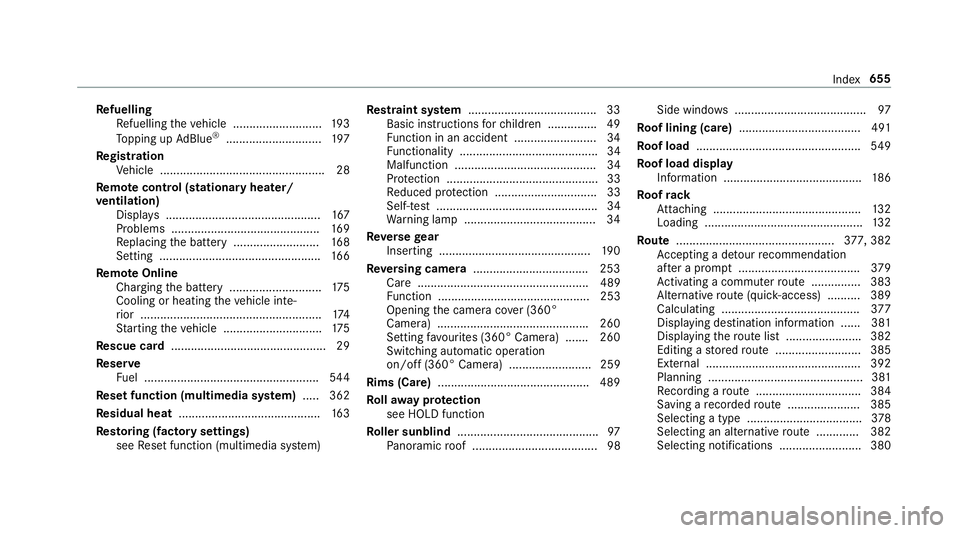
Re
fuelling
Re fuelling theve hicle ........................... 19 3
To pping up AdBlue ®
............................. 197
Re gistration
Ve hicle .................................................. 28
Re mo tecont rol (stationa ryheater/
ve ntilation)
Displa ys............................................... 167
Problems ............................................. 16 9
Re placing the battery .......................... 16 8
Setting ................................................. 16 6
Re mo teOnline
Charging the battery ............................1 75
Cooling or heating theve hicle inte‐
ri or .......................................................1 74
St arting theve hicle .............................. 175
Re scue card ............................................... 29
Re ser ve
Fu el ..................................................... 544
Re set function (multimedia sy stem) .....3 62
Re sidual heat ...........................................1 63
Re sto ring (factory settings)
see Reset function (multimedia sy stem) Re
stra int sy stem ...................................... .33
Basic instructions forch ildren .............. .49
Fu nction in an accident ......................... 34
Fu nctionality .......................................... 34
Malfunction ........................................... 34
Pr otection ..............................................33
Re duced pr otection ...............................33
Self-test ................................................. 34
Wa rning lamp ........................................ 34
Re versege ar
Inserting .............................................. 19 0
Re versing camera .................................. .253
Care .................................................... 489
Fu nction .............................................. 253
Opening the camera co ver (360°
Camera) ............................................. .260
Setting favo urites (360° Camera) ...... .260
Switching auto matic operation
on/off (360° Camera) ......................... 259
Rims (Care) ............................................. .489
Ro llaw ay protection
see HOLD function
Ro ller sunblind .......................................... .97
Pa noramic roof ...................................... 98 Side windo
ws........................................ 97
Ro of lining (care) .................................... .491
Ro of load .................................................. 549
Ro of load display
In fo rm ation .......................................... 186
Ro ofrack
At tach ing ............................................ .132
Loading ................................................ 13 2
Ro ute ................................................ 377, 382
Ac cepting a de tour recommendation
af te r a prom pt..................................... 379
Ac tivating a commuter route .............. .383
Alternative route (quic k-access) .......... 389
Calculating .......................................... 377
Displ aying destination information ...... 381
Displaying thero ute list ...................... .382
Editing a stored route .......................... 385
Ex tern al .............................................. .392
Planning ............................................... 381
Re cording a route ................................ 384
Saving a recorded route ...................... 385
Selecting a type .................................. .378
Selecting an al tern ative route ............ .382
Selecting notifications ......................... 380 Index
655