Page 99 of 673
#
Make sure that nobody reaches into the
sweep of the sliding sunroof whilst the
ve hicle is in motion. #
If somebody becomes trapped, briefly
push the sliding sunroof button for‐
wa rds or backwards.
The sliding sunroof lifts during opening. Problems with
the sliding sunroof %
The term "sliding sun roof" also refers to the
panorama sliding sunroof. Problem
Possible causes/consequences and M
MSolutions
The sliding sunroof cann otbe closed
and you cannot see the cause. &
WARNING Risk of becoming trapped or fata l injury byclosing the sliding sunroof again
If yo u close the sliding sunroof again immediately af ter it has been bloc ked or reset, the sliding sunroof
closes with increased forc e.
Pa rts of the body could become trapped in the closing area in the process. #
Make sure that no parts of the body are in the closing area. #
Release the button immediately if somebody becomes trapped.
or #
Press the button in any direction during the automatic closing process.
The closing process is stopped. If
th e sliding sunroof is obstructed during closing and reopens again slightly: 96
Opening and closing
Page 102 of 673
st
op automatic operation bypushing or pulling
th e button again.
Au tomatic reve rsing function of thero ller
sunblind
If an object is obstructing thero ller sunblind dur‐
ing the closing process, thero ller sunblind will
open again automaticall y.The automatic reve rs‐
ing function is only an aid and is not a substitute
fo ryo ur attentiveness. #
When closing thero ller sunblind, make sure
th at no body parts are in thera nge of mo ve‐
ment. &
WARNING Risk of becoming trapped
despi tereve rsing function
In particular, there ve rsing function does not
re act tosoft, light and thin objects, e.g. fin‐
ge rs.
This means that there ve rsing function can‐
not pr event entrapment in these situations. #
When closing thero ller sunblind, make
sure that no body parts are in thera nge
of mo vement. #
Release the button immediately if
somebody becomes trapped.
or #
Press the button in any direction during
th e automatic closing process.
The closing process is stopped. Ad
justing the roller sunblind for the panor‐
amic roof Re
quirements:
R The po wer supply is switched on.
If th ero ller sunblind cannot be mo ved smoo thly,
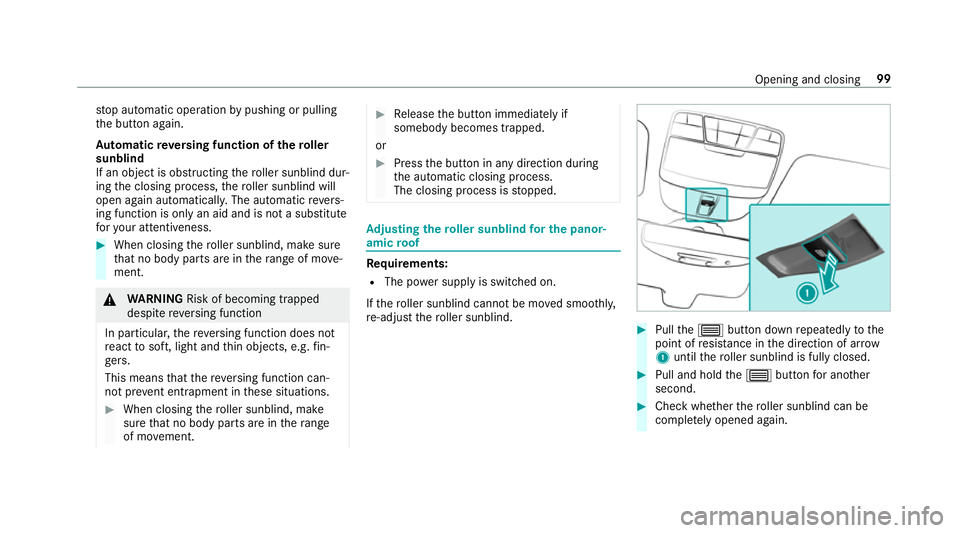
re -adjust thero ller sunblind. #
Pull the3 button down repeatedly tothe
point of resis tance in the direction of ar row
1 until thero ller sunblind is fully closed. #
Pull and hold the3 button for ano ther
second. #
Check whe ther thero ller sunblind can be
comple tely opened again. Opening and closing
99
Page 106 of 673
Note
s onthe cor rect driver's seat position &
WARNING Risk of inju rythro ugh adjust‐
ing vehicle settings while theve hicle is in
motion
Yo u could lose cont rol of theve hicle in the
fo llowing situations:
R ifyo u adjust the driver's seat, the head
re stra ints, thesteering wheel or the mir‐
ro r while theve hicle is in motion
R ifyo ufast enyour seat belt while theve hi‐
cle is in motion #
Before starting the engine: adjust the
driver's seat, the head restra ints, the
st eering wheel or the mir ror and fasten
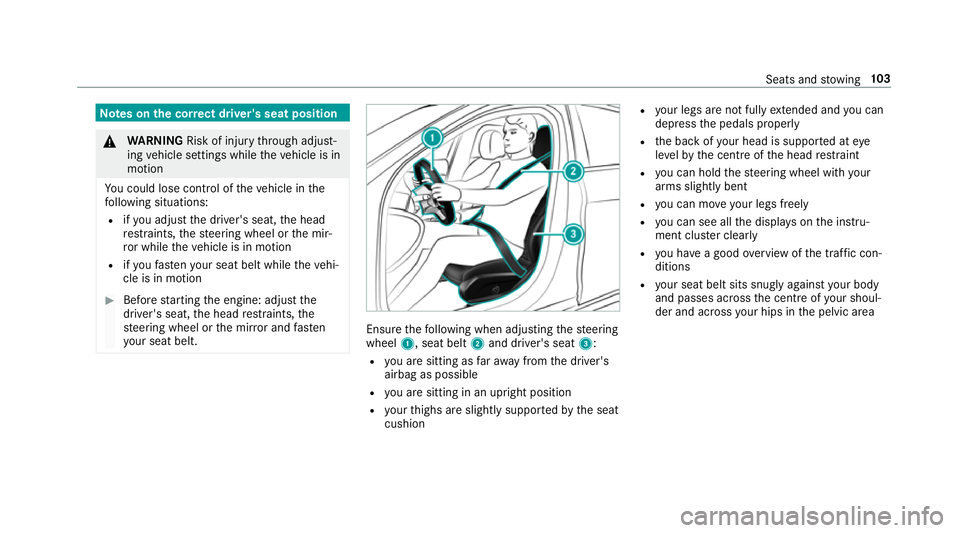
yo ur seat belt. Ensure
thefo llowing when adjusting thesteering
wheel 1, seat belt 2and driver's seat 3:
R you are sitting as faraw ay from the driver's
airbag as possible
R you are sitting in an upright position
R your thighs are slight lysuppor tedby the seat
cushion R
your legs are not fully extended and you can
depress the pedals properly
R the back of your head is suppo rted at eye
le ve lby the cent reofthe head restra int
R you can hold thesteering wheel with your
arms slightly bent
R you can mo veyour legs freely
R you can see all the displa yson the instru‐
ment clus ter clea rly
R you ha vea good overview of the traf fic con‐
ditions
R your seat belt sits snug lyagainst your body
and passes across the cent reofyour shoul‐
der and across your hips in the pelvic area Seats and
stowing 103
Page 112 of 673
Fi
tting/ removing the rear seat head
re stra ints
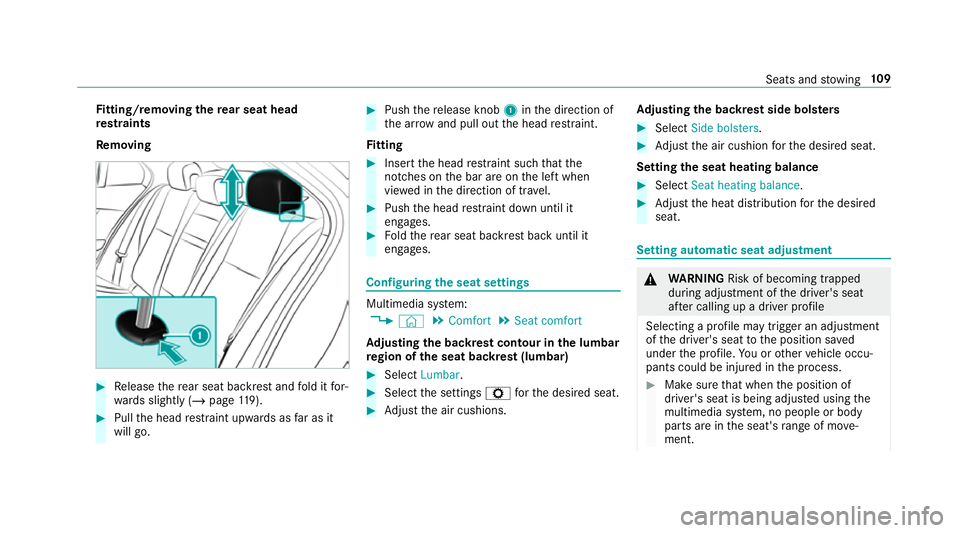
Re moving #
Release there ar seat backrest and fold it for‐
wa rds slightly (/ page119). #
Pull the head restra int upwards as far as it
will go. #
Push there lease knob 1inthe direction of
th e ar row and pull out the head restra int.
Fi tting #
Inse rtthe head restra int such that the
notches on the bar are on the left when
vie we d in the direction of tra vel. #
Push the head restra int down until it
engages. #
Foldthere ar seat backrest back until it
engages. Configuring
the seat settings Multimedia sy
stem:
4 © 5
Comfort 5
Seat comfort
Ad justing the backrest contour in the lumbar
re gion of the seat backrest (lumbar) #
Select Lumbar . #
Select the settings Zforth e desired seat. #
Adjust the air cushions. Ad
justing the backrest side bols ters #
Select Side bolsters . #
Adjust the air cushion forth e desired seat.
Setting the seat heating balance #
Select Seat heating balance. #
Adjust the heat distribution forth e desired
seat. Setting automatic seat adjustment
&
WARNING Risk of becoming trapped
du ring adjustment of the driver's seat
af te r calling up a driver profile
Selecting a profile may trigger an adju stment
of the driver's seat tothe position sa ved
under the profile. You or other vehicle occu‐
pants could be injured in the process. #
Make sure that when the position of
driver's seat is being adjus ted using the
multimedia sy stem, no people or body
parts are in the seat's range of mo ve‐
ment. Seats and
stowing 109
Page 122 of 673
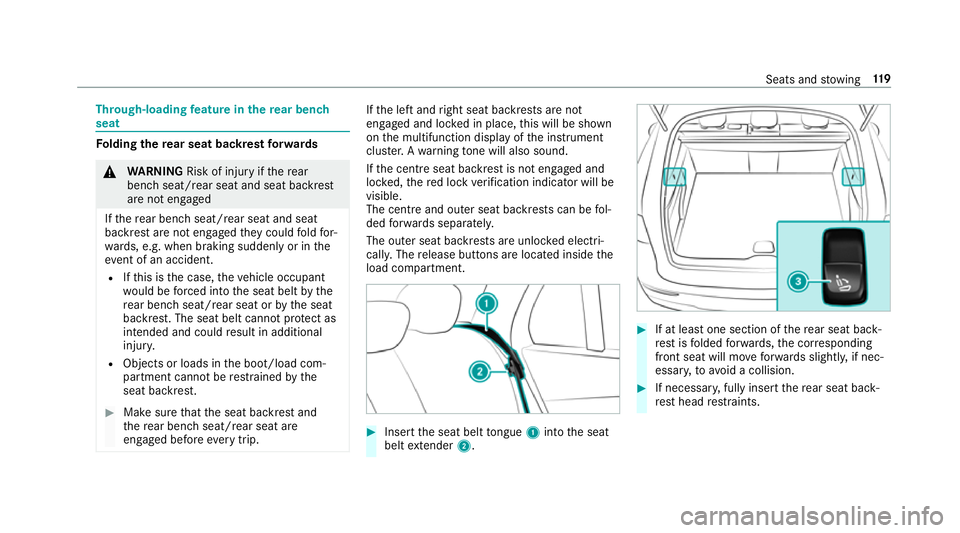
Through-loading
feature in there ar ben ch
seat Fo
lding there ar seat backrest forw ards &
WARNING Risk of inju ryifth ere ar
ben chseat/rear seat and seat backrest
are not engaged
If th ere ar ben chseat/rear seat and seat
backrest are not engaged they could fold for‐
wa rds, e.g. when braking suddenly or in the
ev ent of an accident.
R Ifth is is the case, theve hicle occupant
wo uld be forc ed into the seat belt bythe
re ar ben chseat/rear seat or bythe seat
backrest. The seat belt cann otprotect as
intended and could result in additional
injur y.
R Objects or loads in the boot/load com‐
partment cann otbe restra ined bythe
seat backrest. #
Make sure that the seat backrest and
th ere ar ben chseat/rear seat are
engaged before everytrip. If
th e left and right seat backrests are not
engaged and loc ked in place, this will be shown
on the multifunction display of the instrument
clus ter.A wa rning tone will also sound.
If th e cent reseat backrest is not engaged and
loc ked, there d lock verification indicator will be
visible.
The centre and ou ter seat backrests can be fol‐
ded forw ards separatel y.
The outer seat backrests are unloc ked elect ri‐
cally. The release buttons are located inside the
load compartment. #
Insert the seat belt tongue 1into the seat
belt extender 2. #
If at least one section of there ar seat back‐
re st isfolded forw ards, the cor responding
front seat will mo veforw ards slightl y,if nec‐
essar y,to avoid a collision. #
If necessar y,fully insert there ar seat back‐
re st head restra ints. Seats and
stowing 11 9
Page 129 of 673
#
Toremo ve: pull the belt clamp 5upwards
until the lashing stra ps are loose. #
Remo vethe hooks 3from the tie-down
ey es 4 onthe left and right. #
Remo vethe guide rod1 from the holders
2. #
Tosto w:press there d buttons on thetop
and bottom guide rods. #
Collapse and roll up the partition net. Overview of
the tie-down eyes Obser
vethe no tes on loading theve hicle
(/ page 116). 1
Tie-down eyes Overview of bag hooks
&
WARNING Risk of inju rywhen using bag
hooks with heavy objects
The bag hooks cannot restra in heavy objects
or items of luggage. Objects or items of luggage could be
thrown
around and thereby hit vehicle occupants
when braking or abruptly changing direc‐
tions. #
Onlyhang light objects on the bag
hooks. #
Never hang hard, sharp-edged or fragile
objects on the bag hooks. Obser
vethe no tes on loading theve hicle
(/ page 116).
The bag hooks can bear a maximum load of
3 kg . Do not use them tosecure a load. 12 6
Seats and stowing
Page 130 of 673
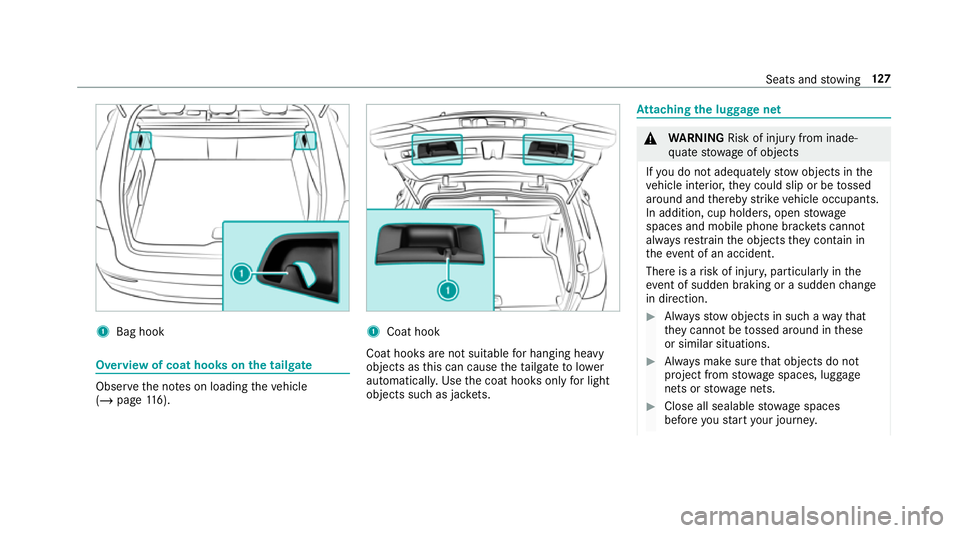
1
Bag hook Overview of coat hoo
kson the tailgate Obser
vethe no tes on loading theve hicle
(/ page 116). 1
Coat hook
Coat hoo ksare not suitable for hanging heavy
objects as this can cause theta ilgate tolower
automaticall y.Use the coat hooks only for light
objects such as jac kets. At
taching the luggage net &
WARNING Risk of inju ryfrom inade‐
qu ate stow age of objects
If yo u do not adequately stowobjects in the
ve hicle interior, they could slip or be tossed
around and thereby strike vehicle occupants.
In addition, cup holders, open stowage
spaces and mobile phone brac kets cann ot
alw aysre stra in the objects they contain in
th eev ent of an accident.
There is a risk of injur y,particularly in the
ev ent of sudden braking or a sudden change
in direction. #
Alw aysstow objects in such a wayth at
th ey cannot be tossed around in these
or similar situations. #
Alw ays make sure that objects do not
project from stowage spaces, luggage
nets or stowage nets. #
Close all sealable stowage spaces
before youstart your journe y. Seats and
stowing 127
Page 138 of 673
#
Toopen: fold the lid 1upwards.
% Twist theto p part of the ashtray toremo veit
fo r cleaning, e.g. with clean, luk ewarmwate r,
or for em ptying. Using
the cigar ette lighter in the front centre
console &
WARNING ‑ Risk of fire and injury from
th e hot cigar ette lighter
Yo u can burn yourself if youto uch the hot
heating element or the soc ket of the ciga‐
re tte lighter.
In addition, flammable materials may ignite
if:
R you drop the hot cigar ette lighter
R ach ild holds the hot cigar ette lighter to
objects, forex ample #
Alw ays hold the cigar ette lighter bythe
knob. #
Alw ays make sure that the cigar ette
lighter is out of reach of children. #
Never lea vechildren unat tended in the
ve hicle. Re
quirements:
R The ignition is switched on. #
Press in cigar ette lighter 1.
The cigar ette lighter will pop out automati‐
cally when the heating element is red-hot. Using
the cigar ette lighter in there ar com‐
partment Re
quirements:
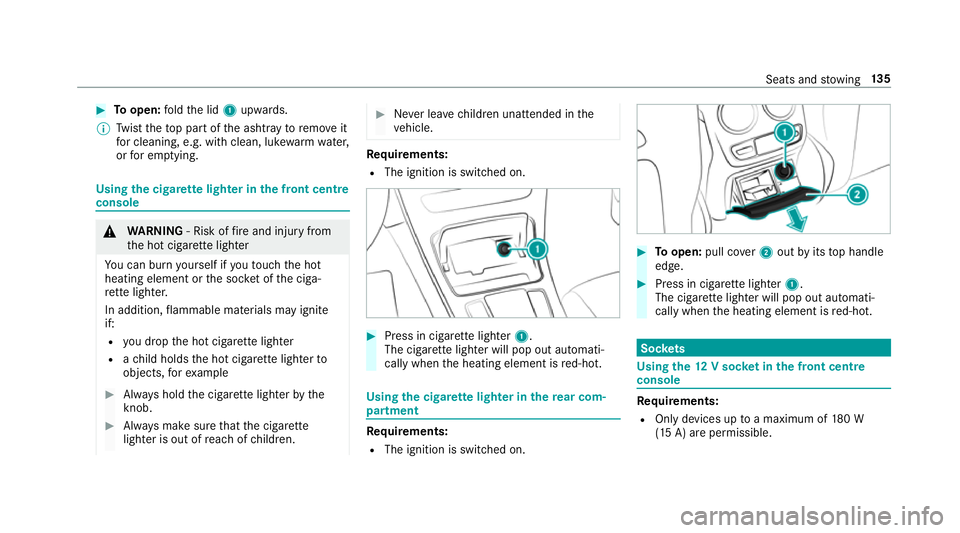
R The ignition is switched on. #
Toopen: pull co ver2 out byits top handle
edge. #
Press in cigar ette lighter 1.
The cigar ette lighter will pop out automati‐
cally when the heating element is red-hot. Soc
kets Using the
12V so cket inthe front centre
console Re
quirements:
R Only devices up toa maximum of 180 W
(15 A) are permissible. Seats and
stowing 13 5