2019 MERCEDES-BENZ GLC SUV air condition
[x] Cancel search: air conditionPage 164 of 673
%
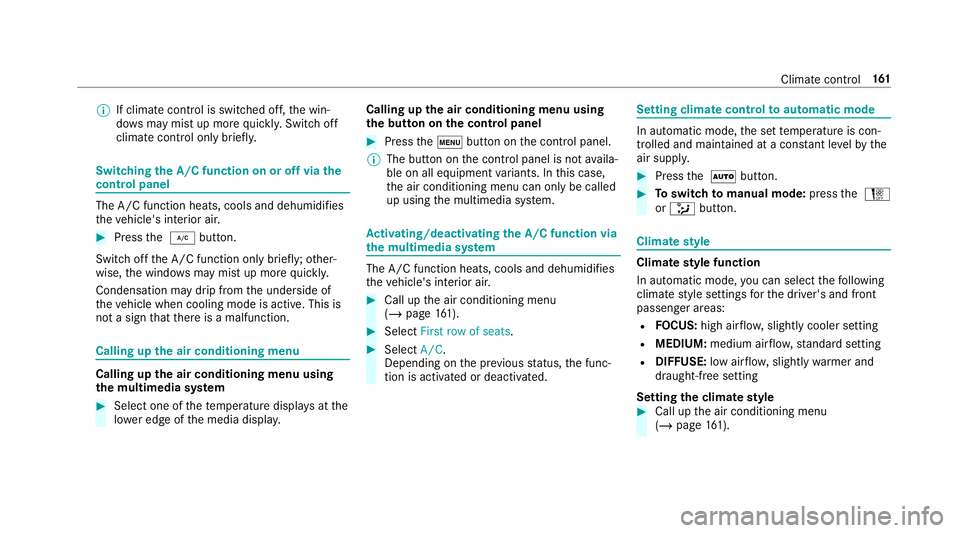
If climate control is switched off, the win‐
do ws may mist up more quickl y.Switch off
climate control only brie fly. Switching
the A/C function on or off via the
cont rol panel The A/C function heats, cools and dehumidifies
th
eve hicle's interior air. #
Press the ¿ button.
Switch off the A/C function only brief ly;ot her‐
wise, the windo wsmay mist up more quickl y.
Condensation may drip from the underside of
th eve hicle when cooling mode is active. This is
not a sign that there is a malfunction. Calling up
the air conditioning menu Calling up
the air conditioning menu using
th e multimedia sy stem #
Select one of thete mp erature displa ysatthe
lo we r edge of the media displa y. Calling up
the air conditioning menu using
th e but ton on the control panel #
Press thet button on the control panel.
% The button on the control panel is not availa‐
ble on all equipment variants. In this case,
th e air conditioning menu can only be called
up using the multimedia sy stem. Ac
tivating/deactivating the A/C function via
the multimedia sy stem The A/C function heats, cools and dehumidifies
th
eve hicle's interior air. #
Call up the air conditioning menu
(/ page 161). #
Select First row of seats . #
Select A/C.
Depending on the pr evious status, the func‐
tion is activated or deactivated. Setting climate control
toautomatic mode In auto
matic mode, the set temp erature is con‐
trolled and maintained at a const ant levelby the
air suppl y. #
Press the à button. #
Toswitch tomanual mode: pressthe H
or _ button. Climate
style Climate
style function
In automatic mode, you can select thefo llowing
climate style settings forth e driver's and front
passenger areas:
R FOCUS: high air flow , slightly cooler setting
R MEDIUM: medium air flow ,st andard setting
R DIFFUSE: low airflow , slightly warmer and
draught-f ree setting
Setting the clima testyle #
Call up the air conditioning menu
(/ page 161). Clima
tecontrol 161
Page 165 of 673
#
Select First row of seats orSecond row of
seats. #
Call up theCLIMATE MODE menu.#
Select a climate style. Overview of
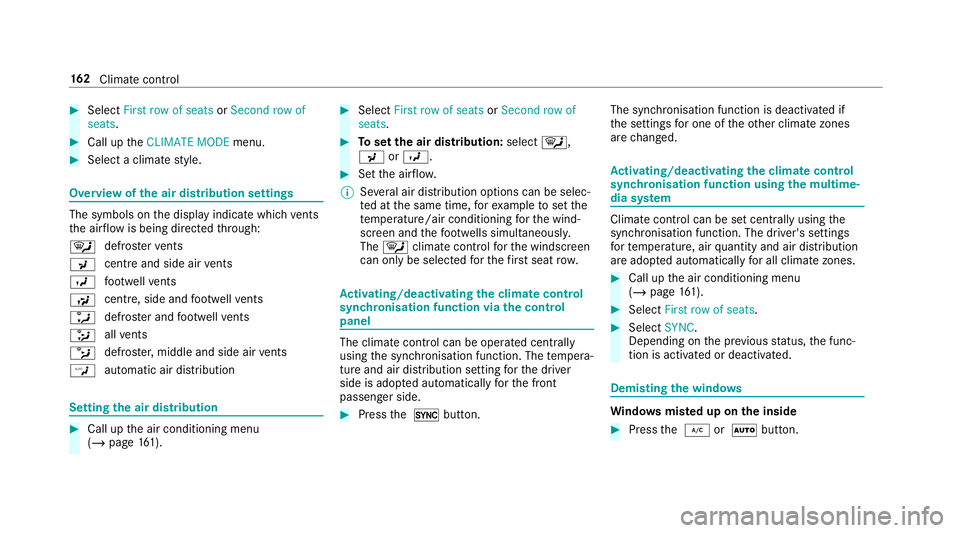
the air distribution settings The symbols on
the display indicate which vents
th e air flow is being directed thro ugh:
¯ def
rost ervents
P centre and side air
vents
O fo
ot we llve nts
S centre, side and
foot we llve nts
a defros
ter and foot we llve nts
_ all
vents
b defros
ter,middle and side air vents
W au
tomatic air distribution Setting
the air distribution #
Call up the air conditioning menu
(/ page 161). #
Select First row of seats orSecond row of
seats. #
Toset the air distribution: select¯,
P orO. #
Set the air flow.
% Several air distribution options can be selec‐
te d at the same time, forex ample toset the
te mp erature/air conditioning forth e wind‐
screen and thefo ot we lls simultaneousl y.
The ¯ climate contro lfo rth e windscreen
can only be selected forth efirs t seat row. Ac
tivating/deactivating the climate control
syn chro nisation function via the control
panel The climate control can be operated centrally
using
the synchronisation function. The temp era‐
ture and air distribution setting forth e driver
side is adop ted automatically forth e front
passenger side. #
Press the 0 button. The synchronisation function is deactivated if
th
e settings for one of theot her climate zones
are changed. Ac
tivating/deactivating the climate control
syn chro nisation function using the multime‐
dia sy stem Climate control can be set centrally using
the
synchronisation function. The driver's settings
fo rte mp erature, air quantity and air distribution
are adop ted automatically for all clima tezones. #
Call up the air conditioning menu
(/ page 161). #
Select First row of seats . #
Select SYNC.
Depending on the pr evious status, the func‐
tion is activated or deactivated. Demisting
the windo ws Wi
ndo wsmis ted up on the inside #
Press the ¿ orà button. 16 2
Climate cont rol
Page 166 of 673
#
Ifth e windo wscontinue tomist up: press the
¬ button.
Wi ndo wsmis ted up on the outside #
Switch on the windscreen wipers. #
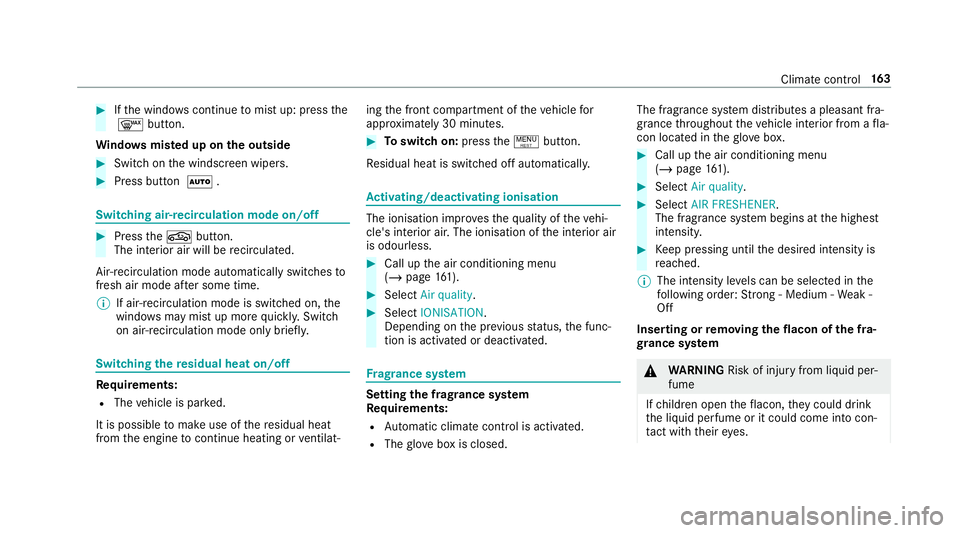
Press button Ã. Switching air-recirculation mode on/off
#
Press theg button.
The interior air will be recirculated.
Air-reci rculation mode automatically swit ches to
fresh air mode af ter some time.
% If air-recirculation mode is switched on, the
windo wsmay mist up more quickl y.Switch
on ai r-re circulation mode only brie fly. Switching
there sidual heat on/off Re
quirements:
R The vehicle is par ked.
It is possible tomake use of there sidual heat
from the engine tocontinue heating or ventilat‐ ing
the front compartment of theve hicle for
appr oximately 30 minutes. #
Toswitch on: pressthe! button.
Re sidual heat is switched off automaticall y. Ac
tivating/deactivating ionisation The ionisation impr
oves thequ ality of theve hi‐
cle's interior air. The ionisation of the interior air
is odourless. #
Call up the air conditioning menu
(/ page 161). #
Select Air quality. #
Select IONISATION .
Depending on the pr evious status, the func‐
tion is activated or deactivated. Fr
ag rance sy stem Setting
the frag rance sy stem
Re quirements:
R Automatic clima tecontrol is acti vated.
R The glove box is closed. The fragrance sy
stem distributes a pleasant fra‐
grance thro ughout theve hicle interior from a fla‐
con located in theglov e box. #
Call up the air conditioning menu
(/ page 161). #
Select Air quality. #
Select AIR FRESHENER .
The frag rance sy stem begins at the highest
intensit y. #
Keep pressing until the desired intensity is
re ached.
% The intensity le vels can be selec ted in the
fo llowing order: Strong - Medium - Weak -
Off
Inserting or removing the flacon ofthe fra‐
gr ance sy stem &
WARNING Risk of inju ryfrom liquid per‐
fume
If ch ildren open theflacon, they could drink
th e liquid perfume or it could come into con‐
ta ct wi th theireyes. Climate control
16 3
Page 169 of 673
#
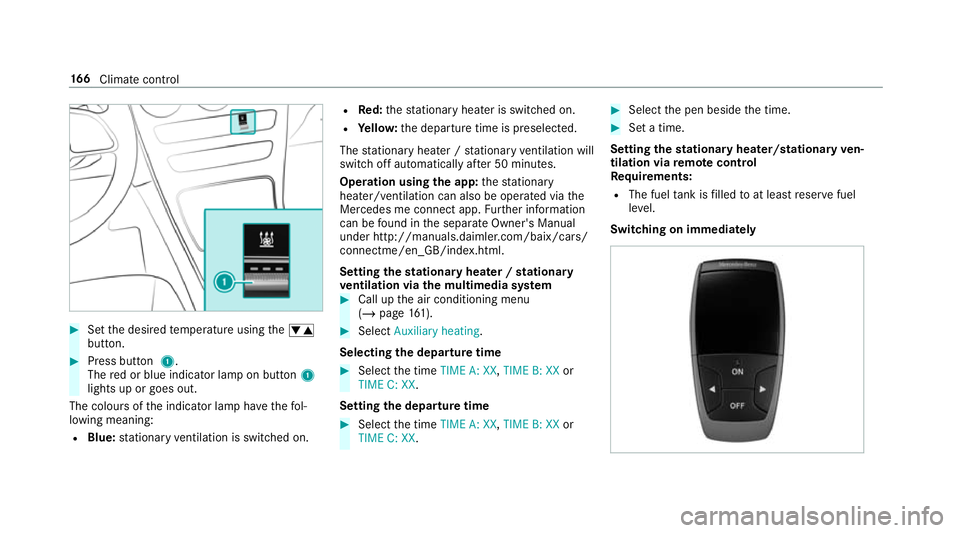
Set the desired temp erature using thew
button. #
Press button 1.
The red or blue indicator lamp on button 1
lights up or goes out.
The colours of the indicator lamp ha vethefo l‐
lowing meaning:
R Blue: stationary ventilation is switched on. R
Red:thest ationary heater is swit ched on.
R Yello w: the departure time is preselected.
The stationary heater / stationary ventilation will
switch off au tomatical lyafte r 50 minutes.
Operation using the app: thest ationary
heater/ ventilation can also be operated via the
Mercedes me connect app. Further information
can be found in the separate Owner's Manual
under http://manuals.daimler.com/baix/cars/
connectme/en_GB/index.html.
Setting thest ationary heater / stationary
ve ntilation via the multimedia sy stem #
Call up the air conditioning menu
(/ page 161). #
Select Auxiliary heating.
Selecting the departure time #
Select the time TIME A: XX, TIME B: XXor
TIME C: XX.
Setting the departu retime #
Select the time TIME A: XX, TIME B: XXor
TIME C: XX. #
Select the pen beside the time. #
Set a time.
Setting thest ationary heater/stationary ven‐
tilation via remo tecont rol
Re quirements:
R The fuel tank is filled toat least reser vefuel
le ve l.
Switching on immedia tely 16 6
Climate cont rol
Page 177 of 673
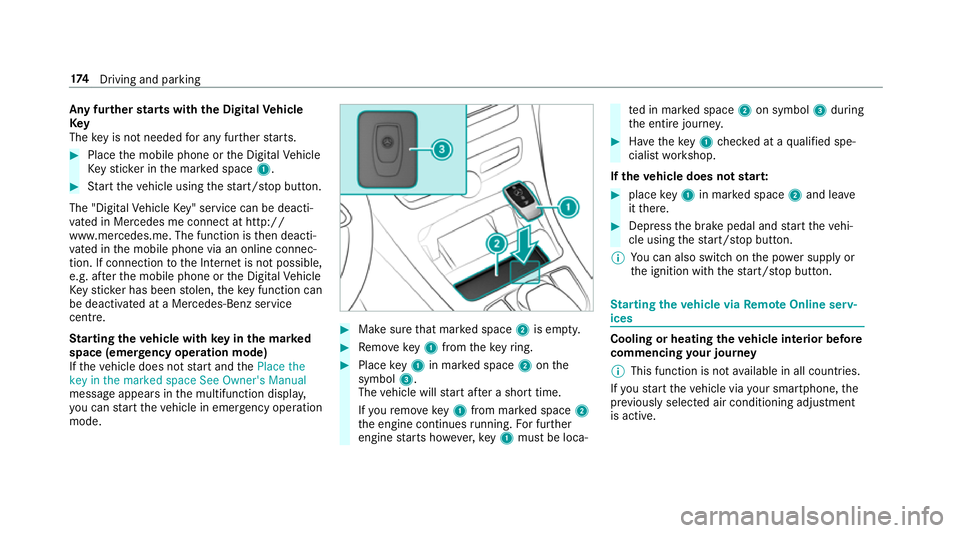
Any fu
rther starts with th e DigitalVehicle
Key
The key is not needed for any fur ther starts. #
Place the mobile phone or the Digital Vehicle
Ke yst icke r in the mar ked space 1. #
Start theve hicle using thest art/ stop button.
The "Digital Vehicle Key" service can be deacti‐
va ted in Mercedes me connect at http://
www.mercedes.me. The function is then deacti‐
va ted in the mobile phone via an online connec‐
tion. If connection tothe Internet is not possible,
e.g. af terth e mobile phone or the Digital Vehicle
Ke yst icke r has been stolen, theke y function can
be deacti vated at a Mercedes-Benz service
centre.
St arting theve hicle with key in the ma rked
space (emer gency operation mode)
If th eve hicle does not start and thePlace the
key in the marked space See Owner's Manual
message appears in the multifunction displa y,
yo u can start theve hicle in emer gency operation
mode. #
Makesure that mar ked space 2is em pty. #
Remo vekey1 from theke yring. #
Place key1 in mar ked space 2onthe
symbol 3.
The vehicle will start af ter a short time.
If yo ure mo vekey1 from mar ked space 2
th e engine continues running. For fur ther
engine starts ho wever,ke y1 must be loca‐ te
d in mar ked space 2on symbol 3during
th e entire journe y. #
Have theke y1 checked at a qualified spe‐
cialist workshop.
If th eve hicle does not star t: #
place key1 in mar ked space 2and lea ve
it th ere. #
Depress the brake pedal and start theve hi‐
cle using thest art/ stop button.
% You can also swit chon the po wer supp lyor
th e ignition with thest art/ stop button. St
arting theve hicle via Remo teOnline serv‐
ices Cooling or heating
theve hicle interior before
commencing your journey
% This function is not available in all countries.
If yo ustart theve hicle via your smartphone, the
pr ev iously selec ted air conditioning adjustment
is active. 174
Driving and pa rking
Page 189 of 673
ECO Assi
stis only an aid. The driver is responsi‐
ble forke eping a safe dis tance totheve hicle in
front, forve hicle speed and for braking in good
time. The driver must be ready tobrake at all
times ir respective of whe ther the sy stem inter‐
ve nes.
The sy stem may be impaired or may not function
in thefo llowing situations:
R If visibility is poor (e.g. due toinsuf ficient illu‐
mination of thero ad, high lyvariable shade
conditions, rain, sno w,fog or heavy spr ay).
R Ifth ere is glare (e.g. from oncoming traf fic,
di re ct sunlight or reflections).
R Ifth ere is dirt on the windscreen in the vicin‐
ity of the multifunction camera or the camera
is mis ted up, damaged or obscured.
R If tra ffic signs are hard todiscern (e.g. due to
dirt, snow or insuf ficient lighting, or because
th ey are obscured).
R Ifth e information on the navigation sy stem's
digital map is incor rect or out of da te.
R Ifth e signs are ambiguous (e.g. traf fic signs
in roadwor ksor in adjacent lanes). Displaying ECO Assist
On-board computer:
4 Assistance DY
NA MIC SELECT switch Fu
nction of theDY NA MIC SELECT switch Plug-in
hybrid: obser vethe no tes in the Supple‐
ment. Otherwise, you may failto recognise dan‐
ge rs.
Mercedes-AMG vehicles: observeth e no tes in
th e Supplement. Otherwise, you may failto rec‐
ognise dangers.
Use theDY NA MIC SELECT switch tochange
between thefo llowing drive programs:
= (Individual) : individual settings
B (Sport +): particularly sporty driving style
C (Sport): sporty driving style
A (Comfort): comfortable and economical
driving style
; (Eco):particularly economical driving
st yle Ve
hicles with Off-road pac kage:
F Offroad: driving on less demanding off-
ro ad terrain
G (Offroad +): driving on dif ficult off-road
te rrain
% The drive prog ram selected appears in the
multifunction display of the on-board com‐
puter.
Depending on the drive prog ram, thefo llowing
sy stems change their characteristics:
R drive
-
engine and transmission management
- Active Dis tance Assi stDISTRONIC
R ESP ®
R vehicles with AIR BODY CONT ROL or
DY NA MIC BODY CONT ROL:suspension
R electric po werst eering Note
s onthero of load display Cer
tain drive programs and ESP ®
settings are
unsuitable for transporting a roof load. 18 6
Driving and pa rking
Page 219 of 673
Fu
nction of ESP ®
trailer stabilisation &
WARNING Risk of accident in poor road
and weather conditions
In poor road and weather conditions, the
trailer stabilisation cannot pr event lu rching of
th eve hicle/trailer combination. Trailers with
a high centre of gr avity may tip over before
ESP ®
de tects this. #
Alw ays adapt your driving style to suit
th e cur rent road and weather condi‐
tions. When driving with a trailer, ESP
®
can stabilise
yo ur vehicle if the trailer begins toswer vefrom
side toside:
R ESP ®
trailer stabilisation is active abo ve
speeds of 65 km/h.
R Slight swerving is reduced bymeans of a tar‐
ge ted, individual brake application on one
side. R
Intheeve nt of se vere swerving, the engine
output is also reduced and all wheels are
braked.
ESP ®
trailer stabilisation may be impaired or
may not function if:
R The trailer is not connec ted cor rectly or is
not de tected prope rly by theve hicle. Fu
nction of EBD (Electronic Brake forc e Dis‐
tribution) EBD is
characterised bythefo llowing:
R Monitoring and regulating the brake pressure
on there ar wheels.
R Impr oved driving stability when braking,
especially on bends. Fu
nction of STEER CONT ROL ST
EER CONTROL helps youby transmitting a
noticeable steering forc eto thesteering wheel in
th e direction requ ired forve hicle stabilisation. This
steering recommendation is given pa rticu‐
larly in thefo llowing situations:
R both right wheels or bo thleft wheels are on a
we t or slippe ryroad sur face when you brake
R theve hicle starts toskid
Sy stem limits
ST EER CONTROL may be impaired or may not
function in thefo llowing situations:
R ESP ®
is deactivated.
R ESP ®
is malfunctioning.
R The steering is malfunctioning.
If ESP ®
is malfunctioning, you will be assis ted
fur ther by the electric po werst eering. Fu
nction of Active Brake Assi st Ac
tive Brake Assi stconsi sts of thefo llowing
functions:
R Distance warning function
R Autonomous braking function
R Situation-dependent braking assi stance 216
Driving and pa rking
Page 224 of 673
R
Activation byan abrupt steering mo vement
during a swerving manoeuvre.
R Assis tance du ring swerving and stra ightening
of theve hicle.
R Reaction from a speed of appr oximately
20 km/h up toa speed of appr oximately
70 km/h.
Yo u can pr eventthe assis tance at any time by
actively steering. &
WARNING Risk of an accident despi te
Evasive Steering Assist
Evasive Steering Assist cann otalw ays clearly
identify objects and complex traf fic situa‐
tions.
In addition, thesteering support of Evasive
St eering Assist is general lynot su fficient to
avo id a collision.
In such cases Evasive Steering Assist can:
R give an unnecessary warning or pr ovide
assis tance R
not gi veawa rning or not pr ovide assis‐
ta nce #
Alw ays pay careful attention tothe traf‐
fi c situation; do not rely on Ev asive
St eering Assist alone. #
Beready tobrake and take evasive
action, if necessar y. #
Preve ntthe assis tance byactively
st eering in non-critical driving situa‐
tions. #
Drive at an appropriate speed if pedes‐
trians are close tothe path of your vehi‐
cle. Sy
stem limits
Fu ll sy stem per form ance is not available for a
fe w seconds af ter switching on the ignition or
af te r driving off.
The sy stem may be impaired or may not function
in thefo llowing situations:
R In sno w,rain, fog, heavy spr ay, if there is
gl are, in direct sunlight or in greatlyvarying
light conditions. R
Ifth e sensors are dirty, mis ted up, damaged
or co vered.
R Ifth e sensors are impaired due tointer fer‐
ence from other radar sources, e.g. strong
ra dar reflections in multi-s torey car par ks.
R If a loss of tyre pressure or a defective tyre
has been de tected and displ ayed.
R In complex traf fic situations whe reobjects
cannot always be clearly identified.
R If pedestrians or vehicles mo vequickly into
th e sensor de tection range.
R If pede strians are hidden by other objects.
R Ifth e typical outline of a pedestrian cann ot
be distinguished from the bac kground.
R If a pedestrian is not de tected as su ch, e.g.
due tospecial clo thing or other objects.
R On bends with a tight radius. Setting
Active Brake Assi st Requ
irements:
R The ignition is switched on. Driving and parking
221