2019 MERCEDES-BENZ GLC SUV fold seats
[x] Cancel search: fold seatsPage 65 of 673
Fi
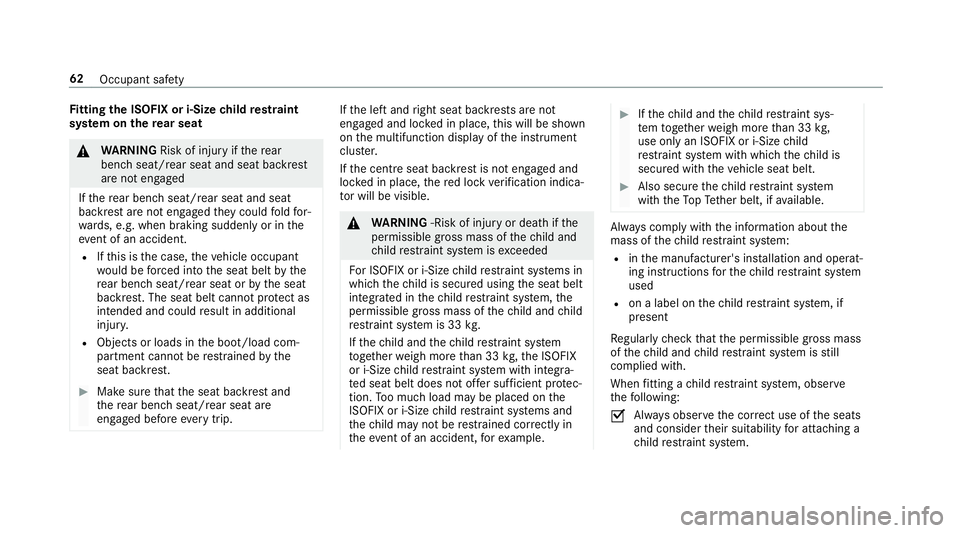
tting the ISOFIX or i‑Size child restra int
sy stem on there ar seat &
WARNING Risk of inju ryifth ere ar
ben chseat/rear seat and seat backrest
are not engaged
If th ere ar ben chseat/rear seat and seat
backrest are not engaged they could fold for‐
wa rds, e.g. when braking suddenly or in the
ev ent of an accident.
R Ifth is is the case, theve hicle occupant
wo uld be forc ed into the seat belt bythe
re ar ben chseat/rear seat or bythe seat
backrest. The seat belt cann otprotect as
intended and could result in additional
injur y.
R Objects or loads in the boot/load com‐
partment cann otbe restra ined bythe
seat backrest. #
Make sure that the seat backrest and
th ere ar ben chseat/rear seat are
engaged before everytrip. If
th e left and right seat backrests are not
engaged and loc ked in place, this will be shown
on the multifunction display of the instrument
clus ter.
If th e cent reseat backrest is not engaged and
loc ked in place, there d lock verification indica‐
to r will be visible. &
WARNING ‑Risk of inju ryor death if the
permissible gross mass of thech ild and
ch ild restra int sy stem is exceeded
Fo r ISOFIX or i‑Size child restra int sy stems in
which thech ild is secured using the seat belt
integrated in thech ild restra int sy stem, the
permissible gross mass of thech ild and child
re stra int sy stem is 33 kg.
If th ech ild and thech ild restra int sy stem
to ge ther we igh more than 33 kg,th e ISOFIX
or i‑Size child restra int sy stem with integra‐
te d seat belt does not of fer suf ficient pr otec‐
tion. Too much load may be placed on the
ISOFIX or i‑Size child restra int sy stems and
th ech ild may not be restra ined cor rectly in
th eev ent of an accident, forex ample. #
Ifth ech ild and thech ild restra int sys‐
te m toget her weigh more than 33 kg,
use on lyan ISOFIX or i‑Size child
re stra int sy stem with which thech ild is
secured with theve hicle seat belt. #
Also secure thech ild restra int sy stem
with theTo pTe ther belt, if available. Alw
ays comply with the information about the
mass of thech ild restra int sy stem:
R inthe manufacturer's ins tallation and operat‐
ing instructions forth ech ild restra int sy stem
used
R on a label on thech ild restra int sy stem, if
present
Re gular lych eck that the permissible gross mass
of thech ild and child restra int sy stem is still
complied with.
When fitting a child restra int sy stem, obser ve
th efo llowing:
O Alw
ays obser vethe cor rect use of the seats
and consider their suitability for attaching a
ch ild restra int sy stem. 62
Occupant saf ety
Page 71 of 673
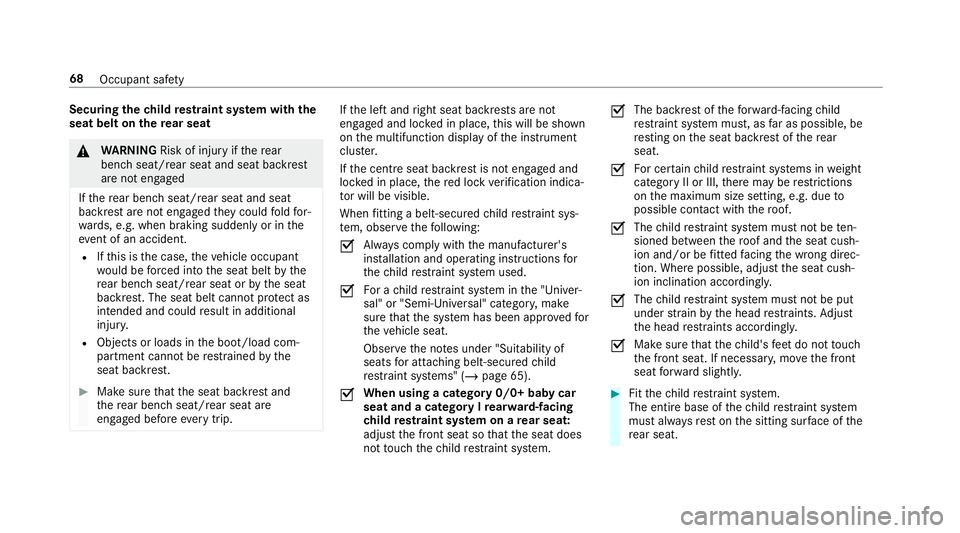
Securing
thech ild restra int sy stem with the
seat belt on there ar seat &
WARNING Risk of inju ryifth ere ar
ben chseat/rear seat and seat backrest
are not engaged
If th ere ar ben chseat/rear seat and seat
backrest are not engaged they could fold for‐
wa rds, e.g. when braking suddenly or in the
ev ent of an accident.
R Ifth is is the case, theve hicle occupant
wo uld be forc ed into the seat belt bythe
re ar ben chseat/rear seat or bythe seat
backrest. The seat belt cann otprotect as
intended and could result in additional
injur y.
R Objects or loads in the boot/load com‐
partment cann otbe restra ined bythe
seat backrest. #
Make sure that the seat backrest and
th ere ar ben chseat/rear seat are
engaged before everytrip. If
th e left and right seat backrests are not
engaged and loc ked in place, this will be shown
on the multifunction display of the instrument
clus ter.
If th e cent reseat backrest is not engaged and
loc ked in place, there d lock verification indica‐
to r will be visible.
When fitting a belt-secu redch ild restra int sys‐
te m, obser vethefo llowing:
O Alw
ays comply with the manufacturer's
ins tallation and operating instructions for
th ech ild restra int sy stem used.
O Fo
r a child restra int sy stem in the "Univer‐
sal" or "Semi-Universal" categor y,make
sure that the sy stem has been appr oved for
th eve hicle seat.
Obser vethe no tes under "Suitability of
seats for attaching belt-secu redch ild
re stra int sy stems" (/ page 65).
O When using a category 0/0+ baby car
seat and a category I rear wa rd-facing
ch ild restra int sy stem on a rear seat:
adju stthe front seat so that the seat does
not touch thech ild restra int sy stem. O
The backrest of
thefo rw ard-facing child
re stra int sy stem must, as far as possible, be
re sting on the seat backrest of there ar
seat.
O Fo
r cer tain child restra int sy stems in weight
category II or III, there may be restrictions
on the maximum size setting, e.g. due to
possible con tact wi th thero of.
O The
child restra int sy stem must not be ten‐
sioned between thero of and the seat cush‐
ion and/or be fitted facing the wrong direc‐
tion. Where possible, adjust the seat cush‐
ion inclination accordingly.
O The
child restra int sy stem must not be put
under stra in by the head restra ints. Adjust
th e head restra ints according ly.
O Make sure
that thech ild's feet do not touch
th e front seat. If necessar y,mo vethe front
seat forw ard slightl y. #
Fitthech ild restra int sy stem.
The entire base of thech ild restra int sy stem
must alw aysre st on the sitting sur face of the
re ar seat. 68
Occupant saf ety
Page 112 of 673
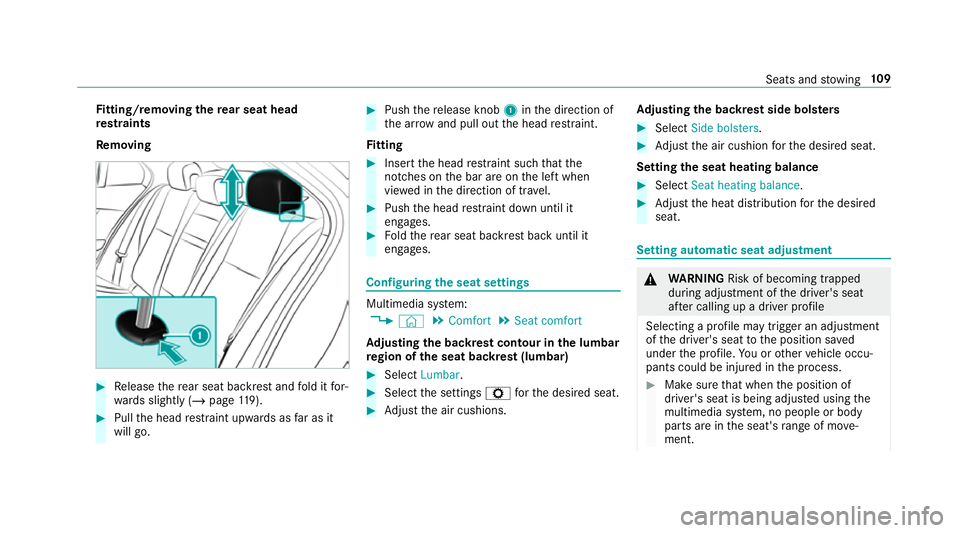
Fi
tting/ removing the rear seat head
re stra ints
Re moving #
Release there ar seat backrest and fold it for‐
wa rds slightly (/ page119). #
Pull the head restra int upwards as far as it
will go. #
Push there lease knob 1inthe direction of
th e ar row and pull out the head restra int.
Fi tting #
Inse rtthe head restra int such that the
notches on the bar are on the left when
vie we d in the direction of tra vel. #
Push the head restra int down until it
engages. #
Foldthere ar seat backrest back until it
engages. Configuring
the seat settings Multimedia sy
stem:
4 © 5
Comfort 5
Seat comfort
Ad justing the backrest contour in the lumbar
re gion of the seat backrest (lumbar) #
Select Lumbar . #
Select the settings Zforth e desired seat. #
Adjust the air cushions. Ad
justing the backrest side bols ters #
Select Side bolsters . #
Adjust the air cushion forth e desired seat.
Setting the seat heating balance #
Select Seat heating balance. #
Adjust the heat distribution forth e desired
seat. Setting automatic seat adjustment
&
WARNING Risk of becoming trapped
du ring adjustment of the driver's seat
af te r calling up a driver profile
Selecting a profile may trigger an adju stment
of the driver's seat tothe position sa ved
under the profile. You or other vehicle occu‐
pants could be injured in the process. #
Make sure that when the position of
driver's seat is being adjus ted using the
multimedia sy stem, no people or body
parts are in the seat's range of mo ve‐
ment. Seats and
stowing 109
Page 122 of 673
Through-loading
feature in there ar ben ch
seat Fo
lding there ar seat backrest forw ards &
WARNING Risk of inju ryifth ere ar
ben chseat/rear seat and seat backrest
are not engaged
If th ere ar ben chseat/rear seat and seat
backrest are not engaged they could fold for‐
wa rds, e.g. when braking suddenly or in the
ev ent of an accident.
R Ifth is is the case, theve hicle occupant
wo uld be forc ed into the seat belt bythe
re ar ben chseat/rear seat or bythe seat
backrest. The seat belt cann otprotect as
intended and could result in additional
injur y.
R Objects or loads in the boot/load com‐
partment cann otbe restra ined bythe
seat backrest. #
Make sure that the seat backrest and
th ere ar ben chseat/rear seat are
engaged before everytrip. If
th e left and right seat backrests are not
engaged and loc ked in place, this will be shown
on the multifunction display of the instrument
clus ter.A wa rning tone will also sound.
If th e cent reseat backrest is not engaged and
loc ked, there d lock verification indicator will be
visible.
The centre and ou ter seat backrests can be fol‐
ded forw ards separatel y.
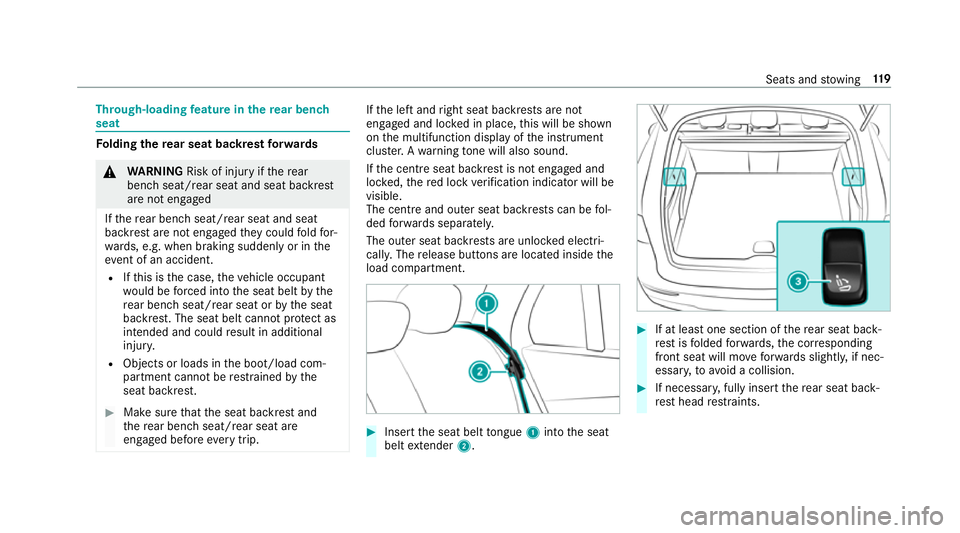
The outer seat backrests are unloc ked elect ri‐
cally. The release buttons are located inside the
load compartment. #
Insert the seat belt tongue 1into the seat
belt extender 2. #
If at least one section of there ar seat back‐
re st isfolded forw ards, the cor responding
front seat will mo veforw ards slightl y,if nec‐
essar y,to avoid a collision. #
If necessar y,fully insert there ar seat back‐
re st head restra ints. Seats and
stowing 11 9
Page 123 of 673
#
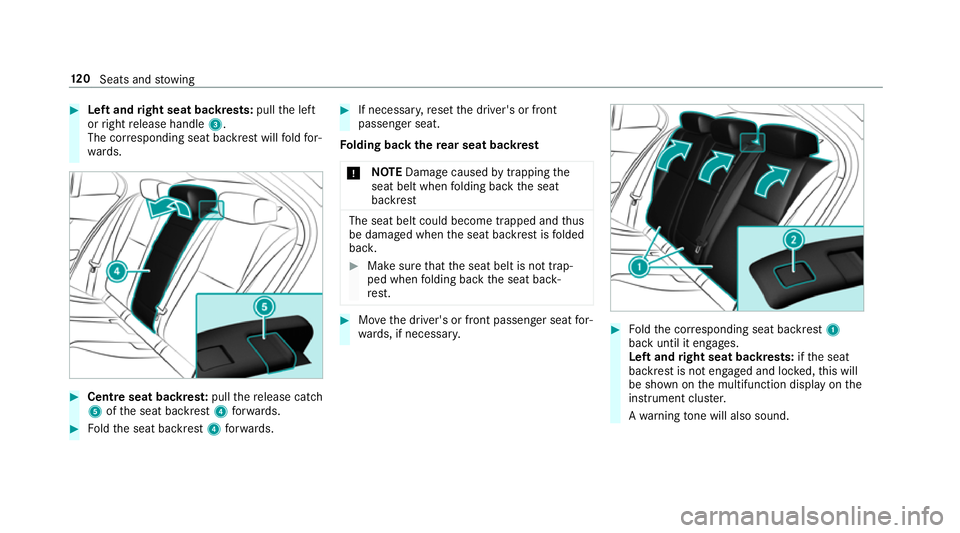
Left and right seat backrests: pullthe left
or right release handle 3.
The cor responding seat backrest will fold for‐
wa rds. #
Centre seat backres t:pull there lease cat ch
5 ofthe seat backrest 4forw ards. #
Foldthe seat backrest 4forw ards. #
If necessar y,reset the driver's or front
passenger seat.
Fo lding back there ar seat backrest
* NO
TEDama gecaused bytrapping the
seat belt when folding back the seat
backrest The seat belt could become trapped and
thus
be damaged when the seat backrest is folded
bac k. #
Make sure that the seat belt is not trap‐
ped when folding back the seat back‐
re st. #
Movethe driver's or front passenger seat for‐
wa rds, if necessar y. #
Foldthe cor responding seat backrest 1
back until it engages.
Left and right seat backrests: ifth e seat
backrest is not engaged and loc ked, this will
be shown on the multifunction display on the
instrument clus ter.
A wa rning tone will also sound. 12 0
Seats and stowing
Page 124 of 673
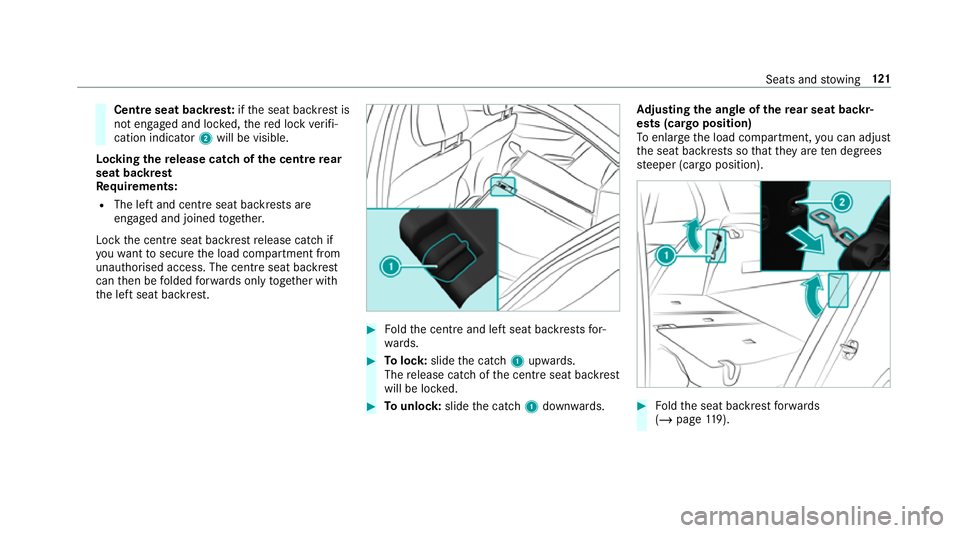
Centre seat backres
t:ifth e seat backrest is
not engaged and loc ked, there d lock verifi‐
cation indicator 2will be visible.
Lo cking there lease catch of the centre rear
seat backrest
Re quirements:
R The left and centre seat backrests are
engaged and joined toge ther.
Lock the cent reseat backrest release cat chif
yo uwa nttosecure the load compartment from
unauthorised access. The cent reseat backrest
can then be folded forw ards on lytoge ther with
th e left seat backrest. #
Foldthe cent reand left seat backrests for‐
wa rds. #
Tolock: slidethe catch 1upwards.
The release cat chofthe cent reseat backrest
will be loc ked. #
Tounlo ck:slide the catch 1down wards. Ad
justing the angle of the rear seat backr‐
ests (cargo position)
To enlar gethe load compartment, you can adjust
th e seat backrests so that they are ten degrees
st eeper (cargo position). #
Foldthe seat backrest forw ards
(/ page 119). Seats and
stowing 121
Page 128 of 673
Pa
rtitioning net without load compartment enlar ge‐
ment Pa
rtitioning net with load compartment enlar ge‐
ment #
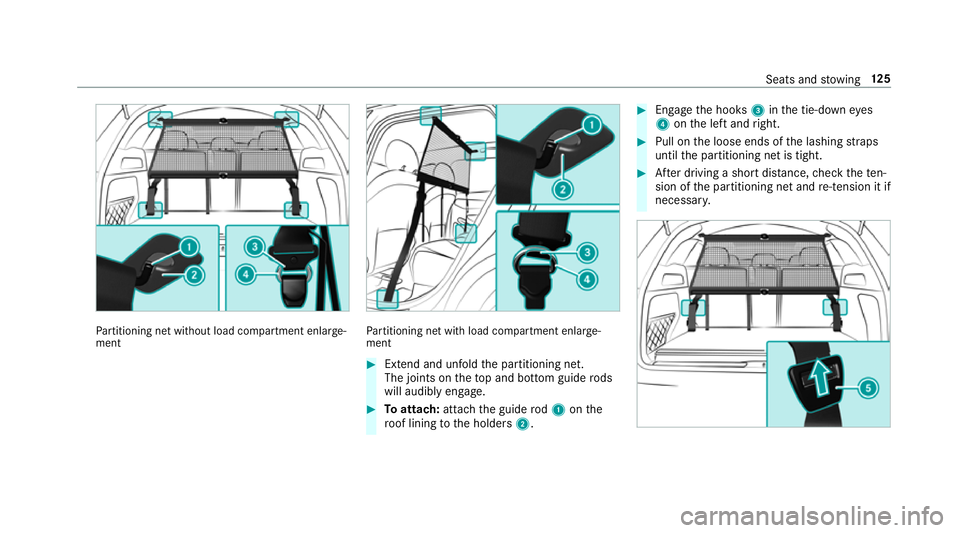
Extend and unfold the partitioning net.
The joints on theto p and bottom guide rods
will audibly engage. #
Toattach: attachthe guide rod1 onthe
ro of lining tothe holders 2. #
Enga gethe hooks 3inthe tie-down eyes
4 onthe left and right. #
Pull on the loose ends of the lashing stra ps
until the partitioning net is tight. #
After driving a short dis tance, check thete n‐
sion of the partitioning net and re-tension it if
necessa ry. Seats and
stowing 12 5
Page 132 of 673
#
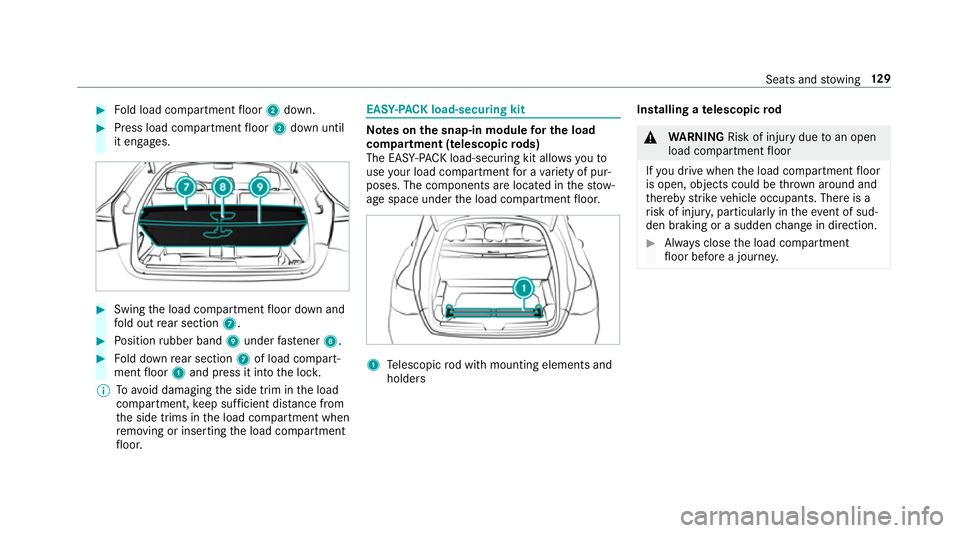
Fold load compartment floor 2down. #
Press load compartment floor 2down until
it engages. #
Swing the load compartment floor down and
fo ld out rear section 7. #
Position rubber band 9under fastener 8. #
Fold down rear section 7of load compart‐
ment floor 1and press it into the loc k.
% Toavo id damaging the side trim in the load
compartment, keep suf ficient di stance from
th e side trims in the load compartment when
re moving or inserting the load compartment
fl oor. EAS
Y-PA CK load-securing kit Note
s onthe snap-in module for the load
co mp artment (telescopic rods)
The EAS Y-PA CK load-securing kit allo wsyouto
use your load co mpartment for a variet y of pur‐
poses. The co mponents are located in thestow‐
age space under the load compartment floor. 1
Telescopic rod with mounting elements and
holders Installing a
telescopic rod &
WARNING Risk of inju rydue toan open
load compartment floor
If yo u drive when the load compartment floor
is open, objects could be thro wn around and
th ereby strike vehicle occupants. There is a
ri sk of injur y,particular lyin theeve nt of sud‐
den braking or a sudden change in direction. #
Alw ays close the load compartment
fl oor before a journe y. Seats and
stowing 12 9