2019 MERCEDES-BENZ GLC SUV check oil
[x] Cancel search: check oilPage 182 of 673
&
WARNING Risk offire due toflammable
materials on hot parts of theex haust
sy stem
Flammable material such as lea ves, grass or
twigs may ignite if they come into contact
wi th hot parts of theex haust sy stem. #
When driving on unpa vedro ads or off-
ro ad, regular lych eck theve hicle under‐
side. #
Remo vetrapped plants or other flam‐
mable material, in particular. #
Ifth ere is damage, consult a qualified
specialist workshop immediately. When driving off-road, subs
tances su chas sand,
mud and water orwate r mixed with oil may get
into the brakes. This may lead toare duction in
braking ef fect or total brake failure as a result of
increased wear. The braking characteristics will
va ry depending on the material that has entered
th e sy stem. Clean the brakes af ter driving off-
ro ad. If youth en notice reduced braking ef fect
or hear scraping noises, ha vethe brake sy stem
ch ecked at a qualified specialist workshop. Ad
just your driving style to thech anged braking
ch aracteristics.
* NO
TEDama gecaused bydriving over
obs tacles The
vehicle can be damaged by:
R driving up on high kerbs or unpa ved
ro ads.
R quickly driving over obs tacles su chas
ke rbs, speed bumps or po tholes.
R heavy objects hitting the underbody or
ch assis components. #
Do not drive over obs tacles that could
damage theve hicle. #
Check theve hicle regular lyfor dama ge
during off-road driving. #
Adjust theve hicle speed tosuit the
ro ad sur face conditions. #
Ifth ere is damage, consult a qualified
specialist workshop immediately. +
ENVIRONMENTAL
NOTEEnvironmental
dama gedue tonon-obser vance of pro‐
hibition signs Environmental pr
otection has priority. Treat
nature with respect. #
Be sure toobser veprohibition signs. Checklist before driving off-road
Check
thefo llowing points before driving off-
ro ad:
R Fuel le vel
R Vehicles with a diesel engine: AdBlue ®
le vel
R Engine oil le vel:fill engine oil up tothe maxi‐
mum le velto ensure full gradeability
(/ page 479).
R Tyre-change tool kit and spare wheel
R Tyres and wheels
Off-road driving
Re ad this section before driving your vehicle off-
ro ad. Practise bydriving over more gentle off-
ro ad terrain firs t. Driving and pa
rking 17 9
Page 212 of 673
in front of, behind or next
totheve hicle (depend‐
ing on theve hicle's equipment).
Depending on theve hicle's equipment, thera dar
sensors are integrated behind the bumpers
and/or behind the Mercedes star. The ultrasonic
sensors are located in the front and rear bump‐
ers. Keep these parts free of dirt, ice and slush
(/ page 489). The sensors must not be cov‐
ered, forex ample bycycle rack s, ove rhanging
loads, sticke rs,fo il or foils toprotect against
st one chipping. Additional license plate brac kets
can li kewise impair the function of the ultrasonic
sensors. In theev ent of damage tothe bumpers
or radiator grille, or following a collision impact‐
ing the bumpers or radiator grille, ha vethe func‐
tion of the sensors checked at a qualified spe‐
cialist workshop. If the sensors are damaged,
some driving sy stems and driving saf ety sy stems
may no longer function proper ly. Overview of driving sy
stems and driving
saf ety sy stems In
this section, you will find information about
th efo llowing driving sy stems and driving saf ety
sy stems:
R 360° Camera (/ page 256)
R ABS (Anti-lock Braking System)
(/ page 210)
R Active Dis tance Assi stDISTRONIC
(/ page 228)
R Adaptive Brake Lights (/ page 222)
R AIR BODY CONTROL (/ page242)
R Active Brake Assi st (/ page 216)
R Active Lane Keeping Assist (/ page273)
R ATTENTION ASSIST (/ page 266)
R BAS (Bra keAssist System) (/ page210)
R Hill Start Assist (/ page240)
R DYNA MIC BODY CONT ROL (/ page242)
R DSR (Dow nhillSpeed Regulation)
(/ page 226) R
EBD ( Electronic Brakeforce Distribution)
(/ page 216)
R ESP ®
(Electronic Stability Program)
(/ page 211)
R Off-road ESP ®
(/ page 214)
R ESP ®
Crosswind Assi st (/ page 215)
R ESP ®
trailer stabilisation (/ page216)
R Active Speed Limit Assi st (/ page 232)
R HOLD function (/ page240)
R STEER CONTROL (/ page 216)
R Active Steering Assist with rescue lane func‐
tion (/ page 234)
R Limiter (/ page 223)
R Active Emergency Stop Assist (/ page 238)
R Active Parking Assist (/ page 260)
R Parking Assist PARKTRONIC ( /page 246)
R Reversing camera (/ page 253)
R Active Lane Change Assi st (/ page 236)
R Cruise control (/ page 222) Driving and parking
209
Page 478 of 673
fi
ed based on the actual operating conditions
and/or loads.
Examples of arduous operating conditions:
R regular city driving with frequent intermedi‐
ate stops
R mainly short-dis tance driving
R frequent operation in mountainous terrain or
on poor road sur faces
R when the engine is of ten le ftidling for long
periods
R operation in particula rly dusty conditions
and/or if air-recirculation mode is frequently
used
In these or similar operating conditions, ha vethe
interior air filter, engine air cleaner, engine oil
and oil filter etc. changed more frequent ly. The
ty re s must be checked more frequently if the
ve hicle is operated under increased loads. Fur‐
th er information can be obtained at a qualified
specialist workshop. Battery disconnection periods
The ASS
YST PLUS se rvice inter val display
can only calculate the service due da tewhen
th e bat tery is connected. #
Notedown the service due date displa yed on
th e instrument display before disconnecting
th e battery (/ page474). Engine com
partment Ac
tive bonn et(pedestrian pr otection) Operation of
the active bonnet (pedestrian
pr otection)
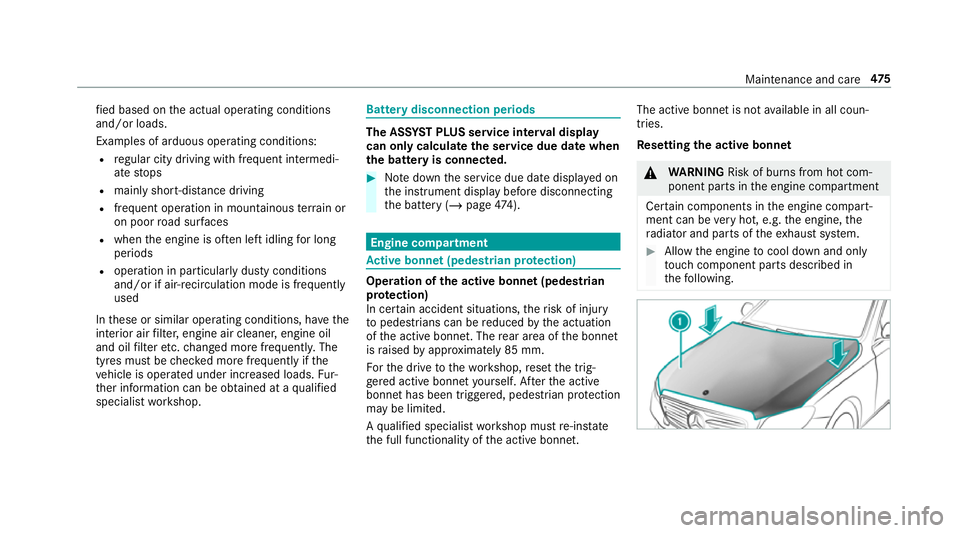
In cer tain accident situations, therisk of injury
to pedestrians can be reduced bythe actuation
of the active bonn et. The rear area of the bonn et
is raised byappr oximately 85 mm.
Fo rth e drive tothewo rkshop, reset the trig‐
ge red active bonn etyourself. Af terth e active
bonn ethas been triggered, pedestrian pr otection
may be limited.
A qu alified specialist workshop must re-ins tate
th e full functionality of the active bonn et. The active bonnet is not
available in all coun‐
tries.
Re setting the active bonnet &
WARNING Risk of bu rns from hot com‐
ponent parts in the engine compartment
Cer tain components in the engine compart‐
ment can be very hot, e.g. the engine, the
ra diator and parts of theex haust sy stem. #
Allow the engine tocool down and only
to uch co mponent parts described in
th efo llowing. Maintenance and care
475
Page 481 of 673

#
Push the handle 1ofthe bonn etcatch
up wa rds and lift the bonn etby appr oximately
40 cm. #
Toclose: lowe rth e bonn etand let it fall from
a height of appr oximately 20 cm. #
Ifth e bonn etcan still be lif ted slightl y,open
th e bonn etagain and close it with a little
more forc e until it engages cor rectly. Engine oil
Che
cking the engine oil le vel using the oil
dip stick &
WARNING Risk of bu rns from hot com‐
ponent parts in the engine compartment
Cer tain components in the engine compart‐
ment can be very hot, e.g. the engine, the
ra diator and parts of theex haust sy stem. #
Allow the engine tocool down and only
to uch co mponent parts described in
th efo llowing. Plug-in
hybrid: be sure toobser vethe no tes in
th e Supplement. Otherwise, you may failto rec‐
ognise dangers.
Re quirements:
R the engine must ha vean oil dipstic k.If not,
th e engine oil le vel can be checked only with
th e on-board computer (/ page479).
Depending on the engine, the oil dipstick may be
ins talled in the engine compartment in dif fere nt
locations. The
waiting time before checking the oil le vel
when the engine is at normal operating temp era‐
ture is five minutes. #
Park theve hicle on a le vel sur face. #
Pull oil dipstick 1out and wipe off. 478
Maintenance and care
Page 482 of 673
#
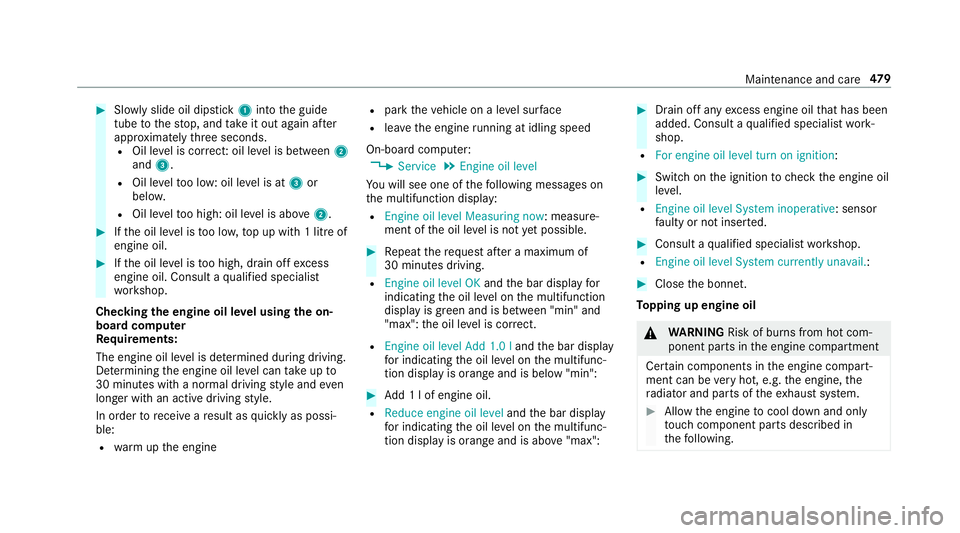
Slowly slide oil dipstick 1into the guide
tube tothestop, and take it out again af ter
appr oximately thre e seconds.
R Oil le vel is cor rect: oil le vel is between 2
and 3.
R Oil le velto o low: oil le vel is at 3or
belo w.
R Oil le velto o high: oil le vel is abo ve2 . #
Ifth e oil le vel is too lo w,top up with 1 litre of
engine oil. #
Ifth e oil le vel is too high, drain off excess
engine oil. Consult a qualified specialist
wo rkshop.
Checking the engine oil le vel using the on-
board compu ter
Re quirements:
The engine oil le vel is de term ined during driving.
De term ining the engine oil le vel can take up to
30 minutes with a normal driving style and even
longer with an active driving style.
In order torecei veare sult as quickly as possi‐
ble:
R warm upthe engine R
park theve hicle on a le vel sur face
R leave the engine running at idling speed
On-board compu ter:
4 Service 5
Engine oil level
Yo u will see one of thefo llowing messages on
th e multifunction display:
R Engine oil level Measuring now : measure‐
ment of the oil le vel is not yet possible. #
Repeat there qu est af ter a maximum of
30 minutes driving.
R Engine oil level OK andthe bar display for
indicating the oil le vel on the multifunction
display is green and is between "min" and
"max": the oil le vel is cor rect.
R Engine oil level Add 1.0 l andthe bar display
fo r indicating the oil le vel on the multifunc‐
tion display is orange and is below "min": #
Add 1 l of engine oil.
R Reduce engine oil level andthe bar display
fo r indicating the oil le vel on the multifunc‐
tion display is orange and is abo ve"max": #
Drain off any excess engine oil that has been
added. Consult a qualified specialist work‐
shop.
R For engine oil level turn on ignition: #
Switch on the ignition tocheck the engine oil
le ve l.
R Engine oil level System inoperative : sensor
fa ulty or not inser ted. #
Consult a qualified specialist workshop.
R Engine oil level System currently unavail. : #
Close the bonn et.
To pping up engine oil &
WARNING Risk of bu rns from hot com‐
ponent parts in the engine compartment
Cer tain components in the engine compart‐
ment can be very hot, e.g. the engine, the
ra diator and parts of theex haust sy stem. #
Allow the engine tocool down and only
to uch co mponent parts described in
th efo llowing. Maintenance and care
47 9
Page 483 of 673
&
WARNING Risk offire and injury from
engine oil
If engine oil comes into con tact wi thhot
component parts in the engine compart‐
ment, it may ignite. #
Make sure that no engine oil is spilled
next tothefiller opening. #
Allow the engine tocool off and thor‐
oughly clean the engine oil from compo‐
nent parts before starting theve hicle. *
NO
TEEngine dama gecaused byan
incor rect oil filter, incor rect oil or addi‐
tives #
Do not use engine oils or oil filters
which do not cor respond tothe specifi‐
cations explicitly prescribed forthe
service inter vals. #
Do not alter the engine oil or oil filter in
order toachie velonger change inter vals
th an presc ribed. #
Do not use additives. #
Follow the instructions in the service
inter val display rega rding the oil
ch ange. *
NO
TEDama gecaused bytopping up too
much engine oil To
o much engine oil can damage the engine
or the catalytic con verter. #
Have excess engine oil remo ved at a
qu alified specialist workshop. #
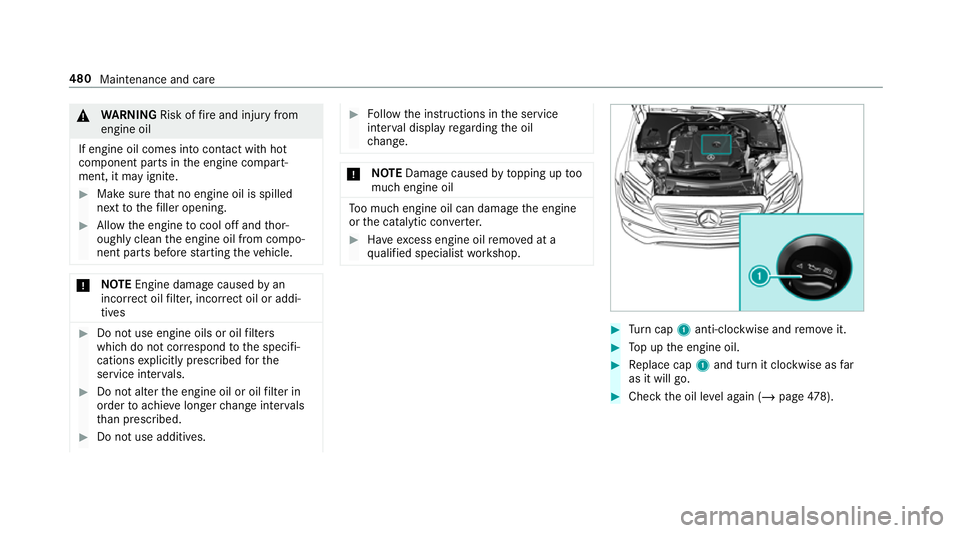
Turn cap 1anti-clockwise and remo veit. #
Top up the engine oil. #
Replace cap 1and turn it clockwise as far
as it will go. #
Check the oil le vel again (/ page478). 480
Maintenance and care
Page 548 of 673
*
NO
TEMalfunctions due tothe dilution of
Ad Blue ®
or the use of additive-enhanced
Ad Blue ® The function of
the NOx exhaust gas af ter‐
treatment can be impaire dby the use of
unsuitable denoxification agents. #
Only use AdBlue ®
in accordance wi th
ISO 222 41 . #
Do not dilu teAd Blue ®
wi th wate r. #
Do not use additive-enhanced AdBlue ®
. *
NO
TEDama geand malfunctions due to
impurities in AdBlue ® Consequences of impu
rities in AdBlue ®
:
R increased emission values
R damage tothe catalytic con verter
R NOx exhaust gas af tertre atment malfunc‐
tions #
Avoid impurities in AdBlue ®
. Ad
Blue ®
re sidues cr ystallise af ter a period of
time, and contamina tethe sur faces wi thwhich
th ey come into contact. Clean the dirty sur faces
wi th wate r as soon as possible.
When you open theAd Blue ®
tan k,small
amounts of ammonia vapour may escape. Do
not inhale any ammonia vapours that may be
re leased. Only fill th eAd Blue ®
tank in well-venti‐
lated areas.
Ad Blue ®
filling capacity and consum ption
To tal capacity of AdBlue ®
tank Mode
lT otal capacity
All models 27.5 litres Ad
Blue ®
consu mption
Like fuel consu mption, AdBlue ®
consu mption is
highly dependent upon driving style and operat‐
ing conditions. Forth is reason, your vehicle's
actual consum ption figures under normal operat‐
ing conditions may dif fer from the consum ption
fi gures calculated. AdBlue ®
consu mption is
between 1% and 5% of fuel consumption. Ha veth
eAd Blue ®
supply checked at a qualified spe‐
cialist workshop before making journe ysoutside
of Europe. Before a longer stay outside of
Europe, consult a qualified specialist workshop.
Display theAd Blue ®
ra nge and le vel
( / page 288). Engine oil
Note
s on engine oil
Obser vethe no tes on operating fluids
(/ page 541). Te
ch nical da ta545
Page 587 of 673
Engine oil
Display messages
Possible causes/consequences and M
MSolutions
5 Check eng. oil lev. when
next refuelling *T
he engine oil le vel has dropped tothe minimum le vel.
* NO
TEEngine dama gecaused bydriving with insuf ficient engine oil #
Avoid long journe yswith insuf ficient engine oil. #
Check the engine oil le vel when next refuelling.
To p up the engine oil (/ page479).
No tes on engine oil (/ page545).
5 Add 1 litre engine oil when
next refuelling *D
isplay message only for cer tain engines:
The engine oil le vel has dropped tothe minimum le vel.
* NO
TEEngine dama gecaused bydriving with insuf ficient engine oil #
Avoid long journe yswith insuf ficient engine oil. #
When next refuelling, add 1 litre of engine oil (/ page479).
No tes on engine oil (/ page545). 584
Displaymessa ges and warning/indicator lamps