2019 MERCEDES-BENZ CLA weight
[x] Cancel search: weightPage 21 of 330
Connecting a mobile phone (gen-
eral information) ............................ 235
Display message ............................ 218
Introduction ...................................185
Menu (on-board computer) ............ 185
Number from the phone book ........186
Redialing ........................................ 186
Rejecting/ending a call ................. 186
see also Digital Operator's Man-
ual ..................................................231
Temperature
Coolant .......................................... 179
Coolant (on-board computer,
Mercedes-AMG vehicles) ...............190
Engine oil (on-board computer,
Mercedes-AMG vehicles) ...............190
Outside temperature ......................178
Setting (climate control) ................ 117
Transmission oil (on-board com-
puter, Mercedes-AMG vehicles) ..... 190
Through-loading feature................... 241
Timing (RACETIMER)......................... 191
Tire pressure
Calling up (on-board computer) ..... 297
Checking manually ........................ 296
Display message ............................ 213
Maximum ....................................... 296
Not reached (TIREFIT) .................... 277
Notes ............................................. 295
Reached (TIREFIT) .......................... 278
Recommended ............................... 293
Tire pressure loss warning system
General notes ................................ 296
Important safety notes .................. 297
Restarting ...................................... 297
Tire pressure monitor
Checking the tire pressure elec-
tronically ........................................ 299
Function/notes .............................297
General notes ................................ 297
Important safety notes .................. 298
Radio type approval for the tire
pressure monitor ........................... 300
Restarting ...................................... 300
Warning lamp ................................. 230
Warning message .......................... 299
TIREFIT kit.......................................... 276
Important safety notes .................. 276
Storage location ............................ 274
Tire pressure not reached .............. 277
Tire pressure reached .................... 278
Tires
Aspect ratio (definition) ................. 310
Average weight of the vehicle
occupants (definition) .................... 308
Bar (definition) ............................... 308
Changing a wheel .......................... 310
Characteristics .............................. 308
Checking ........................................ 290
Curb weight (definition) ................. 309
Definition of terms ......................... 308
Direction of rotation...................... 311
Display message ............................ 213
Distribution of the vehicle occu-
pants (definition) ............................ 310
DOT (Department of Transporta-
tion) (definition) ............................. 308
DOT, Tire Identification Number
(TIN) ............................................... 308
GAWR (Gross Axle Weight Rating)
(definition) ..................................... 309
General notes ................................ 315
GVW (Gross Vehicle Weight) (def-
inition) ........................................... 309
GVWR (Gross Vehicle Weight Rat-
ing) (definition) .............................. 309
Important safety notes .................. 290
Increased vehicle weight due to
optional equipment (definition) ...... 309
Information on driving .................... 290
Kilopascal (kPa) (definition) ........... 309
Labeling (overview) ........................ 305
Load bearing index (definition) ...... 310
Load index ..................................... 307
Load index (definition) ................... 309
M+S tires ....................................... 292
Maximum load on a tire (defini-
tion) ............................................... 309
Maximum loaded vehicle weight
(definition) ..................................... 309
Maximum permissible tire pres-
sure (definition) ............................. 309
Maximum tire load ......................... 307
Maximum tire load (definition) ....... 309
MOExtended tires.......................... 292
Index19
Page 22 of 330
Optional equipment weight (defi-
nition) ............................................ 310
PSI (pounds per square inch) (def-
inition) ...........................................310
Replacing ....................................... 310
Service life ..................................... 291
Sidewall (definition) ....................... 310
Speed rating (definition) ................ 309
Storing ...........................................311
Structure and characteristics
(definition) ..................................... 308
Summer tires ................................. 292
Temperature .................................. 305
TIN (Tire Identification Number)
(definition) ..................................... 310
Tire bead (definition) ......................310
Tire pressure (definition) ................ 310
Tire pressures (recommended) ...... 309
Tire size (data) ............................... 315
Tire size designation, load-bearing
capacity, speed rating .................... 305
Tire tread ....................................... 291
Tire tread (definition) ..................... 310
Total load limit (definition) ............. 310
Traction ......................................... 304
Traction (definition) ....................... 310
Tread wear..................................... 304
Uniform Tire Quality Grading
Standards ...................................... 304
Uniform Tire Quality Grading
Standards (definition) .................... 309
Wear indicator (definition) ............. 310
Wheel rim (definition) .................... 309
see Flat tire
Top Tether............................................ 57
Tow-starting
Emergency engine starting ............ 287
Important safety notes .................. 284
Installing the towing eye ................ 285
Removing the towing eye ............... 286
Towing
Permitted towing methods ............ 287
Towing a trailer
ESP®(Electronic Stability Pro-
gram) ............................................... 67
Towing away
Important safety guidelines ........... 284
Installing the towing eye ................ 285
Notes for 4MATIC vehicles ............ 287
Removing the towing eye ............... 286
Transporting the vehicle ................ 287
With both axles on the ground ....... 286
With the front axle raised ............... 286
Towing eye......................................... 274
Traffic reports
see also Digital Operator's Man-
ual .................................................. 231
Transmission
see Automatic transmission
Transmission position display
(DIRECT SELECT lever)...................... 131
Transporting the vehicle.................. 287
Trim pieces (cleaning instruc-
tions).................................................. 271
Trip computer (on-board com-
puter).................................................. 182
Trip odometer
Calling up ....................................... 182
Resetting (on-board computer) ...... 183
Trunk
Emergency release .......................... 82
Emergency release button ............... 82
Important safety notes .................... 78
Opening (automatically from out-
side) ................................................. 79
Opening (from outside the vehi-
cle, HANDS-FREE ACCESS) .............. 80
Opening automatically from
inside ............................................... 81
Opening/closing (manually from
outside) ............................................ 79
Trunk lid
Display message ............................ 217
see Tailgate
Turn signals
Display message ............................ 204
Replacing bulbs (front) ................... 107
Switching on/off........................... 102
Two-way radio
Frequencies ................................... 317
Installation ..................................... 317
Transmission output (maximum) .... 317
Type identification plate
see Vehicle identification plate
20Index
Page 26 of 330
Protecting the environment
General notes
HEnvironmental note
Daimler's declared policy is one of compre-
hensive environmental protection.
The objectives are for the natural resources
that form the basis of our existence on this
planet to be used sparingly and in a manner
that takes the requirements of both nature
and humanity into account.
You too can help to protect the environment
by operating your vehicle in an environmen-
tally responsible manner.
Fuel consumption and the rate of engine,
transmission, brake and tire wear are affected
by these factors:
Roperating conditions of your vehicle
Ryour personal driving style
You can influence both factors. You should
bear the following in mind:
Operating conditions:
Ravoid short trips as these increase fuel con-
sumption.
Ralways make sure that the tire pressures
are correct.
Rdo not carry any unnecessary weight.
Rremove roof racks once you no longer need
them.
Ra regularly serviced vehicle will contribute
to environmental protection. You should
therefore adhere to the service intervals.
Ralways have service work carried out at a
qualified specialist workshop.
Personal driving style:
Rdo not depress the accelerator pedal when
starting the engine.
Rdo not warm up the engine when the vehicle
is stationary.
Rdrive carefully and maintain a safe distance
from the vehicle in front.
Ravoid frequent, sudden acceleration and
braking.
Rchange gear in good time and use each gear
only up to�
Page 45 of 330

If a child younger than twelve years old andunder 5 ft (1.50m)in height is traveling in thevehicle:
Ralways secure the child in a child restraintsystem suitable for this Mercedes-Benz vehi-cle. The child restraint system must be appro-priate to the age, weight and size of the child.
Ralways observe the instructions and safetynotes on "Children in the vehicle"(Ypage 54) in addition to the child restraintsystem manufacturer's installation and oper-ating instructions
Ralways observe the instructions and safetynotes on the "Occupant classification system(OCS)". (Ypage 47)
GWARNING
The seat belts may not perform their intended
protective function if:
Rthey are damaged, modified, extremely
dirty, bleached or dyed
Rthe seat belt buckle is damaged or
extremely dirty
Rthe Emergency Tensioning Devices, belt
anchorages or inertia reels have been modi-
fied.
Seat belts may be damaged in an accident,
although the damage may not be visible, e.g.
due to splinters of glass. Modified or damaged
seat belts may tear or fail, e.g. in an accident.
Modified Emergency Tensioning Devices
could accidentally trigger or fail to deploy
when necessary. This poses an increased risk
of injury or even fatal injury.
Never modify the seat belts, Emergency Ten-
sioning Devices, belt anchorages and inertia
reels. Make sure that the seat belts are
undamaged, not worn out and clean. Follow-
ing an accident, have the seat belts checked
immediately at a qualified specialist work-
shop.
Only use seat belts that have been approved foryour vehicle by Mercedes-Benz.
Sports seat or AMG Performance seat:thisseat is designed for the standard three-pointseat belt. If you install another multi-point seatbelt, e.g. sport or racing seat belts, the restraint
system cannot provide the best level of protec-tion.
GWARNING
If you feed seat belts through the opening in
the seat backrest, the seat backrest may be
damaged or may even break in the event of an
accident. This poses an increased risk of
injury or even fatal injury.
Only use the standard three-point seat belt.
Never modify the seat belt system.
Proper use of the seat belts
Observe the safety notes on the seat belt(Ypage 42).
All vehicle occupants must be wearing the seatbelt correctly before beginning the journey. Alsomake sure that all vehicle occupants are alwayswearing the seat belt correctly while the vehicleis in motion.
When fastening the seat belt, always make surethat:
Rthe seat belt buckle tongue is inserted onlyinto the belt buckle belonging to that seat
Rthe seat belt is pulled tight across your body
Avoid wearing bulky clothing, e.g. a wintercoat.
Rthe seat belt is not twisted
Only then can the forces which occur be dis-tributed over the area of the belt.
Rthe shoulder section of the belt is routedacross the center of your shoulder
The shoulder section of the seat belt shouldnot touch your neck or be routed under yourarm or behind your back. Where possible,adjust the seat belt to the appropriate height.
Rthe lap belt is taut and passes across your lapas low down as possible
The lap belt must always be routed acrossyour hip joints and not across your abdomen.This applies particularly to pregnant women.If necessary, push the lap belt down to yourhip joint and pull it tight using the shouldersection of the belt.
Rthe seat belt is not routed across sharp, poin-ted or fragile objects
If you have such items located on or in yourclothing, e.g. pens, keys or eyeglasses, storethese in a suitable place.
Ronly one person is using a seat belt
Occupant safety43
Safety
Z
Page 48 of 330
Objects in the vehicle interior may preventan air bag from functioning correctly.Beforestarting your journey and to avoid risks resultingfrom the speed of the air bag as it deploys, makesure that:
Rthere are no people, animals or objectsbetween the vehicle occupants and an air bag
Rthere are no objects between the seat, doorand B-pillar
Rthere are no hard objects, e.g. coat hangers,hanging on the grab handles or coat hooks
Rno accessories, such as cup holders, areattached to the vehicle within the deploymentarea of an air bag, e.g. to doors, side windows,rear side trim or side walls
Rno heavy, sharp-edged or fragile objects are inthe pockets of your clothing. Store suchobjects in a suitable place
GWARNING
If you modify the air bag cover or affix objects
such as stickers to it, the air bag can no longer
function correctly. There is an increased risk
of injury.
Never modify an air bag cover or affix objects
to it.
GWARNING
Sensors to control the air bags are located in
the doors. Modifications or work not per-
formed correctly to the doors or door panel-
ing, as well as damaged doors, can lead to the
function of the sensors being impaired. The air
bags might therefore not function properly
anymore. Consequently, the air bags cannot
protect vehicle occupants as they are
designed to do. There is an increased risk of
injury.
Never modify the doors or parts of the doors.
Always have work on the doors or door pan-
eling carried out at a qualified specialist work-
shop.
Front air bags
!Do not place heavy objects on the front-passenger seat. This could cause the systemto identify the seat as being occupied. In theevent of an accident, the restraint systems on
the front-passenger side may be triggeredand have to be replaced.
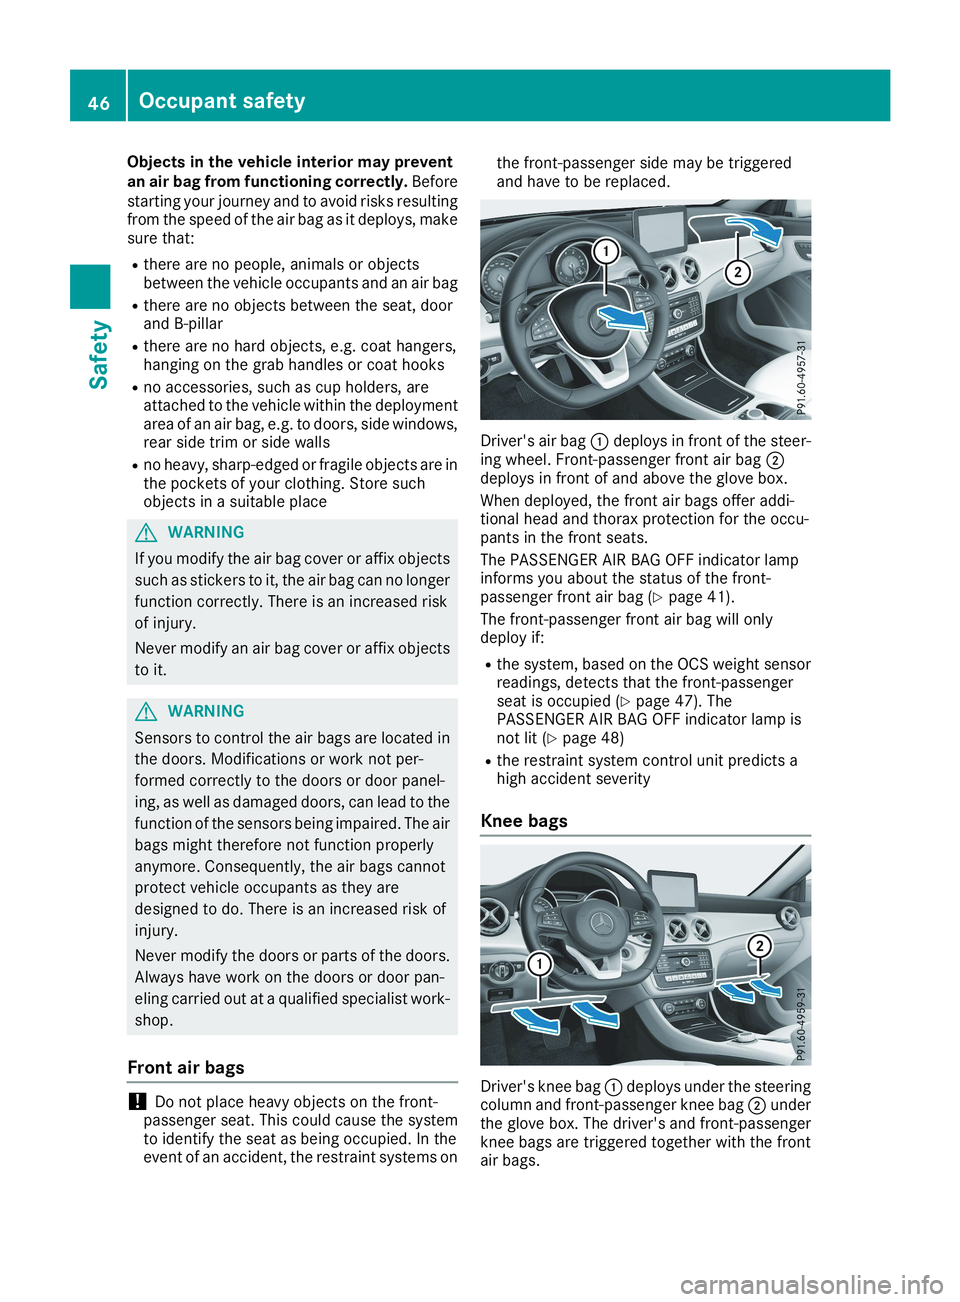
Driver's air bag�Cdeploys in front of the steer-ing wheel. Front-passenger front air bag�Ddeploys in front of and above the glove box.
When deployed, the front air bags offer addi-tional head and thorax protection for the occu-pants in the front seats.
The PASSENGER AIR BAG OFF indicator lampinforms you about the status of the front-passenger front air bag (Ypage 41).
The front-passenger front air bag will onlydeploy if:
Rthe system, based on the OCS weight sensorreadings, detects that the front-passengerseat is occupied (Ypage 47). ThePASSENGER AIR BAG OFF indicator lamp isnot lit (Ypage 48)
Rthe restraint system control unit predicts ahigh accident severity
Knee bags
Driver's knee bag�Cdeploys under the steeringcolumn and front-passenger knee bag�Dunderthe glove box. The driver's and front-passengerknee bags are triggered together with the frontair bags.
46Occupant safety
Safety
Page 50 of 330

Requirements
To be classified correctly, the front passengermust sit:
Rwith the seat belt fastened correctly
Rin an almost upright position with their backagainst the seat backrest
Rwith their feet resting on the floor, if possible
If the front passenger does not observe theseconditions, OCS may produce a false classifica-tion, e.g. because the front passenger:
Rtransfers their weight by supporting them-selves on a vehicle armrest
Rsits in such a way that their weight is raisedfrom the seat cushion
If it is absolutely necessary to install a childrestraint system on the front-passenger seat, besure to observe the correct positioning of thechild restraint system. Never place objectsunder or behind the child restraint system, e.g. acushion. The entire base of the child restraintsystem must always rest on the seat cushion ofthe front-passenger seat. The backrest of theforward-facing child restraint system must lie asflat as possible against the backrest of the front-passenger seat.
The child restraint system must not touch theroof or be subjected to a load by the headrestraint. Adjust the angle of the seat backrestand the head restraint position accordingly.
Only then can OCS be guaranteed to functioncorrectly. Always observe the child restraint sys-tem manufacturer's installation and operatinginstructions.
Occupant Classification System opera-
tion (OCS)
�CPASSENGER AIR BAG ON indicator lamp
�DPASSENGER AIR BAG OFF indicator lamp
The indicator lamps inform you whether thefront-passenger front air bag is deactivated orenabled.
XPress the Start/Stop button once or twice, orturn the SmartKey to position�Gor�Hin theignition lock.The system carries out self-diagnostics.
The PASSENGER AIR BAG OFF and PASSENGERAIR BAG ON indicator lamps must light up simul-taneously for approximately six seconds.
The indicator lamps display the status of thefront-passenger front air bag.
RPASSENGER AIR BAG ON lights up for 60 sec-onds, subsequently both indicator lamps areoff (PASSENGER AIR BAG ON and OFF): thefront-passenger front air bag is able to deployin the event of an accident.
RPASSENGER AIR BAG OFF lights up: the front-passenger front air bag is deactivated. It willthen not be deployed in the event of an acci-dent.
If the PASSENGER AIR BAG ON indicator lamp isoff, only the PASSENGER AIR BAG OFF indicatorlamp shows the status of the front-passengerfront air bag. The PASSENGER AIR BAG OFFindicator lamp may be lit continuously or be off.
If the status of the front-passenger front air bagchanges while the vehicle is in motion, an air bagdisplay message appears in the instrument clus-ter (Ypage 202). When the front-passengerseat is occupied, always pay attention to thePASSENGER AIR BAG OFF indicator lamp. Beaware of the status of the front-passenger frontair bag both before and during the journey.
GWARNING
If the PASSENGER AIR BAG OFF indicator
lamp is lit, the front-passenger front air bag is
disabled. It will not be deployed in the event of
an accident and cannot perform its intended
protective function. A person in the front-
passenger seat could then, for example, come
into contact with the vehicle's interior, espe-
cially if the person is sitting too close to the
dashboard. This poses an increased risk of
injury or even fatal injury.
When the front-passenger seat is occupied,
always ensure that:
Rthe classification of the person in the front-
passenger seat is correct and the front-
48Occupant safety
Safety
Page 54 of 330
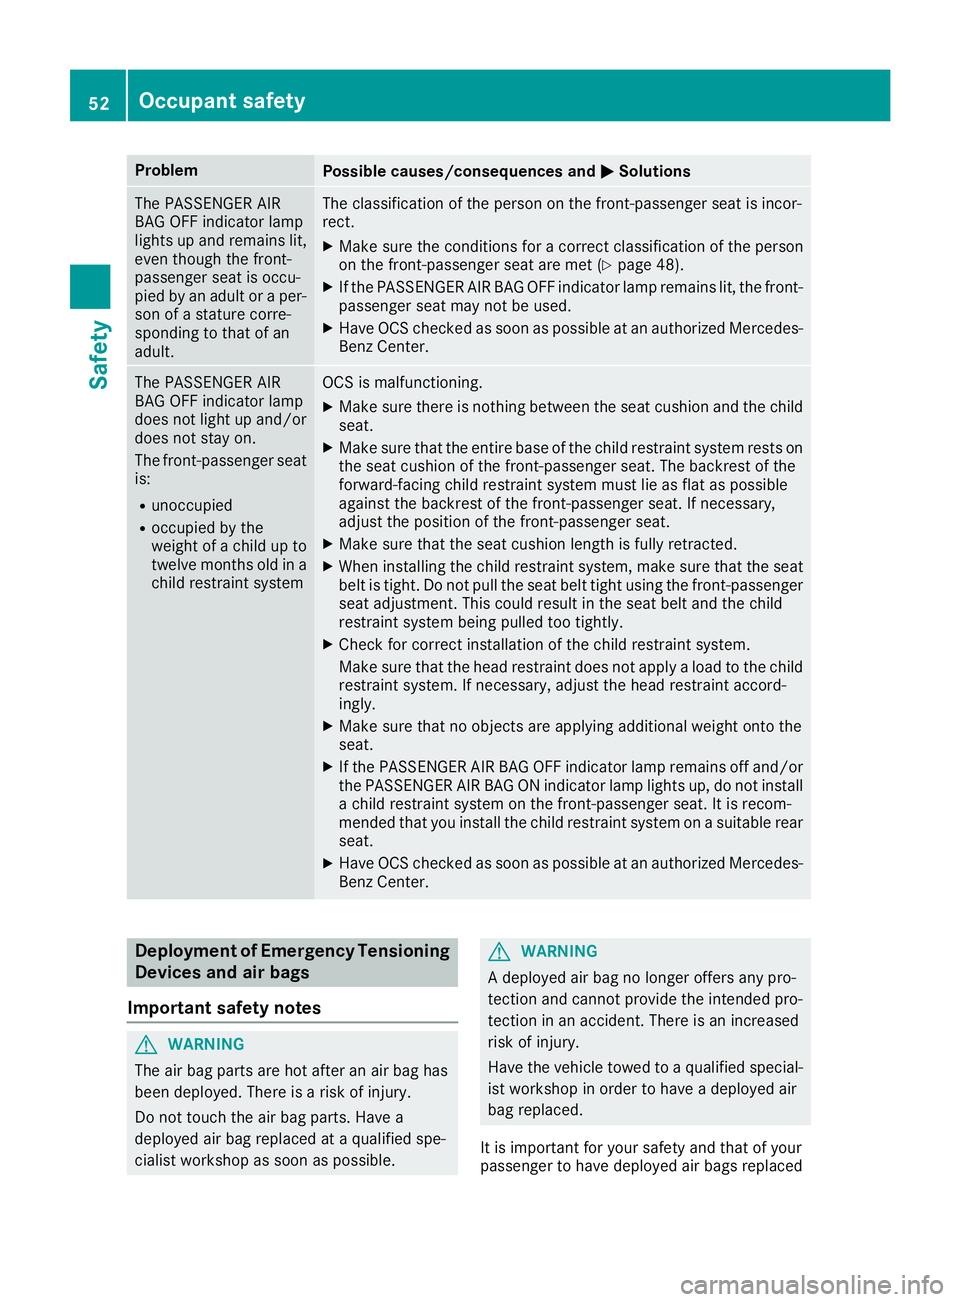
ProblemPossible causes/consequences and�P�PSolutions
The PASSENGER AIRBAG OFF indicator lamplights up and remains lit,even though the front-passenger seat is occu-pied by an adult or a per-son of a stature corre-sponding to that of anadult.
The classification of the person on the front-passenger seat is incor-rect.
XMake sure the conditions for a correct classification of the personon the front-passenger seat are met (Ypage 48).
XIf the PASSENGER AIR BAG OFF indicator lamp remains lit, the front-passenger seat may not be used.
XHave OCS checked as soon as possible at an authorized Mercedes-Benz Center.
The PASSENGER AIRBAG OFF indicator lampdoes not light up and/ordoes not stay on.
The front-passenger seatis:
Runoccupied
Roccupied by theweight of a child up totwelve months old in achild restraint system
OCS is malfunctioning.
XMake sure there is nothing between the seat cushion and the childseat.
XMake sure that the entire base of the child restraint system rests onthe seat cushion of the front-passenger seat. The backrest of theforward-facing child restraint system must lie as flat as possibleagainst the backrest of the front-passenger seat. If necessary,adjust the position of the front-passenger seat.
XMake sure that the seat cushion length is fully retracted.
XWhen installing the child restraint system, make sure that the seatbelt is tight. Do not pull the seat belt tight using the front-passengerseat adjustment. This could result in the seat belt and the childrestraint system being pulled too tightly.
XCheck for correct installation of the child restraint system.
Make sure that the head restraint does not apply a load to the childrestraint system. If necessary, adjust the head restraint accord-ingly.
XMake sure that no objects are applying additional weight onto theseat.
XIf the PASSENGER AIR BAG OFF indicator lamp remains off and/orthe PASSENGER AIR BAG ON indicator lamp lights up, do not installa child restraint system on the front-passenger seat. It is recom-mended that you install the child restraint system on a suitable rearseat.
XHave OCS checked as soon as possible at an authorized Mercedes-Benz Center.
Deployment of Emergency Tensioning
Devices and air bags
Important safety notes
GWARNING
The air bag parts are hot after an air bag has
been deployed. There is a risk of injury.
Do not touch the air bag parts. Have a
deployed air bag replaced at a qualified spe-
cialist workshop as soon as possible.
GWARNING
A deployed air bag no longer offers any pro-
tection and cannot provide the intended pro-
tection in an accident. There is an increased
risk of injury.
Have the vehicle towed to a qualified special-
ist workshop in order to have a deployed air
bag replaced.
It is important for your safety and that of yourpassenger to have deployed air bags replaced
52Occupant safety
Safety
Page 56 of 330
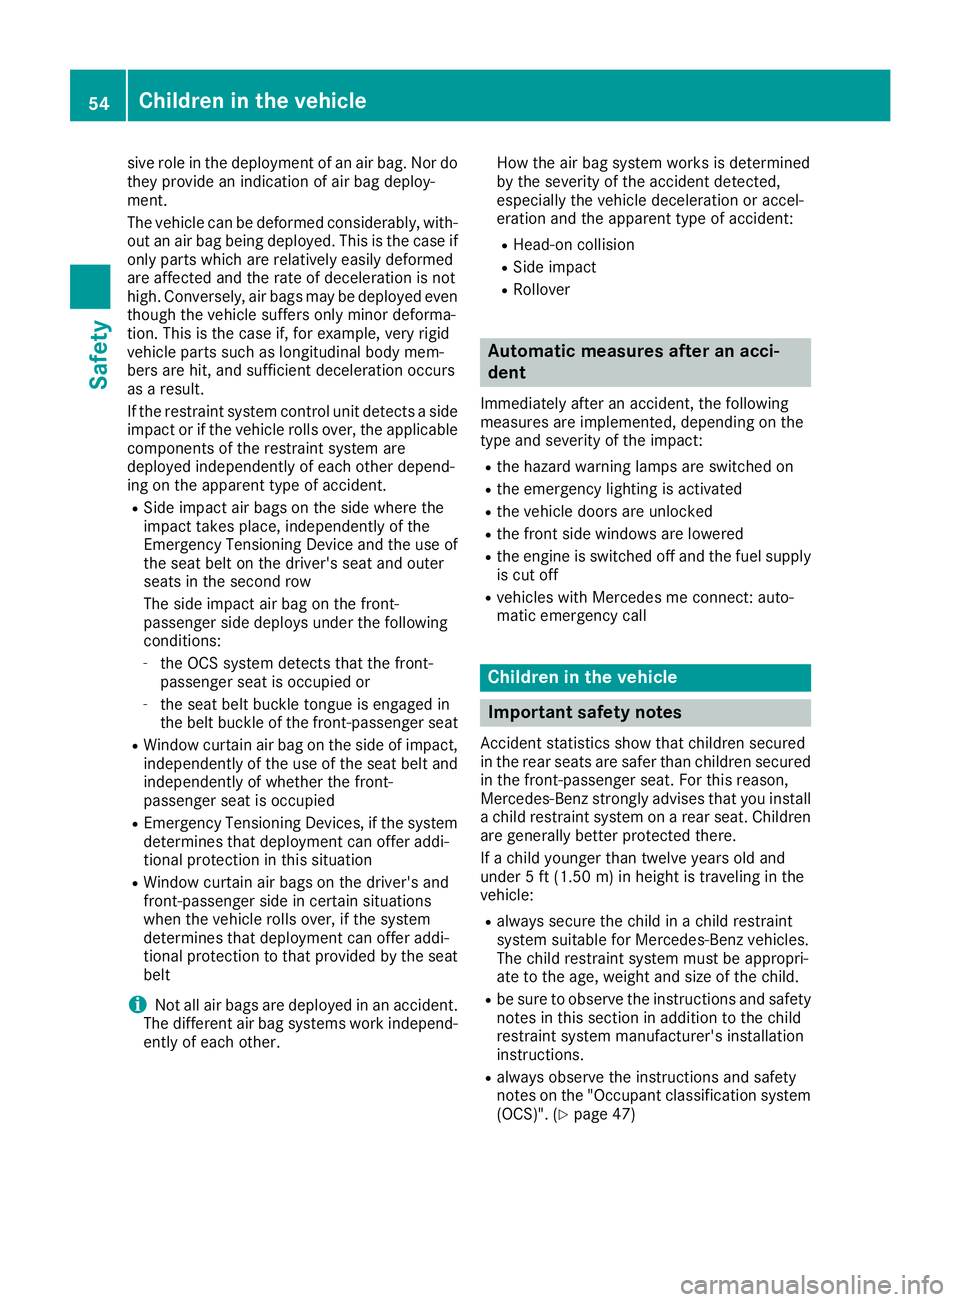
sive role in the deployment of an air bag. Nor dothey provide an indication of air bag deploy-ment.
The vehicle can be deformed considerably, with-out an air bag being deployed. This is the case ifonly parts which are relatively easily deformedare affected and the rate of deceleration is nothigh. Conversely, air bags may be deployed eventhough the vehicle suffers only minor deforma-tion. This is the case if, for example, very rigidvehicle parts such as longitudinal body mem-bers are hit, and sufficient deceleration occursas a result.
If the restraint system control unit detects a sideimpact or if the vehicle rolls over, the applicablecomponents of the restraint system aredeployed independently of each other depend-ing on the apparent type of accident.
RSide impact air bags on the side where theimpact takes place, independently of theEmergency Tensioning Device and the use ofthe seat belt on the driver's seat and outerseats in the second row
The side impact air bag on the front-passenger side deploys under the followingconditions:
-the OCS system detects that the front-passenger seat is occupied or
-the seat belt buckle tongue is engaged inthe belt buckle of the front-passenger seat
RWindow curtain air bag on the side of impact,independently of the use of the seat belt andindependently of whether the front-passenger seat is occupied
REmergency Tensioning Devices, if the systemdetermines that deployment can offer addi-tional protection in this situation
RWindow curtain air bags on the driver's andfront-passenger side in certain situationswhen the vehicle rolls over, if the systemdetermines that deployment can offer addi-tional protection to that provided by the seatbelt
iNot all air bags are deployed in an accident.The different air bag systems work independ-ently of each other.
How the air bag system works is determinedby the severity of the accident detected,especially the vehicle deceleration or accel-eration and the apparent type of accident:
RHead-on collision
RSide impact
RRollover
Automatic measures after an acci-
dent
Immediately after an accident, the followingmeasures are implemented, depending on thetype and severity of the impact:
Rthe hazard warning lamps are switched on
Rthe emergency lighting is activated
Rthe vehicle doors are unlocked
Rthe front side windows are lowered
Rthe engine is switched off and the fuel supplyis cut off
Rvehicles with Mercedes me connect: auto-matic emergency call
Children in the vehicle
Important safety notes
Accident statistics show that children securedin the rear seats are safer than children securedin the front-passenger seat. For this reason,Mercedes-Benz strongly advises that you installa child restraint system on a rear seat. Childrenare generally better protected there.
If a child younger than twelve years old andunder 5 ft (1.50 m) in height is traveling in thevehicle:
Ralways secure the child in a child restraintsystem suitable for Mercedes-Benz vehicles.The child restraint system must be appropri-ate to the age, weight and size of the child.
Rbe sure to observe the instructions and safetynotes in this section in addition to the childrestraint system manufacturer's installationinstructions.
Ralways observe the instructions and safetynotes on the "Occupant classification system(OCS)". (Ypage 47)
54Children in the vehicle
Safety