2019 MASERATI QUATTROPORTE fuel
[x] Cancel search: fuelPage 168 of 396
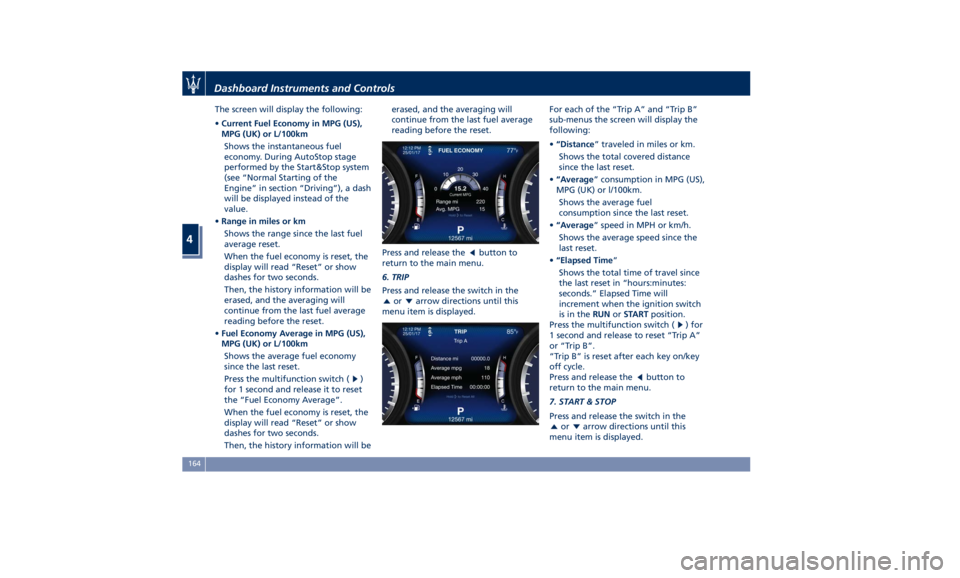
The screen will display the following:
• Current Fuel Economy in MPG (US),
MPG (UK) or L/100km
Shows the instantaneous fuel
economy. During AutoStop stage
performed by the Start&Stop system
(see “Normal Starting of the
Engine” in section “Driving”), a dash
will be displayed instead of the
value.
• Range in miles or km
Shows the range since the last fuel
average reset.
When the fuel economy is reset, the
display will read “Reset” or show
dashes for two seconds.
Then, the history information will be
erased, and the averaging will
continue from the last fuel average
reading before the reset.
• Fuel Economy Average in MPG (US),
MPG (UK) or L/100km
Shows the average fuel economy
since the last reset.
Press the multifunction switch (
)
for 1 second and release it to reset
the “Fuel Economy Average”.
When the fuel economy is reset, the
display will read “Reset” or show
dashes for two seconds.
Then, the history information will be erased, and the averaging will
continue from the last fuel average
reading before the reset.
Press and release the
button to
return to the main menu.
6. TRIP
Press and release the switch in the
or arrow directions until this
menu item is displayed. For each of the “Trip A” and “Trip B”
sub-menus the screen will display the
following:
• “Distance ” traveled in miles or km.
Shows the total covered distance
since the last reset.
• “Average ” consumption in MPG (US),
MPG (UK) or l/100km.
Shows the average fuel
consumption since the last reset.
• “Average ” speed in MPH or km/h.
Shows the average speed since the
last reset.
• “Elapsed Time ”
Shows the total time of travel since
the last reset in “hours:minutes:
seconds.” Elapsed Time will
increment when the ignition switch
is in the RUN or START position.
Press the multifunction switch (
) for
1 second and release to reset “Trip A”
or “Trip B”.
“Trip B” is reset after each key on/key
off cycle.
Press and release the
button to
return to the main menu.
7. START & STOP
Press and release the switch in the
or arrow directions until this
menu item is displayed.Dashboard Instruments and Controls
4
164
Page 173 of 396
“Time” is selected). A check mark will
remain next to the previously-selected
item until a new selection is made.
Press and release the switch (
)to
select an item. The notification of
setting saved appears as a popup for 2
seconds, then the display will show
the last-modified item.
Press and release the
button to
return to the “Screen Setup”
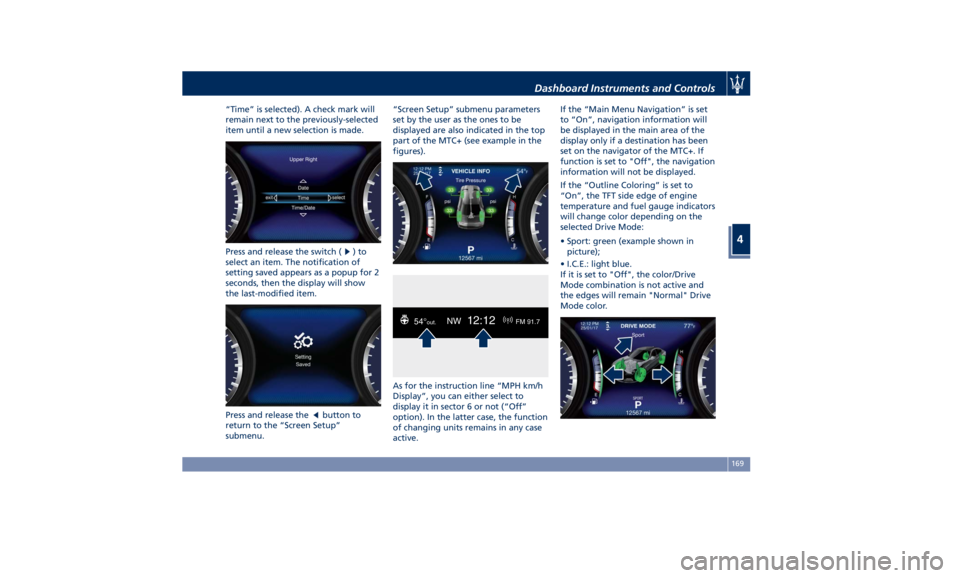
submenu. “Screen Setup” submenu parameters
set by the user as the ones to be
displayed are also indicated in the top
part of the MTC+ (see example in the
figures).
As for the instruction line “MPH km/h
Display”, you can either select to
display it in sector 6 or not (“Off”
option). In the latter case, the function
of changing units remains in any case
active. If the “Main Menu Navigation” is set
to “On”, navigation information will
be displayed in the main area of the
display only if a destination has been
set on the navigator of the MTC+. If
function is set to "Off", the navigation
information will not be displayed.
If the “Outline Coloring” is set to
“On”, the TFT side edge of engine
temperature and fuel gauge indicators
will change color depending on the
selected Drive Mode:
• Sport: green (example shown in
picture);
• I.C.E.: light blue.
If it is set to "Off", the color/Drive
Mode combination is not active and
the edges will remain "Normal" Drive
Mode color.Dashboard Instruments and Controls
4
169
Page 177 of 396
or engine stall and your vehicle may
require towing.
Low Fuel Indicator
When the fuel level reaches
approximately 4.2 Gallons (16
litres) this light under the fuel
gauge indicator will turn on,
and remain on until fuel is added
together with the related message. In
this condition the color indicating the
quantity of fuel in the tank, inside the
indicator on display, will go from
white to amber.
Refer to “Refueling” in section
“Driving” for fuel filling.
Windshield Washer Low Fluid
Indicator
This indicator will illuminate
for 5 seconds to indicate a low
level of the windshield washer
fluid. A related message will
be displayed.
See “Maintenance Procedures” in
section “Maintenance and Care” for
fluid filling.
Headlight Aiming System Failure
Warning Light
This warning light and the
related message indicate a
failure of the automatic
headlight aiming system. Please contact an Authorized Maserati
Dealer to check the system.
Automatic High Beam Failure Warning
Light
This warning light and the
related message illuminate to
report a failure of the
automatic high beam
headlights.
Contact an Authorized Maserati
Dealer as soon as possible.
Suspensions Failure Warning Light
This warning light and the
related message turn on while
driving if there is a failure of
the Skyhook suspension
system.
Please contact an Authorized Maserati
Dealer to check the system (only with
optional Skyhook active suspension).
Ice Hazard Indicator
When the external
temperature falls below 38°F
(3°C), the temperature value
blinks for a few seconds, the
indicator light turns on, a message is
displayed and an acoustic signal is
triggered to warn the driver of the
risk of icy roadbed.
Under such conditions, we recommend
using the I.C.E. drive mode (see “Automatic Transmission” in section
“Driving”) drive carefully and slow
down as the grip of the tires may be
significantly reduced.
The indicator light flashes for 5
seconds and switches off when the
temperature reaches 43°F (6°C) or
higher.
Electric Parking Brake Failure Warning
Light
This warning light and related
message illuminate when
there is an EPB system failure.
The failure could also
completely or partially block the
vehicle because the parking brake
could remain on even after it has been
automatically or manually disengaged
though its controls.
If it is still possible to use the vehicle
(parking brake not engaged) drive to
the nearest Authorized Maserati
Dealer and remember to performing
each operation/command that the
electric parking brake is not
functioning.
Start&Stop Disable Indicator
This indicator illuminates
when Start&Stop is turned off
through the main menu item
“Start&Stop”, via the controls
located on the right side of theDashboard Instruments and Controls
4
173
Page 180 of 396
For further details, see “Lights” in
section “Understanding the Vehicle”.
Automatic High Beam On Indicator
This indicator turns on when
the “Auto High Beam Assist”
feature is set on MTC+ (see
“MTC+ Settings” in this
section).
Gear Shift Indicator Light
This indicator lights up to
indicate gear shift change in
order to optimize fuel
consumption.
See “Drive Mode” in section
“Driving” for further
information.
Service AWD System Message (AWD
version only)
The message and the warning light on
the TFT display will illuminate when
all-wheel drive feature requires
service. For further information refer
to “All-Wheel Drive” in section
“Driving”. Infotainment System The vehicle is equipped with the
infotainment Maserati Touch Control
Plus (MTC+) System, an advanced user
interface which combines innovative
and exclusive technical features
integrating entertainment, user
settings, air conditioning, navigation,
communication and information
features within a single system.
The MTC+ System features an audio
system which is acoustically optimized
for this specific vehicle.
WARNING!
The navigation system assists the
driver while driving, providing advice
and suggestions, by voice guidance
and graphic information, for the best
route to reach the set destination. The
suggestions provided by the
navigation system do not relieve the
driver from full responsibility for the
maneuvers made through traffic while
driving, or from compliance with road
regulations and other provisions
regarding road traffic. The person
driving the vehicle is always and in
any case responsible for safe driving
on the road.Dashboard Instruments and Controls
4
176
Page 211 of 396

two vents on the upper part of the
dashboard and two positioned at
the rear end of the central console.
Each of these vents can be singly
adjusted. The air grids or vanes of
the vents can be moved to adjust air
flow direction. A setting wheel,
placed near each vent, allows to
regulate or close the airflow.
• “Bi-Level” mode
Air for each zone comes from the
dashboard and central console
adjustable vents and the fixed floor
vents. A small portion of the airflow
is directed through the
defrost/demist vents to prevent
windows fogging.
NOTE:
Bi-Level mode is designed to let cooler
air come in the dashboard and rear
part of the central console vents and
warmer air from the floor vents.
• “Defrost” mode
Air for each zone comes from the
dashboard defrost/demist vents to
prevent windows fogging.
• “Mix” mode
Air for each zone comes from the
defrost/demist vent, the vent under
the dashboard and from floor vent. This mode is recommended for cold
climates, to improve comfort and
prevent windows fogging.
• “Hi-Level” mode
Air for each zone comes from the
dashboard defrost/demist vents and
from the dashboard adjustable
vents, the central console adjustable
vent and the fixed floor vent.
• “Tri-Level” mode
Air for each zone comes from all the
adjustable/fixed and defrost/demist
vents.
14. “SYNC” mode
Touch the “SYNC” soft-key on the
MTC+ to switch the Sync feature
on/off. The “SYNC” soft-key
illuminates when this feature is
selected. This function is used to
synchronise the passenger
temperature setting with the driver
temperature setting.
Changing the passenger temperature
setting while in “SYNC” will
automatically exit this feature.
15. “REAR” mode
This soft-key is present only if the
vehicle is equipped with the
additional dual-zone air conditioning
system for rear passengers. Touching "REAR" soft-key you enter
the screen where the settings
available for rear seat passengers are
displayed. For the description of these
controls, see paragraph "Four-Zone
Climate Controls (optional)" of this
chapter.
Dual Zone Climate Control
Functions Air Conditioning (A/C)
The “A/C” soft-key allows to manually
activate or deactivate the air
conditioning system. When the air
conditioning system is turned on, cool
dehumidified air will flow through the
vents into the cabin. For improved fuel
economy, touch the “A/C” soft-key to
turn off the air conditioning and
manually adjust the blower and
airflow mode settings.
When the “A/C” and “AUTO”
functions are switched off it is not
possible to have air at a lower
temperature than the outside.
Recirculation
and Air Quality
Sensor
When outside air contains smoke,
odours, or high humidity, or if rapid
cooling is desired, you may wish to
recirculate interior air by pressing the
recirculation control button or theDashboard Instruments and Controls
4
207
Page 221 of 396
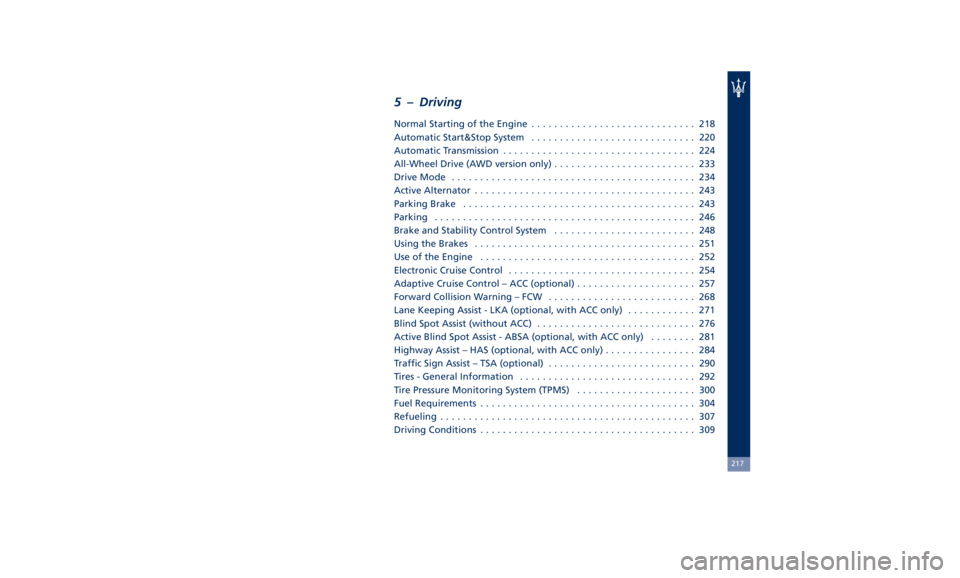
5 – Driving Normal Starting of the Engine ............................. 218
Automatic Start&Stop System ............................. 220
Automatic Transmission .................................. 224
All-Wheel Drive (AWD version only) ......................... 233
Drive Mode ........................................... 234
Active Alternator ....................................... 243
Parking Brake ......................................... 243
Parking .............................................. 246
Brake and Stability Control System ......................... 248
Using the Brakes ....................................... 251
Use of the Engine ...................................... 252
Electronic Cruise Control ................................. 254
Adaptive Cruise Control – ACC (optional) ..................... 257
Forward Collision Warning – FCW .......................... 268
Lane Keeping Assist - LKA (optional, with ACC only) ............ 271
Blind Spot Assist (without ACC) ............................ 276
Active Blind Spot Assist - ABSA (optional, with ACC only) ........ 281
Highway Assist – HAS (optional, with ACC only) ................ 284
Traffic Sign Assist – TSA (optional) .......................... 290
Tires - General Information ............................... 292
Tire Pressure Monitoring System (TPMS) ..................... 300
Fuel Requirements ...................................... 304
Refueling ............................................. 307
Driving Conditions ...................................... 309
217
Page 222 of 396
Normal Starting of the
Engine WARNING!
It is dangerous to run the engine in an
enclosed area. The engine consumes
oxygen and discharges carbon
dioxide, carbon monoxide and other
toxic gases in the atmosphere.
WARNING!
California Proposition 65
Operating, servicing and maintaining
a passenger vehicle or off-road vehicle
can expose you to chemicals including
such as, engine exhaust, carbon
monoxide, phthalates and lead, that
which are known to the State of
California to cause cancer and birth
defects or other reproductive harm. To
minimize exposure, avoid breathing
exhaust, do not idle the engine except
as necessary, service your vehicle in a
well-ventilated area and wear gloves
or wash your hands frequently when
servicing your vehicle. For more
information go to: www.P65Warnings.ca.gov/passenger-
vehicle
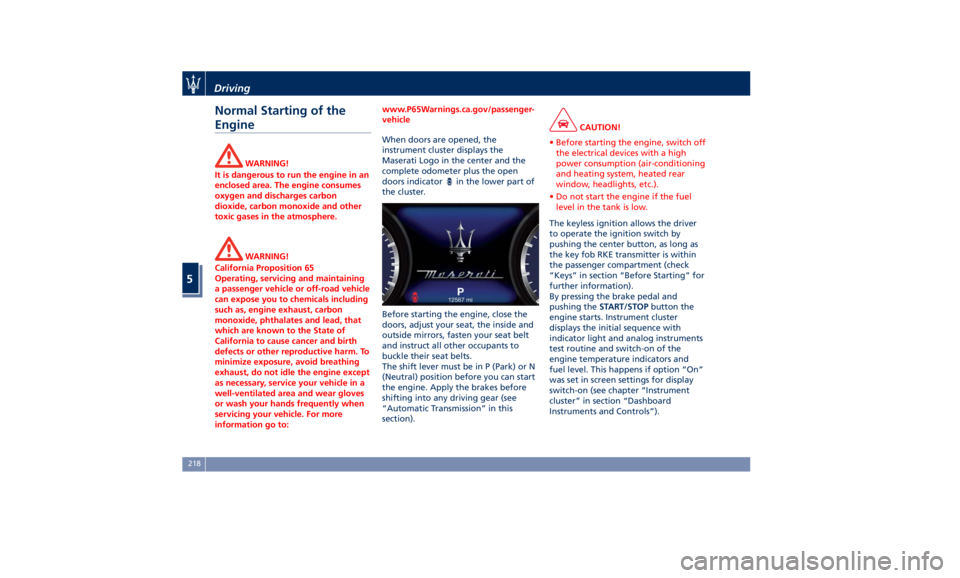
When doors are opened, the
instrument
cluster displays
the
Maserati Logo in the center and the
complete odometer plus the open
doors indicator
in the lower part of
the cluster.
Before starting the engine, close the
doors, adjust your seat, the inside and
outside mirrors, fasten your seat belt
and instruct all other occupants to
buckle their seat belts.
The shift lever must be in P (Park) or N
(Neutral) position before you can start
the engine. Apply the brakes before
shifting into any driving gear (see
“Automatic Transmission” in this
section). CAUTION!
• Before starting the engine, switch off
the electrical devices with a high
power consumption (air-conditioning
and heating system, heated rear
window, headlights, etc.).
• Do not start the engine if the fuel
level in the tank is low.
The keyless ignition allows the driver
to
operate the
ignition switch by
pushing the center button, as long as
the key fob RKE transmitter is within
the passenger compartment (check
“Keys” in section “Before Starting” for
further information).
By pressing the brake pedal and
pushing the START/STOP button the
engine starts. Instrument cluster
displays the initial sequence with
indicator light and analog instruments
test routine and switch-on of the
engine temperature indicators and
fuel level. This happens if option “On”
was set in screen settings for display
switch-on (see chapter “Instrument
cluster” in section “Dashboard
Instruments and Controls”).Driving
5
218
Page 224 of 396
Starting with a Cold Engine
Start-off slowly, avoiding sudden
acceleration and rev the engine up at
low medium speeds. High-
performance driving should be
avoided until the engine temperature
reaches 149-158°F (65-70°C).
Engine Turn-Off • With the shift lever in P (Park), D
(Drive) or R (Reverse) positions (see
“Automatic Transmission” in this
section) and vehicle standstill, press
and release the START/STOP button
to switch off the engine. A burst on
the accelerator pedal before turning
off the engine has no purpose and
increases fuel consumption.
• If the shift lever is in N (Neutral) and
the START/STOP button is pressed
once, the instrument cluster will
display a “Vehicle Not in Park”
message and the engine will remain
running.
WARNING!
Never leave a vehicle out of the P
(Park) position, as it could move. NOTE:
If
the ignition switch is left in the ACC
or RUN (engine not running) position
and the transmission is in P (Park), the
system will automatically time out
after 30 minutes of inactivity and the
ignition will switch to OFF position.
Engine Turn Off when in Automatic
Start&Stop
When the engine has been turned off
by the Start&Stop system, press and
release the START/STOP button. The
ignition switch will return to the OFF
position and the vehicle is off.
“Panic Stop” Strategy In panic conditions, if driver stops
engine in any non-standard manner
while driving at a speed over 2 mph
(3 km/h), the “Panic Stop” strategy can
manage the situation by checking
gearchange condition upon engine
cutting, driver’s action on brakes, road
condition (flat or slope) so as to set
gearchange to the most suitable
condition.
The “Panic Stop” strategy considers
that the driver should stop the engine
by pressing the ignition switch at least
3 times or holding it depressed for at
least 2 seconds.Automatic Start&Stop
System The Maserati Start&Stop system allows
the engine to automatically switch off
when the vehicle stops and to restart
when the driver intends to drive. This
feature can reduce fuel consumption
up to 6% according to different drive
conditions. During the “Stop
(AutoStop)” phase the ignition is still
on and all security features are
available.
In order for the Start&Stop to activate,
the vehicle must be stationary and the
brake pedal adequately pressed.
NOTE:
If the brake pedal is not sufficiently
pressed the Start&Stop may not
function even if the vehicle is stopped.
When the Start&Stop switches off the
engine, the related light
illuminates on the instrument
cluster.
As soon as the brake pedal is released,
the engine turns on.
While the vehicle is stopped, the
transmission can be placed in P (Park)
pressing the “P” button on the shift
lever.Driving
5
220