2019 MASERATI QUATTROPORTE fuel
[x] Cancel search: fuelPage 76 of 396

will determine whether the enhanced
accident response system will have to
perform the following functions:
• cut off fuel to the engine;
• turn hazard lights and interior lights
on as long as the battery has power
or until the ignition switch is turned
off;
• unlock the doors automatically;
• disconnect the battery with a
pyrotechnic charge.
Air Bag Deployment Result
The advanced front air bags are
designed to deflate immediately after
deployment.
If you do have a collision which
deploys the air bags, any or all of the
following may occur:
• The nylon air bag material may
sometimes cause abrasions and/or
skin reddening to the driver and
front passenger as the air bags
deploy and unfold.
• As the air bags deflate, you may see
some smoke-like particles. The
particles are a normal by-product of
the process that generates the
non-toxic gas used for air bag
inflation. These airborne particles
may irritate the skin, eyes, nose, or
throat. If these particles settle on your clothing, follow the garment
manufacturer's instructions for
cleaning. Do not drive your vehicle
after the air bags have deployed. If
you are involved in another collision,
the air bags will not be in place to
protect you.
ENVIRONMENTAL!
Air bag inflation releases a small
amount of powder. This powder is not
harmful to the environment.
WARNING!
California Proposition 65
Operating, servicing and maintaining
a passenger vehicle or off-road vehicle
can expose you to chemicals including
such as, engine exhaust, carbon
monoxide, phthalates and lead, that
which are known to the State of
California to cause cancer and birth
defects or other reproductive harm. To
minimize exposure, avoid breathing
exhaust, do not idle the engine except
as necessary, service your vehicle in a
well-ventilated area and wear gloves
or wash your hands frequently when
servicing your vehicle. For more
information go to: www.P65Warnings.ca.gov/passenger-
vehicle
WARNING!
• Deployed air bags and seat belt
pretensioners cannot protect you in
another collision. Have the air bags,
seat belt pretensioners, and the
front seat belt retractor assemblies
replaced by a Maserati Service
Center. Also, have the Occupant
Restraint Controller (ORC) system
serviced as well.
• Have the air bag checked, serviced
and replaced only by an Authorized
Maserati Dealer.
Air Bag System Maintenance
WARNING!
• Modifications to any part of the air
bag system could cause it to fail;
thus you could be injured if the air
bag system is not there to protect
you. Do not modify the components
or wiring. Do not modify the front
bumper, vehicle body structure, or
add aftermarket side steps or
running boards.Before Starting
2
72
Page 96 of 396
• Check the tires (see “Tire Inflation
Pressure” chapter in section
“Features and Specifications”) for
proper cold inflation pressure.
Lights and Indicator Lights
• Have someone observe the operation
of exterior lights while you operate
the controls (see “Lights” chapter in
section “Understanding the
Vehicle”).
• Check turn signal and high beam
indicator lights on the instrument
cluster (see “Instrument Cluster”
chapter in section “Dashboard
Instruments and Controls”).
Door Latches
• Check for positive closing, latching,
and locking of doors and trunk lid
(see “Unlock the Vehicle with Key
fob” chapter in this section).
Fluid Leaks
• Check area under vehicle after
overnight parking for recent fluid
leaks (oil, fuel, etc.).
• If gasoline fumes are detected or
fluid leaks are suspected, contact the
Authorized Maserati Dealer . WARNING!
California Proposition 65
Operating, servicing and maintaining
a passenger vehicle or off-road vehicle
can expose you to chemicals including
such as, engine exhaust, carbon
monoxide, phthalates and lead, that
which are known to the State of
California to cause cancer and birth
defects or other reproductive harm. To
minimize exposure, avoid breathing
exhaust, do not idle the engine except
as necessary, service your vehicle in a
well-ventilated area and wear gloves
or wash your hands frequently when
servicing your vehicle. For more
information go to:
www.P65Warnings.ca.gov/passenger-
vehicleBefore Starting
2
92
Page 123 of 396

Daytime Running Lights (DRL) The lighting system uses the same
high or low intensity headlamps LED,
respectively, for the DRL lights and
front position lights.
DRL lights will turn on when the
twilight sensor is in “DAY” mode, the
engine is running and the light switch
is in
or “AUTO” position.
If a turn signal is activated, the DRL
LED on the same side of the vehicle
switches in position light function for
the duration of the turn signal
activation. Once the turn signal is
deactivated, the DRL LED will light up
again.
NOTE:
On Canadian vehicles DRL are always
on. On USA vehicles, the DRL lights
can be turned on and off using the
MTC+ System, see “MTC+ Settings” in
section “Dashboard Instruments and
Controls” for further information.
“Full-LED” Headlight with
Cornering Function These headlamps combine the
cornering function to the “Full-LED”
technology consisting of an additional
LED module which turns on when two
conditions occurs: the driver turns the steering wheel or the driver activates
the turn indicator. The cornering
function will illuminate the corner to
enhance the visibility to the driver as
long as speed will be lower than 25
mph (40 km/h).
“Full-LED” Technology
This technology creates headlights
with a simpler construction and a
more compact size compared to those
equipped with traditional or Xenon
light bulbs.
Other advantages are:
• a clearer light beam, with a cool
white tone that allows a better
perception of the contrasts thus
making the night vision more
efficient and less tiring;
• a longer duration equivalent at least
to that of the vehicle;
• a reduced current consumption. These features positively affect some
vehicle management economy aspects
by eliminating/reducing the light bulb
replacements and help limit fuel
consumption.
Automatic High Beam (for
versions/markets, where
provided) The Automatic High Beam headlight
control system provides increased
forward lighting at night by
automating high beam control
through the use of the forward-facing
digital camera located behind the
rear-view mirror, which is the same
one used for example by the Lane
Keeping Assist - LKA system on
vehicles with ADAS systems.
This camera detects the environmental
luminosity, the headlamps of
oncoming vehicles and the tail lamps
of proceding vehicles in the front
area. In these cases, the system
automatically switches from high
beams to low beams until the
approaching vehicle is out of view.
Furthermore, the digital camera is
able to detect the urban areas and the
inhabited centers and to turn off the
high beams when driving near of one
of them.Understanding the Vehicle
3
119
Page 129 of 396
The right regulator has 2 different
positions:
0
(OFF) Stable position: front seat
lighting and front dome light
LED are turned off.
1 st
Dimmable position: allows
minimum to maximum
brightness tuning of the
front dome light LED and the
front seats lighting.
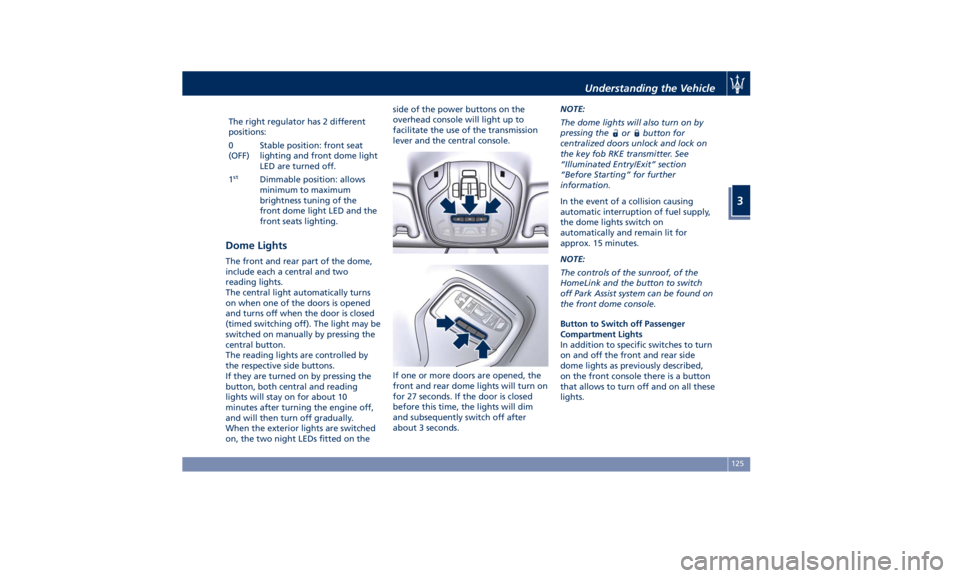
Dome Lights The front and rear part of the dome,
include each a central and two
reading lights.
The central light automatically turns
on when one of the doors is opened
and turns off when the door is closed
(timed switching off). The light may be
switched on manually by pressing the
central button.
The reading lights are controlled by
the respective side buttons.
If they are turned on by pressing the
button, both central and reading
lights will stay on for about 10
minutes after turning the engine off,
and will then turn off gradually.
When the exterior lights are switched
on, the two night LEDs fitted on the side of the power buttons on the
overhead console will light up to
facilitate the use of the transmission
lever and the central console.
If one or more doors are opened, the
front and rear dome lights will turn on
for 27 seconds. If the door is closed
before this time, the lights will dim
and subsequently switch off after
about 3 seconds. NOTE:
The dome lights will also turn on by
pressing the
or button for
centralized doors unlock and lock on
the key fob RKE transmitter. See
“Illuminated Entry/Exit” section
“Before Starting” for further
information.
In the event of a collision causing
automatic interruption of fuel supply,
the dome lights switch on
automatically and remain lit for
approx. 15 minutes.
NOTE:
The controls of the sunroof, of the
HomeLink and the button to switch
off Park Assist system can be found on
the front dome console.
Button to Switch off Passenger
Compartment Lights
In addition to specific switches to turn
on and off the front and rear side
dome lights as previously described,
on the front console there is a button
that allows to turn off and on all these
lights.Understanding the Vehicle
3
125
Page 157 of 396
Warning and Indicator Lights
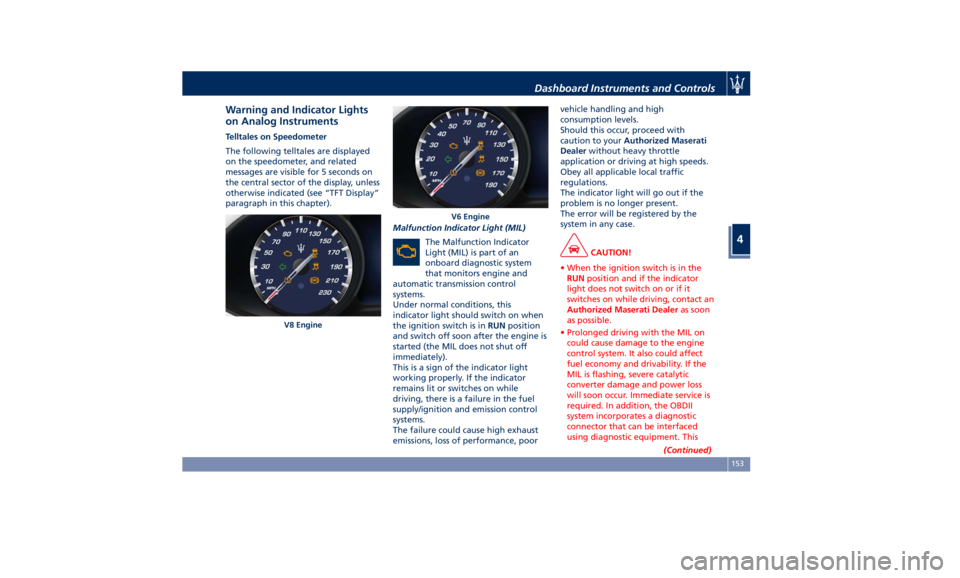
on Analog Instruments Telltales on Speedometer
The following telltales are displayed
on the speedometer, and related
messages are visible for 5 seconds on
the central sector of the display, unless
otherwise indicated (see “TFT Display”
paragraph in this chapter).
Malfunction Indicator Light (MIL)
The Malfunction Indicator
Light (MIL) is part of an
onboard diagnostic system
that monitors engine and
automatic transmission control
systems.
Under normal conditions, this
indicator light should switch on when
the ignition switch is in RUN position
and switch off soon after the engine is
started (the MIL does not shut off
immediately).
This is a sign of the indicator light
working properly. If the indicator
remains lit or switches on while
driving, there is a failure in the fuel
supply/ignition and emission control
systems.
The failure could cause high exhaust
emissions, loss of performance, poor vehicle handling and high
consumption levels.
Should this occur, proceed with
caution to your Authorized Maserati
Dealer without heavy throttle
application or driving at high speeds.
Obey all applicable local traffic
regulations.
The indicator light will go out if the
problem is no longer present.
The error will be registered by the
system in any case.
CAUTION!
• When the ignition switch is in the
RUN position and if the indicator
light does not switch on or if it
switches on while driving, contact an
Authorized Maserati Dealer as soon
as possible.
• Prolonged driving with the MIL on
could cause damage to the engine
control system. It also could affect
fuel economy and drivability. If the
MIL is flashing, severe catalytic
converter damage and power loss
will soon occur. Immediate service is
required. In addition, the OBDII
system incorporates a diagnostic
connector that can be interfaced
using diagnostic equipment. This
(Continued)V8 Engine V6 EngineDashboard Instruments and Controls
4
153
Page 162 of 396
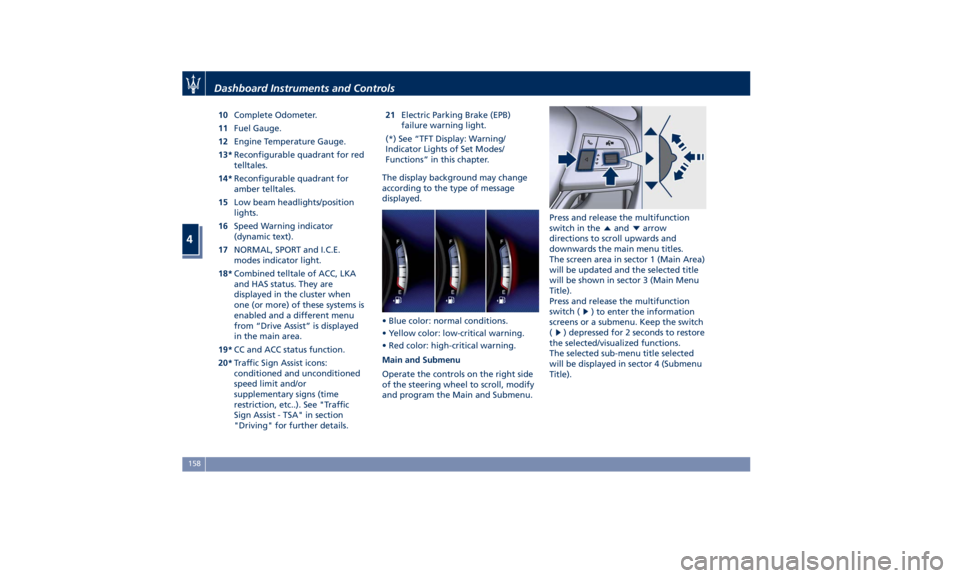
10 Complete Odometer.
11 Fuel Gauge.
12 Engine Temperature Gauge.
13* Reconfigurable quadrant for red
telltales.
14* Reconfigurable quadrant for
amber telltales.
15 Low beam headlights/position
lights.
16 Speed Warning indicator
(dynamic text).
17 NORMAL, SPORT and I.C.E.
modes indicator light.
18* Combined telltale of ACC, LKA
and HAS status. They are
displayed in the cluster when
one (or more) of these systems is
enabled and a different menu
from “Drive Assist” is displayed
in the main area.
19* CC and ACC status function.
20* Traffic Sign Assist icons:
conditioned and unconditioned
speed limit and/or
supplementary signs (time
restriction, etc..). See "Traffic
Sign Assist - TSA" in section
"Driving" for further details. 21 Electric Parking Brake (EPB)
failure warning light.
(*) See “TFT Display: Warning/
Indicator Lights of Set Modes/
Functions” in this chapter.
The display background may change
according to the type of message
displayed.
• Blue color: normal conditions.
• Yellow color: low-critical warning.
• Red color: high-critical warning.
Main and Submenu
Operate the controls on the right side
of the steering wheel to scroll, modify
and program the Main and Submenu. Press and release the multifunction
switch in the
and arrow
directions to scroll upwards and
downwards the main menu titles.
The screen area in sector 1 (Main Area)
will be updated and the selected title
will be shown in sector 3 (Main Menu
Title).
Press and release the multifunction
switch (
) to enter the information
screens or a submenu. Keep the switch
(
) depressed for 2 seconds to restore
the selected/visualized functions.
The selected sub-menu title selected
will be displayed in sector 4 (Submenu
Title).Dashboard Instruments and Controls
4
158
Page 163 of 396
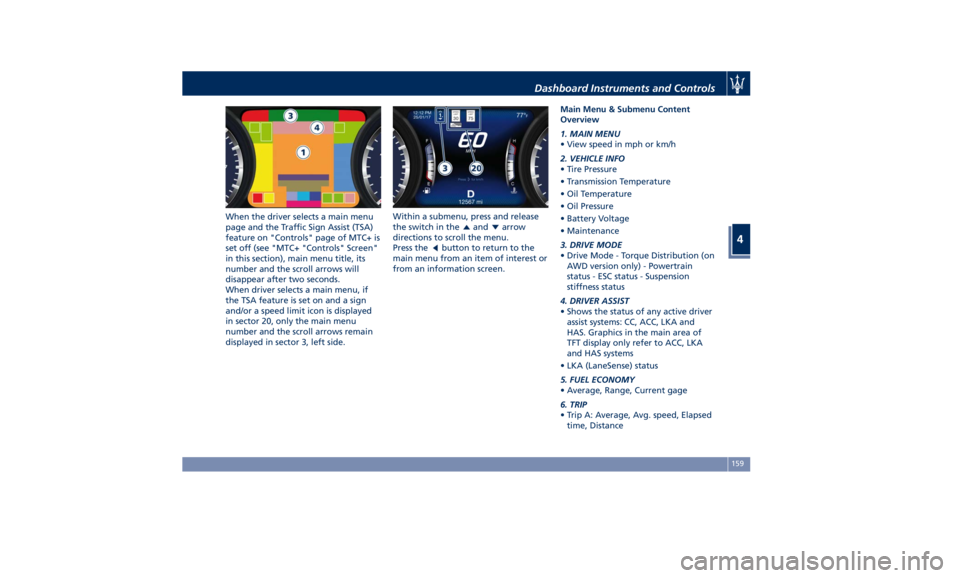
When the driver selects a main menu
page and the Traffic Sign Assist (TSA)
feature on "Controls" page of MTC+ is
set off (see "MTC+ "Controls" Screen"
in this section), main menu title, its
number and the scroll arrows will
disappear after two seconds.
When driver selects a main menu, if
the TSA feature is set on and a sign
and/or a speed limit icon is displayed
in sector 20, only the main menu
number and the scroll arrows remain
displayed in sector 3, left side. Within a submenu, press and release
the switch in the
and arrow
directions to scroll the menu.
Press the
button to return to the
main menu from an item of interest or
from an information screen. Main Menu & Submenu Content
Overview
1. MAIN MENU
• View speed in mph or km/h
2. VEHICLE INFO
• Tire Pressure
• Transmission Temperature
• Oil Temperature
• Oil Pressure
• Battery Voltage
• Maintenance
3. DRIVE MODE
• Drive Mode - Torque Distribution (on
AWD version only) - Powertrain
status - ESC status - Suspension
stiffness status
4. DRIVER ASSIST
• Shows the status of any active driver
assist systems: CC, ACC, LKA and
HAS. Graphics in the main area of
TFT display only refer to ACC, LKA
and HAS systems
• LKA (LaneSense) status
5. FUEL ECONOMY
• Average, Range, Current gage
6. TRIP
• Trip A: Average, Avg. speed, Elapsed
time, DistanceDashboard Instruments and Controls
4
159
Page 167 of 396
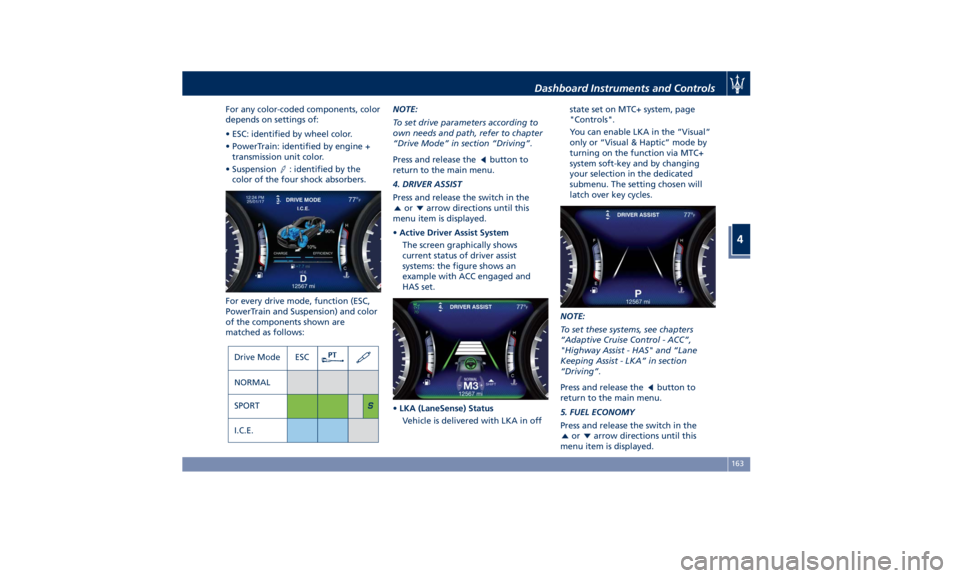
For any color-coded components, color
depends on settings of:
• ESC: identified by wheel color.
• PowerTrain: identified by engine +
transmission unit color.
• Suspension
: identified by the
color of the four shock absorbers.
For every drive mode, function (ESC,
PowerTrain and Suspension) and color
of the components shown are
matched as follows: NOTE:
To set drive parameters according to
own needs and path, refer to chapter
“Drive Mode” in section “Driving”.
Press and release the
button to
return to the main menu.
4. DRIVER ASSIST
Press and release the switch in the
or arrow directions until this
menu item is displayed.
• Active Driver Assist System
The screen graphically shows
current status of driver assist
systems: the figure shows an
example with ACC engaged and
HAS set.
• LKA (LaneSense) Status
Vehicle is delivered with LKA in off state set on MTC+ system, page
"Controls".
You can enable LKA in the ”Visual”
only or “Visual & Haptic” mode by
turning on the function via MTC+
system soft-key and by changing
your selection in the dedicated
submenu. The setting chosen will
latch over key cycles.
NOTE:
To set these systems, see chapters
“Adaptive Cruise Control - ACC”,
"Highway Assist - HAS" and “Lane
Keeping Assist - LKA” in section
“Driving”.
Press and release the
button to
return to the main menu.
5. FUEL ECONOMY
Press and release the switch in the
or arrow directions until this
menu item is displayed.Dashboard Instruments and Controls
4
163