2019 MASERATI QUATTROPORTE radio
[x] Cancel search: radioPage 86 of 396

Front Sensors - Warning Alerts
Front distance More than 50 in
(120 cm) 50-40 in
(120-101 cm) 40-24 in
(100-61 cm) 23.6-12.2 in
(60-31 cm) Less than 12 in
(30 cm)
Audible Alert None None Slow Fast Continuous
Arc in left and
right areas None 4 th
3 rd
2 nd
1 st
(inner most)
Light type None Solid Solid Flash Flash
Arc color - Green Amber Amber Red
Radio sound Active Active Mute Mute Mute
Rear Sensors - Warning Alerts
Rear
distance More than 78 in
(200 cm) 78-59.4 in
(200-151 cm) 60-40 in
(150-101 cm) 40-24 in
(100-61 cm) 23.6-12.2 in
(60-31 cm) Less than 12 in
(30 cm)
Audible
Alert None Single Slow Slow Fast Continuous
Arc in left
and right
areas None 5 th
4 th
3 rd
2 nd
1 st
(inner most)
Light type None Solid Solid Solid Flash Flash
Arc color – Green Amber Amber Amber Red
Radio sound Active Mute Mute Mute Mute Mute
NOTE:
• Maserati reserves the right to change specifications without prior notification.
• Park Assist will turn off the front park assist audible alert (chime) after approximately 4 seconds when an obstacle has
been detected, the vehicle is stationary, and brake pedal is applied.Before Starting
2
82
Page 89 of 396

or when the vehicle is overtaken by
motorcycles or other vehicles on one
or both sides in a queue of traffic.
When you set the volume, only the
parking sensor acoustic signal will be
affected. The radio or any other
devices connected to the vehicle
sound system will not be affected.
Refer to chapter “MTC+ Settings” in
section “Dashboard Instruments and
Controls” for further information.
Rear Parking Camera Your vehicle is equipped with a rear
parking camera that allows you to see
an image on the MTC+ screen of the
rear surroundings of your vehicle
whenever the shift lever is put into R
(Reverse).
When “Parkview Camera Off Delay”
mode is enabled, the rear view image
shall be displayed for up to 10 seconds
after shifting out of R (Reverse).
When “Rearwiew Camera Delay”
mode is enabled, the rear view image
shall be displayed for up to 10 seconds
after shifting out of R (Reverse).
To assist the driver during maneuvers
on dead-ends/roads and on
intersections, the vehicle may be
equipped with an optional surround
view camera system. In this case, the
rear parking camera is integrated into
the surround view camera system. In
both configurations (rear parking
camera only or surround view camera
system), you can always monitor the
rear view. For more details on this
option, see chapter "Surround View
Camera System (optional)" in this
section.
The image will be displayed along
with a caution note to “Check Entire
Surroundings” across the top of the screen. After five seconds this note
will disappear.
The rear parking camera is located on
the rear of the vehicle above the rear
license plate.
When the shift lever is shifted out of R
(Reverse), the rear camera mode is
exited and the navigation or audio
screen appears again.
When displayed, dynamic grid lines (if
the function is set to “MTC+ Settings”)
will illustrate the width of the vehicle
to assist with parking or aligning to a
hitch/receiver. The dynamic grid lines
will show separate zones in different
color that will help indicate the
distance to the rear of the vehicle.Before Starting
2
85
Page 105 of 396

• Within 15 seconds, touch the driver
or passenger seat soft-key a second
time to select LO-level ventilation.
• Within 15 seconds, touch the same
soft-key a third time to shut off the
seat ventilation. Driver Memory Seat This feature allows the driver to store
up to two different memory profiles
for easy recall through a memory
switch. Each memory profile contains
desired position settings for the driver
seat, external side mirrors, adjustable
pedals (optional), and power tilt and
telescopic steering column and a set of
programmed radio stations.
Your key fob RKE transmitter can also
be set to recall the same positions by
pressing the
button.
NOTE:
• Only one key fob RKE transmitter
can be linked to each of the memory
positions.
• “Passive Entry” door handles cannot
be linked to the memory function.
Use either the memory recall switch
or the key fob RKE transmitter (if
linked to the memory feature) to
recall memory positions 1 or 2.
The memory seat switch is located on
the driver's door trim panel. The
switch consists of three buttons:
• The “S” (SET) button, which is used
to activate the memory save
function. • The “1” and “2” buttons which are
used to recall either of two
programmed memory profiles.
Memory Profiles Setting NOTE:
Saving a new memory profile will
erase an existing profile from memory.
To create a new memory profile,
perform the following:
• Cycle the ignition device to the ACC
or RUN position.
• Adjust all memory profile settings to
desired preferences (i.e., seat, side
mirrors, adjustable pedals (optional),
power tilt and telescopic steering
column, and radio station presets).
• Press and release the “S” button on
the memory switch.
• Within 5 seconds, press and release
the memory button “1” or “2”.Understanding the Vehicle
3
101
Page 147 of 396
open, then adjust the sunroof opening
to minimise the buffeting.
Ignition Off Operation The power sunroof controls will
remain active for up to approximately
ten minutes after the ignition switch is
in OFF position. Opening either front
door will cancel this feature. The
ignition system timing can be set using
the MTC+ System (see “MTC+
Settings” in section “Dashboard
Instruments and Controls”).
Sunroof Maintenance Use only a nonabrasive cleaner and a
soft cloth to clean the glass panel. HomeLink ®
(optional) HomeLink ®
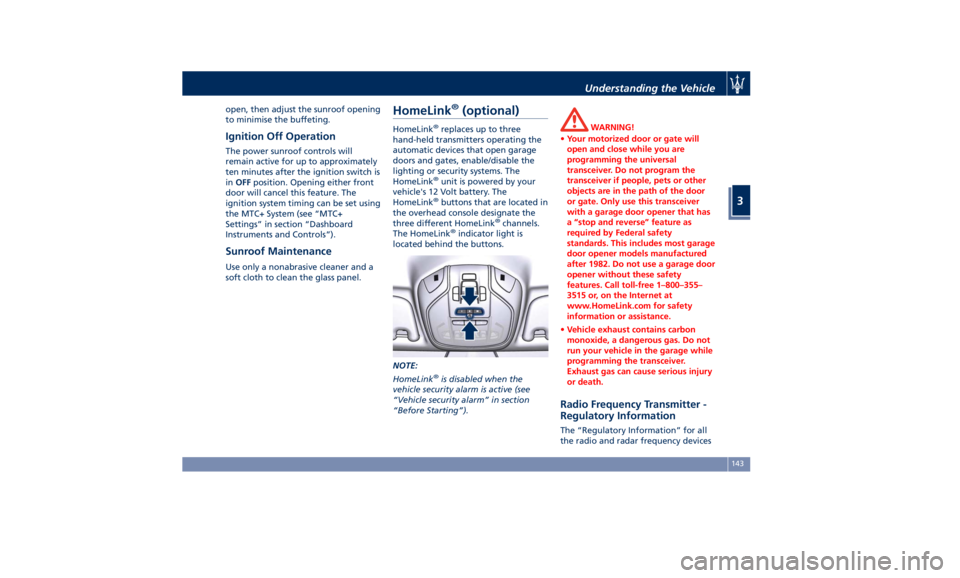
replaces up to three
hand-held transmitters operating the
automatic devices that open garage
doors and gates, enable/disable the
lighting or security systems. The
HomeLink ®
unit is powered by your
vehicle's 12 Volt battery. The
HomeLink ®
buttons that are located in
the overhead console designate the
three different HomeLink ®
channels.
The HomeLink ®
indicator light is
located behind the buttons.
NOTE:
HomeLink ®
is disabled when the
vehicle security alarm is active (see
“Vehicle security alarm” in section
“Before Starting”). WARNING!
• Your motorized door or gate will
open and close while you are
programming the universal
transceiver. Do not program the
transceiver if people, pets or other
objects are in the path of the door
or gate. Only use this transceiver
with a garage door opener that has
a “stop and reverse” feature as
required by Federal safety
standards. This includes most garage
door opener models manufactured
after 1982. Do not use a garage door
opener without these safety
features. Call toll-free 1–800–355–
3515 or, on the Internet at
www.HomeLink.com for safety
information or assistance.
• Vehicle exhaust contains carbon
monoxide, a dangerous gas. Do not
run your vehicle in the garage while
programming the transceiver.
Exhaust gas can cause serious injury
or death.
Radio Frequency Transmitter -
Regulatory Information The “Regulatory Information” for all
the radio and radar frequency devicesUnderstanding the Vehicle
3
143
Page 148 of 396
can be consulted by accessing the
"Services" section on the website
www.maserati.com.
Before You Start Programming
HomeLink ®
Be sure that your vehicle is parked
outside of the garage before you
begin programming.
For more efficient programming and
accurate transmission of the
radio-frequency signal it is
recommended that a new battery be
placed in the hand-held transmitter of
the device that is being programmed
to the HomeLink ®
system.
Before starting programming it is
necessary to erase the standard codes
memorized on the HomeLink ®
device
during the production phase. To erase
such codes:
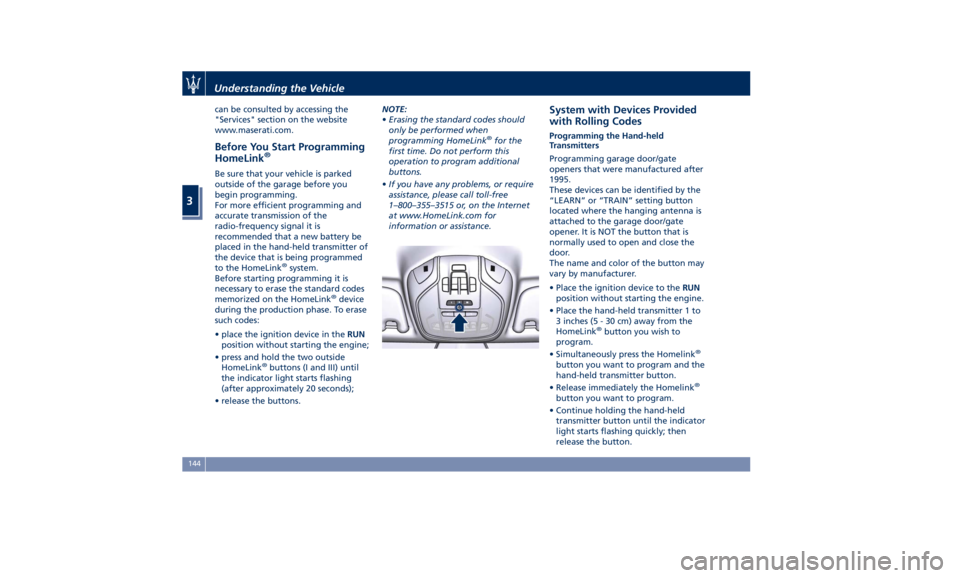
• place the ignition device in the RUN
position without starting the engine;
• press and hold the two outside
HomeLink ®
buttons (I and III) until
the indicator light starts flashing
(after approximately 20 seconds);
• release the buttons. NOTE:
• Erasing the standard codes should
only be performed when
programming HomeLink ®
for the
first time. Do not perform this
operation to program additional
buttons.
• If you have any problems, or require
assistance, please call toll-free
1–800–355–3515 or, on the Internet
at www.HomeLink.com for
information or assistance. System with Devices Provided
with Rolling Codes Programming the Hand-held
Transmitters
Programming garage door/gate
openers that were manufactured after
1995.
These devices can be identified by the
“LEARN” or “TRAIN” setting button
located where the hanging antenna is
attached to the garage door/gate
opener. It is NOT the button that is
normally used to open and close the
door.
The name and color of the button may
vary by manufacturer.
• Place the ignition device to the RUN
position without starting the engine.
• Place the hand-held transmitter 1 to
3 inches (5 - 30 cm) away from the
HomeLink ®
button you wish to
program.
• Simultaneously press the Homelink ®
button you want to program and the
hand-held transmitter button.
• Release immediately the Homelink ®
button you want to program.
• Continue holding the hand-held
transmitter button until the indicator
light starts flashing quickly; then
release the button.Understanding the Vehicle
3
144
Page 169 of 396
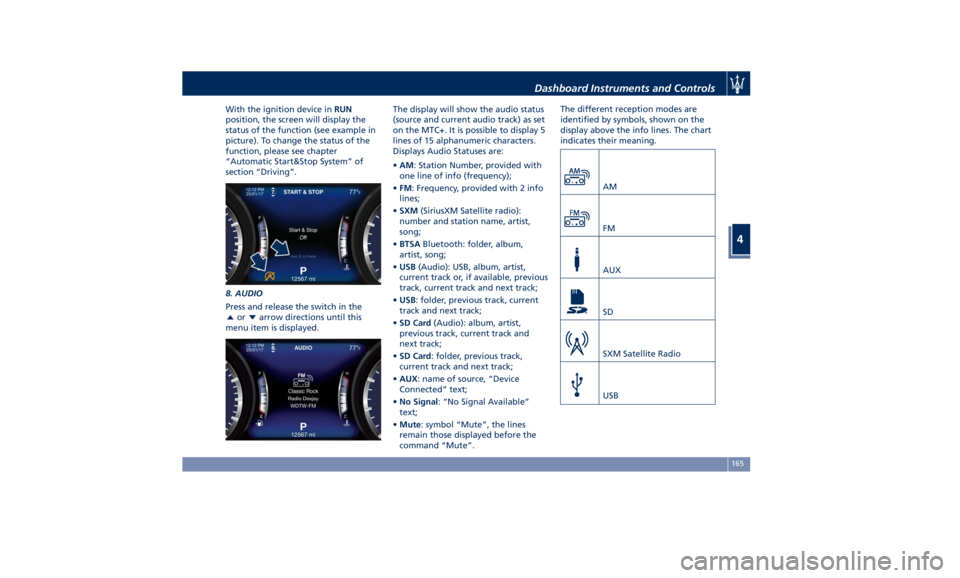
With the ignition device in RUN
position, the screen will display the
status of the function (see example in
picture). To change the status of the
function, please see chapter
“Automatic Start&Stop System” of
section “Driving”.
8. AUDIO
Press and release the switch in the
or arrow directions until this
menu item is displayed. The display will show the audio status
(source and current audio track) as set
on the MTC+. It is possible to display 5
lines of 15 alphanumeric characters.
Displays Audio Statuses are:
• AM : Station Number, provided with
one line of info (frequency);
• FM : Frequency, provided with 2 info
lines;
• SXM (SiriusXM Satellite radio):
number and station name, artist,
song;
• BTSA Bluetooth: folder, album,
artist, song;
• USB (Audio): USB, album, artist,
current track or, if available, previous
track, current track and next track;
• USB : folder, previous track, current
track and next track;
• SD Card (Audio): album, artist,
previous track, current track and
next track;
• SD Card : folder, previous track,
current track and next track;
• AUX : name of source, “Device
Connected” text;
• No Signal : “No Signal Available”
text;
• Mute : symbol “Mute”, the lines
remain those displayed before the
command “Mute”. The different reception modes are
identified by symbols, shown on the
display above the info lines. The chart
indicates their meaning.
AM
FM
AUX
SD
SXM Satellite Radio
USBDashboard Instruments and Controls
4
165
Page 181 of 396
The vehicle is provided with a specific
add to the owner’s manual, describing
the MTC+ System features and listing
all warnings and precautions, which
are essential for a safe use of the
system. Maserati advises you to read
this add carefully and thoroughly.
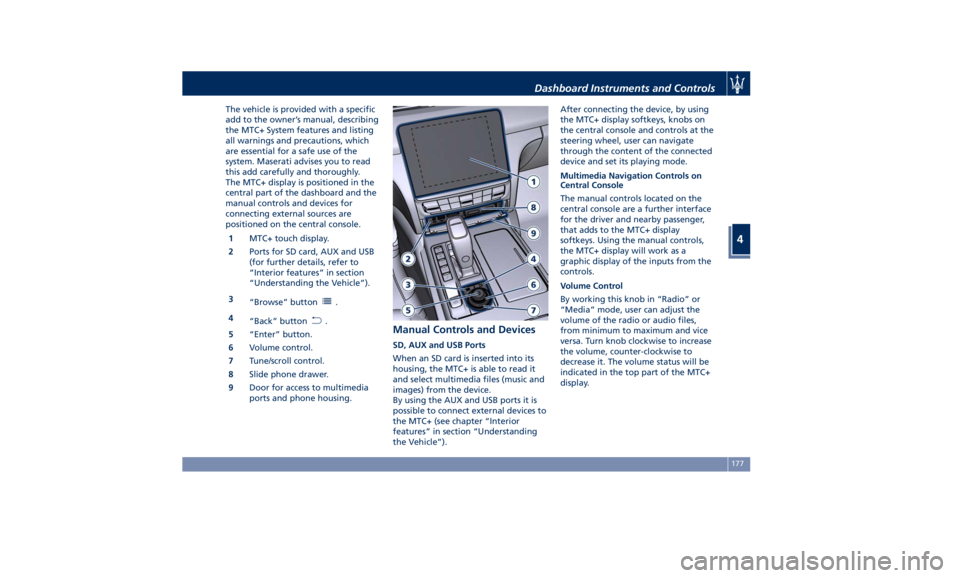
The MTC+ display is positioned in the
central part of the dashboard and the
manual controls and devices for
connecting external sources are
positioned on the central console.
1 MTC+ touch display.
2 Ports for SD card, AUX and USB
(for further details, refer to
“Interior features” in section
“Understanding the Vehicle”).
3
“Browse” button
.
4
“Back” button
.
5 “Enter” button.
6 Volume control.
7 Tune/scroll control.
8 Slide phone drawer.
9 Door for access to multimedia
ports and phone housing. Manual Controls and Devices SD, AUX and USB Ports
When an SD card is inserted into its
housing, the MTC+ is able to read it
and select multimedia files (music and
images) from the device.
By using the AUX and USB ports it is
possible to connect external devices to
the MTC+ (see chapter “Interior
features” in section “Understanding
the Vehicle”). After connecting the device, by using
the MTC+ display softkeys, knobs on
the central console and controls at the
steering wheel, user can navigate
through the content of the connected
device and set its playing mode.
Multimedia Navigation Controls on
Central Console
The manual controls located on the
central console are a further interface
for the driver and nearby passenger,
that adds to the MTC+ display
softkeys. Using the manual controls,
the MTC+ display will work as a
graphic display of the inputs from the
controls.
Volume Control
By working this knob in “Radio” or
“Media” mode, user can adjust the
volume of the radio or audio files,
from minimum to maximum and vice
versa. Turn knob clockwise to increase
the volume, counter-clockwise to
decrease it. The volume status will be
indicated in the top part of the MTC+
display.Dashboard Instruments and Controls
4
177
Page 182 of 396
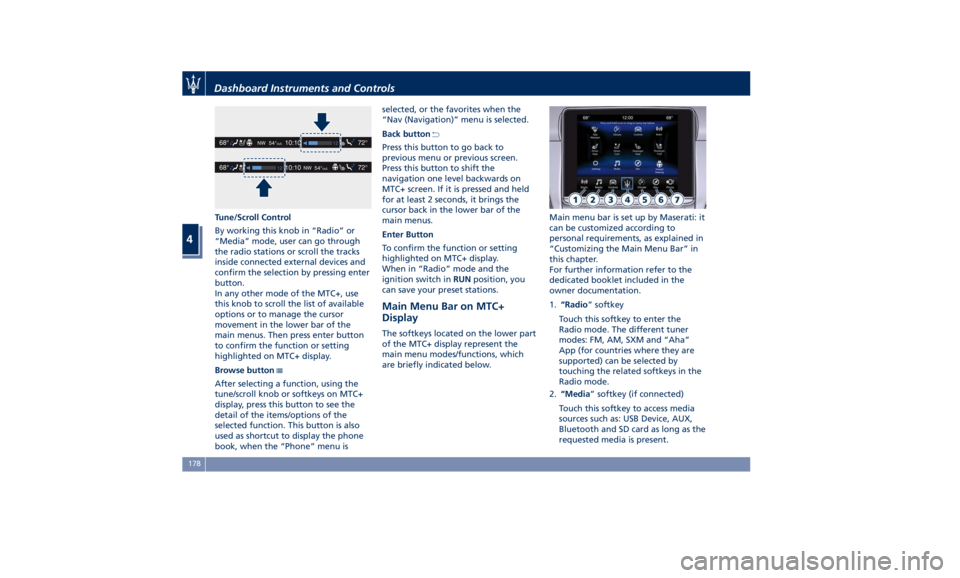
Tune/Scroll Control
By working this knob in “Radio” or
“Media” mode, user can go through
the radio stations or scroll the tracks
inside connected external devices and
confirm the selection by pressing enter
button.
In any other mode of the MTC+, use
this knob to scroll the list of available
options or to manage the cursor
movement in the lower bar of the
main menus. Then press enter button
to confirm the function or setting
highlighted on MTC+ display.
Browse button
After selecting a function, using the
tune/scroll knob or softkeys on MTC+
display, press this button to see the
detail of the items/options of the
selected function. This button is also
used as shortcut to display the phone
book, when the “Phone” menu is selected, or the favorites when the
“Nav (Navigation)” menu is selected.
Back button
Press this button to go back to
previous menu or previous screen.
Press this button to shift the
navigation one level backwards on
MTC+ screen. If it is pressed and held
for at least 2 seconds, it brings the
cursor back in the lower bar of the
main menus.
Enter Button
To confirm the function or setting
highlighted on MTC+ display.
When in “Radio” mode and the
ignition switch in RUN position, you
can save your preset stations.
Main Menu Bar on MTC+
Display The softkeys located on the lower part
of the MTC+ display represent the
main menu modes/functions, which
are briefly indicated below. Main menu bar is set up by Maserati: it
can be customized according to
personal requirements, as explained in
“Customizing the Main Menu Bar” in
this chapter.
For further information refer to the
dedicated booklet included in the
owner documentation.
1. “Radio ” softkey
Touch this softkey to enter the
Radio mode. The different tuner
modes: FM, AM, SXM and “Aha”
App (for countries where they are
supported) can be selected by
touching the related softkeys in the
Radio mode.
2. “Media ” softkey (if connected)
Touch this softkey to access media
sources such as: USB Device, AUX,
Bluetooth and SD card as long as the
requested media is present.Dashboard Instruments and Controls
4
178