2019 MASERATI QUATTROPORTE key battery
[x] Cancel search: key batteryPage 54 of 396
C. Sunshade fully rolled down (DOWN
position) and Window completely
open (DOWN position)
• Pulling the control to 1 or 2 detent:
the window closes partially or
completely and the sunshade
remains rolled.
• Pressing the control to 1 or 2 detent:
no action (NOP).
Teaching Cycle
After battery disconnection, the
following teaching cycle is required to
store the limit positions the sunshades.
Use the controls on the rear doors to
move the sunshades.
• With glass closed, lift rear sunshade
control on driver side for a few
seconds. It is not necessary that the
sunshade reaches its upper limit.
• Reverse the sunshade movement by
pressing the control downwards.
Once the lower limit is reached, press
and hold the control for at least 10
seconds. This action allows setting
the control unit in initialisation
status.
• Release the movement command.
• Within maximum 15 seconds:
• Press once the control downwards
(first or second detent). In this way
the control unit stores the lower limit position. During this
operation a slight click of the
sunshade motor that switches to
mechanical lock condition can be
heard.
• Lift the control and hold it up until
the sunshade completes its
upstroke and reaches the car body
pillar, fully home. Once the upper
limit stop is reached, the sunshade
will move downwards for approx.
2-3 millimetres and the control unit
will store this height as the upper
limit. Now the teaching of the
driver side rear sunshade is
complete.
• Repeat the same operations for the
passenger side rear sunshade to
complete the teaching procedure.Rear Window Rear Window Defroster The rear window defroster button is
located on the climate control panel.
See “Air Conditioning Controls” in
section “Dashboard Instruments and
Controls”.
Power Sunshade (if equipped) Your vehicle can be equipped on
request with a power sunshade that
will reduce the amount of sunlight
that will enter through the rear
window.
The sunshade is rolled in and stored
inside the cover behind the rear seats;
when activated, it rolls out upwards.
The power sunshade can be operated
using the MTC+ System.
• Touch the “Controls” soft-key.
• Within 15 seconds, touch the “Rear
Sunshade” soft-key to raise the
power sunshade.
• Within 15 seconds, touch the “Rear
Sunshade” soft-key a second time to
lower the sunshade.Before Starting
2
50
Page 60 of 396

sideways and immediately pull it back:
from this moment, the power trunk lid
will activate within two seconds.
If closed, with the foot movement the
power trunk lid will:
• unlock and completely open;
• after another kick, will stop;
• after another kick, will reverse its
movement and completely close
unless stopped again.
If open, with the foot movement the
power trunk lid will:
• completely close but not lock;
• another kick before the completed
closing can stop the movement;
• if the movement was stopped
another kick operation will invert a
complete opening.
NOTE:
• If your foot movement fails to
activate the power trunk lid
movement, wiggling your foot under
the bumper will not help. Repeat the
whole kick movement.
• In particular situations, external
factors affecting the sensor area may
trigger the Hands free power trunk
lid release feature. For example,
when washing the vehicle, a water
jet aimed at the sensor area may trigger the “Hands free” power
trunk release feature. Keep the key
fob RKE transmitter away from the
sensing range of the sensors (10 ft/3
m) or disable the “Hands free”
feature from the MTC+ menu (see
“MTC+ Settings” in section
“Dashboard Instruments and
Controls”). A key fob RKE transmitter
located in the front seat passenger
area is considered out of range of
the “Hands free” trunk lid release
sensor.
• If somebody or something knocks
against the power trunk lid while it is
moving, the safety system might stop
lid opening or closing movement.
Trunk Lid Emergency Release If accessing the trunk from the rear
seats, operate the emergency release
lever (see the chapter "Trunk Safety"
in this section) in order to lower the
rear seat backrest (see "Cargo Area" in
section “Understanding the Vehicle”).
If the power release control operated
by pressing the button on the dome
console fails, which may occur when
the battery is low on voltage, it is
possible to temporarily power the
system by using the battery remote
poles located inside the engine compartment (see “Auxiliary
Jump-Start Procedure” in section “In
an Emergency”). Thus it is possible to
normally open the trunk lid by using
the key fob RKE transmitter. Have the
vehicle checked by an Authorized
Maserati Dealer in order to solve the
failure.Before Starting
2
56
Page 206 of 396
NOTE:
• If you do not enter all PIN digits, a
prompt will indicate that you should
do so.
• In case of an incoming call while
entering the PIN, the MTC+ system
will temporarily stop the release
function. As soon as the call is over,
the keypad screen will be displayed
again so that you can enter the PIN.
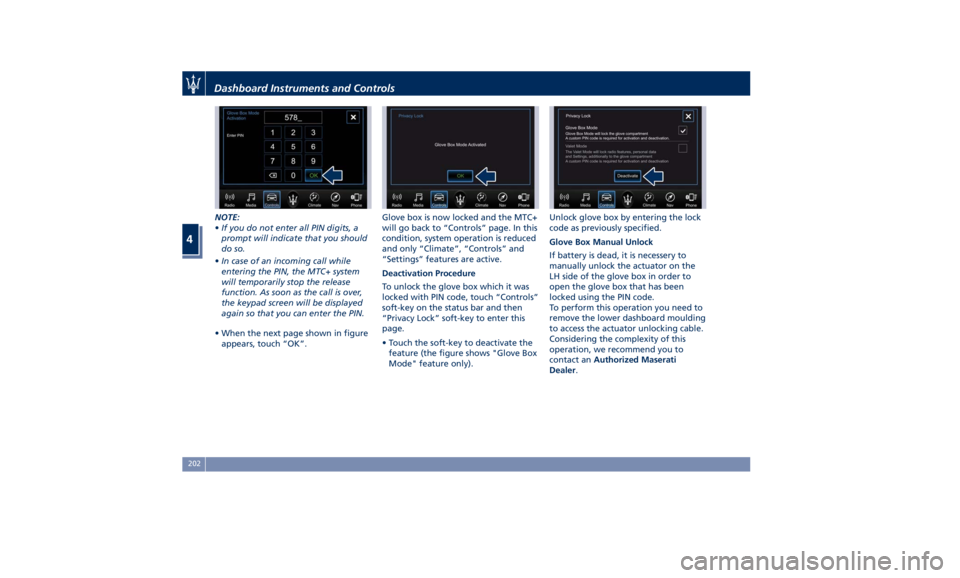
• When the next page shown in figure
appears, touch “OK”. Glove box is now locked and the MTC+
will go back to “Controls” page. In this
condition, system operation is reduced
and only “Climate”, “Controls” and
“Settings” features are active.
Deactivation Procedure
To unlock the glove box which it was
locked with PIN code, touch “Controls”
soft-key on the status bar and then
“Privacy Lock” soft-key to enter this
page.
• Touch the soft-key to deactivate the
feature (the figure shows "Glove Box
Mode" feature only). Unlock glove box by entering the lock
code as previously specified.
Glove Box Manual Unlock
If battery is dead, it is necessery to
manually unlock the actuator on the
LH side of the glove box in order to
open the glove box that has been
locked using the PIN code.
To perform this operation you need to
remove the lower dashboard moulding
to access the actuator unlocking cable.
Considering the complexity of this
operation, we recommend you to
contact an Authorized Maserati
Dealer .Dashboard Instruments and Controls
4
202
Page 223 of 396
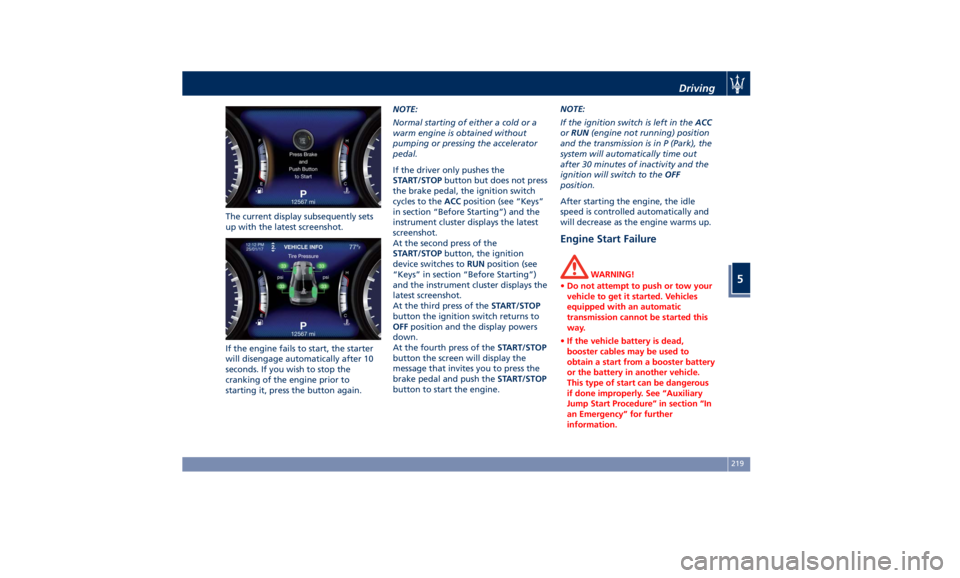
The current display subsequently sets
up with the latest screenshot.
If the engine fails to start, the starter
will disengage automatically after 10
seconds. If you wish to stop the
cranking of the engine prior to
starting it, press the button again. NOTE:
Normal starting of either a cold or a
warm engine is obtained without
pumping or pressing the accelerator
pedal.
If the driver only pushes the
START/STOP button but does not press
the brake pedal, the ignition switch
cycles to the ACC position (see “Keys”
in section “Before Starting”) and the
instrument cluster displays the latest
screenshot.
At the second press of the
START/STOP button, the ignition
device switches to RUN position (see
“Keys” in section “Before Starting”)
and the instrument cluster displays the
latest screenshot.
At the third press of the START/STOP
button the ignition switch returns to
OFF position and the display powers
down.
At the fourth press of the START/STOP
button the screen will display the
message that invites you to press the
brake pedal and push the START/STOP
button to start the engine. NOTE:
If the ignition switch is left in the ACC
or RUN (engine not running) position
and the transmission is in P (Park), the
system will automatically time out
after 30 minutes of inactivity and the
ignition will switch to the OFF
position.
After starting the engine, the idle
speed is controlled automatically and
will decrease as the engine warms up.
Engine Start Failure WARNING!
• Do not attempt to push or tow your
vehicle to get it started. Vehicles
equipped with an automatic
transmission cannot be started this
way.
• If the vehicle battery is dead,
booster cables may be used to
obtain a start from a booster battery
or the battery in another vehicle.
This type of start can be dangerous
if done improperly. See “Auxiliary
Jump Start Procedure” in section “In
an Emergency” for further
information.Driving
5
219
Page 319 of 396
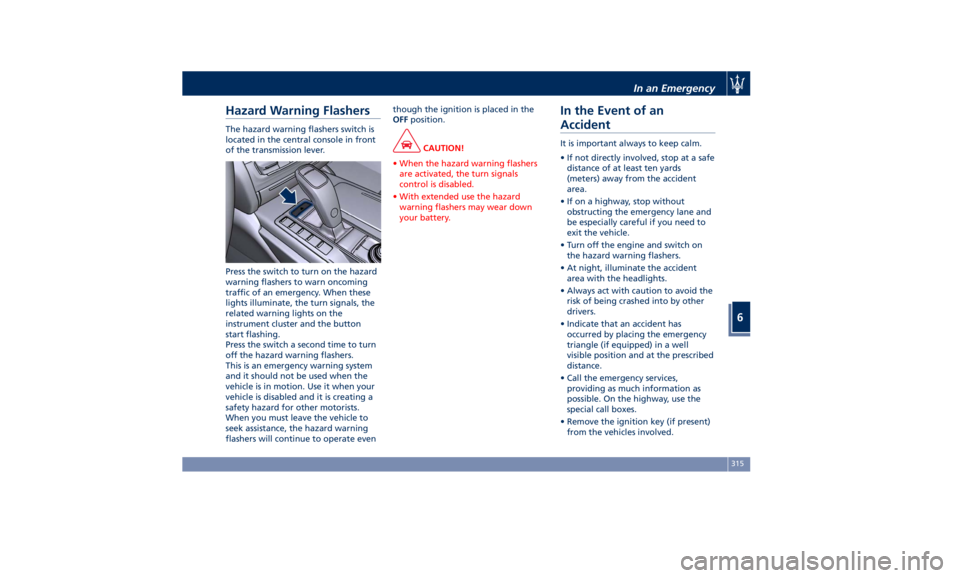
Hazard Warning Flashers The hazard warning flashers switch is
located in the central console in front
of the transmission lever.
Press the switch to turn on the hazard
warning flashers to warn oncoming
traffic of an emergency. When these
lights illuminate, the turn signals, the
related warning lights on the
instrument cluster and the button
start flashing.
Press the switch a second time to turn
off the hazard warning flashers.
This is an emergency warning system
and it should not be used when the
vehicle is in motion. Use it when your
vehicle is disabled and it is creating a
safety hazard for other motorists.
When you must leave the vehicle to
seek assistance, the hazard warning
flashers will continue to operate even though the ignition is placed in the
OFF position.
CAUTION!
• When the hazard warning flashers
are activated, the turn signals
control is disabled.
• With extended use the hazard
warning flashers may wear down
your battery.
In the Event of an
Accident It is important always to keep calm.
• If not directly involved, stop at a safe
distance of at least ten yards
(meters) away from the accident
area.
• If on a highway, stop without
obstructing the emergency lane and
be especially careful if you need to
exit the vehicle.
• Turn off the engine and switch on
the hazard warning flashers.
• At night, illuminate the accident
area with the headlights.
• Always act with caution to avoid the
risk of being crashed into by other
drivers.
• Indicate that an accident has
occurred by placing the emergency
triangle (if equipped) in a well
visible position and at the prescribed
distance.
• Call the emergency services,
providing as much information as
possible. On the highway, use the
special call boxes.
• Remove the ignition key (if present)
from the vehicles involved.In an Emergency
6
315
Page 349 of 396
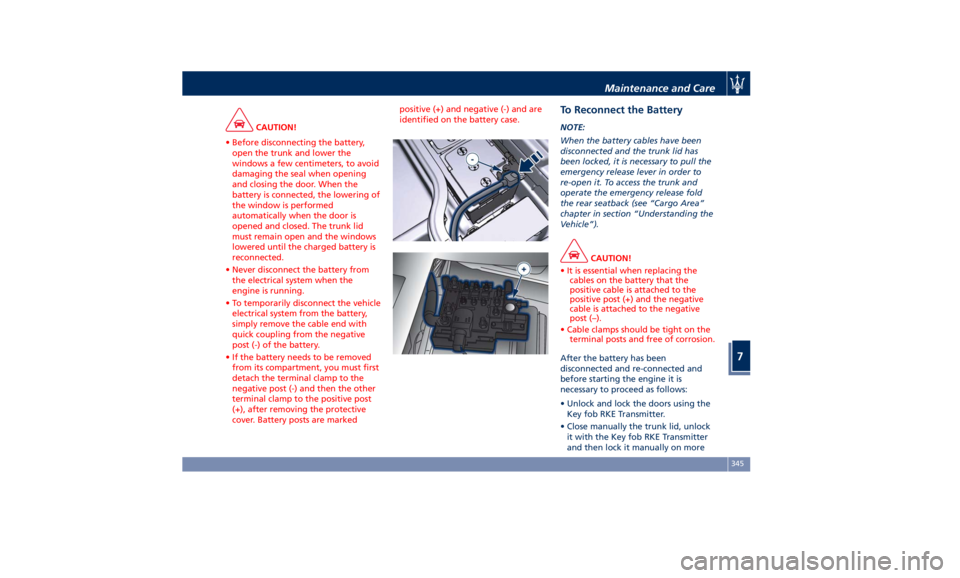
CAUTION!
• Before disconnecting the battery,
open the trunk and lower the
windows a few centimeters, to avoid
damaging the seal when opening
and closing the door. When the
battery is connected, the lowering of
the window is performed
automatically when the door is
opened and closed. The trunk lid
must remain open and the windows
lowered until the charged battery is
reconnected.
• Never disconnect the battery from
the electrical system when the
engine is running.
• To temporarily disconnect the vehicle
electrical system from the battery,
simply remove the cable end with
quick coupling from the negative
post (-) of the battery.
• If the battery needs to be removed
from its compartment, you must first
detach the terminal clamp to the
negative post (-) and then the other
terminal clamp to the positive post
(+), after removing the protective
cover. Battery posts are marked positive (+) and negative (-) and are
identified on the battery case.
To Reconnect the Battery NOTE:
When the battery cables have been
disconnected and the trunk lid has
been locked, it is necessary to pull the
emergency release lever in order to
re-open it. To access the trunk and
operate the emergency release fold
the rear seatback (see “Cargo Area”
chapter in section “Understanding the
Vehicle”).
CAUTION!
• It is essential when replacing the
cables on the battery that the
positive cable is attached to the
positive post (+) and the negative
cable is attached to the negative
post (–).
• Cable clamps should be tight on the
terminal posts and free of corrosion.
After the battery has been
disconnected
and re-connected and
before starting the engine it is
necessary to proceed as follows:
• Unlock and lock the doors using the
Key fob RKE Transmitter.
• Close manually the trunk lid, unlock
it with the Key fob RKE Transmitter
and then lock it manually on moreMaintenance and Care
7
345
Page 390 of 396

Handholds and Cloth Hooks ..... .136
Hazard Warning Flashers ....... .315
Head Restraints ...............98
Highway Assist - HAS ......... .284
HomeLink ................. .143
Security ................. .146
Troubleshooting Tips ........ .146
Using HomeLink ........... .146
Hood
Hood Operation .............57
Trunk Lid and Hood Ajar
Indicators .................57
HSA (Hill Start Assist) ......... .250
Identification Labels ............19
Illuminated Entry/Exit ...........30
Immobilizer (Sentry Key) .........26
Indicator Lights
Air Bag Warning Light .........90
TFT Display: Menus and Settings .157
TFT Display: Warning/Indicator
Lights of Set Modes/Functions. . .170
Warning and Indicator Lights on
Analog Instrument ......... .153
Infotainment System
Main Menu Bar on MTC+
Display ................. .178
Manual Controls and Devices . . .177
Personalized the Main Menu Bar.179
Instrument Cluster ........... .152
Interior Components ...........94
Interior Maintenance and Care. . . .363
Interiors Features ............ .130 iPad Holder ................ .137
iPod Connection ............. .135
Jump Start Procedure ......... .324
KeyFob ....................25
Key Fob Battery Replacement ....35
Preventing Inadvertent Locking of
key fob RKE Transmitter Inside the
Vehicle ...................43
Replacement ...............27
Requiring and setting Additional
Key Fobs ..................34
Unlock the Vehicle with Key fob . .33
Keys .......................24
Lane Departure Warning (LDW) . . .271
Level Checks ............... .337
Adding Washer Fluid ........ .339
Brake Fluid Level Check ...... .338
Engine Coolant Level Check . . . .337
Engine Oil Level Check ....... .337
Fluid Level Check for Coolant
Transmission System ........ .341
Transmission Oil Check ....... .341
Lights
.................... .116
Automatic
Headlights ....... .118
Automatic
High Beam ....... .119
Bulb Replacement .......... .355
Cargo Lamps ............. .126
Dome Lights .............. .125
DRL, Daytime Running Lights . . .119
Fog Lights ............... .121 Full-LED Headlight with Cornering
Function ................ .119
Headlight Time Delay ....... .118
High Beam and Flashing ..... .122
Interior Lights ............. .123
Light Switch .............. .116
Multifunction Lever ......... .121
Turn Signals .............. .121
Loading the Vehicle
Loading with Rear Seatback . . . .140
Vehicle Load Carrying Capacity . .139
Main- and Submenu .......... .158
Maintenance ..................5
A/C System Maintenance ..... .357
Air Bag System Maintenance ....72
Bodywork Maintenance and
Care ................... .360
Emissions Inspection and
Maintenance Programs ...... .332
Interior Maintenance and Care . .363
Maintenance Procedures ..... .334
Periodic Maintenance ....... .331
Scheduled Maintenance Service .328
Scheduled Service Plan ....... .329
Wheels Maintenance ........ .358
Map Pockets ............... .136
Maserati Roadside Assistance
Program ...................16
Messages on Main Display Area . . .157
MIL (Malfunction Indicator Light) . .153
Mirrors ................... .113
External Mirrors ........... .113Index
9 386