2019 MASERATI QUATTROPORTE display
[x] Cancel search: displayPage 250 of 396
(Continued)
• In case of repetitive requests to reset
the EPB through the messages shown
on the TFT display, please contact an
Authorized Maserati Dealer .
Failure Indication In the event of electric parking brake
system failure, the warning light
on the display will light up and the
related message will show for 5
seconds.
WARNING!
In the event of an EPB failure, take
your vehicle to the nearest Authorized
Maserati Dealer as soon as possible.
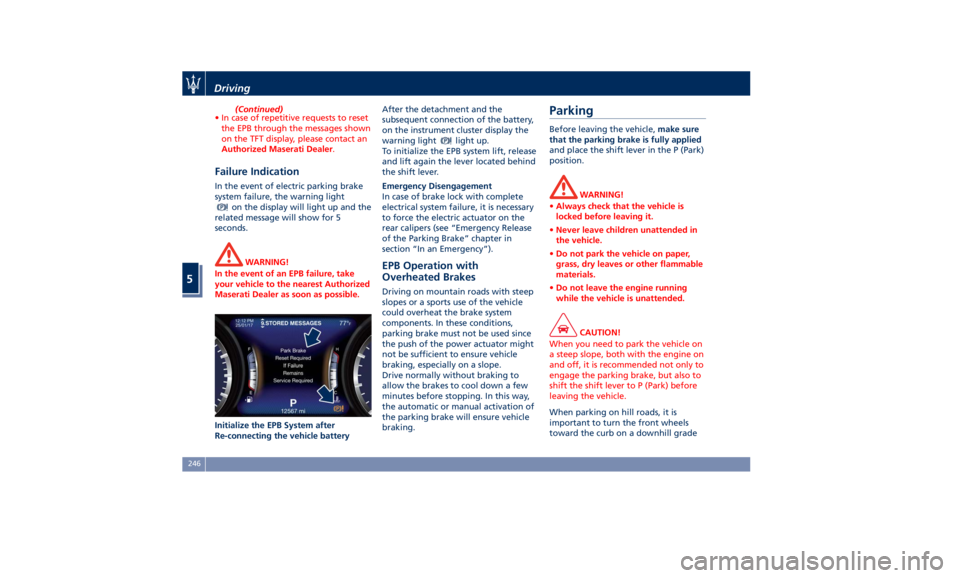
Initialize the EPB System after
Re-connecting
the vehicle battery After the detachment and the
subsequent connection of the battery,
on the instrument cluster display the
warning light
light up.
To initialize the EPB system lift, release
and lift again the lever located behind
the shift lever.
Emergency Disengagement
In case of brake lock with complete
electrical system failure, it is necessary
to force the electric actuator on the
rear calipers (see “Emergency Release
of the Parking Brake” chapter in
section “In an Emergency”).
EPB Operation with
Overheated Brakes Driving on mountain roads with steep
slopes or a sports use of the vehicle
could overheat the brake system
components. In these conditions,
parking brake must not be used since
the push of the power actuator might
not be sufficient to ensure vehicle
braking, especially on a slope.
Drive normally without braking to
allow the brakes to cool down a few
minutes before stopping. In this way,
the automatic or manual activation of
the parking brake will ensure vehicle
braking.Parking Before leaving the vehicle, make sure
that the parking brake is fully applied
and place the shift lever in the P (Park)
position.
WARNING!
• Always check that the vehicle is
locked before leaving it.
• Never leave children unattended in
the vehicle.
• Do not park the vehicle on paper,
grass, dry leaves or other flammable
materials.
• Do not leave the engine running
while the vehicle is unattended.
CAUTION!
When you need to park the vehicle on
a steep slope, both with the engine on
and off, it is recommended not only to
engage the parking brake, but also to
shift the shift lever to P (Park) before
leaving the vehicle.
When parking on hill roads, it is
important
to turn
the front wheels
toward the curb on a downhill gradeDriving
5
246
Page 251 of 396
and away from the curb on an uphill
grade.
Apply the parking brake before
placing the shift lever in P (Park),
otherwise the load on the
transmission locking mechanism may
make it difficult to move the shift
lever out of P (Park).
In certain conditions, it is however
advisable to disengage the parking brake manually and slightly apply the
service brake for starting off. This is
advisable when there are obstacles
very close to the vehicle in the
direction in which you intend to move.
“Drive Away Inhibit” strategy In order to avoid a dangerous
condition resulting from leaving the
vehicle “not braked” with running engine and without driver on board,
“Drive Away Inhibit” strategy alerts
the driver with messages on the
instrument cluster display and
sounding chimes, then puts the
transmission in P (Park).
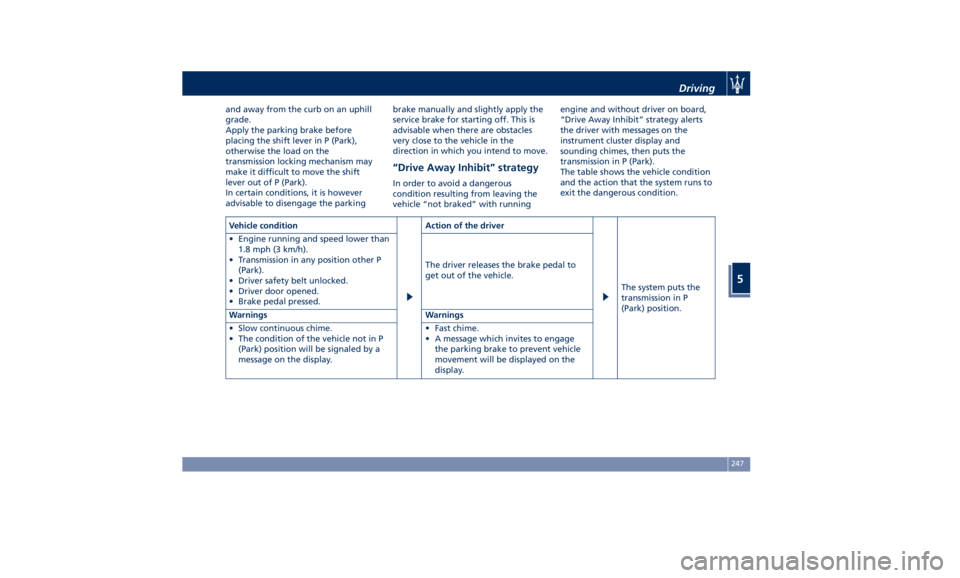
The table shows the vehicle condition
and the action that the system runs to
exit the dangerous condition.
Vehicle condition Action of the driver
The system puts the
transmission in P
(Park) position.• Engine running and speed lower than
1.8 mph (3 km/h).
• Transmission in any position other P
(Park).
• Driver safety belt unlocked.
• Driver door opened.
• Brake pedal pressed. The driver releases the brake pedal to
get out of the vehicle.
Warnings Warnings
• Slow continuous chime.
• The condition of the vehicle not in P
(Park) position will be signaled by a
message on the display. • Fast chime.
• A message which invites to engage
the parking brake to prevent vehicle
movement will be displayed on the
display. Driving
5
247
Page 257 of 396
CAUTION!
• Under normal conditions, all red
warning lights on the instrument
cluster display should be off. When
they come on, this indicates a
malfunction. Refer to “Instrument
Cluster” in section “Dashboard
Instruments and Controls”.
• Continuing to drive when a red
warning light is on could cause
serious damage to the vehicle and
affect its performance.
Onboard Diagnostic System Your vehicle is equipped with a
sophisticated onboard diagnostic
system. This system monitors the
performance of the emissions, engine,
and automatic transmission control
systems. When these systems are
operating properly, your vehicle will
provide excellent performance and
fuel economy, as well as engine
emissions well within current local
regulations of various countries.
If any of these systems require service,
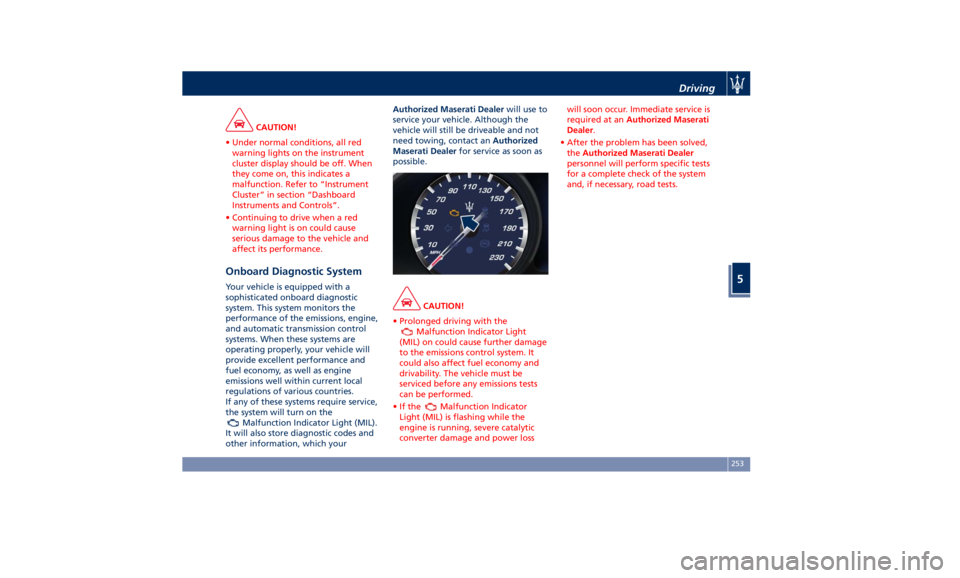
the system will turn on the
Malfunction Indicator Light (MIL).
It will also store diagnostic codes and
other information, which your Authorized Maserati Dealer will use to
service your vehicle. Although the
vehicle will still be driveable and not
need towing, contact an Authorized
Maserati Dealer for service as soon as
possible.
CAUTION!
• Prolonged driving with the
Malfunction Indicator Light
(MIL) on could cause further damage
to the emissions control system. It
could also affect fuel economy and
drivability. The vehicle must be
serviced before any emissions tests
can be performed.
•Ifthe
Malfunction Indicator
Light (MIL) is flashing while the
engine is running, severe catalytic
converter damage and power loss will soon occur. Immediate service is
required at an Authorized Maserati
Dealer .
• After the problem has been solved,
the Authorized Maserati Dealer
personnel will perform specific tests
for a complete check of the system
and, if necessary, road tests.Driving
5
253
Page 259 of 396
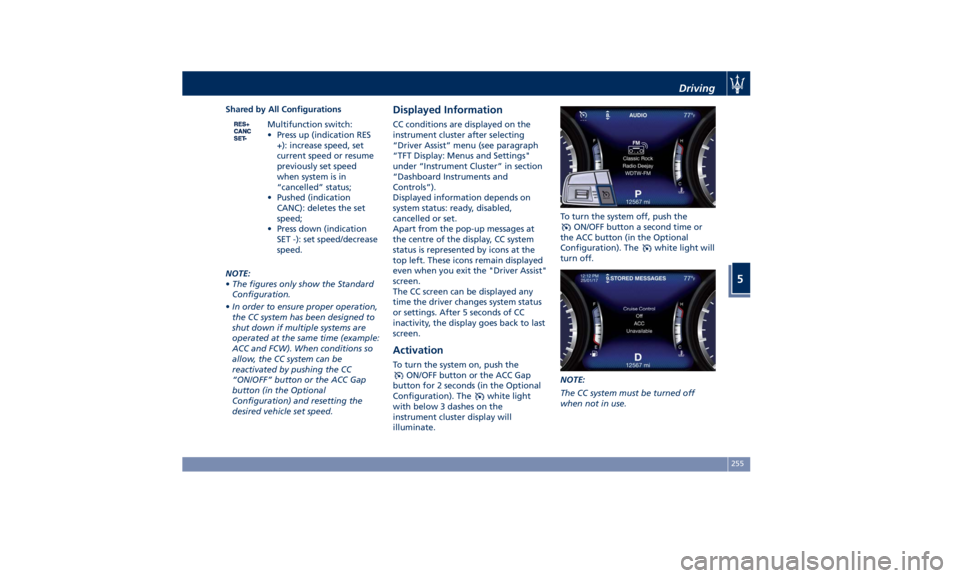
Shared by All Configurations
Multifunction switch:
• Press up (indication RES
+): increase speed, set
current speed or resume
previously set speed
when system is in
“cancelled” status;
• Pushed (indication
CANC): deletes the set
speed;
• Press down (indication
SET -): set speed/decrease
speed.
NOTE:
• The figures only show the Standard
Configuration.
• In order to ensure proper operation,
the CC system has been designed to
shut down if multiple systems are
operated at the same time (example:
ACC and FCW). When conditions so
allow, the CC system can be
reactivated by pushing the CC
“ON/OFF” button or the ACC Gap
button (in the Optional
Configuration) and resetting the
desired vehicle set speed. Displayed Information CC conditions are displayed on the
instrument cluster after selecting
“Driver Assist” menu (see paragraph
“TFT Display: Menus and Settings"
under “Instrument Cluster” in section
“Dashboard Instruments and
Controls”).
Displayed information depends on
system status: ready, disabled,
cancelled or set.
Apart from the pop-up messages at
the centre of the display, CC system
status is represented by icons at the
top left. These icons remain displayed
even when you exit the "Driver Assist"
screen.
The CC screen can be displayed any
time the driver changes system status
or settings. After 5 seconds of CC
inactivity, the display goes back to last
screen.
Activation To turn the system on, push the
ON/OFF button or the ACC Gap
button for 2 seconds (in the Optional
Configuration). The
white light
with below 3 dashes on the
instrument cluster display will
illuminate. To turn the system off, push the
ON/OFF button a second time or
the ACC button (in the Optional
Configuration). The
white light will
turn off.
NOTE:
The CC system must be turned off
when not in use.Driving
5
255
Page 260 of 396
WARNING!
Never leave the electronic Cruise
Control system on when not in use.
You could accidentally set the system
or cause it to go faster than you want.
Always leave the system off when you
are not using it.
Speed Range of Use Speed mph (km/h)
Minimum 18 (30)
Engaged/activated 18 (30)
Maximum 130 (210)
Setting Desired Speed Turn on the CC function. When the
vehicle has reached the desired speed
(in the example: 60 mph), push
downward the multifunction switch
(SET -) and release.
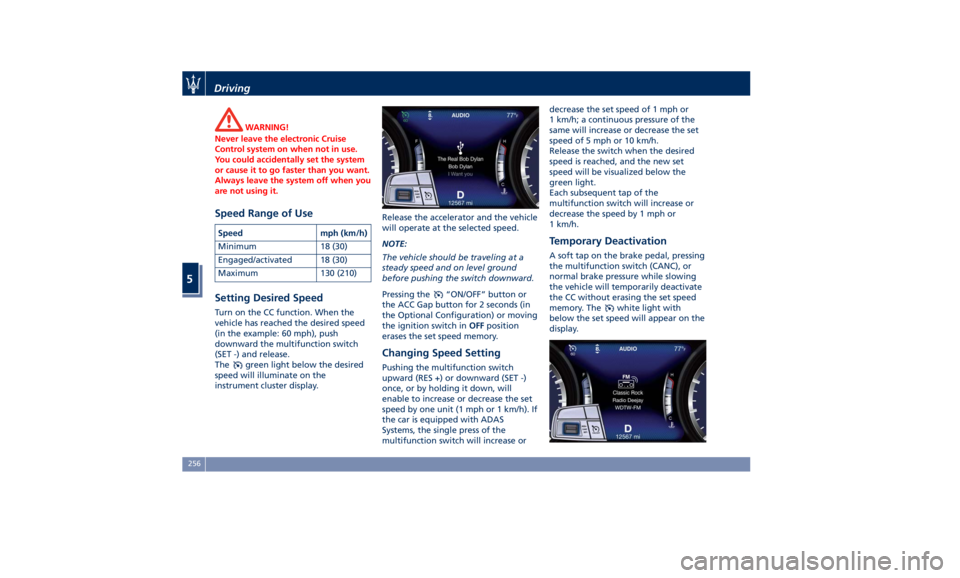
The
green light below the desired
speed will illuminate on the
instrument cluster display. Release the accelerator and the vehicle
will operate at the selected speed.
NOTE:
The vehicle should be traveling at a
steady speed and on level ground
before pushing the switch downward.
Pressing the
“ON/OFF” button or
the ACC Gap button for 2 seconds (in
the Optional Configuration) or moving
the ignition switch in OFF position
erases the set speed memory.
Changing Speed Setting Pushing the multifunction switch
upward (RES +) or downward (SET -)
once, or by holding it down, will
enable to increase or decrease the set
speed by one unit (1 mph or 1 km/h). If
the car is equipped with ADAS
Systems, the single press of the
multifunction switch will increase or decrease the set speed of 1 mph or
1 km/h; a continuous pressure of the
same will increase or decrease the set
speed of 5 mph or 10 km/h.
Release the switch when the desired
speed is reached, and the new set
speed will be visualized below the
green light.
Each subsequent tap of the
multifunction switch will increase or
decrease the speed by 1 mph or
1 km/h.
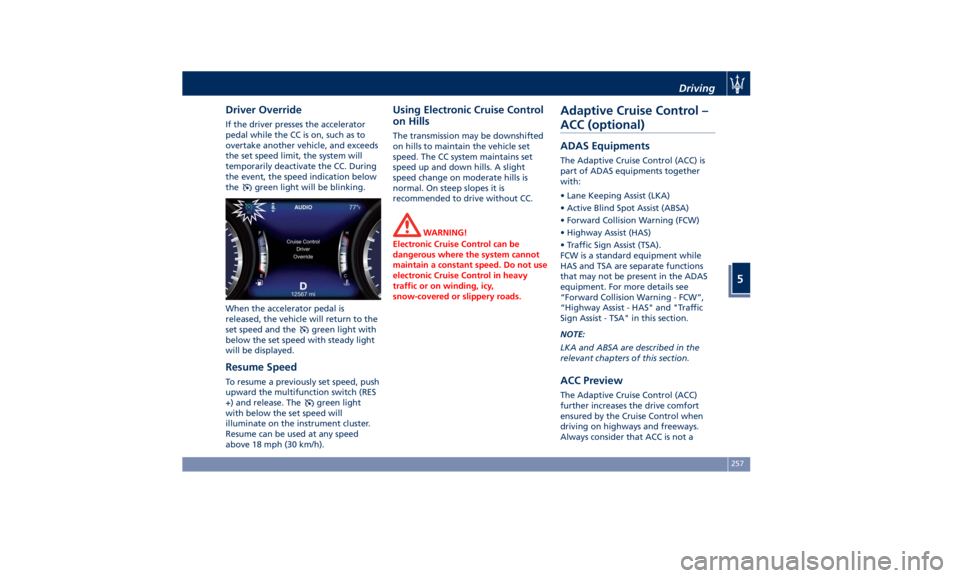
Temporary Deactivation A soft tap on the brake pedal, pressing
the multifunction switch (CANC), or
normal brake pressure while slowing
the vehicle will temporarily deactivate
the CC without erasing the set speed
memory. The
white light with
below the set speed will appear on the
display.Driving
5
256
Page 261 of 396
Driver Override If the driver presses the accelerator
pedal while the CC is on, such as to
overtake another vehicle, and exceeds
the set speed limit, the system will
temporarily deactivate the CC. During
the event, the speed indication below
the
green light will be blinking.
When the accelerator pedal is
released, the vehicle will return to the
set speed and the
green light with
below the set speed with steady light
will be displayed.
Resume Speed To resume a previously set speed, push
upward the multifunction switch (RES
+) and release. The
green light
with below the set speed will
illuminate on the instrument cluster.
Resume can be used at any speed
above 18 mph (30 km/h). Using Electronic Cruise Control
on Hills The transmission may be downshifted
on hills to maintain the vehicle set
speed. The CC system maintains set
speed up and down hills. A slight
speed change on moderate hills is
normal. On steep slopes it is
recommended to drive without CC.
WARNING!
Electronic Cruise Control can be
dangerous where the system cannot
maintain a constant speed. Do not use
electronic Cruise Control in heavy
traffic or on winding, icy,
snow-covered or slippery roads.Adaptive Cruise Control –
ACC (optional) ADAS Equipments The Adaptive Cruise Control (ACC) is
part of ADAS equipments together
with:
• Lane Keeping Assist (LKA)
• Active Blind Spot Assist (ABSA)
• Forward Collision Warning (FCW)
• Highway Assist (HAS)
• Traffic Sign Assist (TSA).
FCW is a standard equipment while
HAS and TSA are separate functions
that may not be present in the ADAS
equipment. For more details see
“Forward Collision Warning - FCW”,
“Highway Assist - HAS" and "Traffic
Sign Assist - TSA" in this section.
NOTE:
LKA and ABSA are described in the
relevant chapters of this section.
ACC Preview The Adaptive Cruise Control (ACC)
further increases the drive comfort
ensured by the Cruise Control when
driving on highways and freeways.
Always consider that ACC is not aDriving
5
257
Page 263 of 396
could cause an incorrect assessment
of the required safety distance.
It is recommended to disable the ACC
system in the following instances:
• When driving in the fog, heavy rain,
heavy snow, slush, heavy traffic and
similar complex situations such as
highway construction zones.
• When entering a junction lane or a
slip road to leave the highway; when
driving on narrow, icy, snowy,
slippery roads, or on steep uphill and
downhill roads.
• When circumstances do not allow to
drive safely at constant speed.
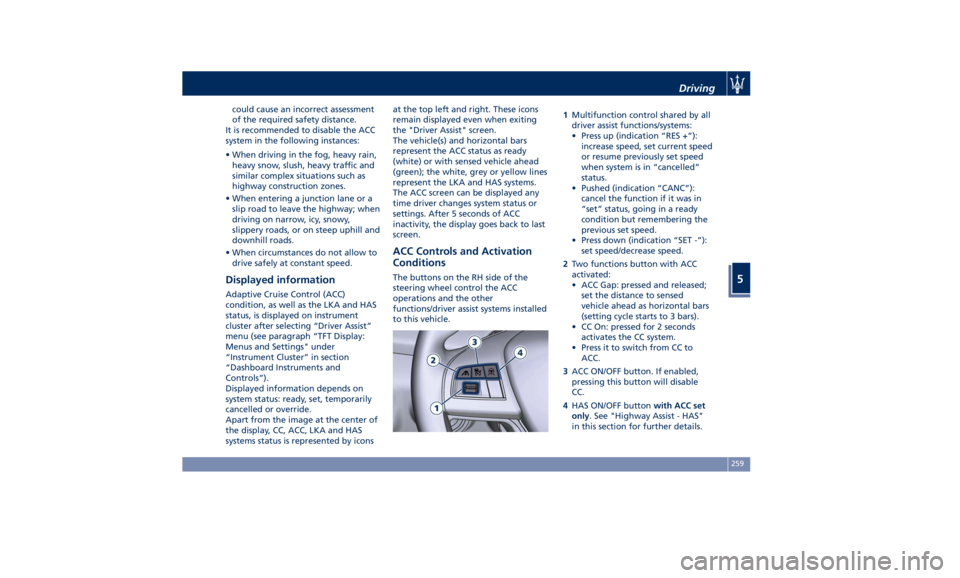
Displayed information Adaptive Cruise Control (ACC)
condition, as well as the LKA and HAS
status, is displayed on instrument
cluster after selecting “Driver Assist”
menu (see paragraph “TFT Display:
Menus and Settings" under
“Instrument Cluster” in section
“Dashboard Instruments and
Controls”).
Displayed information depends on
system status: ready, set, temporarily
cancelled or override.
Apart from the image at the center of
the display, CC, ACC, LKA and HAS
systems status is represented by icons at the top left and right. These icons
remain displayed even when exiting
the "Driver Assist" screen.
The vehicle(s) and horizontal bars
represent the ACC status as ready
(white) or with sensed vehicle ahead
(green); the white, grey or yellow lines
represent the LKA and HAS systems.
The ACC screen can be displayed any
time driver changes system status or
settings. After 5 seconds of ACC
inactivity, the display goes back to last
screen.
ACC Controls and Activation
Conditions The buttons on the RH side of the
steering wheel control the ACC
operations and the other
functions/driver assist systems installed
to this vehicle. 1 Multifunction control shared by all
driver assist functions/systems:
• Press up (indication “RES +”):
increase speed, set current speed
or resume previously set speed
when system is in “cancelled”
status.
• Pushed (indication “CANC”):
cancel the function if it was in
“set” status, going in a ready
condition but remembering the
previous set speed.
• Press down (indication “SET -”):
set speed/decrease speed.
2 Two functions button with ACC
activated:
• ACC Gap: pressed and released;
set the distance to sensed
vehicle ahead as horizontal bars
(setting cycle starts to 3 bars).
• CC On: pressed for 2 seconds
activates the CC system.
• Press it to switch from CC to
ACC.
3 ACC ON/OFF button. If enabled,
pressing this button will disable
CC.
4 HAS ON/OFF button with ACC set
only . See "Highway Assist - HAS"
in this section for further details.Driving
5
259
Page 264 of 396

NOTE:
Any change made to tire dimensions
affects performance of Adaptive Cruise
Control and Front Collision Warning
(FCW), if equipped.
The ACC is not activated in the
following conditions:
• When braking.
• When parking brake is activated.
• When automatic transmission is in P
(Park), R (Reverse) or N (Neutral).
• When vehicle speed is out of preset
speed range
• When brakes are overheated.
• When driver door is open.
• When the driver’s seat belt is
unbuckled.
• When the road is particularly steep
(both uphill and downhill) at low
speed.
• When drive mode
(ESC OFF) is
selected.
• When the door is opened at low
speed.
• When there has been an ESC event in
the last 5 seconds, or is still active.
• When there is an object too close in
front of the vehicle.
It is possible that more than one
system is active at the same time such as ACC and ABSA just to mention
some.
While activation of ACC and CC at the
same time is impossible.
Speed Range of Use Speed mph (km/h)
Minimum 0 (0)
Engaged/activated 18 (30)
Maximum 130 (210)
Activation/Deactivation NOTE:
Pictures show status of ACC and LKA
systems.
Press and release
ON/OFF button to
activate the ACC. The display will show
the
white symbol with below 3
dashes will illuminate indicating that
system is ready to be set.
If a vehicle is detected as being too
close, the display will show a message
for 5 seconds and trigger a signal to
warn the driver that current conditions
do not allow enabling of the ACC. At
any rate, system will remain in the
ready status. Driver Assist Page
Non-Driver Assist PageDriving
5
260