2019 MASERATI LEVANTE refuel
[x] Cancel search: refuelPage 185 of 436

or engine stall and your vehicle may
require towing.
Low Fuel Indicator
When the fuel level reaches
approximately 4.2 Gallons (16
liters) this light under the fuel
gauge indicator will turn on,
and remain on until fuel is added
together with the related message. In
this condition the color indicating the
quantity of fuel in the tank, inside the
indicator on display, will go from
white to amber.
Refer to “Refueling” in section
“Driving” for fuel filling.
Windshield and Headlights Washer
Low Fluid Indicator
This indicator will illuminate
for 5 seconds to indicate a low
level of the windshield and
headlights washer fluid. A
related message will be displayed.
See “Maintenance Procedures” in
section “Maintenance and Care” for
fluid filling.
Headlight Aiming System Failure
Warning Light
This warning light and the
related message indicate a
failure of the automatic
headlight aiming system (horizontal leveling, electromechanical
swiveling) or of the Advanced
Frontlighting System (AFS).
Please contact an Authorized Maserati
Dealer to check the system.
Advanced Frontlighting System (AFS)
Failure Warning Light
This warning light and the
related message light up to
report a failure of the AFS
system.
Contact an Authorized Maserati
Dealer as soon as possible.
Automatic High Beam Failure Warning
Light
This warning light and the
related message illuminate to
report a failure of the
automatic high beam
headlights.
Contact an Authorized Maserati
Dealer as soon as possible.
Suspensions Failure Warning Light
This warning light and the
related message turn on while
driving if there is a failure of
the suspension system.
Please contact an Authorized Maserati
Dealer to check the system. Ice Hazard Indicator
When the external
temperature falls below 38°F
(3°C), the temperature value
blinks for a few seconds, the
indicator light turns on, a message is
displayed and an acoustic signal is
triggered to warn the driver of the
risk of icy roadbed.
Under such conditions, we recommend
using the I.C.E. drive mode (see
“Automatic Transmission” in section
“Driving”) drive carefully and slow
down as the grip of the tires may be
significantly reduced.
The indicator light flashes for 5
seconds and switches off when the
temperature reaches 43°F (6°C) or
higher.
Fuel Filler Cap (Gas cap) Open
Warning Light
After refueling the car
performs a check of the fuel
filler cap and this warning
light comes on if it is not
correctly closed, after approximately
10 minutes also depending on driving
conditions.
See “Refueling” in section “Driving”
for more details.Dashboard Instruments and Controls
4
181
Page 231 of 436
5 – Driving Normal Starting of the Engine ............................. 228
Automatic Start&Stop System ............................. 230
Automatic Transmission .................................. 234
All-Wheel Drive ........................................ 243
Drive Mode ........................................... 244
Active Alternator ....................................... 264
Off-Road Drive ......................................... 264
Parking Brake ......................................... 268
Parking .............................................. 271
Brake and Stability Control System ......................... 273
Using the Brakes ....................................... 280
Use of the Engine ...................................... 281
Electronic Cruise Control ................................. 282
Adaptive Cruise Control - ACC (optional) ..................... 286
Forward Collision Warning – FCW .......................... 297
Lane Keeping Assist - LKA (optional, with ACC only) ............ 301
Blind Spot Assist – BSA (without ACC) ....................... 305
Active Blind Spot Assist - ABSA (optional, with ACC only) ........ 310
Highway Assist – HAS (optional, with ACC only) ................ 313
Traffic Sign Assist – TSA (optional) .......................... 319
Tires - General Information ............................... 321
Tire Pressure Monitoring System (TPMS) ..................... 329
Fuel Requirements ...................................... 334
Refueling ............................................. 336
Driving Conditions ...................................... 338
Trailer Towing ......................................... 341 227
Page 268 of 436

Active Alternator To improve overall efficiency by
reducing the auxiliary loads on the
engine, the vehicle is equipped with a
smart alternator that is mainly active
in the latter energy balance phases
(for example, during braking, coasting
and overloading). The alternator
becomes active when the battery
charge is insufficient and when the
vehicle exits from the braking and
overload situations.
Active Alternator Feature (if feature is
available)
In the I.C.E. screen, the user can display
in the form of dynamic bars some
informative parameters on the state of
battery charge ("CHARGE"), efficiency
of drive style ("EFFICIENCY") and the
matured economy (“
” bonus range)
expressed in miles (mi) or kilometres
(km). The bonus range (about 37 mi / 60 km
for each full of fuel) is automatically
reset every time the vehicle is refueled.
Off-Road Drive This vehicle is equipped with a specific
“Off Road” driving mode which allows
to drive through various terrain
conditions (rock, mud, sand), also
uphill and downhill, eventually in
condition of lateral inclination.
To set the "OFF ROAD" drive mode,
please see the paragraphs “Setting the
Drive Mode” and “Setting Ride
Height” of chapter “Drive Mode” in
this section.
In order to enhance this specific
performance, the "OFF ROAD" drive
mode modifies the setting of:
• Ride height;
• Engine, transmission calibration;
• Suspensions.
When “OFF ROAD” is selected, ride
height is set to “Off Road 1” (vehicle is
higher by approx. 1 in / 25 mm).
It is possible to select ride height “Off
Road 2” (vehicle is raised by approx.
1.5 in / 40 mm) using the ride height
selector.
“OFF ROAD” drive mode is limited up
to a max speed of 56 mph (90 km/h). In
case the vehicle speed should exceed
this limit, the drive mode will be
de-selected automatically and the
drive mode will return to “NORMAL”.Driving
5
264
Page 340 of 436
(Continued)
with proper maintenance. Have the
exhaust system inspected every time
the vehicle is raised. Have any
abnormal conditions repaired
promptly. Until repaired, drive with
all side windows fully open.
WARNING!
California Proposition 65
Operating, servicing and maintaining
a passenger vehicle or off-road vehicle
can expose you to chemicals including
such as, engine exhaust, carbon
monoxide, phthalates and lead, that
which are known to the State of
California to cause cancer and birth
defects or other reproductive harm. To
minimize exposure, avoid breathing
exhaust, do not idle the engine except
as necessary, service your vehicle in a
well-ventilated area and wear gloves
or wash your hands frequently when
servicing your vehicle. For more
information go to:
www.P65Warnings.ca.gov/passenger-
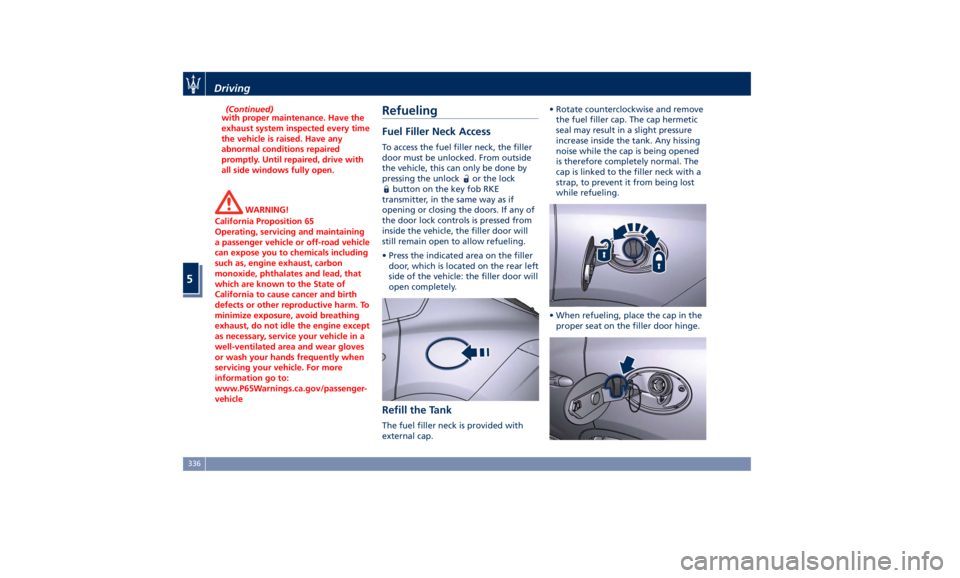
vehicle Refueling Fuel Filler Neck Access To access the fuel filler neck, the filler
door must be unlocked. From outside
the vehicle, this can only be done by
pressing the unlock
or the lock
button on the key fob RKE
transmitter, in the same way as if
opening or closing the doors. If any of
the door lock controls is pressed from
inside the vehicle, the filler door will
still remain open to allow refueling.
• Press the indicated area on the filler
door, which is located on the rear left
side of the vehicle: the filler door will
open completely.
Refill the Tank The fuel filler neck is provided with
external cap. • Rotate counterclockwise and remove
the fuel filler cap. The cap hermetic
seal may result in a slight pressure
increase inside the tank. Any hissing
noise while the cap is being opened
is therefore completely normal. The
cap is linked to the filler neck with a
strap, to prevent it from being lost
while refueling.
• When refueling, place the cap in the
proper seat on the filler door hinge.Driving
5
336
Page 341 of 436
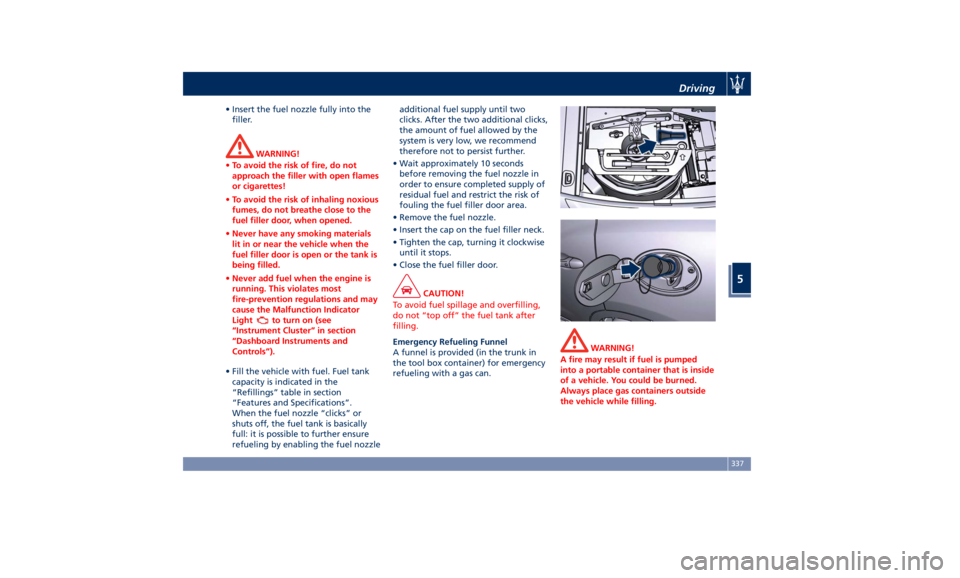
• Insert the fuel nozzle fully into the
filler.
WARNING!
• To avoid the risk of fire, do not
approach the filler with open flames
or cigarettes!
• To avoid the risk of inhaling noxious
fumes, do not breathe close to the
fuel filler door, when opened.
• Never have any smoking materials
lit in or near the vehicle when the
fuel filler door is open or the tank is
being filled.
• Never add fuel when the engine is
running. This violates most
fire-prevention regulations and may
cause the Malfunction Indicator
Light
to turn on (see
“Instrument Cluster” in section
“Dashboard Instruments and
Controls”).
• Fill the vehicle with fuel. Fuel tank
capacity
is indicated in the
“Refillings” table in section
“Features and Specifications”.
When the fuel nozzle “clicks” or
shuts off, the fuel tank is basically
full: it is possible to further ensure
refueling by enabling the fuel nozzle additional fuel supply until two
clicks. After the two additional clicks,
the amount of fuel allowed by the
system is very low, we recommend
therefore not to persist further.
• Wait approximately 10 seconds
before removing the fuel nozzle in
order to ensure completed supply of
residual fuel and restrict the risk of
fouling the fuel filler door area.
• Remove the fuel nozzle.
• Insert the cap on the fuel filler neck.
• Tighten the cap, turning it clockwise
until it stops.
• Close the fuel filler door.
CAUTION!
To avoid fuel spillage and overfilling,
do not “top off” the fuel tank after
filling.
Emergency Refueling Funnel
A
funnel is provided (in the trunk in
the tool box container) for emergency
refueling with a gas can. WARNING!
A fire may result if fuel is pumped
into a portable container that is inside
of a vehicle. You could be burned.
Always place gas containers outside
the vehicle while filling.Driving
5
337
Page 342 of 436
Fuel Filler Cap Open Warning
Light After refueling the car
performs a check of the fuel
filler cap and the amber
warning light on the TFT
display comes on if it is not correctly
closed, after approximately 10 minutes
also depending on driving conditions.
If the problem is in the fuel system, the
Malfunction Indicator Light
also
comes on.
If the fuel filler cap is locked and the
issue remains in the system, at the next
engine start only the Malfunction
Indicator Light
comes on. In this
case, contact an Authorized Maserati
Dealer .
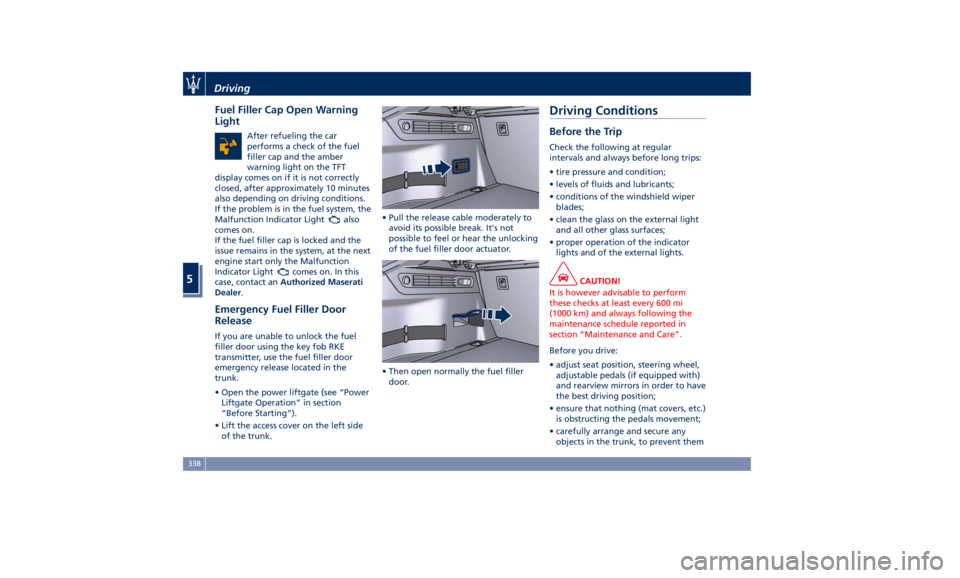
Emergency Fuel Filler Door
Release If you are unable to unlock the fuel
filler door using the key fob RKE
transmitter, use the fuel filler door
emergency release located in the
trunk.
• Open the power liftgate (see “Power
Liftgate Operation” in section
“Before Starting”).
• Lift the access cover on the left side
of the trunk. • Pull the release cable moderately to
avoid its possible break. It's not
possible to feel or hear the unlocking
of the fuel filler door actuator.
• Then open normally the fuel filler
door.Driving Conditions Before the Trip Check the following at regular
intervals and always before long trips:
• tire pressure and condition;
• levels of fluids and lubricants;
• conditions of the windshield wiper
blades;
• clean the glass on the external light
and all other glass surfaces;
• proper operation of the indicator
lights and of the external lights.
CAUTION!
It is however advisable to perform
these checks at least every 600 mi
(1000 km) and always following the
maintenance schedule reported in
section “Maintenance and Care”.
Before you drive:
•
adjust seat position, steering wheel,
adjustable pedals (if equipped with)
and rearview mirrors in order to have
the best driving position;
• ensure that nothing (mat covers, etc.)
is obstructing the pedals movement;
• carefully arrange and secure any
objects in the trunk, to prevent themDriving
5
338
Page 431 of 436
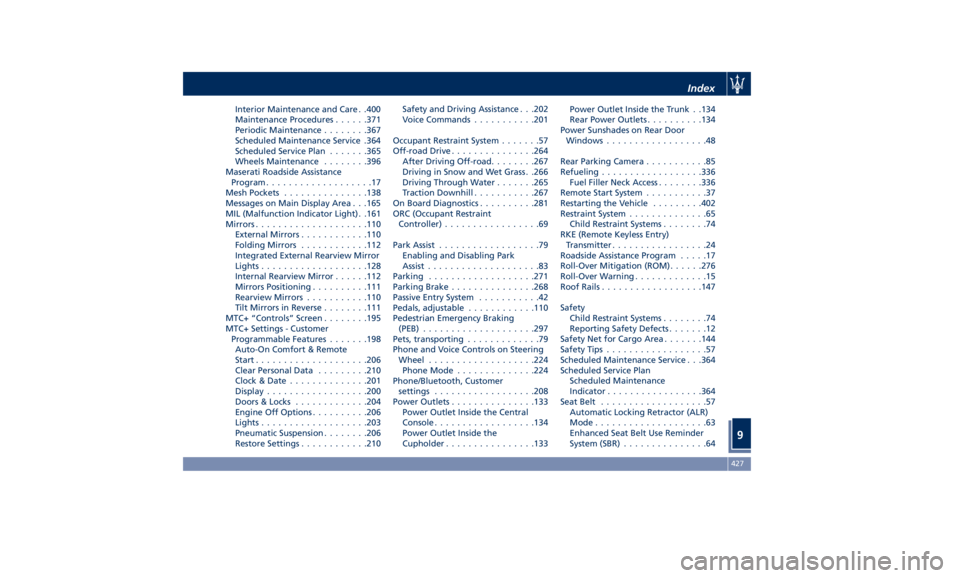
Interior Maintenance and Care . .400
Maintenance Procedures ..... .371
Periodic Maintenance ....... .367
Scheduled Maintenance Service .364
Scheduled Service Plan ...... .365
Wheels Maintenance ....... .396
Maserati Roadside Assistance
Program ...................17
Mesh Pockets .............. .138
Messages on Main Display Area . . .165
MIL (Malfunction Indicator Light). .161
Mirrors ................... .110
External Mirrors ........... .110
Folding Mirrors ........... .112
Integrated External Rearview Mirror
Lights .................. .128
Internal Rearview Mirror ..... .112
Mirrors Positioning ......... .111
Rearview Mirrors .......... .110
Tilt Mirrors in Reverse ....... .111
MTC+ “Controls” Screen ....... .195
MTC+ Settings - Customer
Programmable Features ...... .198
Auto-On Comfort & Remote
Start ................... .206
Clear Personal Data ........ .210
Clock & Date ............. .201
Display ................. .200
Doors & Locks ............ .204
Engine Off Options ......... .206
Lights .................. .203
Pneumatic Suspension ....... .206
Restore Settings ........... .210 Safety and Driving Assistance . . .202
Voice Commands .......... .201
Occupant Restraint System .......57
Off-road Drive .............. .264
After Driving Off-road ....... .267
Driving in Snow and Wet Grass . .266
Driving Through Water ...... .265
Traction Downhill .......... .267
On Board Diagnostics ......... .281
ORC (Occupant Restraint
Controller) .................69
Park Assist ..................
79
Enabling and Disabling Park
Assist ....................83
Parking .................. .271
Parking Brake .............. .268
Passive Entry System ...........42
Pedals, adjustable ........... .110
Pedestrian Emergency Braking
(PEB) ................... .297
Pets, transporting .............79
Phone and Voice Controls on Steering
Wheel .................. .224
Phone Mode ............. .224
Phone/Bluetooth, Customer
settings ................. .208
Power Outlets .............. .133
Power Outlet Inside the Central
Console ................. .134
Power Outlet Inside the
Cupholder ............... .133 Power Outlet Inside the Trunk . .134
Rear Power Outlets ......... .134
Power Sunshades on Rear Door
Windows ..................48
Rear Parking Camera ...........85
Refueling ................. .336
Fuel Filler Neck Access ....... .336
Remote Start System ...........37
Restarting the Vehicle ........ .402
Restraint System ..............65
Child Restraint Systems ........74
RKE (Remote Keyless Entry)
Transmitter .................24
Roadside Assistance Program .....17
Roll-Over Mitigation (ROM) ..... .276
Roll-Over Warning .............15
Roof Rails ................. .147
Safety
Child Restraint Systems ........74
Reporting Safety Defects .......12
Safety Net for Cargo Area ...... .144
Safety Tips ..................57
Scheduled Maintenance Service . . .364
Scheduled Service Plan
Scheduled Maintenance
Indicator ................ .364
Seat Belt ...................57
Automatic Locking Retractor (ALR)
Mode ....................63
Enhanced Seat Belt Use Reminder
System (SBR) ...............64Index
9 427