2019 MASERATI LEVANTE warning lights
[x] Cancel search: warning lightsPage 369 of 436

the next scheduled maintenance is
due or has already overdue.
When the scheduled maintenance has
overdue, the indicator light
and
message will be displayed on the
instrument cluster.
The service indicator and message will
illuminate approximately from 620 mi
(1000 km) or 30 days to the next
scheduled maintenance.
Have your vehicle serviced as soon as
possible. NOTE:
The service indicator will not monitor
the time elapsed from the last
scheduled maintenance.
To check the mi/km and the days that
remain at the inspiration of the next
scheduled maintenance, consult the
“Maintenance” submenu of “VEHICLE
INFO” main menu (see paragraph ”TFT
Dispaly : Warning/Indicator Lights of
the Set Modes/ Functions” in chapter
“Instrument Cluster” of section
“Dashboard Instruments and
Controls” for more details).
An Authorized Maserati Dealer will
reset the service indicator message
after completing the scheduled
maintenance operations.Scheduled Service Plan The Scheduled Maintenance services
listed in this manual must be done
within the times or mileages specified
to protect your vehicle warranty and
ensure the best vehicle performance
and reliability.
More frequent maintenance may be
needed for vehicles in operating
conditions, such as dusty areas,
extremely hot or cold ambient
temperatures and very short trip
driving.
Inspection and service should also be
done anytime a malfunction is
suspected.
Maserati recommends that these
maintenance intervals be performed
at an Authorized Maserati Dealer . The
technicians at your dealership know
your vehicle best, and have access to
factory-approved information,
genuine Maserati parts, and specially
designed electronic and mechanical
tools that can help prevent future
costly repairs.Maintenance and Care
7
365
Page 371 of 436

Interval running coupons: every 12,500 mi (20,000 km)
or 1 year
Service coupons 1° 2° 3° 4°
5° 6°
Main operations Available Pre-Paid Maintenance
Program
Correct operation and reliability of the seats and seat belts IIIIII
Pollen filter RRR
Windshield fluid level - Windshield washer and headlight
cleaner IIIIII
Headlight leveling IIIIII
Controls and adjustment systems in general, hinges, doors,
engine compartment lid and luggage compartment III
Condition of leather interiors III
(1) In case of heavy-duty use of the vehicle, highlighted by the presence of mud and dust in the engine compartment,
proceed to the preventive replacement of the alternator belt.
I = Inspect and carry out any other necessary operation.
R = Replace.
Periodic Maintenance Every 600 mi (1,000 km) or before
long journeys
Check:
• engine coolant;
• brake fluid;
• windshield washer fluid level;
• tire inflation pressure and condition; • operation of lighting system
(headlights, direction indicators,
hazard warning flashers, etc.);
• operation of windshield
washer/wiper system and wear of
windshield wiper blades.
Every 1,900 mi (3,000 km)
Check and top up, if required, the
engine oil level. WARNING!
California Proposition 65
Operating, servicing and maintaining
a passenger vehicle or off-road vehicle
can expose you to chemicals including
such as, engine exhaust, carbon
monoxide, phthalates and lead, that
which are known to the State of
California to cause cancer and birth
(Continued)Maintenance and Care
7
367
Page 380 of 436
(Continued)
mineral type. Using mineral fluids
damages the special rubber linings of
the brake system irreparably.
WARNING!
• To avoid contamination from foreign
materials or moisture, use only new
brake fluid or fluid that has been in
a tightly closed container. Keep the
master cylinder reservoir cap secured
at all times.
• Overfilling the brake fluid reservoir
can result in spilling brake fluid.
Brake fluid can also damage painted
and vinyl surfaces, make sure it does
not spill over these surfaces.
• Do not allow petroleum based fluid
to contaminate the brake fluid.
Brake seal components could be
damaged.
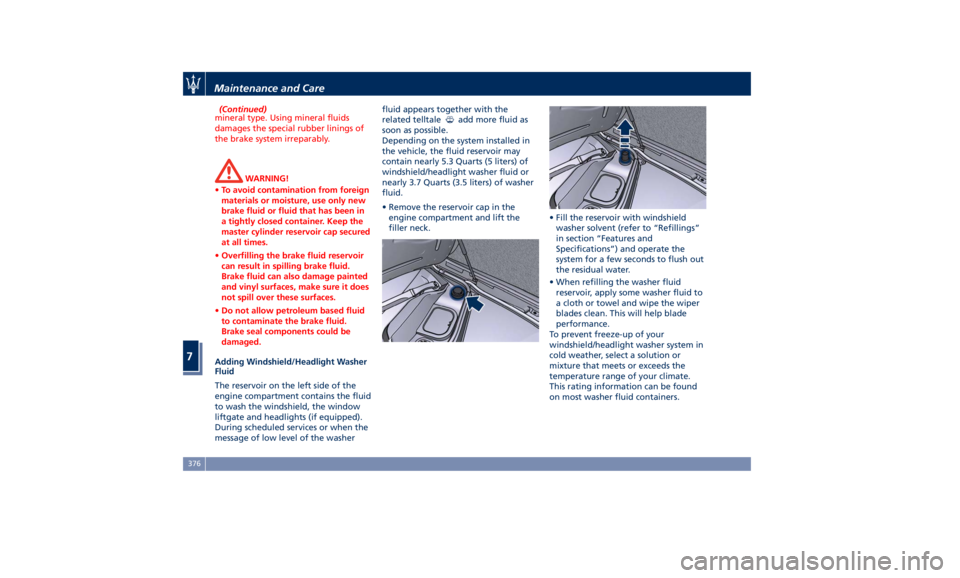
Adding Windshield/Headlight Washer
Fluid
The
reservoir on the
left side of the
engine compartment contains the fluid
to wash the windshield, the window
liftgate and headlights (if equipped).
During scheduled services or when the
message of low level of the washer fluid appears together with the
related telltale
add more fluid as
soon as possible.
Depending on the system installed in
the vehicle, the fluid reservoir may
contain nearly 5.3 Quarts (5 liters) of
windshield/headlight washer fluid or
nearly 3.7 Quarts (3.5 liters) of washer
fluid.
• Remove the reservoir cap in the
engine compartment and lift the
filler neck. • Fill the reservoir with windshield
washer solvent (refer to “Refillings”
in section “Features and
Specifications”) and operate the
system for a few seconds to flush out
the residual water.
• When refilling the washer fluid
reservoir, apply some washer fluid to
a cloth or towel and wipe the wiper
blades clean. This will help blade
performance.
To prevent freeze-up of your
windshield/headlight washer system in
cold weather, select a solution or
mixture that meets or exceeds the
temperature range of your climate.
This rating information can be found
on most washer fluid containers.Maintenance and Care
7
376
Page 387 of 436
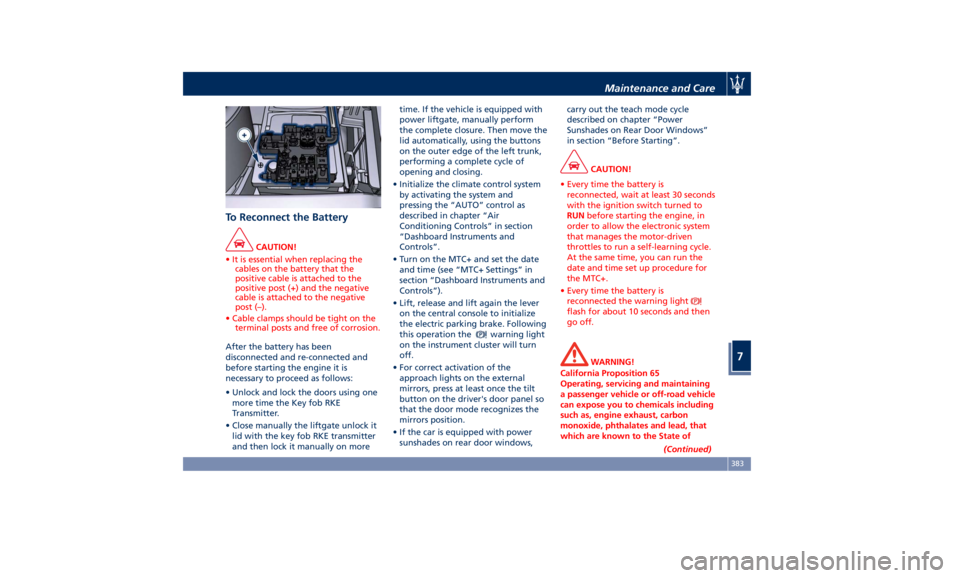
To Reconnect the Battery CAUTION!
• It is essential when replacing the
cables on the battery that the
positive cable is attached to the
positive post (+) and the negative
cable is attached to the negative
post (–).
• Cable clamps should be tight on the
terminal posts and free of corrosion.
After the battery has been
disconnected
and re-connected and
before starting the engine it is
necessary to proceed as follows:
• Unlock and lock the doors using one
more time the Key fob RKE
Transmitter.
• Close manually the liftgate unlock it
lid with the key fob RKE transmitter
and then lock it manually on more time. If the vehicle is equipped with
power liftgate, manually perform
the complete closure. Then move the
lid automatically, using the buttons
on the outer edge of the left trunk,
performing a complete cycle of
opening and closing.
• Initialize the climate control system
by activating the system and
pressing the “AUTO” control as
described in chapter “Air
Conditioning Controls” in section
“Dashboard Instruments and
Controls”.
• Turn on the MTC+ and set the date
and time (see “MTC+ Settings” in
section “Dashboard Instruments and
Controls”).
• Lift, release and lift again the lever
on the central console to initialize
the electric parking brake. Following
this operation the
warning light
on the instrument cluster will turn
off.
• For correct activation of the
approach lights on the external
mirrors, press at least once the tilt
button on the driver's door panel so
that the door mode recognizes the
mirrors position.
• If the car is equipped with power
sunshades on rear door windows, carry out the teach mode cycle
described on chapter “Power
Sunshades on Rear Door Windows”
in section “Before Starting”.
CAUTION!
• Every time the battery is
reconnected, wait at least 30 seconds
with the ignition switch turned to
RUN before starting the engine, in
order to allow the electronic system
that manages the motor-driven
throttles to run a self-learning cycle.
At the same time, you can run the
date and time set up procedure for
the MTC+.
• Every time the battery is
reconnected the warning light
flash for about 10 seconds and then
go off.
WARNING!
California Proposition 65
Operating, servicing and maintaining
a passenger vehicle or off-road vehicle
can expose you to chemicals including
such as, engine exhaust, carbon
monoxide, phthalates and lead, that
which are known to the State of
(Continued)Maintenance and Care
7
383
Page 388 of 436
(Continued)
California to cause cancer and birth
defects or other reproductive harm. To
minimize exposure, avoid breathing
exhaust, do not idle the engine except
as necessary, service your vehicle in a
well-ventilated area and wear gloves
or wash your hands frequently when
servicing your vehicle. For more
information go to:
www.P65Warnings.ca.gov/passenger-
vehicle
Useful Advice to Extend
Battery Life When parking the vehicle, make sure
that the doors, hood, liftgate and flaps
are properly closed. All interior lights
should be off.
When the engine is turned off, do not
keep the connected devices switched
on for a long time (such as radio,
hazard warning flashers, fan, etc.).
CAUTION!
If the battery charge remains below
50% for a long period of time, it will
be damaged due to sulfation; its
performance and starting power will
be reduced and it will be more subject
to freezing. We recommend you to have the
battery
charge condition checked,
preferably
at the beginning of the cold
season, to prevent the electrolyte from
freezing.
This check should be carried out more
frequently if the vehicle is used mainly
for short trips or if it is equipped with
power-absorbing devices that remain
permanently on even when the
ignition switch is off. This applies
above all if these devices have been
retrofitted ("Aftermarket" services).
If the vehicle is not used for long
periods of time, please see “Vehicle
Stored for Long Periods” in this
section.
Battery Recharge WARNING!
The process of charging or recharging
the battery produces hydrogen, a
flammable gas that can explode and
cause serious injuries. When charging
or recharging the battery, follow the
recommended precautions at all times.
• Before using a charger device always
check that this tool is suitable for the
installed battery, with constant
voltage (lower than 14.0 V) and low
amperage (maximum limit 15 A). • Recharge the battery in a
well-ventilated environment.
• Never charge or recharge a frozen
battery.
• Ensure that any sparks or open
flames are kept well away from the
battery while it is charging.
• Before using a charger to charge or
maintain the battery charge status,
carefully follow the instructions
provided to ensure the charger is
connected to the battery safely and
correctly.
It is possible to recharge the battery
without
disconnecting the cables
of
the vehicle electrical system.
• To access the battery lift the ground
coverage of the trunk compartment
(see chapter “Tool Kit” section “In an
Emergency”) and remove the storage
box.
• Remove the protection cover and
connect the terminal clamp of the
charger positive cable (typically in
red) to the positive post (+) of the
battery.
• Connect the terminal clamp of the
charger negative cable (typically in
black) to the nut located by theMaintenance and Care
7
384
Page 398 of 436
CAUTION!
Due to the complexity of the
operation, for the replacement of the
light cluster bulbs/LEDs, we
recommend that you contact an
Authorized Maserati Dealer .
WARNING!
The Bi-Xenon bulbare a type of high
voltage discharge tube. High voltage
can remain in the circuit even with the
ignition switch off. Because of this,
you should not attempt to replace a
Bi-Xenon bulb yourself, but take the
vehicle to an Authorized Maserati
Dealer for service.
Besides the light clusters, a third LED
stop
light is present on the rear side of
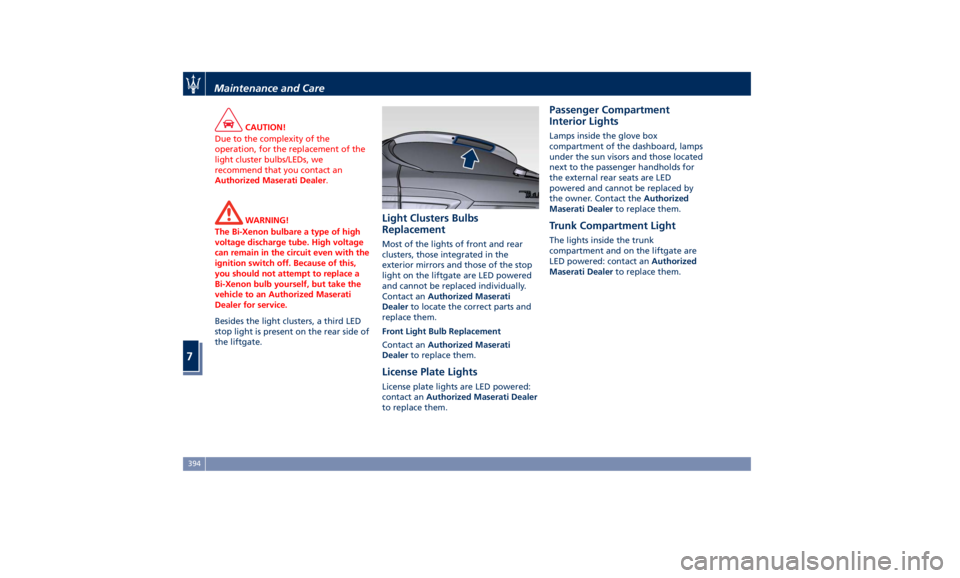
the liftgate. Light Clusters Bulbs
Replacement Most of the lights of front and rear
clusters, those integrated in the
exterior mirrors and those of the stop
light on the liftgate are LED powered
and cannot be replaced individually.
Contact an Authorized Maserati
Dealer to locate the correct parts and
replace them.
Front Light Bulb Replacement
Contact an Authorized Maserati
Dealer to replace them.
License Plate Lights License plate lights are LED powered:
contact an Authorized Maserati Dealer
to replace them. Passenger Compartment
Interior Lights Lamps inside the glove box
compartment of the dashboard, lamps
under the sun visors and those located
next to the passenger handholds for
the external rear seats are LED
powered and cannot be replaced by
the owner. Contact the Authorized
Maserati Dealer to replace them.
Trunk Compartment Light The lights inside the trunk
compartment and on the liftgate are
LED powered: contact an Authorized
Maserati Dealer to replace them.Maintenance and Care
7
394
Page 429 of 436

Infants and Child Restraints .....74
Installing Child Restraint Systems
using the Vehicle Seat Belt
equipped with ALR ...........76
Lower Anchors and Tether for
Children (LATCH) ............76
Older Children and Child
Restraints .................75
Tips on getting the most out of your
child restraint ..............76
Climate Control ............. .214
Clock, analog .............. .201
Console
Central Console Components ....95
Front Dome Console
Components ...............96
Controls Screen ............. .195
Cruise Control
Cruise Control Adaptive (ACC) . .286
Electronic Cruise Control (CC) . . .282
Cupholders ................ .134
Front Passengers Cupholders . . .134
Rear Passengers Cupholders . . . .135
Dashboard Compartment ...... .210
Dashboard Components .........94
Defroster ...................91
Doors
Child Protection Door Lock
System ...................41
Doors Locking ..............39
Doors Manual Lock ...........39
Front Doors Components ......96 Lock/Unlock Door Flashlight ....34
Power Doors Locking/Unlocking . .40
Rear Doors Components .......97
Soft Door Close System ........41
Unlock Driver Door/All Doors with
Key fob 1st Press ............34
Unlock the Vehicle with Key fob. .33
DPF System
DPF Filter Replacement ...... .377
“Drive Away Inhibit” strategy . . . .272
Drive Mode, controls ......... .244
Setting Ride Height ........ .258
Setting the Drive Mode ...... .245
Driving Conditions ........... .338
Before the Trip ............ .338
Driving at Night ........... .339
Driving in Fog ............ .340
Driving in Snow and Wet Grass . .266
Driving in the Mountains ..... .340
Driving in the Rain ......... .339
Driving on Snow or Ice ...... .340
Safe Driving .............. .339
DRL (Daytime Running Light) . . . .116
EDR (Event Data Recorder) .......73
Electronic Cruise Control .......
.282
Emergency ...................
5
Hazard W arning
Lights ...... .128
In the Event of an Accident . . . .350
Jump Starting ............ .357
Use the Vehicle Tow Hook .... .360
Engine
Engine Coolant Level Check . . . .374 Engine Oil Level Check ...... .377
Hood ....................56
Normal Starting of the Engine . .228
Use of the Engine .......... .281
Entry/Exit, lights on ............30
EPB (Electric Parking Brake) ..... .268
ESC (Electronic Stability Control) . .273
Filters
A/C System Air Filter
Replacement ............. .379
Engine Air Filter Replacement . .379
Forward Collision Warning (FCW) . .297
Fuel
Carbon Monoxide Warning . . . .335
Emergency Fuel Filler Door
Release ................. .338
Emissions Inspection and
Maintenance Programs ...... .369
Fuel Consumption ......... .410
Fuel Filter Service .......... .377
Fuel Requirements ......... .334
Fuel System Warnings ....... .335
Gasoline/Oxygenate Blends . . . .334
Low Fuel Indicator ......... .181
Materials Added to Fuel ..... .335
MMT in Gasoline .......... .335
Reformulated Gasoline ...... .334
Fuses .................... .386
Fuses Position ............ .386
Fuses Replacement ......... .386
Glove Box Lock Feature ....... .211Index
9 425
Page 430 of 436
Handholds and Cloth Hooks . . . .138
Hazard Warning Flashers ....... .350
Head Restraints ...............98
Highway Assist - HAS ......... .313
Hill Descend Control (HDC) ..... .277
HomeLink ................. .150
Security ................. .153
Troubleshooting Tips ........ .153
Using HomeLink ........... .153
Hood
Open and Close the Hood ......56
Hood Operation ..............56
HSA (Hill Start Assist) ......... .276
Identification Labels ............19
Illuminated Entry/Exit ...........30
Immobilizer (Sentry Key) .........26
Indicator Lights/Warning Lights
Air Bag Warning Light .........90
TFT Display: Menus and Settings .165
TFT Display: Warning/Indicator
Lights of Set Modes/Functions. . .178
Warning and Indicator Lights on
Analog Instrument ......... .161
Infotainment System .......... .185
Main Menu Bar on MTC+
Display ................. .187
Manual Controls and Devices . . .186
Personalized the Main Menu Bar.188
Instrument Cluster ........... .160
Interior Components ...........94
Interior Maintenance and Care. . . .400 Interiors Features ............ .133
iPad Holder ................ .139
iPod Connection ............. .136
Jump Start Procedure ......... .358
KeyFob ....................25
Key fob Battery Replacement ....35
Preventing Inadvertent Locking of
key fob RKE Transmitter Inside the
Vehicle ...................43
Replacement ...............27
Requiring and setting Additional
Key Fobs ..................34
Unlock the Vehicle with Key fob . .33
Keys .......................24
Lane Departure Warning (LDW) . . .301
Level Checks ............... .374
Brake Fluid Level Check ...... .375
Engine Coolant Level Check . . . .374
Engine Oil Level Check ....... .374
Fluid Level Check for Coolant
Transmission System ........ .379
Transmission Oil Check ....... .378
Washer/Headlight Fluid, adding .376
Liftgate
Automatic
Opening and Closing
Movement
of the Power Liftgate .51
Liftgate and Hood Ajar
Indicators ................ .180
Power Liftgate Emergency
Release ...................55 Power Liftgate Operation ......50
Unlatch the Liftgate ..........34
Lights .................... .113
Automatic Headlights ....... .115
Automatic Headlights Leveling . .126
Automatic High Beam ....... .120
Bi-Xenon Headlight ......... .117
Bulb Replacement .......... .393
Cargo Lamps ............. .127
Dome Lights .............. .126
DRL, Daytime Running Lights . . .116
Fog Lights ............... .123
Headlight Time Delay ....... .115
Headlight with AFS ......... .117
High Beam and Flashing ..... .124
Interior Lights ............. .125
Light Switch .............. .113
Multifunction Lever ......... .124
SmartBeam System ......... .116
Turn Signals .............. .124
Loading the Vehicle
Loading with Rear Seatbacks
Down .................. .141
Vehicle Load Carrying Capacity . .139
Main- and Submenu .......... .166
Maintenance ..................5
A/C System Maintenance ..... .395
Air Bag System Maintenance ....72
Bodywork Maintenance and
Care ................... .397
Emissions Inspection and
Maintenance Programs ...... .369Index
9 426