2019 MASERATI LEVANTE key fob
[x] Cancel search: key fobPage 114 of 436
Adjustable Pedals (if
equipped) The adjustable pedals system is
designed to allow greater range of
pedals positions enabling driver
comfort with regard to the steering
wheel tilt and the seat position.
This feature allows the brake and
accelerator pedals to move toward or
away from the driver’s feet.
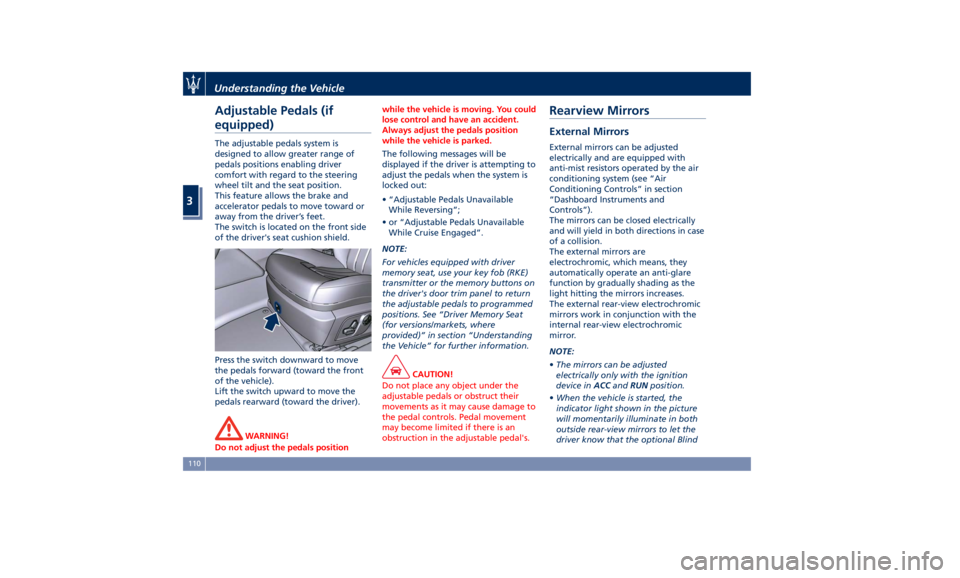
The switch is located on the front side
of the driver's seat cushion shield.
Press the switch downward to move
the pedals forward (toward the front
of the vehicle).
Lift the switch upward to move the
pedals rearward (toward the driver).
WARNING!
Do not adjust the pedals position while the vehicle is moving. You could
lose control and have an accident.
Always adjust the pedals position
while the vehicle is parked.
The following messages will be
displayed
if the driver is attempting to
adjust the pedals when the system is
locked out:
• “Adjustable Pedals Unavailable
While Reversing”;
• or “Adjustable Pedals Unavailable
While Cruise Engaged”.
NOTE:
For vehicles equipped with driver
memory seat, use your key fob (RKE)
transmitter or the memory buttons on
the driver's door trim panel to return
the adjustable pedals to programmed
positions. See “Driver Memory Seat
(for versions/markets, where
provided)” in section “Understanding
the Vehicle” for further information.
CAUTION!
Do not place any object under the
adjustable pedals or obstruct their
movements as it may cause damage to
the pedal controls. Pedal movement
may become limited if there is an
obstruction in the adjustable pedal's.Rearview Mirrors External Mirrors External mirrors can be adjusted
electrically and are equipped with
anti-mist resistors operated by the air
conditioning system (see “Air
Conditioning Controls” in section
“Dashboard Instruments and
Controls”).
The mirrors can be closed electrically
and will yield in both directions in case
of a collision.
The external mirrors are
electrochromic, which means, they
automatically operate an anti-glare
function by gradually shading as the
light hitting the mirrors increases.
The external rear-view electrochromic
mirrors work in conjunction with the
internal rear-view electrochromic
mirror.
NOTE:
• The mirrors can be adjusted
electrically only with the ignition
device in ACC and RUN position.
• When the vehicle is started, the
indicator light shown in the picture
will momentarily illuminate in both
outside rear-view mirrors to let the
driver know that the optional BlindUnderstanding the Vehicle
3
110
Page 116 of 436
Seat" chapter in section
“Understanding the Vehicle”)
corresponds to a mirror tilt position in
reverse.
NOTE:
The mirrors tilt in reverse can be
turned on and off using the MTC+
System, refer to “MTC+ Settings” in
section “Dashboard Instruments and
Controls”.
Folding Mirrors
By selecting this feature on MTC+ the
rear-view mirrors automatically fold
when the vehicle is locked by the key
fob and when the power liftgate (if
equipped) is closed and locked by
pressing the
button on the outer
ledge of the left boot compartment
lining. When the vehicle and the
liftgate will be unlocked and the
ignition device is set in RUN position,
the rear-view mirrors will
automatically open in the position
they had before the lock.
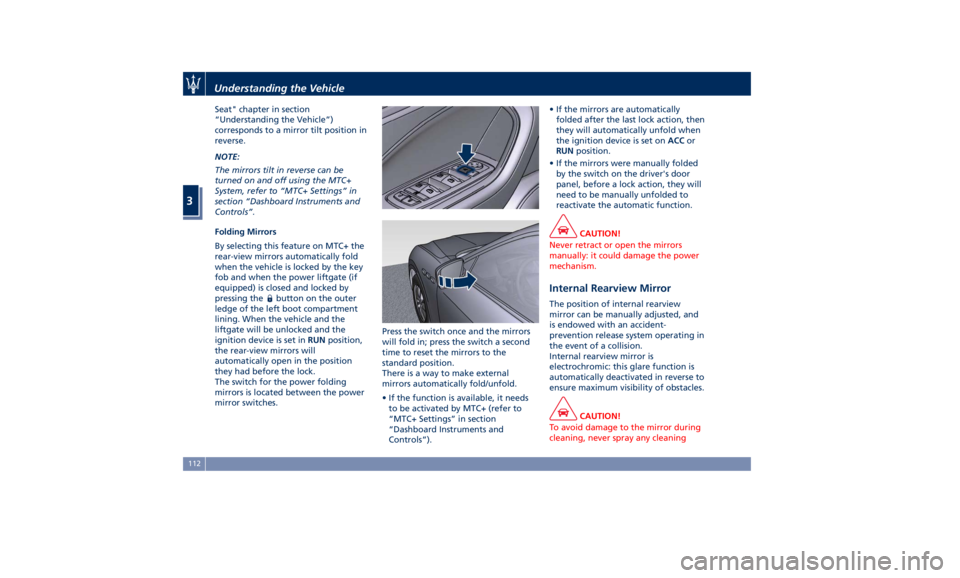
The switch for the power folding
mirrors is located between the power
mirror switches. Press the switch once and the mirrors
will fold in; press the switch a second
time to reset the mirrors to the
standard position.
There is a way to make external
mirrors automatically fold/unfold.
• If the function is available, it needs
to be activated by MTC+ (refer to
“MTC+ Settings” in section
“Dashboard Instruments and
Controls”). • If the mirrors are automatically
folded after the last lock action, then
they will automatically unfold when
the ignition device is set on ACC or
RUN position.
• If the mirrors were manually folded
by the switch on the driver's door
panel, before a lock action, they will
need to be manually unfolded to
reactivate the automatic function.
CAUTION!
Never retract or open the mirrors
manually: it could damage the power
mechanism.
Internal Rearview Mirror The position of internal rearview
mirror can be manually adjusted, and
is endowed with an accident-
prevention release system operating in
the event of a collision.
Internal rearview mirror is
electrochromic: this glare function is
automatically deactivated in reverse to
ensure maximum visibility of obstacles.
CAUTION!
To avoid damage to the mirror during
cleaning, never spray any cleaningUnderstanding the Vehicle
3
112
Page 131 of 436
facilitate the use of the transmission
lever and the central console.
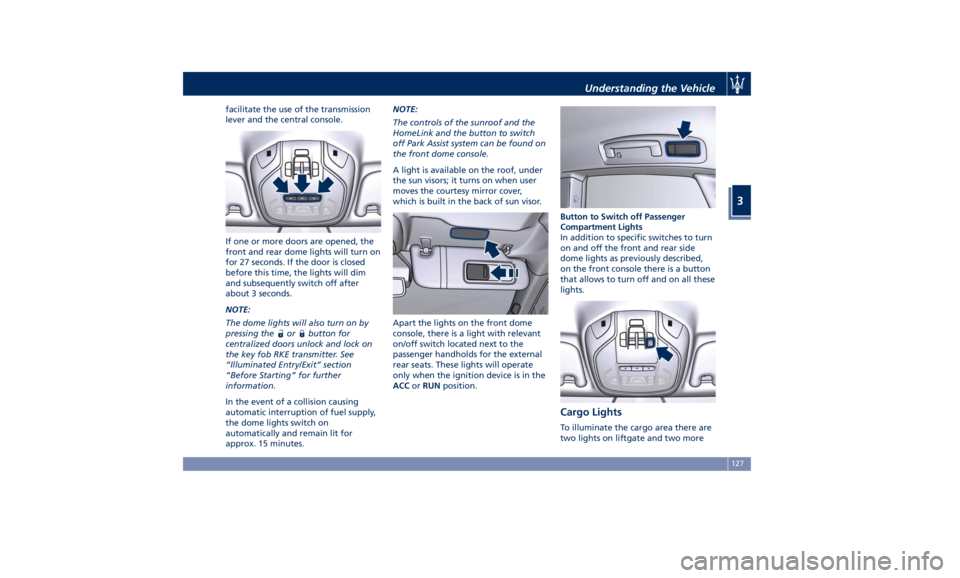
If one or more doors are opened, the
front and rear dome lights will turn on
for 27 seconds. If the door is closed
before this time, the lights will dim
and subsequently switch off after
about 3 seconds.
NOTE:
The dome lights will also turn on by
pressing the
or button for
centralized doors unlock and lock on
the key fob RKE transmitter. See
“Illuminated Entry/Exit” section
“Before Starting” for further
information.
In the event of a collision causing
automatic interruption of fuel supply,
the dome lights switch on
automatically and remain lit for
approx. 15 minutes. NOTE:
The controls of the sunroof and the
HomeLink and the button to switch
off Park Assist system can be found on
the front dome console.
A light is available on the roof, under
the sun visors; it turns on when user
moves the courtesy mirror cover,
which is built in the back of sun visor.
Apart the lights on the front dome
console, there is a light with relevant
on/off switch located next to the
passenger handholds for the external
rear seats. These lights will operate
only when the ignition device is in the
ACC or RUN position. Button to Switch off Passenger
Compartment Lights
In addition to specific switches to turn
on and off the front and rear side
dome lights as previously described,
on the front console there is a button
that allows to turn off and on all these
lights.
Cargo Lights To illuminate the cargo area there are
two lights on liftgate and two moreUnderstanding the Vehicle
3
127
Page 152 of 436
Power Sunroof with
Sunshade (optional) The sunroof and the sunshade are
power-controlled and can only be
operated with the ignition switch in
RUN position.
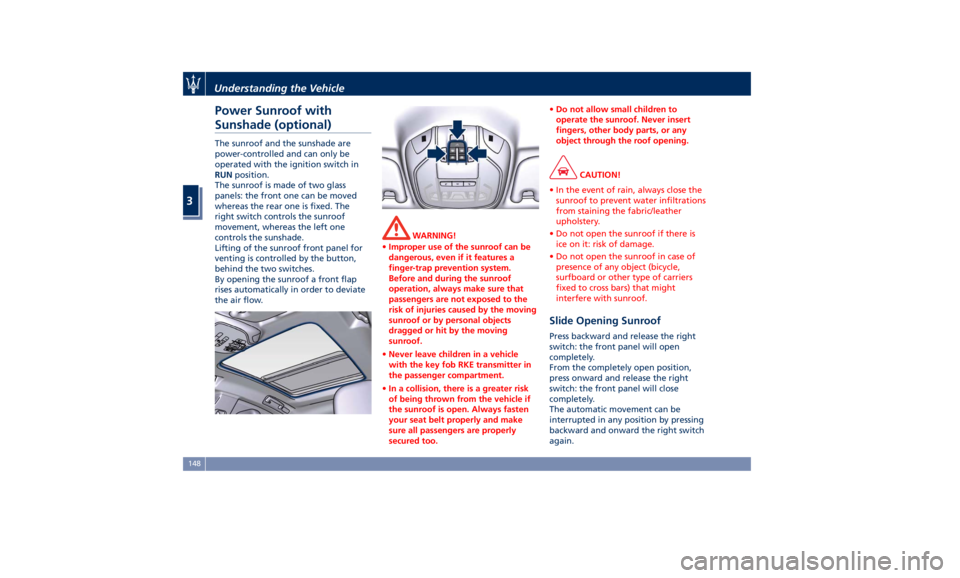
The sunroof is made of two glass
panels: the front one can be moved
whereas the rear one is fixed. The
right switch controls the sunroof
movement, whereas the left one
controls the sunshade.
Lifting of the sunroof front panel for
venting is controlled by the button,
behind the two switches.
By opening the sunroof a front flap
rises automatically in order to deviate
the air flow. WARNING!
• Improper use of the sunroof can be
dangerous, even if it features a
finger-trap prevention system.
Before and during the sunroof
operation, always make sure that
passengers are not exposed to the
risk of injuries caused by the moving
sunroof or by personal objects
dragged or hit by the moving
sunroof.
• Never leave children in a vehicle
with the key fob RKE transmitter in
the passenger compartment.
• In a collision, there is a greater risk
of being thrown from the vehicle if
the sunroof is open. Always fasten
your seat belt properly and make
sure all passengers are properly
secured too. • Do not allow small children to
operate the sunroof. Never insert
fingers, other body parts, or any
object through the roof opening.
CAUTION!
• In the event of rain, always close the
sunroof to prevent water infiltrations
from staining the fabric/leather
upholstery.
• Do not open the sunroof if there is
ice on it: risk of damage.
• Do not open the sunroof in case of
presence of any object (bicycle,
surfboard or other type of carriers
fixed to cross bars) that might
interfere with sunroof.
Slide Opening Sunroof Press backward and release the right
switch: the front panel will open
completely.
From the completely open position,
press onward and release the right
switch: the front panel will close
completely.
The automatic movement can be
interrupted in any position by pressing
backward and onward the right switch
again.Understanding the Vehicle
3
148
Page 207 of 436
D (Drive), front parking sensors are
NOT activated.
• Front ParkSense Volume
When this feature is selected, the
chime volume of front park assist
sensors can be set to “Low”,
“Medium” or “High” level.
“Medium” is the default setting.
The system will retain its last known
configuration state through ignition
cycles.
• Rear ParkSense Volume
When this feature is selected, the
chime volume of rear park assist
sensors can be set to “Low”,
“Medium” or “High” level.
“Medium” is the default setting.
The system will retain its last known
configuration state through ignition
cycles.
• Tilt Side Mirrors In Reverse
By selecting this feature the outside
side-view mirrors will tilt downward
when the ignition is in RUN position
and the transmission shift lever is in
R (Reverse) position. The mirrors will
move back to their previous
position when the transmission is
shifted out of R (Reverse). The
feature can be set to “On” or “Off”. • Auto Folding Side Mirrors
By selecting this feature the
rear-view mirrors automatically fold
when the vehicle is locked by the
key fob and when the power
liftgate (if equipped) is closed and
locked by pressing the
button on
the outer ledge of the left boot
compartment lining. When the
vehicle and the liftgate will be
unlocked and the ignition device is
set in RUN position, the rear-view
mirrors will automatically open in
the position they had before the
lock.
If the mirrors were manually folded
by the switch on the driver's door
panel, before a lock action, they will
need to be manually unfold to
reactivate the automatic behave.
• ParkView Backup Camera Delay
By selecting this feature, when the
shift lever is moved out of R
(Reverse), the rear view image with
dynamic grid lines will be displayed
for up to 10 seconds after shifting
unless the forward vehicle speed
exceeds 8 mph (12 km/h), or the
transmission is shifted into P (Park)
or the ignition device is switched to
the OFF position. The feature can be
set to “On” or “Off”. • Rain Sensing Auto Wipers
By selecting this feature, the system
will automatically activate the
windshield wipers if the rain sensor
senses moisture on the windshield.
The feature can be set to “On” or
“Off”.
• Hill Start Assist
This feature allows you to disable
the HSA system. The feature can be
set to “On” or “Off”. See “Brake
and Stability Control System” in
section “Driving” for further details.
Lights Press the “Lights” soft-key to set the
following modes.
• Headlight Off Delay
By selecting this feature, the driver
can choose to have the headlight
off or lit for 30, 60, or 90 seconds
when the engine is shut off. To
change the current headlight off
delay status, touch and release the
“0”, “30”, “60” or “90” soft-key to
select the desired time range.Dashboard Instruments and Controls
4
203
Page 208 of 436
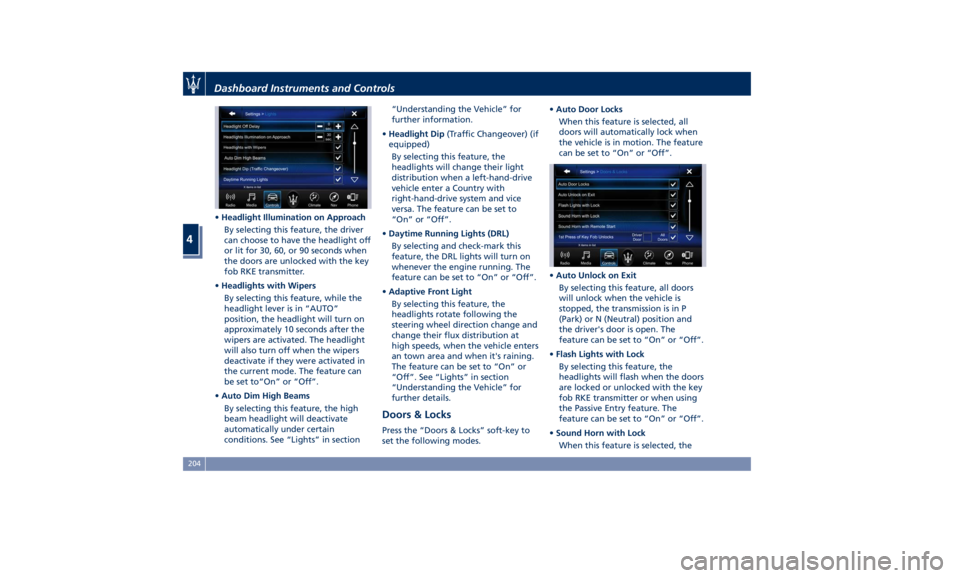
• Headlight Illumination on Approach
By selecting this feature, the driver
can choose to have the headlight off
or lit for 30, 60, or 90 seconds when
the doors are unlocked with the key
fob RKE transmitter.
• Headlights with Wipers
By selecting this feature, while the
headlight lever is in “AUTO”
position, the headlight will turn on
approximately 10 seconds after the
wipers are activated. The headlight
will also turn off when the wipers
deactivate if they were activated in
the current mode. The feature can
be set to“On” or “Off”.
• Auto Dim High Beams
By selecting this feature, the high
beam headlight will deactivate
automatically under certain
conditions. See “Lights” in section “Understanding the Vehicle” for
further information.
• Headlight Dip (Traffic Changeover) (if
equipped)
By selecting this feature, the
headlights will change their light
distribution when a left-hand-drive
vehicle enter a Country with
right-hand-drive system and vice
versa. The feature can be set to
“On” or “Off”.
• Daytime Running Lights (DRL)
By selecting and check-mark this
feature, the DRL lights will turn on
whenever the engine running. The
feature can be set to “On” or “Off”.
• Adaptive Front Light
By selecting this feature, the
headlights rotate following the
steering wheel direction change and
change their flux distribution at
high speeds, when the vehicle enters
an town area and when it's raining.
The feature can be set to “On” or
“Off”. See “Lights” in section
“Understanding the Vehicle” for
further details.
Doors & Locks Press the “Doors & Locks” soft-key to
set the following modes. • Auto Door Locks
When this feature is selected, all
doors will automatically lock when
the vehicle is in motion. The feature
can be set to “On” or “Off”.
• Auto Unlock on Exit
By selecting this feature, all doors
will unlock when the vehicle is
stopped, the transmission is in P
(Park) or N (Neutral) position and
the driver's door is open. The
feature can be set to “On” or “Off”.
• Flash Lights with Lock
By selecting this feature, the
headlights will flash when the doors
are locked or unlocked with the key
fob RKE transmitter or when using
the Passive Entry feature. The
feature can be set to “On” or “Off”.
• Sound Horn with Lock
When this feature is selected, theDashboard Instruments and Controls
4
204
Page 209 of 436
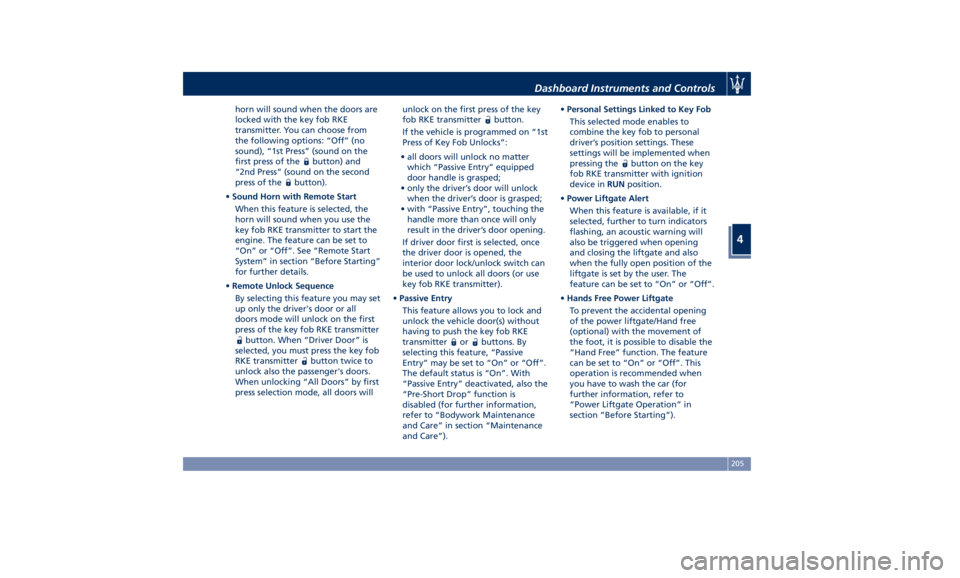
horn will sound when the doors are
locked with the key fob RKE
transmitter. You can choose from
the following options: “Off” (no
sound), “1st Press” (sound on the
first press of the
button) and
“2nd Press” (sound on the second
press of the
button).
• Sound Horn with Remote Start
When this feature is selected, the
horn will sound when you use the
key fob RKE transmitter to start the
engine. The feature can be set to
“On” or “Off”. See “Remote Start
System” in section “Before Starting”
for further details.
• Remote Unlock Sequence
By selecting this feature you may set
up only the driver's door or all
doors mode will unlock on the first
press of the key fob RKE transmitter
button. When “Driver Door” is
selected, you must press the key fob
RKE transmitter
button twice to
unlock also the passenger's doors.
When unlocking “All Doors” by first
press selection mode, all doors will unlock on the first press of the key
fob RKE transmitter
button.
If the vehicle is programmed on “1st
Press of Key Fob Unlocks”:
• all doors will unlock no matter
which “Passive Entry” equipped
door handle is grasped;
• only the driver’s door will unlock
when the driver’s door is grasped;
• with “Passive Entry”, touching the
handle more than once will only
result in the driver’s door opening.
If driver door first is selected, once
the driver door is opened, the
interior door lock/unlock switch can
be used to unlock all doors (or use
key fob RKE transmitter).
• Passive Entry
This feature allows you to lock and
unlock the vehicle door(s) without
having to push the key fob RKE
transmitter
or buttons. By
selecting this feature, “Passive
Entry” may be set to “On” or “Off”.
The default status is “On”. With
“Passive Entry” deactivated, also the
“Pre-Short Drop” function is
disabled (for further information,
refer to “Bodywork Maintenance
and Care” in section “Maintenance
and Care”). • Personal Settings Linked to Key Fob
This selected mode enables to
combine the key fob to personal
driver’s position settings. These
settings will be implemented when
pressing the
button on the key
fob RKE transmitter with ignition
device in RUN position.
• Power Liftgate Alert
When this feature is available, if it
selected, further to turn indicators
flashing, an acoustic warning will
also be triggered when opening
and closing the liftgate and also
when the fully open position of the
liftgate is set by the user. The
feature can be set to “On” or “Off”.
• Hands Free Power Liftgate
To prevent the accidental opening
of the power liftgate/Hand free
(optional) with the movement of
the foot, it is possible to disable the
“Hand Free” function. The feature
can be set to “On” or “Off”. This
operation is recommended when
you have to wash the car (for
further information, refer to
“Power Liftgate Operation” in
section “Before Starting”).Dashboard Instruments and Controls
4
205
Page 210 of 436
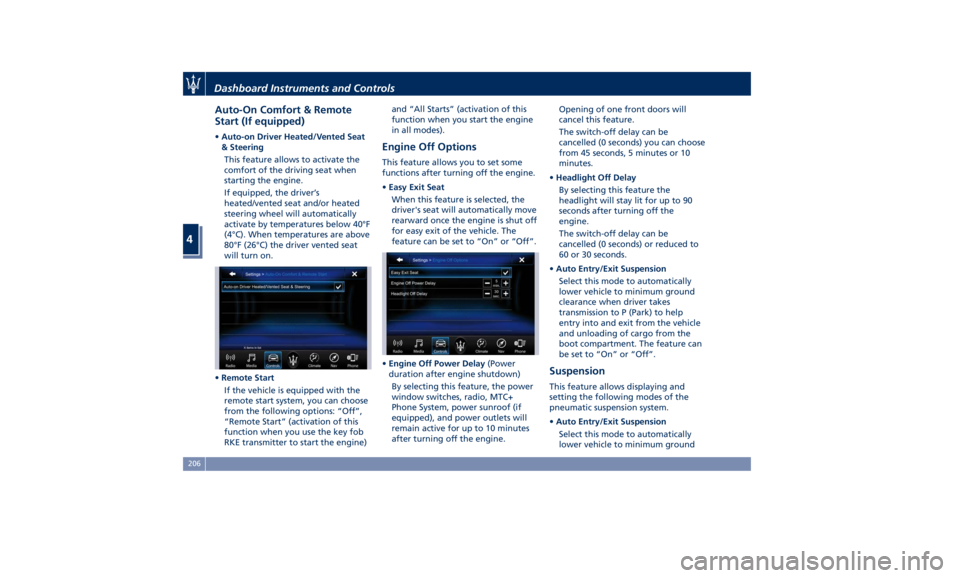
Auto-On Comfort & Remote
Start (If equipped) • Auto-on Driver Heated/Vented Seat
& Steering
This feature allows to activate the
comfort of the driving seat when
starting the engine.
If equipped, the driver’s
heated/vented seat and/or heated
steering wheel will automatically
activate by temperatures below 40°F
(4°C). When temperatures are above
80°F (26°C) the driver vented seat
will turn on.
• Remote Start
If the vehicle is equipped with the
remote start system, you can choose
from the following options: “Off”,
“Remote Start” (activation of this
function when you use the key fob
RKE transmitter to start the engine) and “All Starts” (activation of this
function when you start the engine
in all modes).
Engine Off Options This feature allows you to set some
functions after turning off the engine.
• Easy Exit Seat
When this feature is selected, the
driver's seat will automatically move
rearward once the engine is shut off
for easy exit of the vehicle. The
feature can be set to “On” or “Off”.
• Engine Off Power Delay (Power
duration after engine shutdown)
By selecting this feature, the power
window switches, radio, MTC+
Phone System, power sunroof (if
equipped), and power outlets will
remain active for up to 10 minutes
after turning off the engine. Opening of one front doors will
cancel this feature.
The switch-off delay can be
cancelled (0 seconds) you can choose
from 45 seconds, 5 minutes or 10
minutes.
• Headlight Off Delay
By selecting this feature the
headlight will stay lit for up to 90
seconds after turning off the
engine.
The switch-off delay can be
cancelled (0 seconds) or reduced to
60 or 30 seconds.
• Auto Entry/Exit Suspension
Select this mode to automatically
lower vehicle to minimum ground
clearance when driver takes
transmission to P (Park) to help
entry into and exit from the vehicle
and unloading of cargo from the
boot compartment. The feature can
be set to “On” or “Off”.
Suspension This feature allows displaying and
setting the following modes of the
pneumatic suspension system.
• Auto Entry/Exit Suspension
Select this mode to automatically
lower vehicle to minimum groundDashboard Instruments and Controls
4
206