2019 MASERATI LEVANTE check engine
[x] Cancel search: check enginePage 275 of 436
components. In these conditions the
parking brake must not be used since
the push of the power actuator might
not be sufficient to ensure vehicle
braking, especially on a slope.
Drive normally without braking to
allow the brakes to cool down a few
minutes before stopping. In this way,
the automatic or manual activation of
the parking brake will ensure vehicle
braking.
Parking Before leaving the vehicle, make sure
that the parking brake is fully applied
and place the transmission lever in the
P (Park) position by pressing the “P”
button.
WARNING!
• Always check that the vehicle is
locked before leaving it.
• Never leave children unattended in
the vehicle.
• Do not park the vehicle on paper,
grass, dry leaves or other flammable
materials.
• Do not leave the engine running
while the vehicle is unattended.
CAUTION!
• When you need to park the vehicle
on a steep slope, both with the
engine on or off, it is recommended
not only to engage the parking
brake, but also to shift the
transmission lever to P (Park) before
leaving the vehicle.
• When parking on uneven surfaces
(rocks, sidewalks, etc..) do not activate the Entry/Exit ride height to
avoid any contact of the bottom of
the car with the protrusions of the
ground.
When parking on hill roads, it is
important
to turn the
front wheels
toward the curb on a downhill grade
and away from the curb on an uphill
grade.
Apply the parking brake before
placing the shift lever in P (Park),
otherwise the load on the
transmission locking mechanism may
make it difficult to move the shift
lever out of P (Park).
In certain conditions, it is however
advisable to disengage the parking
brake manually and slightly apply the
service brake for starting off. This is
advisable when there are obstacles
very close to the vehicle in the
direction in which you intend to move.Driving
5
271
Page 285 of 436
Use of the Engine Breaking-In Today's most modern production
methods are designed to provide
extremely precise construction and
assembly of components. However,
moving parts do undergo a settling
process, basically in the first hours of
vehicle operation.
Do not drive keeping at a constant
high speed rate for a prolonged time.
While cruising, brief full-throttle
acceleration within the limits of local
traffic laws contributes to a good
break-in. Wide-open throttle
acceleration in low gear can be
detrimental and should be avoided.
The engine oil installed in the engine
at the factory is a high-quality energy
conserving type lubricant. Oil changes
should be consistent with anticipated
climate conditions under which vehicle
operations will occur. For the
recommended viscosity and quality
grades, see “Refillings” in section
“Features and Specifications”.
A new engine may consume some oil
during its first few thousand
miles/kilometers of operation. This
should be considered as a normal part of the break-in and not interpreted as
an indication of malfunction.
Specific Requirements
Avoid exceeding 5000 rpm for the first
620 mi trip (1000 km).
After starting the vehicle, do not
exceed 4000 rpm until the engine has
warmed up sufficiently (coolant
temperature: 149-158°F /65 70°).
Trailer Towing
During the first 620 mi (1000 km) of a
new vehicle it is advisable not to tow a
trailer. This allows to limit the load on
the engine and on the other parts of
the vehicle.
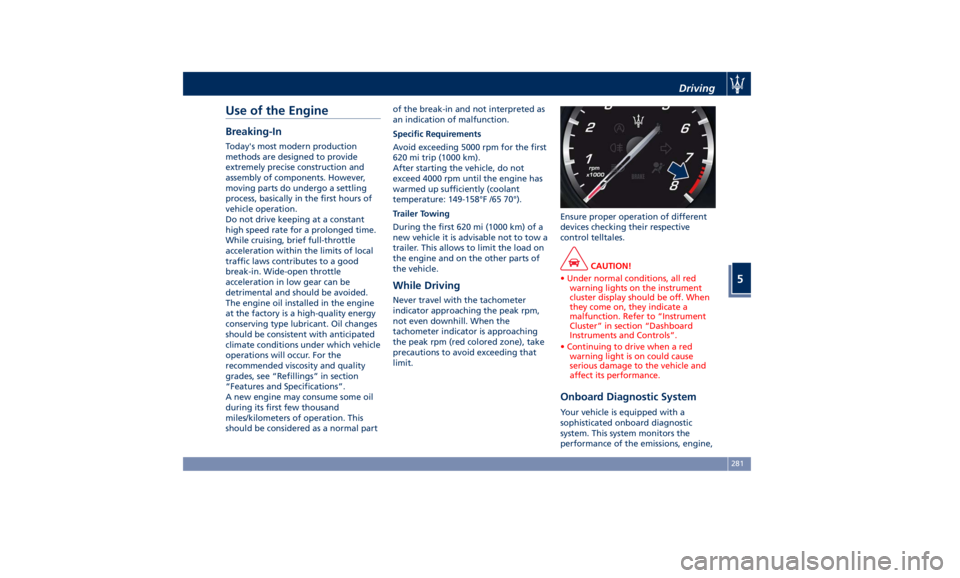
While Driving Never travel with the tachometer
indicator approaching the peak rpm,
not even downhill. When the
tachometer indicator is approaching
the peak rpm (red colored zone), take
precautions to avoid exceeding that
limit. Ensure proper operation of different
devices checking their respective
control telltales.
CAUTION!
• Under normal conditions, all red
warning lights on the instrument
cluster display should be off. When
they come on, they indicate a
malfunction. Refer to “Instrument
Cluster” in section “Dashboard
Instruments and Controls”.
• Continuing to drive when a red
warning light is on could cause
serious damage to the vehicle and
affect its performance.
Onboard Diagnostic System Your vehicle is equipped with a
sophisticated onboard diagnostic
system. This system monitors the
performance of the emissions, engine,Driving
5
281
Page 286 of 436
and automatic transmission control
systems. When these systems are
operating properly, your vehicle will
provide excellent performance and
fuel economy, as well as engine
emissions well within current local
regulations of various countries.
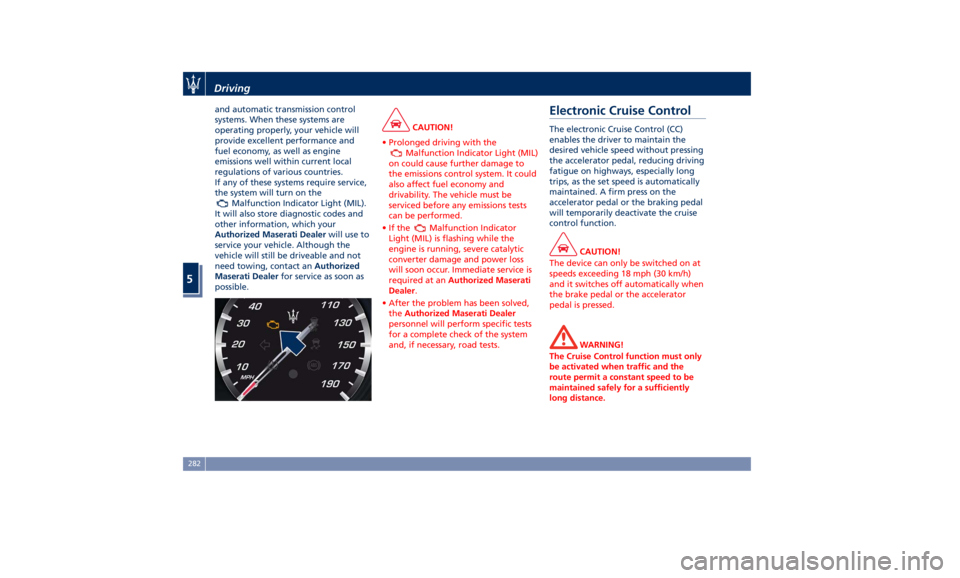
If any of these systems require service,
the system will turn on the
Malfunction Indicator Light (MIL).
It will also store diagnostic codes and
other information, which your
Authorized Maserati Dealer will use to
service your vehicle. Although the
vehicle will still be driveable and not
need towing, contact an Authorized
Maserati Dealer for service as soon as
possible. CAUTION!
• Prolonged driving with the
Malfunction Indicator Light (MIL)
on could cause further damage to
the emissions control system. It could
also affect fuel economy and
drivability. The vehicle must be
serviced before any emissions tests
can be performed.
•Ifthe
Malfunction Indicator
Light (MIL) is flashing while the
engine is running, severe catalytic
converter damage and power loss
will soon occur. Immediate service is
required at an Authorized Maserati
Dealer .
• After the problem has been solved,
the Authorized Maserati Dealer
personnel will perform specific tests
for a complete check of the system
and, if necessary, road tests.Electronic Cruise Control The electronic Cruise Control (CC)
enables the driver to maintain the
desired vehicle speed without pressing
the accelerator pedal, reducing driving
fatigue on highways, especially long
trips, as the set speed is automatically
maintained. A firm press on the
accelerator pedal or the braking pedal
will temporarily deactivate the cruise
control function.
CAUTION!
The device can only be switched on at
speeds exceeding 18 mph (30 km/h)
and it switches off automatically when
the brake pedal or the accelerator
pedal is pressed.
WARNING!
The Cruise Control function must only
be activated when traffic and the
route permit a constant speed to be
maintained safely for a sufficiently
long distance.Driving
5
282
Page 342 of 436
Fuel Filler Cap Open Warning
Light After refueling the car
performs a check of the fuel
filler cap and the amber
warning light on the TFT
display comes on if it is not correctly
closed, after approximately 10 minutes
also depending on driving conditions.
If the problem is in the fuel system, the
Malfunction Indicator Light
also
comes on.
If the fuel filler cap is locked and the
issue remains in the system, at the next
engine start only the Malfunction
Indicator Light
comes on. In this
case, contact an Authorized Maserati
Dealer .
Emergency Fuel Filler Door
Release If you are unable to unlock the fuel
filler door using the key fob RKE
transmitter, use the fuel filler door
emergency release located in the
trunk.
• Open the power liftgate (see “Power
Liftgate Operation” in section
“Before Starting”).
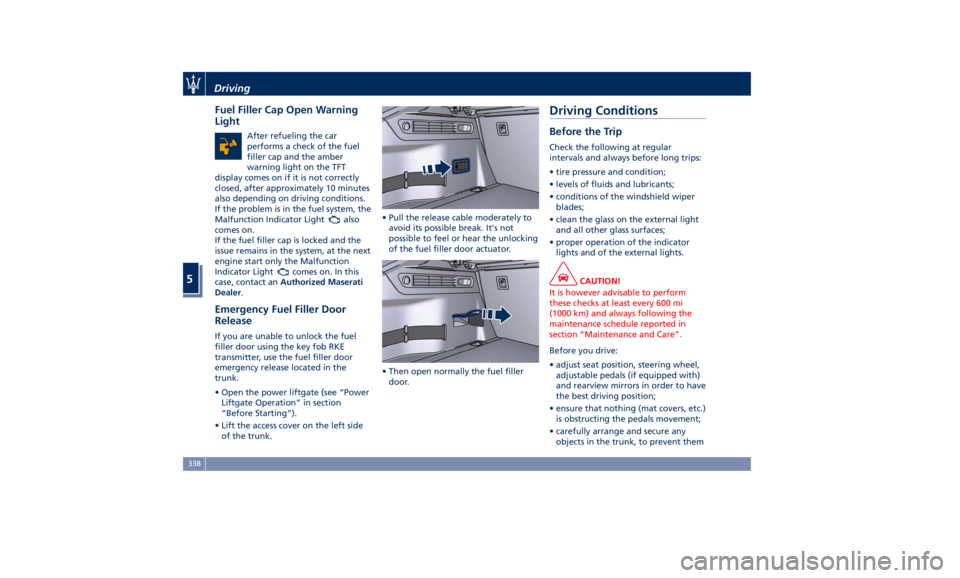
• Lift the access cover on the left side
of the trunk. • Pull the release cable moderately to
avoid its possible break. It's not
possible to feel or hear the unlocking
of the fuel filler door actuator.
• Then open normally the fuel filler
door.Driving Conditions Before the Trip Check the following at regular
intervals and always before long trips:
• tire pressure and condition;
• levels of fluids and lubricants;
• conditions of the windshield wiper
blades;
• clean the glass on the external light
and all other glass surfaces;
• proper operation of the indicator
lights and of the external lights.
CAUTION!
It is however advisable to perform
these checks at least every 600 mi
(1000 km) and always following the
maintenance schedule reported in
section “Maintenance and Care”.
Before you drive:
•
adjust seat position, steering wheel,
adjustable pedals (if equipped with)
and rearview mirrors in order to have
the best driving position;
• ensure that nothing (mat covers, etc.)
is obstructing the pedals movement;
• carefully arrange and secure any
objects in the trunk, to prevent themDriving
5
338
Page 349 of 436

• Refit the access cover making sure to
engage the two projecting elements
indicated by the arrow fully home
into the bumper.
• Push cover lower end toward
bumper until the two retainers click
in place.
Towing Tips • Before setting out on a trip, check
operation of trailer rear lights and stop lights to ensure you do not
jeopardize other road users' safety.
• Make certain that the load is secured
in the trailer and will not shift
during travel. When trailering cargo
that is not fully secured, dynamic
load shifts can occur that may be
difficult for the driver to control.
• When hauling cargo or towing a
trailer, do not overload your vehicle
or trailer. Overloading can cause a
loss of control, damage to brakes,
driveline, steering, suspension or
tires.
• Safety metal wire must always be
used between your vehicle and
trailer. Always connect the wire to
the hook retainers of the trailer and
vehicle hitch. Cross the wire under
the trailer tongue and allow enough
slack for turning corners.
• Comply with local applicable speed
limits.
• Towing any trailer will increase your
stopping distance. When towing,
you should allow for additional
space between your vehicle and the
vehicle in front of you. Failure to do
so could result in an accident.
• For towing use “Normal” ride
height. • Do not exceed maximum specified
pressure for vehicle and trailer tires.
• Vehicles with trailers should not be
parked on a steep grade. When
parking, put the tow vehicle
transmission in P (Park) and apply
the parking brake on the tow
vehicle. Always, block or "chock" the
trailer wheels.
• Do not use electronic Cruise Control
(CC and/or ACC) when driving on
slopes or when carrying heavy loads.
• The D (Drive) gear must be selected
when towing. The transmission
controls include a drive strategy to
avoid frequent shifting when
towing. However, if frequent
shifting does occur while in D
(Drive), if provided, you can use the
paddle shift switches to manually
select a lower gear.
• Using a lower gear while operating
the vehicle under heavy loading
conditions, will improve
performance and extend
transmission life by reducing
excessive shifting and heat buildup.
This action will also provide better
engine braking.Driving
5
345
Page 357 of 436
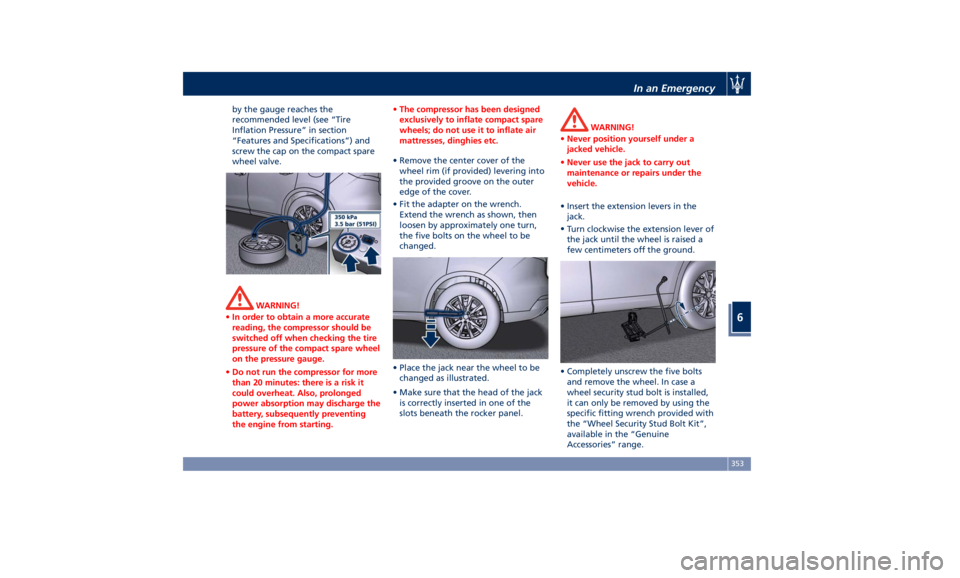
by the gauge reaches the
recommended level (see “Tire
Inflation Pressure” in section
“Features and Specifications”) and
screw the cap on the compact spare
wheel valve.
WARNING!
• In order to obtain a more accurate
reading, the compressor should be
switched off when checking the tire
pressure of the compact spare wheel
on the pressure gauge.
• Do not run the compressor for more
than 20 minutes: there is a risk it
could overheat. Also, prolonged
power absorption may discharge the
battery, subsequently preventing
the engine from starting. • The compressor has been designed
exclusively to inflate compact spare
wheels; do not use it to inflate air
mattresses, dinghies etc.
• Remove the center cover of the
wheel
rim (if provided) levering into
the provided groove on the outer
edge of the cover.
• Fit the adapter on the wrench.
Extend the wrench as shown, then
loosen by approximately one turn,
the five bolts on the wheel to be
changed.
• Place the jack near the wheel to be
changed as illustrated.
• Make sure that the head of the jack
is correctly inserted in one of the
slots beneath the rocker panel. WARNING!
• Never position yourself under a
jacked vehicle.
• Never use the jack to carry out
maintenance or repairs under the
vehicle.
• Insert the extension levers in the
jack.
•
Turn clockwise
the extension lever of
the jack until the wheel is raised a
few centimeters off the ground.
• Completely unscrew the five bolts
and remove the wheel. In case a
wheel security stud bolt is installed,
it can only be removed by using the
specific fitting wrench provided with
the “Wheel Security Stud Bolt Kit”,
available in the “Genuine
Accessories” range.In an Emergency
6
353
Page 368 of 436

Scheduled Maintenance
Service Correct maintenance is clearly the best
way to guarantee vehicle performance
and safety features, ensure respect for
the environment and low operating
costs.
NOTE:
Also remember that the observance of
the maintenance procedures is
essential for keeping your vehicle
operating properly. Not adhering to
the “Scheduled Service Plan” can
impact your vehicle’s warranty.
Interval Running Coupons Maserati has therefore provided for a
series of checks and maintenance
operations involving the 1 st
service and
subsequent when the vehicle reaches
mileage/years reported on the
“Scheduled Service Plan” in this
section.
After the last service, maintenance
must be restarted with the operations
scheduled for the 1 st
,2 nd
and 3 rd
service. CAUTION!
The Scheduled Maintenance services
are prescribed by the Manufacturer.
Failure to have the services carried out
can affect your warranty.
The Scheduled Maintenance service is
provided
by an Authorized Maserati
Dealer . In the event that, when a
service is performed, further
replacements or repairs are found to
be necessary in addition to the
scheduled operations, these can be
carried out only with the specific
consent of the Customer.
CAUTION!
You are advised to notify the
Authorized Maserati Dealer of any
minor operating problem, without
waiting for the next scheduled service. NOTE:
• Change
your engine oil more often if
you drive your vehicle off-road for an
extended period of time or short
trips without reaching operating
temperatures. Even the use of the
vehicle with extremely hot or cold
ambient temperatures and with
trailer tow may make more frequent
engine oil changes necessary.
• Under no circumstances should oil
change intervals exceed
mileage/years reported on the
“Scheduled Service Plan” in this
section.
CAUTION!
Failure to perform the required
maintenance items may result in
damage to the vehicle.
Scheduled Maintenance
(Service) Indicator The service indicator system will
remind you the deadline for the
maintenance program.
The indicator light
on the
instrument cluster flashes for approx. 5
seconds displaying the message backed
by a beeping sound, indicating thatMaintenance and Care
7
364
Page 370 of 436

Main Operations/Service Coupons Interval running coupons: every 12,500 mi (20,000 km)
or 1 year
Service coupons 1° 2° 3° 4°
5° 6°
Main operations Available Pre-Paid Maintenance
Program
Vehicle road test III
Check with Maserati Diagnosi IIIIII
Engine oil and filter RRRRRR
Engine coolant level IIIIII
Engine check for leaks IIIIII
Cooling system connections and lines (check for leaks) III
Air filter R
Belt for alternator, water pump and air conditioning
compressor (3.8 V8 engine) IIIRII
Replace every time the part is removed
Belt for alternator (1) and belt for water pump and air
conditioning compressor (3.0 V6 engine) IIIRII
Replace every time the part is removed
Spark plugs RR
Intercooler check for leaks IIIIII
Brake fluid IIIIII
Replace every 2 years
Brake system (lines, calipers, connections) - Instrument cluster
warning light efficiency - Parking brake operation IIIIII
Tire wear, tire and spare tire (if equipped) pressure check IIIIII
Joints, rods for front and rear suspensions, front and rear
under-chassis IIIMaintenance and Care
7
366