2019 MASERATI LEVANTE transmission
[x] Cancel search: transmissionPage 182 of 436

“Key-On Display” and “Key-Off
Display” items allow user to set display
during vehicle key-on and off.
“Key-On Display” is normally set to
“On”. When entering the vehicle, after
the welcome screen, the display will
show the information concerning
engine starting sequence. While if it is
set to “Off” (example shown in
figure), the display will show the
information displayed before last
vehicle key-off.
When engine is started and ignition
device is pressed to stop it, it is
possible to set “Key-Off Display”, “On”
or “Off” to obtain the following
display settings:
• “On”: “Trip summary” screen (Trip B
is reset after each key-on/key-off
cycle);
• “Off”: screen with Maserati logo and
trident. The “Defaults” item of “Screen Setup”
submenu allows restoring Maserati
factory settings.
TFT Display: Warning/Indicator
Lights of Set Modes/Functions Display sections indicated in the figure
show warning/indicator lights
concerning all selected driving
functions and all set functions/systems.
The relevant messages will be
indicated within the main area for five
seconds, unless otherwise specified.
Fault messages will be stored under
“Stored messages”.
Charging System Warning Light
This warning light shows the
status of the electrical
charging system. If the light
stays on or comes on while
driving, turn off some of the vehicle's
non-essential electrical devices or
increase engine speed (if at idle). If the
charging system warning light remains
on, it means that the vehicle is
experiencing a problem with the
charging system. IMMEDIATELY
contact an Authorized Maserati Dealer
to have the vehicle serviced.
If jump starting is required, refer to
“Jump Start Procedures” in section “In
an Emergency”. Transmission Temperature Warning
Light
This warning light and the
related message indicate that
the transmission fluid
temperature is rising.
If this warning light turns on, safely
pull over and stop the vehicle.
Then, shift the transmission into P
(Park) and run the engine at idle until
the temperature drops and the light
switches off. If the problem persists,
contact an Authorized Maserati
Dealer .
CAUTION!
Continuous driving with the
transmission temperature warning
light illuminated will eventually cause
severe transmission damage or failure.
Engine Temperature Warning Light
This
warning light notifies
when
the engine is
overheated. If the
temperature reaches critical
levels and the gauge displayed in
sector 12 turns red, this warning light
under the engine temperature gauge
indicator will illuminate in red color
combined with the related message on
display. When the temperature isDashboard Instruments and Controls
4
178
Page 183 of 436

reaching the set threshold an acoustic
signal will be heard.
If the warning light switches on while
driving, safely pull over and stop the
vehicle. If the A/C system is on, turn it
off. Also, shift the transmission into N
(Neutral) and idle the vehicle. If the
temperature does not return to
normal, immediately turn the engine
off and contact an Authorized
Maserati Dealer . Check “Engine Overheating” in
section “In an Emergency” for more
information.
Low Oil Pressure Warning Light
Under normal conditions, the
warning light illuminates
when the ignition device is
turned to RUN and goes off as
soon as the engine is started.
If the warning light stays or turns on
while driving, the engine oil pressure is too low. The warning light is
combined with a displayed message
and an acoustic signal that will last 4
minutes. In this case, turn the engine
off immediately and carry out the
necessary checks.
Do not operate the vehicle until the
problem has been corrected. This light
does not indicate the oil level. The
engine oil level must be checked with
the dipstick located under the hood
(see “Maintenance Procedures” in
section “Maintenance and Care”).
If the problem persists, contact an
Authorized Maserati Dealer .
Engine Oil Temperature Warning Light
This light indicates that the
engine oil is overheated. The
warning light is combined
with the related displayed
message. In this case, drive carefully
until the temperature drops back to
normal level and the light warning
light turns off.
If the problem persists, contact an
Authorized Maserati Dealer .
Low Engine Oil Level Warning Light
This warning light and the
related displayed message,
indicate a low engine oil level.
The engine oil level must be
checked with the dipstick fitted underDashboard Instruments and Controls
4
179
Page 185 of 436

or engine stall and your vehicle may
require towing.
Low Fuel Indicator
When the fuel level reaches
approximately 4.2 Gallons (16
liters) this light under the fuel
gauge indicator will turn on,
and remain on until fuel is added
together with the related message. In
this condition the color indicating the
quantity of fuel in the tank, inside the
indicator on display, will go from
white to amber.
Refer to “Refueling” in section
“Driving” for fuel filling.
Windshield and Headlights Washer
Low Fluid Indicator
This indicator will illuminate
for 5 seconds to indicate a low
level of the windshield and
headlights washer fluid. A
related message will be displayed.
See “Maintenance Procedures” in
section “Maintenance and Care” for
fluid filling.
Headlight Aiming System Failure
Warning Light
This warning light and the
related message indicate a
failure of the automatic
headlight aiming system (horizontal leveling, electromechanical
swiveling) or of the Advanced
Frontlighting System (AFS).
Please contact an Authorized Maserati
Dealer to check the system.
Advanced Frontlighting System (AFS)
Failure Warning Light
This warning light and the
related message light up to
report a failure of the AFS
system.
Contact an Authorized Maserati
Dealer as soon as possible.
Automatic High Beam Failure Warning
Light
This warning light and the
related message illuminate to
report a failure of the
automatic high beam
headlights.
Contact an Authorized Maserati
Dealer as soon as possible.
Suspensions Failure Warning Light
This warning light and the
related message turn on while
driving if there is a failure of
the suspension system.
Please contact an Authorized Maserati
Dealer to check the system. Ice Hazard Indicator
When the external
temperature falls below 38°F
(3°C), the temperature value
blinks for a few seconds, the
indicator light turns on, a message is
displayed and an acoustic signal is
triggered to warn the driver of the
risk of icy roadbed.
Under such conditions, we recommend
using the I.C.E. drive mode (see
“Automatic Transmission” in section
“Driving”) drive carefully and slow
down as the grip of the tires may be
significantly reduced.
The indicator light flashes for 5
seconds and switches off when the
temperature reaches 43°F (6°C) or
higher.
Fuel Filler Cap (Gas cap) Open
Warning Light
After refueling the car
performs a check of the fuel
filler cap and this warning
light comes on if it is not
correctly closed, after approximately
10 minutes also depending on driving
conditions.
See “Refueling” in section “Driving”
for more details.Dashboard Instruments and Controls
4
181
Page 187 of 436
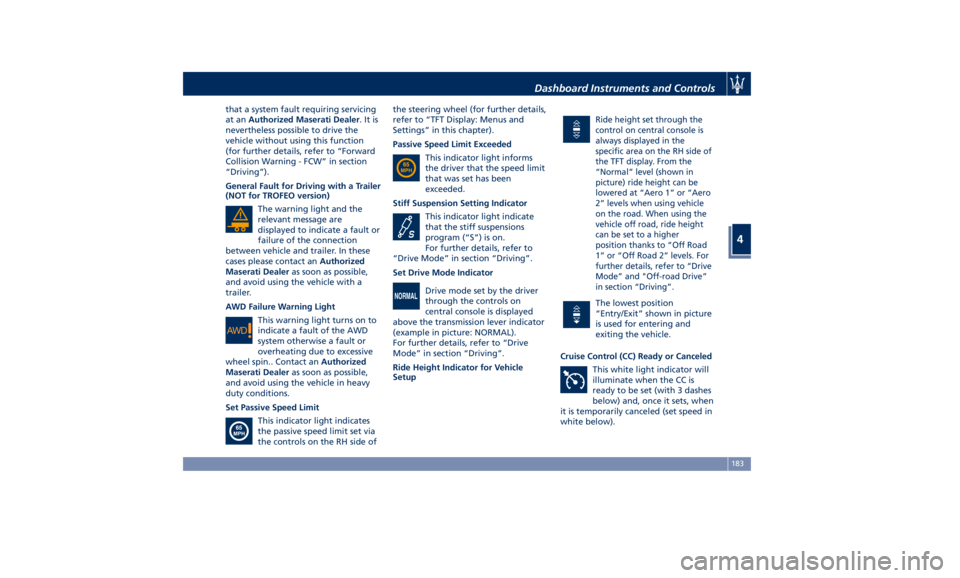
that a system fault requiring servicing
at an Authorized Maserati Dealer .Itis
nevertheless possible to drive the
vehicle without using this function
(for further details, refer to “Forward
Collision Warning - FCW” in section
“Driving”).
General Fault for Driving with a Trailer
(NOT for TROFEO version)
The warning light and the
relevant message are
displayed to indicate a fault or
failure of the connection
between vehicle and trailer. In these
cases please contact an Authorized
Maserati Dealer as soon as possible,
and avoid using the vehicle with a
trailer.
AWD Failure Warning Light
This warning light turns on to
indicate a fault of the AWD
system otherwise a fault or
overheating due to excessive
wheel spin.. Contact an Authorized
Maserati Dealer as soon as possible,
and avoid using the vehicle in heavy
duty conditions.
Set Passive Speed Limit
This indicator light indicates
the passive speed limit set via
the controls on the RH side of the steering wheel (for further details,
refer to “TFT Display: Menus and
Settings” in this chapter).
Passive Speed Limit Exceeded
This indicator light informs
the driver that the speed limit
that was set has been
exceeded.
Stiff Suspension Setting Indicator
This indicator light indicate
that the stiff suspensions
program (“S”) is on.
For further details, refer to
“Drive Mode” in section “Driving”.
Set Drive Mode Indicator
Drive mode set by the driver
through the controls on
central console is displayed
above the transmission lever indicator
(example in picture: NORMAL).
For further details, refer to “Drive
Mode” in section “Driving”.
Ride Height Indicator for Vehicle
Setup Ride height set through the
control on central console is
always displayed in the
specific area on the RH side of
the TFT display. From the
“Normal” level (shown in
picture) ride height can be
lowered at “Aero 1” or “Aero
2” levels when using vehicle
on the road. When using the
vehicle off road, ride height
can be set to a higher
position thanks to “Off Road
1” or “Off Road 2” levels. For
further details, refer to “Drive
Mode” and "Off-road Drive”
in section “Driving”.
The lowest position
“Entry/Exit” shown in picture
is used for entering and
exiting the vehicle.
Cruise Control (CC) Ready or Canceled
This white light indicator will
illuminate when the CC is
ready to be set (with 3 dashes
below) and, once it sets, when
it is temporarily canceled (set speed in
white below).Dashboard Instruments and Controls
4
183
Page 202 of 436
setting. This warns you of a possible
collision when you are much closer
to the vehicle or pedestrian (if the
car is equipped with Pedestrian
Emergency Braking - PEB function)
in front of you.
FCW with active braking can be set
to “On” or “Off”.
• Surround View Camera
By activating this feature the system
uses four cameras to monitor the
area around the vehicle when
transmission lever is shifted to P
(Park), N (Neutral) or D (Drive)
position.
When activation occurs by touching
the “Surround Camera” soft-key in
the “Controls” screen or moving the
shift lever in R (Reverse) position,
the initial view will be the default
view (associated with current gear
state). Image will be displayed with
active guidelines while in that gear
as long as vehicle speed remains
lower than 12 km/h (8 mph).
When vehicle is shifted into a
different gear, the image will
remain displayed for 10 seconds, or
vehicle is shifted in P (Park), or until
vehicle speed exceeds 12 km/h
(8 mph), at which point it will immediately cancel and return to
the last-viewed screen.
The feature can be set to “On” or
“Off”. See “Surround View Camera
System (optional)” in section
“Understanding the Vehicle” for
further details.
• Traffic Sign Assist
By activating this feature the
forward-facing digital camera, with
the aid of maps on the navigation
system, is able to detect speed limits
and traffic signs with a restriction
indicated by an additional sign (e.g.
in snow conditions). Those are
displayed by the TSA system on the
instrument cluster display together
with a possible alert when the
vehicle exceeds the speed limit.
See “Traffic Sign Assist - TSA” in
section “Driving” for further details.MTC+ Settings Customer Programmable
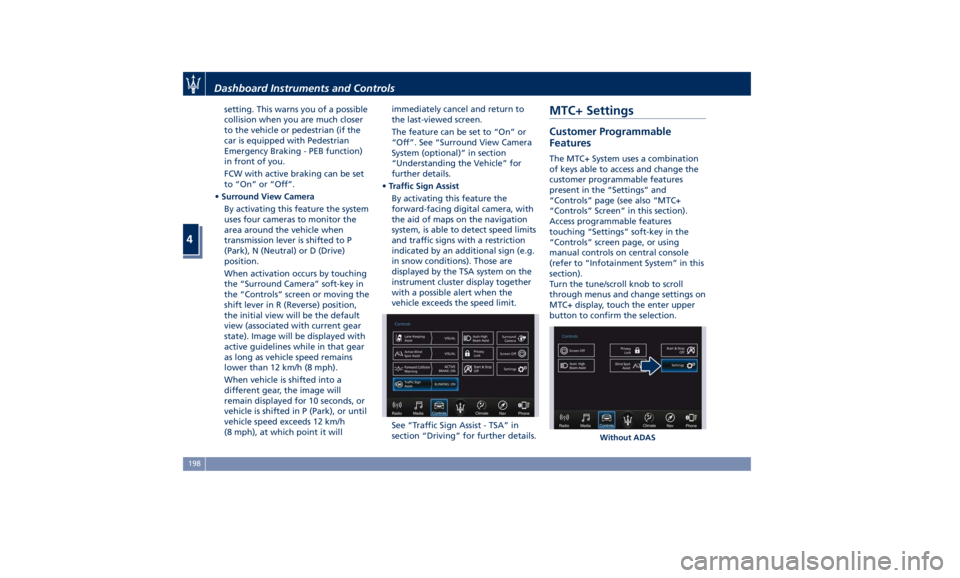
Features The MTC+ System uses a combination
of keys able to access and change the
customer programmable features
present in the “Settings” and
“Controls” page (see also “MTC+
“Controls” Screen” in this section).
Access programmable features
touching “Settings” soft-key in the
“Controls” screen page, or using
manual controls on central console
(refer to “Infotainment System” in this
section).
Turn the tune/scroll knob to scroll
through menus and change settings on
MTC+ display, touch the enter upper
button to confirm the selection.
Without ADASDashboard Instruments and Controls
4
198
Page 206 of 436
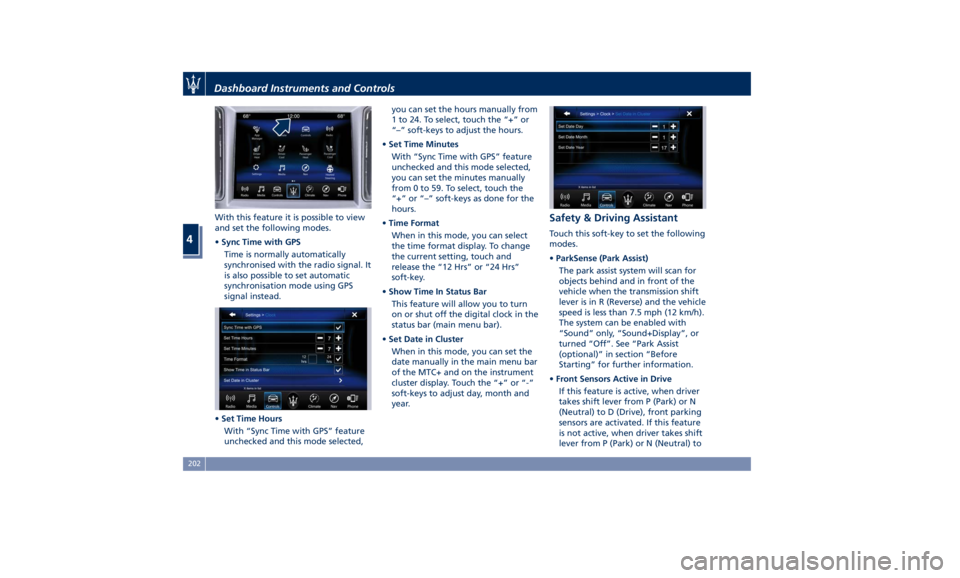
With this feature it is possible to view
and set the following modes.
• Sync Time with GPS
Time is normally automatically
synchronised with the radio signal. It
is also possible to set automatic
synchronisation mode using GPS
signal instead.
• Set Time Hours
With “Sync Time with GPS” feature
unchecked and this mode selected, you can set the hours manually from
1 to 24. To select, touch the “+” or
“–” soft-keys to adjust the hours.
• Set Time Minutes
With “Sync Time with GPS” feature
unchecked and this mode selected,
you can set the minutes manually
from 0 to 59. To select, touch the
“+” or “–” soft-keys as done for the
hours.
• Time Format
When in this mode, you can select
the time format display. To change
the current setting, touch and
release the “12 Hrs” or “24 Hrs”
soft-key.
• Show Time In Status Bar
This feature will allow you to turn
on or shut off the digital clock in the
status bar (main menu bar).
• Set Date in Cluster
When in this mode, you can set the
date manually in the main menu bar
of the MTC+ and on the instrument
cluster display. Touch the “+” or “-”
soft-keys to adjust day, month and
year. Safety & Driving Assistant Touch this soft-key to set the following
modes.
• ParkSense (Park Assist)
The park assist system will scan for
objects behind and in front of the
vehicle when the transmission shift
lever is in R (Reverse) and the vehicle
speed is less than 7.5 mph (12 km/h).
The system can be enabled with
“Sound” only, “Sound+Display”, or
turned “Off”. See “Park Assist
(optional)” in section “Before
Starting” for further information.
• Front Sensors Active in Drive
If this feature is active, when driver
takes shift lever from P (Park) or N
(Neutral) to D (Drive), front parking
sensors are activated. If this feature
is not active, when driver takes shift
lever from P (Park) or N (Neutral) toDashboard Instruments and Controls
4
202
Page 207 of 436
D (Drive), front parking sensors are
NOT activated.
• Front ParkSense Volume
When this feature is selected, the
chime volume of front park assist
sensors can be set to “Low”,
“Medium” or “High” level.
“Medium” is the default setting.
The system will retain its last known
configuration state through ignition
cycles.
• Rear ParkSense Volume
When this feature is selected, the
chime volume of rear park assist
sensors can be set to “Low”,
“Medium” or “High” level.
“Medium” is the default setting.
The system will retain its last known
configuration state through ignition
cycles.
• Tilt Side Mirrors In Reverse
By selecting this feature the outside
side-view mirrors will tilt downward
when the ignition is in RUN position
and the transmission shift lever is in
R (Reverse) position. The mirrors will
move back to their previous
position when the transmission is
shifted out of R (Reverse). The
feature can be set to “On” or “Off”. • Auto Folding Side Mirrors
By selecting this feature the
rear-view mirrors automatically fold
when the vehicle is locked by the
key fob and when the power
liftgate (if equipped) is closed and
locked by pressing the
button on
the outer ledge of the left boot
compartment lining. When the
vehicle and the liftgate will be
unlocked and the ignition device is
set in RUN position, the rear-view
mirrors will automatically open in
the position they had before the
lock.
If the mirrors were manually folded
by the switch on the driver's door
panel, before a lock action, they will
need to be manually unfold to
reactivate the automatic behave.
• ParkView Backup Camera Delay
By selecting this feature, when the
shift lever is moved out of R
(Reverse), the rear view image with
dynamic grid lines will be displayed
for up to 10 seconds after shifting
unless the forward vehicle speed
exceeds 8 mph (12 km/h), or the
transmission is shifted into P (Park)
or the ignition device is switched to
the OFF position. The feature can be
set to “On” or “Off”. • Rain Sensing Auto Wipers
By selecting this feature, the system
will automatically activate the
windshield wipers if the rain sensor
senses moisture on the windshield.
The feature can be set to “On” or
“Off”.
• Hill Start Assist
This feature allows you to disable
the HSA system. The feature can be
set to “On” or “Off”. See “Brake
and Stability Control System” in
section “Driving” for further details.
Lights Press the “Lights” soft-key to set the
following modes.
• Headlight Off Delay
By selecting this feature, the driver
can choose to have the headlight
off or lit for 30, 60, or 90 seconds
when the engine is shut off. To
change the current headlight off
delay status, touch and release the
“0”, “30”, “60” or “90” soft-key to
select the desired time range.Dashboard Instruments and Controls
4
203
Page 208 of 436
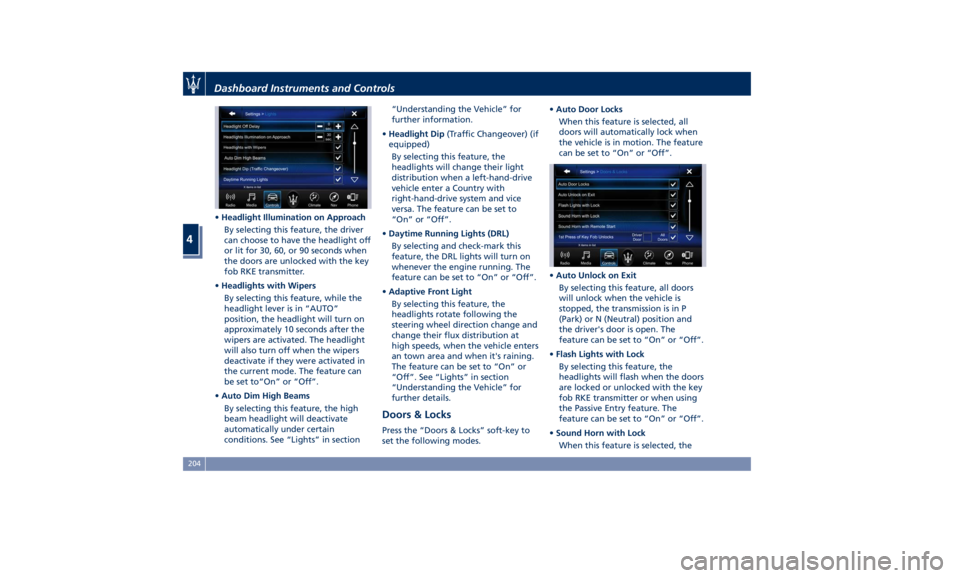
• Headlight Illumination on Approach
By selecting this feature, the driver
can choose to have the headlight off
or lit for 30, 60, or 90 seconds when
the doors are unlocked with the key
fob RKE transmitter.
• Headlights with Wipers
By selecting this feature, while the
headlight lever is in “AUTO”
position, the headlight will turn on
approximately 10 seconds after the
wipers are activated. The headlight
will also turn off when the wipers
deactivate if they were activated in
the current mode. The feature can
be set to“On” or “Off”.
• Auto Dim High Beams
By selecting this feature, the high
beam headlight will deactivate
automatically under certain
conditions. See “Lights” in section “Understanding the Vehicle” for
further information.
• Headlight Dip (Traffic Changeover) (if
equipped)
By selecting this feature, the
headlights will change their light
distribution when a left-hand-drive
vehicle enter a Country with
right-hand-drive system and vice
versa. The feature can be set to
“On” or “Off”.
• Daytime Running Lights (DRL)
By selecting and check-mark this
feature, the DRL lights will turn on
whenever the engine running. The
feature can be set to “On” or “Off”.
• Adaptive Front Light
By selecting this feature, the
headlights rotate following the
steering wheel direction change and
change their flux distribution at
high speeds, when the vehicle enters
an town area and when it's raining.
The feature can be set to “On” or
“Off”. See “Lights” in section
“Understanding the Vehicle” for
further details.
Doors & Locks Press the “Doors & Locks” soft-key to
set the following modes. • Auto Door Locks
When this feature is selected, all
doors will automatically lock when
the vehicle is in motion. The feature
can be set to “On” or “Off”.
• Auto Unlock on Exit
By selecting this feature, all doors
will unlock when the vehicle is
stopped, the transmission is in P
(Park) or N (Neutral) position and
the driver's door is open. The
feature can be set to “On” or “Off”.
• Flash Lights with Lock
By selecting this feature, the
headlights will flash when the doors
are locked or unlocked with the key
fob RKE transmitter or when using
the Passive Entry feature. The
feature can be set to “On” or “Off”.
• Sound Horn with Lock
When this feature is selected, theDashboard Instruments and Controls
4
204