2019 MASERATI LEVANTE light
[x] Cancel search: lightPage 387 of 436
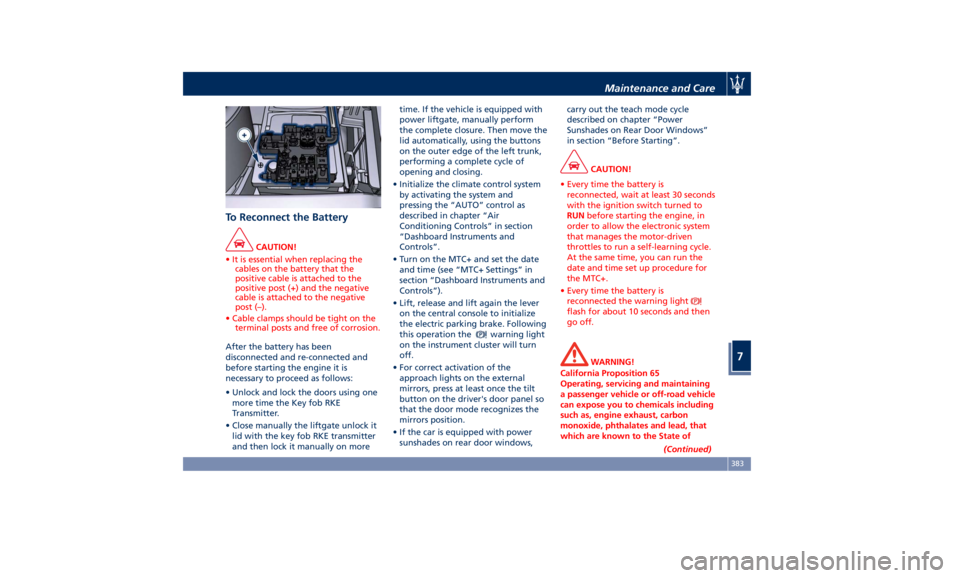
To Reconnect the Battery CAUTION!
• It is essential when replacing the
cables on the battery that the
positive cable is attached to the
positive post (+) and the negative
cable is attached to the negative
post (–).
• Cable clamps should be tight on the
terminal posts and free of corrosion.
After the battery has been
disconnected
and re-connected and
before starting the engine it is
necessary to proceed as follows:
• Unlock and lock the doors using one
more time the Key fob RKE
Transmitter.
• Close manually the liftgate unlock it
lid with the key fob RKE transmitter
and then lock it manually on more time. If the vehicle is equipped with
power liftgate, manually perform
the complete closure. Then move the
lid automatically, using the buttons
on the outer edge of the left trunk,
performing a complete cycle of
opening and closing.
• Initialize the climate control system
by activating the system and
pressing the “AUTO” control as
described in chapter “Air
Conditioning Controls” in section
“Dashboard Instruments and
Controls”.
• Turn on the MTC+ and set the date
and time (see “MTC+ Settings” in
section “Dashboard Instruments and
Controls”).
• Lift, release and lift again the lever
on the central console to initialize
the electric parking brake. Following
this operation the
warning light
on the instrument cluster will turn
off.
• For correct activation of the
approach lights on the external
mirrors, press at least once the tilt
button on the driver's door panel so
that the door mode recognizes the
mirrors position.
• If the car is equipped with power
sunshades on rear door windows, carry out the teach mode cycle
described on chapter “Power
Sunshades on Rear Door Windows”
in section “Before Starting”.
CAUTION!
• Every time the battery is
reconnected, wait at least 30 seconds
with the ignition switch turned to
RUN before starting the engine, in
order to allow the electronic system
that manages the motor-driven
throttles to run a self-learning cycle.
At the same time, you can run the
date and time set up procedure for
the MTC+.
• Every time the battery is
reconnected the warning light
flash for about 10 seconds and then
go off.
WARNING!
California Proposition 65
Operating, servicing and maintaining
a passenger vehicle or off-road vehicle
can expose you to chemicals including
such as, engine exhaust, carbon
monoxide, phthalates and lead, that
which are known to the State of
(Continued)Maintenance and Care
7
383
Page 388 of 436
(Continued)
California to cause cancer and birth
defects or other reproductive harm. To
minimize exposure, avoid breathing
exhaust, do not idle the engine except
as necessary, service your vehicle in a
well-ventilated area and wear gloves
or wash your hands frequently when
servicing your vehicle. For more
information go to:
www.P65Warnings.ca.gov/passenger-
vehicle
Useful Advice to Extend
Battery Life When parking the vehicle, make sure
that the doors, hood, liftgate and flaps
are properly closed. All interior lights
should be off.
When the engine is turned off, do not
keep the connected devices switched
on for a long time (such as radio,
hazard warning flashers, fan, etc.).
CAUTION!
If the battery charge remains below
50% for a long period of time, it will
be damaged due to sulfation; its
performance and starting power will
be reduced and it will be more subject
to freezing. We recommend you to have the
battery
charge condition checked,
preferably
at the beginning of the cold
season, to prevent the electrolyte from
freezing.
This check should be carried out more
frequently if the vehicle is used mainly
for short trips or if it is equipped with
power-absorbing devices that remain
permanently on even when the
ignition switch is off. This applies
above all if these devices have been
retrofitted ("Aftermarket" services).
If the vehicle is not used for long
periods of time, please see “Vehicle
Stored for Long Periods” in this
section.
Battery Recharge WARNING!
The process of charging or recharging
the battery produces hydrogen, a
flammable gas that can explode and
cause serious injuries. When charging
or recharging the battery, follow the
recommended precautions at all times.
• Before using a charger device always
check that this tool is suitable for the
installed battery, with constant
voltage (lower than 14.0 V) and low
amperage (maximum limit 15 A). • Recharge the battery in a
well-ventilated environment.
• Never charge or recharge a frozen
battery.
• Ensure that any sparks or open
flames are kept well away from the
battery while it is charging.
• Before using a charger to charge or
maintain the battery charge status,
carefully follow the instructions
provided to ensure the charger is
connected to the battery safely and
correctly.
It is possible to recharge the battery
without
disconnecting the cables
of
the vehicle electrical system.
• To access the battery lift the ground
coverage of the trunk compartment
(see chapter “Tool Kit” section “In an
Emergency”) and remove the storage
box.
• Remove the protection cover and
connect the terminal clamp of the
charger positive cable (typically in
red) to the positive post (+) of the
battery.
• Connect the terminal clamp of the
charger negative cable (typically in
black) to the nut located by theMaintenance and Care
7
384
Page 392 of 436

Ref. Type Function
20 Maxi – 30A Wiper motor
relay output
21 Maxi – 20A LH low beam
relay input (with
Bi-Xenon
headlight) Ref. Type Function
22 Maxi – 20A RH low beam
relay input (with
Bi-Xenon
headlight)
23 – –
24 – – Ref. Type Function
28 Mini – 7,5A Drive Assist
System Module
(DASM)
29 Mini – 10A PCM module -
Starter solenoid
relay coil
30 Mini – 5A ORC- Air bag
module
31 Mini – 5A ABS-ESP module
32 Mini – 5A AWD module,
EPS and AQS
33 Mini – 10A HDLP Headlights
- AFLS
34 Mini – 15A Primary load to
engine harness
LH side
35 Mini – 15A Primary load to
engine harness
RH side
36 Mini – 30A PCM module
primary load
37 Mini – 15A Engine
secondary load
38 Mini – 15A Lambda sensorMaintenance and Care
7
388
Page 394 of 436

Ref. Type Function
16 Maxi – 40A Rear window
defrost relay coil
(HVAC module)
17 Maxi – 30A Rear LH door
module
18 Maxi – 30A Rear RH door
module Ref. Type Function
19 Maxi – 25A Power liftgate
module
20 Maxi – 20A “Premium”
stereo amplifier
unit (2)
21 Maxi – 40A ELDOR coil (V8
engines only) Ref. Type Function
22 Mini – 7,5A Rear HVAC
module
23 Mini – 10A Fuel door relay
and RF Hub
module
24 Mini – 10A ITM module,
ceiling light unit
(front and rear),
rain/lights sensor
25 Mini – 25A Sunroof module
26 – –
27 – –
31 Mini – 30A LH front seat
movement
32 Mini – 15A Trailer module
LH side (not for
TROFEO version)
33 Mini – 15A Trailer module
RH side (not for
TROFEO version)
34 Mini – 20A Soft Door Close
latch
35 Mini – 20A Rear doors
sunshadeMaintenance and Care
7
390
Page 395 of 436

Ref. Type Function
36 Mini – 10A Transmission
lever, TPMS
module, Navtrak,
USB/AUX and
USB cherger,
ASBM Control
suspension and
Hands Free
access module
37 Mini – 25A ASCM module
38 Mini – 30A RH front seat
movement
41 Maxi – 40A ASCM motor
supply
42 – –
43 Mini – 20A Seat passenger
heater module
44 – –
45 – –
46 Mini – 5A Rear camera
47 Mini – 5A Navtrak
48 Mini – 5A Surround view
49 Mini – 10A Internal
temperature
sensor, umidity
sensor, internal
mirror and HALF Ref. Type Function
50 – –
51 Mini – 25A Rear seat and
steering wheel
heater module
52 Mini – 20A Trunk power
outlet
53 – –
54 Mini – 7,5A Blind Spot
module
55 – –
56 Mini – 10A Blower front
HVAC coil relay
57 Mini – 10A Blower rear
HVAC coil relay
58 Mini – 10A Trailer harness
(not for TROFEO
version)
59 Mini – 10A USB charger,
transmission
lever, ASBM, rear
tunnel stack
switch
60 – –
61 Mini – 15A Rear window
wiper relay
62 Mini – 7,5A Front HVAC
module Ref. Type Function
63 Mini – 20A Blower rear
HVAC
64 Mini – 7,5A Rear HVAC
module
65 Mini – 10A Intelligent
battery sensor
66 Mini – 10A Rear Seat
Entertainment
(RSE)
67 Mini – 10A Sunroof
68 Mini – 20A Power outlet on
central console
rear side
69 Mini – 25A Rear console
power outlet
and cigar lighter
70 Mini – 10A Front HVAC
module, Parking
Aid Module
(PAM), ASCM
Front HVAC
module, Parking
Aid Module
(PAM), ASCM
and ELDOR coil
(V8 engines only)Maintenance and Care
7
391
Page 397 of 436
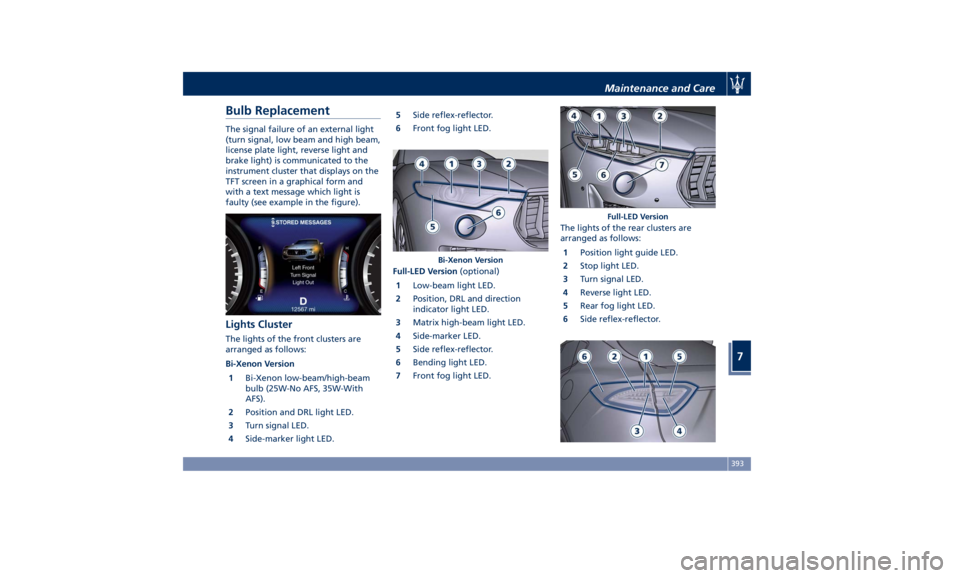
Bulb Replacement The signal failure of an external light
(turn signal, low beam and high beam,
license plate light, reverse light and
brake light) is communicated to the
instrument cluster that displays on the
TFT screen in a graphical form and
with a text message which light is
faulty (see example in the figure).
Lights Cluster The lights of the front clusters are
arranged as follows:
Bi-Xenon Version
1 Bi-Xenon low-beam/high-beam
bulb (25W-No AFS, 35W-With
AFS).
2 Position and DRL light LED.
3 Turn signal LED.
4 Side-marker light LED. 5 Side reflex-reflector.
6 Front fog light LED.
Full-LED Version (optional)
1 Low-beam light LED.
2 Position, DRL and direction
indicator light LED.
3 Matrix high-beam light LED.
4 Side-marker LED.
5 Side reflex-reflector.
6 Bending light LED.
7 Front fog light LED. The lights of the rear clusters are
arranged as follows:
1 Position light guide LED.
2 Stop light LED.
3 Turn signal LED.
4 Reverse light LED.
5 Rear fog light LED.
6 Side reflex-reflector.Bi-Xenon Version Full-LED VersionMaintenance and Care
7
393
Page 398 of 436
CAUTION!
Due to the complexity of the
operation, for the replacement of the
light cluster bulbs/LEDs, we
recommend that you contact an
Authorized Maserati Dealer .
WARNING!
The Bi-Xenon bulbare a type of high
voltage discharge tube. High voltage
can remain in the circuit even with the
ignition switch off. Because of this,
you should not attempt to replace a
Bi-Xenon bulb yourself, but take the
vehicle to an Authorized Maserati
Dealer for service.
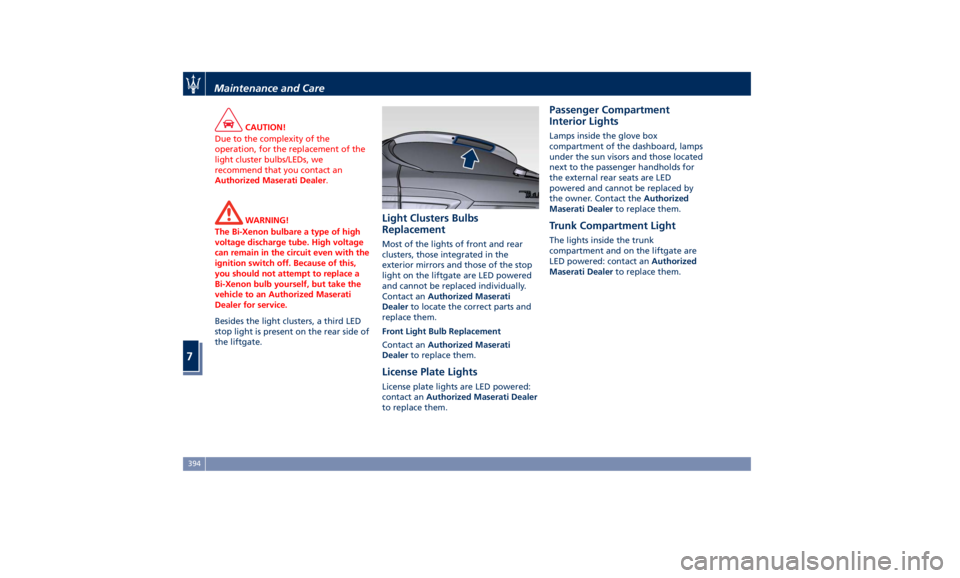
Besides the light clusters, a third LED
stop
light is present on the rear side of
the liftgate. Light Clusters Bulbs
Replacement Most of the lights of front and rear
clusters, those integrated in the
exterior mirrors and those of the stop
light on the liftgate are LED powered
and cannot be replaced individually.
Contact an Authorized Maserati
Dealer to locate the correct parts and
replace them.
Front Light Bulb Replacement
Contact an Authorized Maserati
Dealer to replace them.
License Plate Lights License plate lights are LED powered:
contact an Authorized Maserati Dealer
to replace them. Passenger Compartment
Interior Lights Lamps inside the glove box
compartment of the dashboard, lamps
under the sun visors and those located
next to the passenger handholds for
the external rear seats are LED
powered and cannot be replaced by
the owner. Contact the Authorized
Maserati Dealer to replace them.
Trunk Compartment Light The lights inside the trunk
compartment and on the liftgate are
LED powered: contact an Authorized
Maserati Dealer to replace them.Maintenance and Care
7
394
Page 402 of 436
wax products having high protective
power;
• spraying of plastic materials, with a
protective function, in the most
exposed points: underneath the
doors, inside part of the mud guards,
edges, etc.;
• use of ventilated box sections, coated
with protective wax products, to
avoid condensation and trapped
water which could encourage the
formation of internal rust.
Useful Advice to Keep the
Bodywork in Good Condition Paint
The paintwork does not only have an
aesthetic function but also protects the
underlying metal sheets. In the event
of abrasions or deep scratches, we
recommend to have the necessary
touch-ups made immediately, to avoid
any rust formation. Touch-ups do not
feature particular difficulties, even on
metallic finishes.
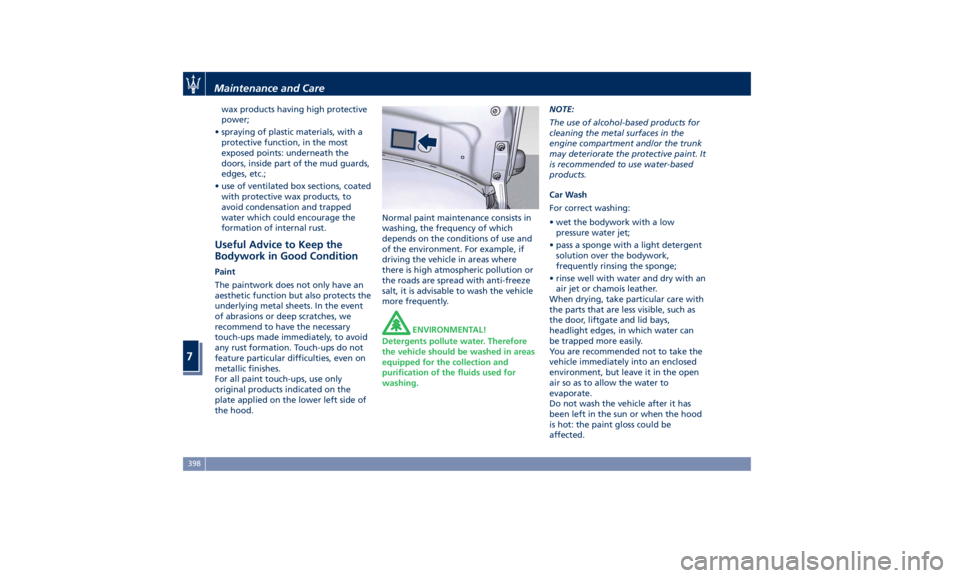
For all paint touch-ups, use only
original products indicated on the
plate applied on the lower left side of
the hood. Normal paint maintenance consists in
washing, the frequency of which
depends on the conditions of use and
of the environment. For example, if
driving the vehicle in areas where
there is high atmospheric pollution or
the roads are spread with anti-freeze
salt, it is advisable to wash the vehicle
more frequently.
ENVIRONMENTAL!
Detergents pollute water. Therefore
the vehicle should be washed in areas
equipped for the collection and
purification of the fluids used for
washing. NOTE:
The use of alcohol-based products for
cleaning the metal surfaces in the
engine compartment and/or the trunk
may deteriorate the protective paint. It
is recommended to use water-based
products.
Car Wash
For correct washing:
• wet the bodywork with a low
pressure water jet;
• pass a sponge with a light detergent
solution over the bodywork,
frequently rinsing the sponge;
• rinse well with water and dry with an
air jet or chamois leather.
When drying, take particular care with
the parts that are less visible, such as
the door, liftgate and lid bays,
headlight edges, in which water can
be trapped more easily.
You are recommended not to take the
vehicle immediately into an enclosed
environment, but leave it in the open
air so as to allow the water to
evaporate.
Do not wash the vehicle after it has
been left in the sun or when the hood
is hot: the paint gloss could be
affected.Maintenance and Care
7
398