2019 LINCOLN CONTINENTAL rear view mirror
[x] Cancel search: rear view mirrorPage 106 of 627
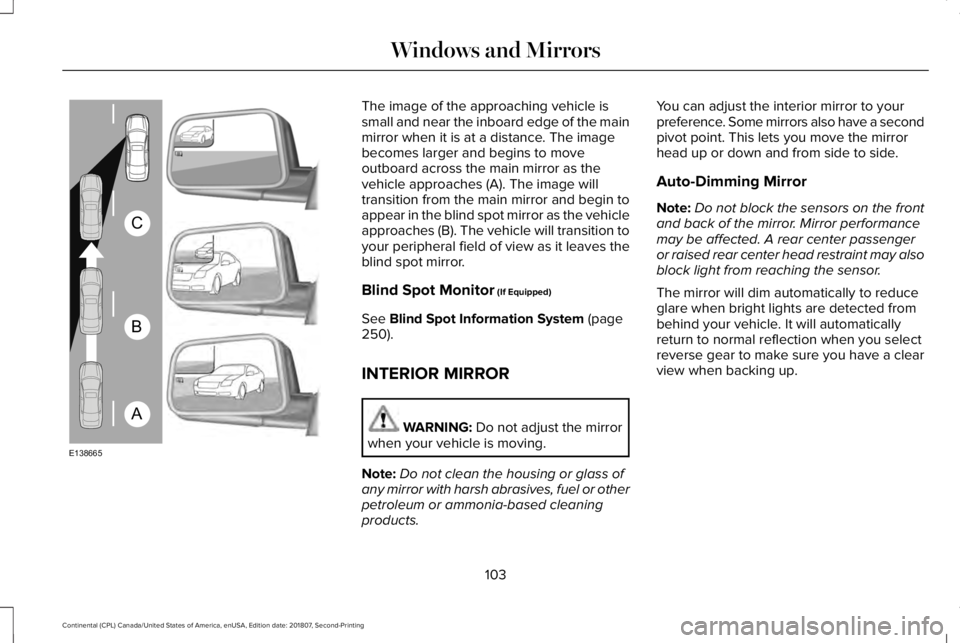
The image of the approaching vehicle is
small and near the inboard edge of the main
mirror when it is at a distance. The image
becomes larger and begins to move
outboard across the main mirror as the
vehicle approaches (A). The image will
transition from the main mirror and begin to
appear in the blind spot mirror as the vehicle
approaches (B). The vehicle will transition to
your peripheral field of view as it leaves the
blind spot mirror.
Blind Spot Monitor (If Equipped)
See
Blind Spot Information System (page
250).
INTERIOR MIRROR WARNING:
Do not adjust the mirror
when your vehicle is moving.
Note: Do not clean the housing or glass of
any mirror with harsh abrasives, fuel or other
petroleum or ammonia-based cleaning
products. You can adjust the interior mirror to your
preference. Some mirrors also have a second
pivot point. This lets you move the mirror
head up or down and from side to side.
Auto-Dimming Mirror
Note:
Do not block the sensors on the front
and back of the mirror. Mirror performance
may be affected. A rear center passenger
or raised rear center head restraint may also
block light from reaching the sensor.
The mirror will dim automatically to reduce
glare when bright lights are detected from
behind your vehicle. It will automatically
return to normal reflection when you select
reverse gear to make sure you have a clear
view when backing up.
103
Continental (CPL) Canada/United States of America, enUSA, Edition date: 201807, Second-Printing Windows and MirrorsA
B
C
E138665
Page 231 of 627
REAR VIEW CAMERA
WARNING: The rear view camera
system is a reverse aid supplement device
that still requires the driver to use it in
conjunction with the interior and exterior
mirrors for maximum coverage. WARNING:
Objects that are close to
either corner of the bumper or under the
bumper, might not be seen on the screen
due to the limited coverage of the camera
system. WARNING:
Reverse your vehicle
slowly. Failure to follow this instruction
could result in the loss of control of your
vehicle, personal injury or death. WARNING:
Use caution when the
rear cargo door is ajar. If the rear cargo
door is ajar, the camera will be out of
position and the video image may be
incorrect. All guidelines disappear when
the rear cargo door is ajar. Failure to follow
this instruction could result in personal
injury. WARNING: Use caution when turning
camera features on or off when the
transmission is not in park (P). Make sure
your vehicle is not moving.
The rear view camera system provides a
video image of the area behind your vehicle.
During operation, lines appear in the display
which represent your vehicle ’s path and
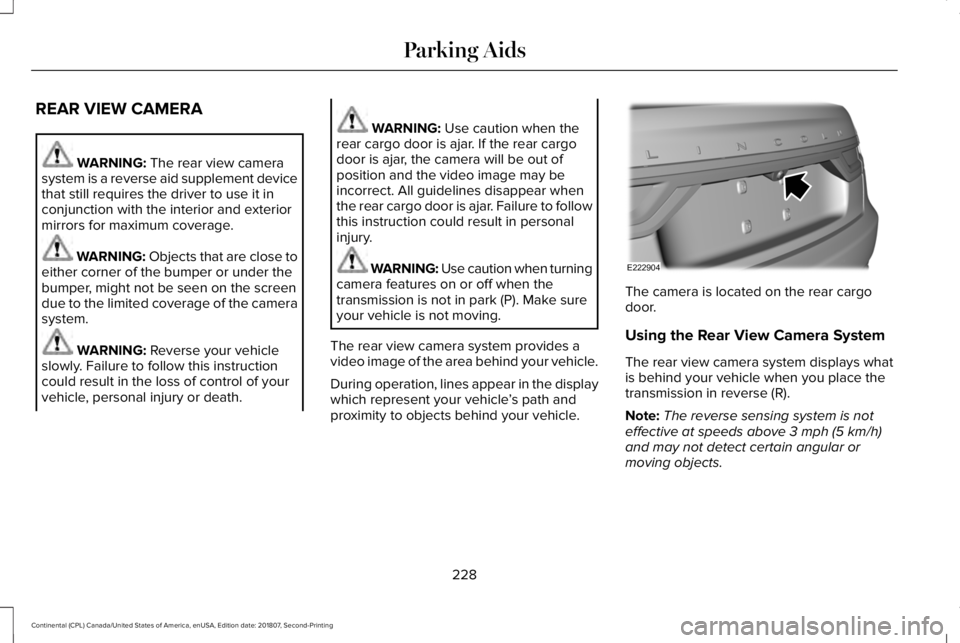
proximity to objects behind your vehicle. The camera is located on the rear cargo
door.
Using the Rear View Camera System
The rear view camera system displays what
is behind your vehicle when you place the
transmission in reverse (R).
Note:
The reverse sensing system is not
effective at speeds above
3 mph (5 km/h)
and may not detect certain angular or
moving objects.
228
Continental (CPL) Canada/United States of America, enUSA, Edition date: 201807, Second-Printing Parking AidsE222904
Page 233 of 627
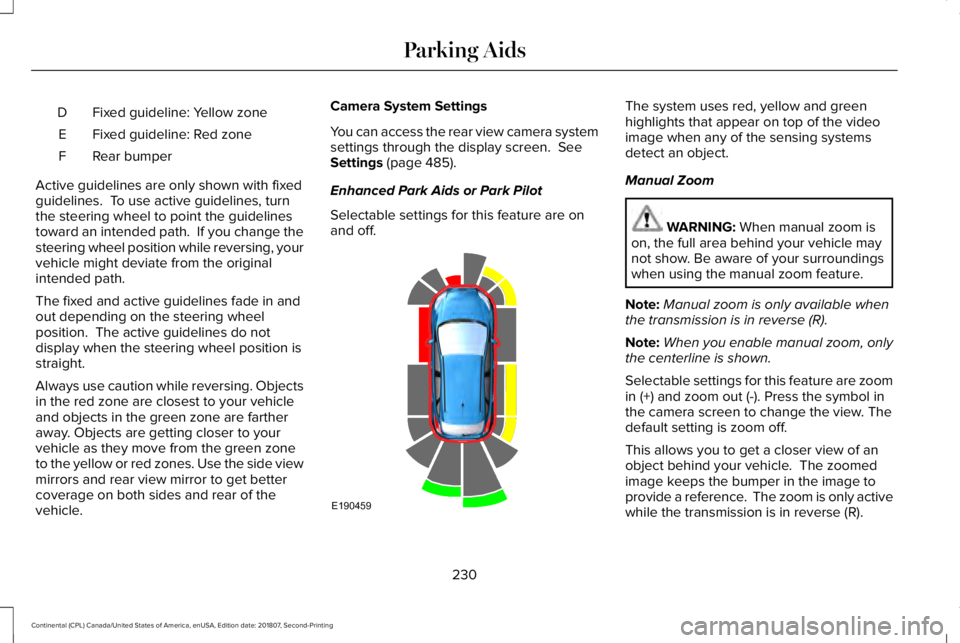
Fixed guideline: Yellow zone
D
Fixed guideline: Red zone
E
Rear bumper
F
Active guidelines are only shown with fixed
guidelines. To use active guidelines, turn
the steering wheel to point the guidelines
toward an intended path. If you change the
steering wheel position while reversing, your
vehicle might deviate from the original
intended path.
The fixed and active guidelines fade in and
out depending on the steering wheel
position. The active guidelines do not
display when the steering wheel position is
straight.
Always use caution while reversing. Objects
in the red zone are closest to your vehicle
and objects in the green zone are farther
away. Objects are getting closer to your
vehicle as they move from the green zone
to the yellow or red zones. Use the side view
mirrors and rear view mirror to get better
coverage on both sides and rear of the
vehicle. Camera System Settings
You can access the rear view camera system
settings through the display screen. See
Settings (page 485).
Enhanced Park Aids or Park Pilot
Selectable settings for this feature are on
and off. The system uses red, yellow and green
highlights that appear on top of the video
image when any of the sensing systems
detect an object.
Manual Zoom
WARNING:
When manual zoom is
on, the full area behind your vehicle may
not show. Be aware of your surroundings
when using the manual zoom feature.
Note: Manual zoom is only available when
the transmission is in reverse (R).
Note: When you enable manual zoom, only
the centerline is shown.
Selectable settings for this feature are zoom
in (+) and zoom out (-). Press the symbol in
the camera screen to change the view. The
default setting is zoom off.
This allows you to get a closer view of an
object behind your vehicle. The zoomed
image keeps the bumper in the image to
provide a reference. The zoom is only active
while the transmission is in reverse (R).
230
Continental (CPL) Canada/United States of America, enUSA, Edition date: 201807, Second-Printing Parking AidsE190459
Page 234 of 627
Rear Camera Delay
Selectable settings for this feature are on
and off.
The default setting for the rear camera delay
is off.
When shifting the transmission out of reverse
(R) and into any gear other than park (P), the
camera image remains in the display until:
•
Your vehicle speed sufficiently increases.
• You shift your vehicle into park (P).
360 DEGREE CAMERA (IF EQUIPPED) WARNING:
The 360 degree camera
system still requires the driver to use it in
conjunction with looking out of the
windows, and checking the interior and
exterior mirrors for maximum coverage. WARNING: You may not see objects
that are close to either corner of the
bumper or under the bumper due to the
limited coverage of the camera system. WARNING:
Use caution when
turning camera features on or off when the
transmission is not in park (P). Make sure
your vehicle is not moving. WARNING:
At all times, you are
responsible for controlling your vehicle,
supervising the system and intervening, if
required. Failure to take care may result in
the loss of control of your vehicle, serious
personal injury or death.
Note: Use caution using the 360 view when
any of the doors are ajar. If a door is ajar,
the camera will be out of position and the
video image may be incorrect.
The 360 degree camera system consists of
front, side and rear cameras. The system:
• Allows you to see what is directly in front
or behind your vehicle.
• Provides cross traffic view in front and
behind your vehicle. •
Allows you to see a top-down view of the
area outside your vehicle, including the
blind spots.
• Provides visibility around your vehicle to
you in parking maneuvers such as:
•Centering in a parking space.
• Obstacles near vehicle.
• Parallel parking. The front camera enable button is
located near the display screen
and turns on the front camera
when your vehicle is not in reverse (R).
Using the System
Note: The 360 degree camera system turns
off when your vehicle is in motion at low
speed, except when in reverse (R).
The front and rear cameras have multiple
screens which consist of: normal view with
360, normal view, and split view. When in
park (P), neutral (N) or drive (D), only the front
images display when you press the button.
When in reverse (R), only the rear images
display.
231
Continental (CPL) Canada/United States of America, enUSA, Edition date: 201807, Second-Printing Parking AidsE205884
Page 236 of 627
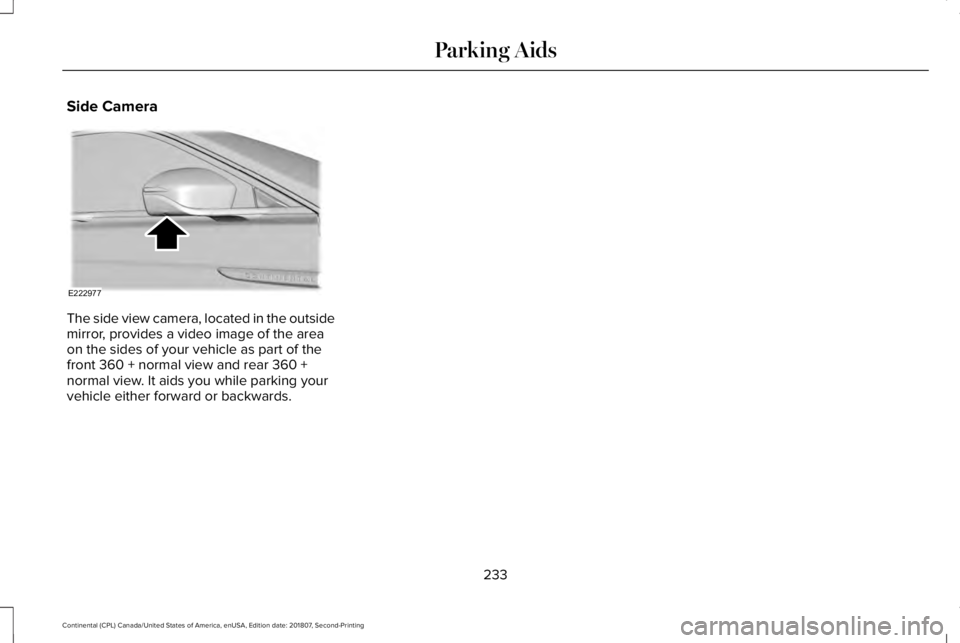
Side Camera
The side view camera, located in the outside
mirror, provides a video image of the area
on the sides of your vehicle as part of the
front 360 + normal view and rear 360 +
normal view. It aids you while parking your
vehicle either forward or backwards.
233
Continental (CPL) Canada/United States of America, enUSA, Edition date: 201807, Second-Printing Parking AidsE222977
Page 620 of 627

Installing Child Restraints.............................22
Inflatable Seatbelts...............................................26
Standard Seatbelts...............................................23
Using Lap and Shoulder Belts...........................22
Using Lower Anchors and Tethers for
CHildren (LATCH).............................................28
Using Tether Straps..............................................30
Installing the Vehicle Identification Card..............................................................405
Instrument Cluster........................................106
Instrument Lighting Dimmer........................93
Instrument Panel Overview...........................18
Interior Lamps..................................................97 Front Interior Lamp...............................................97
Rear Interior Lamps..............................................98
Interior Luggage Compartment Release............................................................81
Interior Mirror.................................................103
Auto-Dimming Mirror..........................................103
Introduction
.........................................................7
J
Jump Starting the Vehicle..........................278 Connecting the Jumper Cables......................279
Jump Starting......................................................280
Preparing Your Vehicle.....................................278
Removing the Jumper Cables........................280 K
Keyless Entry
....................................................79
SECURICODE™ Keyless Entry Keypad.............79
Keyless Starting
.............................................175
Ignition Modes......................................................175
Keys and Remote Controls
...........................63
L
Lane Keeping System.................................244 Switching the System On and Off..................245
Lighting Control
................................................91
Flashing the Headlamp High Beam.................92
Headlamp High Beam.........................................92
Lighting...............................................................91 General Information..............................................91
Lincoln Automotive Financial Services......14
Lincoln Protect..............................................525 Lincoln Protect (CANADA ONLY)...................526
Lincoln Protect Extended Service Plans (U.S.
Only)
..................................................................525
Load Carrying
................................................263
Load Limit.......................................................263 Special Loading Instructions for Owners of
Pick-up Trucks and Utility-type
Vehicles............................................................267 Vehicle Loading - with and without a
Trailer................................................................263
Locking and Unlocking
.................................68
Activating Intelligent Access.............................68
Autolock..................................................................73
Battery Saver..........................................................74
Door Lock Indicator..............................................68
Door Lock Switch Inhibitor.................................68
Emergency Locking...............................................71
Illuminated Entry....................................................73
Illuminated Exit.......................................................73
Locking and Unlocking the Doors From
Inside....................................................................71
Opening the Luggage Compartment...............74
Remote Control.....................................................70
Smart Unlocks for Intelligent Access Keys......................................................................72
Unlocking the Driver Door with the Key Blade....................................................................72
Lug Nuts See: Changing a Road Wheel.........................363
M
Maintenance...................................................310 General Information............................................310
Media Hub
.......................................................416
617
Continental (CPL) Canada/United States of America, enUSA, Edition date: 201807, Second-Printing Index