Page 369 of 476
3696-3. Do-it-yourself maintenance
6
Maintenance and care
1Take out the mechanical key.
2
Remove the cover.
To prevent damage to the key, cover the tip
of the flathead screwdriver with a tape.
3Remove the depleted battery using
the small flathead screwdriver.
Insert a new battery with the “+” terminal
facing up.
Replacing the batteryWARNING
■Removed battery and other parts
These parts are small and if swallowed by
a child, they can cause choking. Keep
away from children. Failure to do so
could result in death or serious injury.
NOTICE
■When replacing the battery
Use a screwdriver of appropriate size.
Applying excessive force may deform or
damage the cover.
■For normal operation after replacing
the battery
Observe the following precautions to
prevent accidents:
●Always work with dry hands.
Moisture may cause the battery to
rust.
●Do not touch or move any other com-
ponent inside the remote control.
●Do not bend either of the battery ter-
minals.
Page 370 of 476
3706-3. Do-it-yourself maintenance
1Turn the power switch off.
2 Open the fuse box cover.
Engine compartment: type A fuse
box
Push the tab in and lift the lid off.
Engine compartment: type B fuse
box
Push the tab in and lift the lid off.
Left side instrument panel
Remove the lid.
Luggage compartment
Remove the 12-volt battery cover
( P.343) and push the tab in and lift the
lid off.
3 Remove the fuse.
Only type A fuse can be removed using the
pullout tool.
4Check if the fuse is blown.
Replace the blown fuse with a new fuse of
an appropriate amperage rating. The
amperage rating can be found on the fuse
box lid.
Checking and replacing
fuses
If any of the electrical components
do not operate, a fuse may have
blown. If this happens, check and
replace the fuses as necessary.
Checking and replacing fuses
Page 375 of 476

3756-3. Do-it-yourself maintenance
6
Maintenance and care
■Front turn signal lights (vehicles
with single-beam headlights)
1
Turn the bulb base counterclock-
wise.
2
Remove the light bulb.
3
When installing, reverse the steps
listed.
Replacing light bulb
WARNING
■Replacing light bulb
●Turn off the light. Do not attempt to
replace the bulb immediately after
turning off the light.
The bulb become very hot and may
cause burns.
●Do not touch the glass portion of the
light bulb with bare hands. When it is
unavoidable to hold the glass portion,
use and hold with a clean dry cloth to
avoid getting moisture and oils on the
bulb.
Also, if the bulb is scratched or
dropped, it may blow out or crack.
●Fully install light bulb and any parts
used to secure it. Failure to do so may
result in heat damage, fire, or water
entering the light unit. This may dam-
age the light or cause condensation to
build up on the lens.
■To prevent damage or fire
●Make sure bulb is fully seated and
locked.
●Check the wattage of the bulb before
installing to prevent heat damage.
Page 379 of 476

3797-1. Essential information
7
When trouble arises
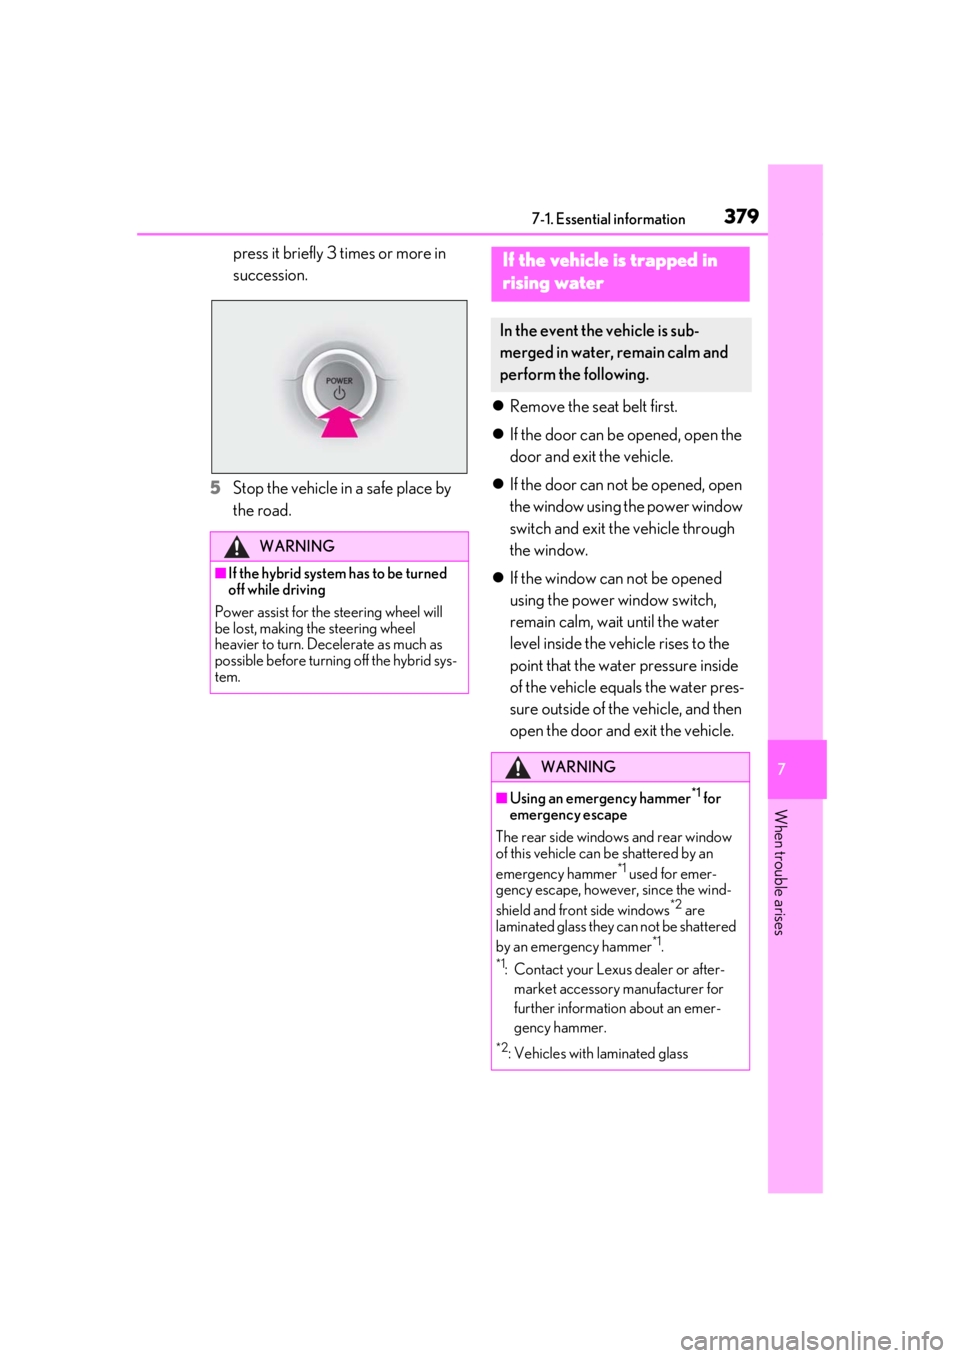
press it briefly 3 times or more in
succession.
5
Stop the vehicle in a safe place by
the road.
Remove the seat belt first.
If the door can be opened, open the
door and exit the vehicle.
If the door can not be opened, open
the window using the power window
switch and exit the vehicle through
the window.
If the window can not be opened
using the power window switch,
remain calm, wait until the water
level inside the vehicle rises to the
point that the water pressure inside
of the vehicle equals the water pres-
sure outside of the vehicle, and then
open the door and exit the vehicle.
WARNING
■If the hybrid system has to be turned
off while driving
Power assist for the steering wheel will
be lost, making the steering wheel
heavier to turn. Decelerate as much as
possible before turning off the hybrid sys-
tem.
If the vehicle is trapped in
r
ising water
In the event the vehicle is sub-
merged in water, remain calm and
perform the following.
WARNING
■Using an emergency hammer*1 for
emergency escape
The rear side windows and rear window
of this vehicle can be shattered by an
emergency hammer
*1 used for emer-
gency escape, however, since the wind-
shield and front side windows
*2 are
laminated glass they can not be shattered
by an emergency hammer
*1.
*1: Contact your Lexus dealer or after-
market accessory manufacturer for
further information about an emer-
gency hammer.
*2: Vehicles with laminated glass
Page 384 of 476

3847-2. Steps to take in an emergency
wheels, drivetrain, axles, steering and
brakes must be in good condition.
To have your vehicle towed by another
vehicle, the towing eyelet must be
installed to your vehicle. Install the tow-
ing eyelet by following the specified
procedure.
1 Take out the towing eyelet.
(P.296)
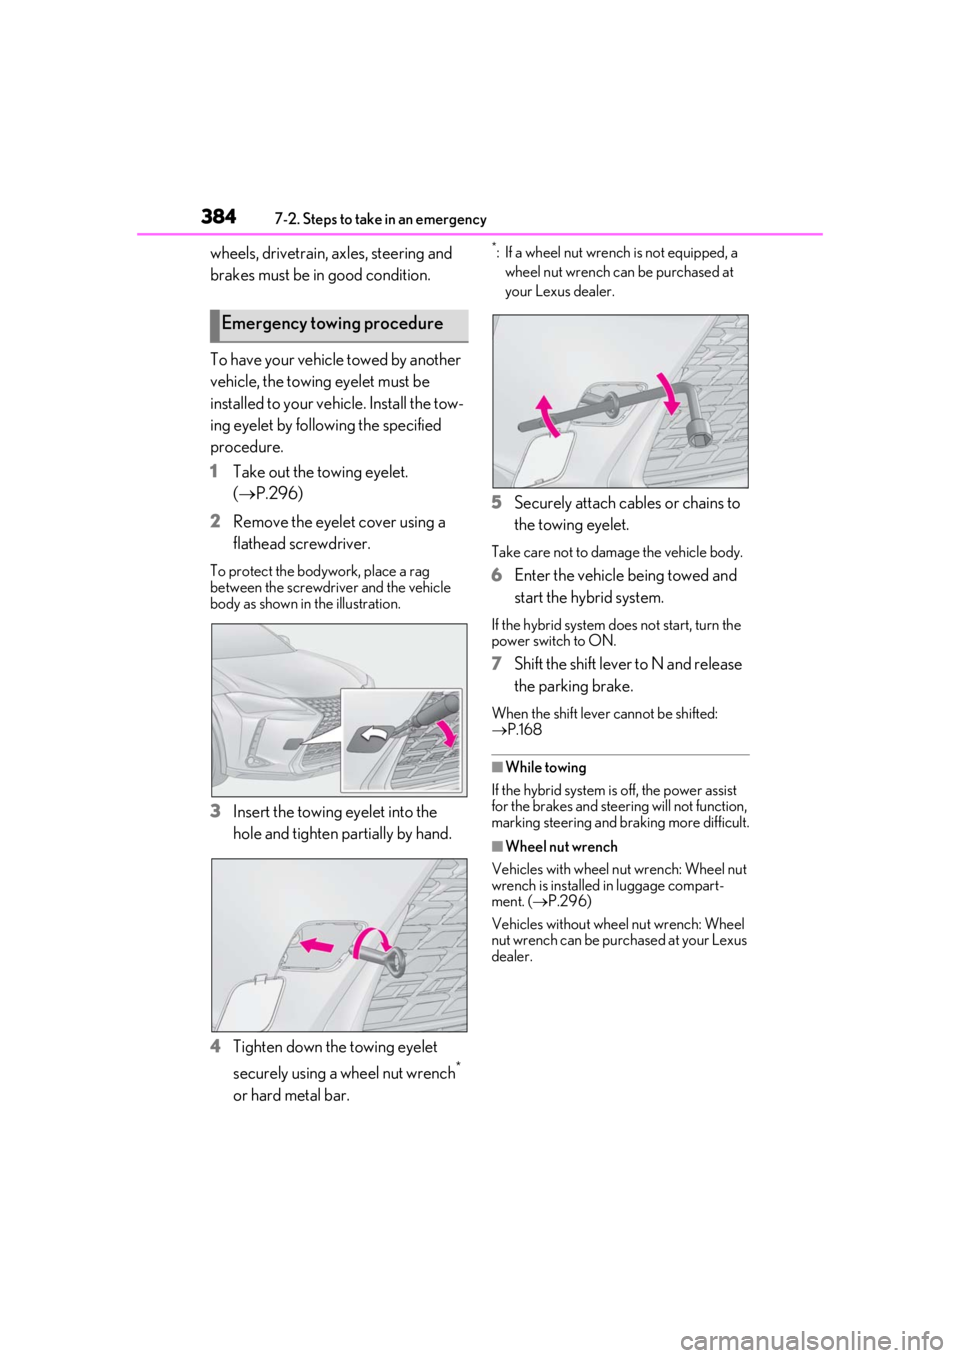
2 Remove the eyelet cover using a
flathead screwdriver.
To protect the bodywork, place a rag
between the screwdriver and the vehicle
body as shown in the illustration.
3Insert the towing eyelet into the
hole and tighten partially by hand.
4 Tighten down the towing eyelet
securely using a wheel nut wrench
*
or hard metal bar.
*: If a wheel nut wrench is not equipped, a wheel nut wrench can be purchased at
your Lexus dealer.
5 Securely attach cables or chains to
the towing eyelet.
Take care not to damage the vehicle body.
6Enter the vehicle being towed and
start the hybrid system.
If the hybrid system does not start, turn the
power switch to ON.
7Shift the shift lever to N and release
the parking brake.
When the shift lever cannot be shifted:
P.168
■While towing
If the hybrid system is off, the power assist
for the brakes and steering will not function,
marking steering and braking more difficult.
■Wheel nut wrench
Vehicles with wheel nut wrench: Wheel nut
wrench is installed in luggage compart-
ment. ( P.296)
Vehicles without wheel nut wrench: Wheel
nut wrench can be purchased at your Lexus
dealer.
Emergency towing procedure
Page 402 of 476

4027-2. Steps to take in an emergency
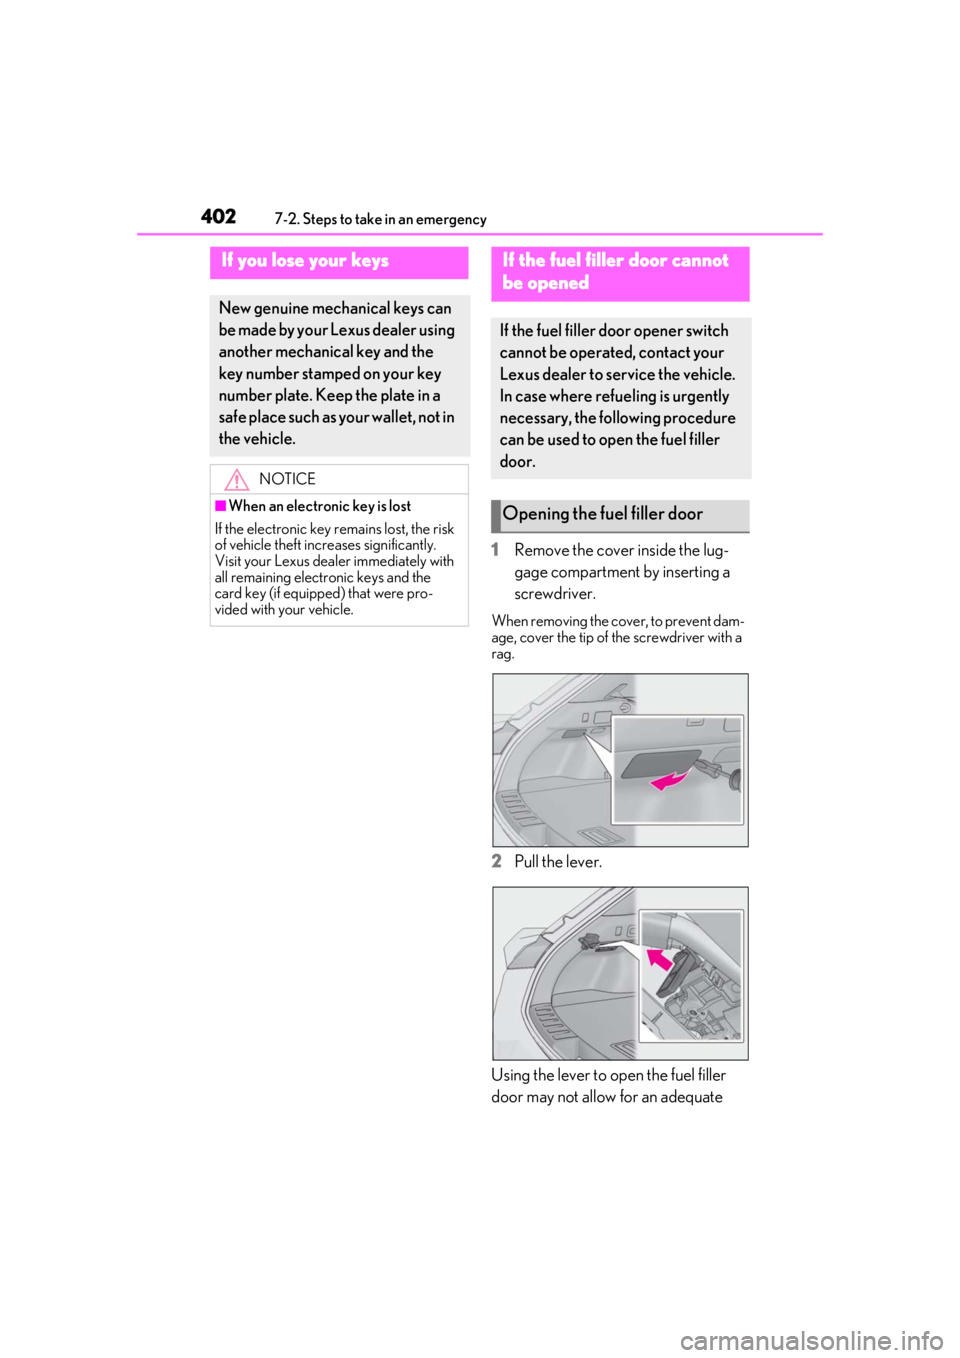
1Remove the cover inside the lug-
gage compartment by inserting a
screwdriver.
When removing the cover, to prevent dam-
age, cover the tip of the screwdriver with a
rag.
2Pull the lever.
Using the lever to open the fuel filler
door may not allow for an adequate
If you lose your keys
New genuine mechanical keys can
be made by your Lexus dealer using
another mechanical key and the
key number stamped on your key
number plate. Keep the plate in a
safe place such as your wallet, not in
the vehicle.
NOTICE
■When an electronic key is lost
If the electronic key remains lost, the risk
of vehicle theft increases significantly.
Visit your Lexus deal er immediately with
all remaining electronic keys and the
card key (if equipped) that were pro-
vided with your vehicle.
If the fuel filler door cannot
b
e opened
If the fuel filler door opener switch
cannot be operated, contact your
Lexus dealer to service the vehicle.
In case where refueling is urgently
necessary, the following procedure
can be used to open the fuel filler
door.
Opening the fuel filler door
Page 404 of 476

4047-2. Steps to take in an emergency
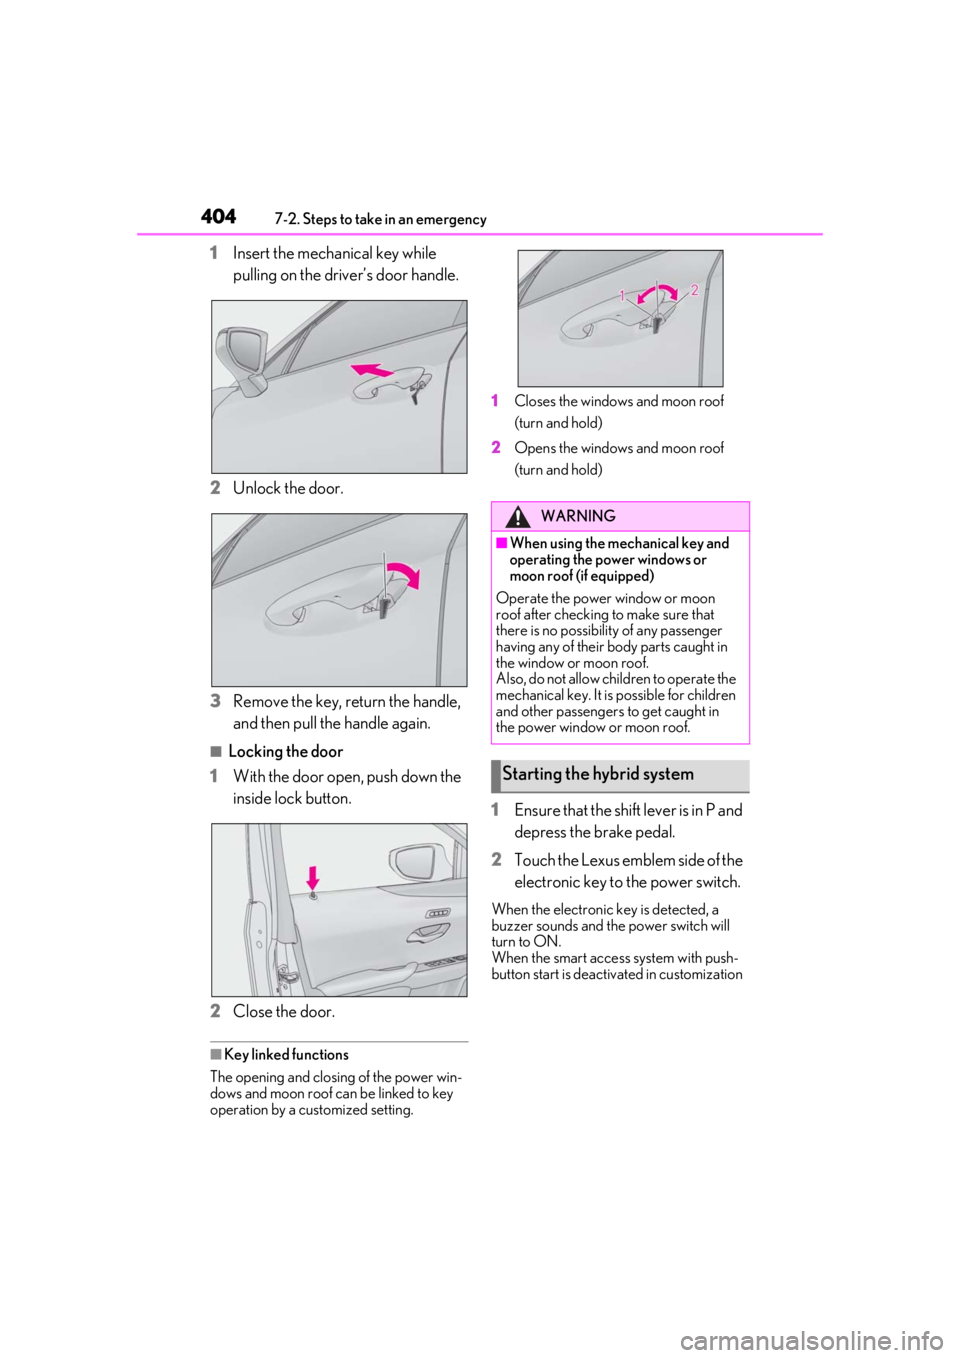
1Insert the mechanical key while
pulling on the driver’s door handle.
2
Unlock the door.
3
Remove the key, return the handle,
and then pull the handle again.
■Locking the door
1
With the door open, push down the
inside lock button.
2
Close the door.
■Key linked functions
The opening and closing of the power win-
dows and moon roof can be linked to key
operation by a customized setting. 1
Closes the windows and moon roof
(turn and hold)
2
Opens the windows and moon roof
(turn and hold)
1Ensure that the shift lever is in P and
depress the brake pedal.
2
Touch the Lexus emblem side of the
electronic key to the power switch.
When the electronic key is detected, a
buzzer sounds and the power switch will
turn to ON.
When the smart access system with push-
button start is deactivated in customization
WARNING
■When using the mechanical key and
operating the power windows or
moon roof (if equipped)
Operate the power window or moon
roof after checking to make sure that
there is no possibility of any passenger
having any of their body parts caught in
the window or moon roof.
Also, do not allow children to operate the
mechanical key. It is possible for children
and other passengers to get caught in
the power window or moon roof.
Starting the hybrid system
Page 406 of 476
4067-2. Steps to take in an emergency
Push the tab in and lift the lid off.
3Open the exclusive jump starting
terminal cover.
4 Remove the engine cover.