2019 LEXUS UX250H steering wheel
[x] Cancel search: steering wheelPage 280 of 476

2805-3. Using the air conditioning system and defogger
: Air flows to the feet
: Air flows to the feet and the wind-
shield defogger operates
Adjust the right-hand side tem-
perature setting
Function on/off indicators
When the function is on, the indicator illu-
minates on the control screen.
Sub function menu
When the sub function button on the
Remote Touch is pressed, the following
functions can be switched on and off.
: Set Lexus Climate Concierge
( P.274)
“AUTO”: Set automatic mode on/off
( P.281)
“OFF”: Turn the fan off
“A/C”: Set cooling and dehumidification
function
“DUAL”: Adjust the temperature for driver
and front passenger seats separately
(“DUAL” mode) ( P.283)
: Set eco air conditioning mode
■Option control screen
Select on the sub menu to display
the option control screen.
The functions can be switched on and off.
When the function is on, the indicator illu-
minates on the screen.
Set Lexus Climate Concierge
( P.274)
Adjusting the temperature for
driver and front passenger seats
separately (“DUAL” mode)
( P.283)
Set eco air conditioning mode
Air conditioning and heater output is lim-
ited to prioritize fuel economy.
Cooling and dehumidification func-
tion
Prevent ice from building up on the
windshield and wiper blades
(Windshield wiper de-icer) (if
equipped)
Select S-FLOW mode ( P.282)
■Side display (10.3-inch display
model)
Display the heated steering
wheel/seat heaters/seat ventilators
E
F
G
A
B
C
D
E
F
A
Page 286 of 476

2865-3. Using the air conditioning system and defogger
*: If equipped
Turns the heated steering wheel on/off
Each time the switch is pressed, the opera-
tion condition changes as follows.
AUTO (lit) Hi (2 segments lit) Lo (1
segment lit) Off
The AUTO indicator and/or level indi-
cator illuminates during operation.
■The heated steering wheel can be used
when
The power switch is in ON.
■Customization
Steering wheel heating preference in auto-
matic mode can be changed. (Customiz-
able features: P.444)
Heated steering wheel*/seat
h
eaters*/seat ventilators*
Heated steering wheel
Warms up the grip of the steering
wheel
Seat heaters
Warm up the seat upholstery
Seat ventilators
Maintain good airflow on the seat
upholstery by sucking air into the
seats
Press the “MENU” button on the
Remote Touch and select “Climate”
to display the air conditioning con-
trol screen. Then, select on the
sub menu ( P.279) to display the
heated steering wheel/seat heat-
ers/seat ventilators control screen.
WARNING
■To prevent minor burn injuries
Care should be taken if anyone in the fol-
lowing categories comes in contact with
the steering wheel or seats when the
heater is on:
●Babies, small children, the elderly, the
sick and the phys ically challenged
●Persons with sensitive skin
●Persons who are fatigued
●Persons who have taken alcohol or
drugs that induce sleep (sleeping
drugs, cold remedies, etc.)
NOTICE
■To prevent damage to the seat heat-
ers and seat ventilators
Do not put heavy objects that have an
uneven surface on the seat and do not
stick sharp objects (n eedles, nails, etc.)
into the seat.
■To prevent battery discharge
Do not use the functions when the hybrid
system is off.
Heated steering wheel
A
B
Page 288 of 476

2885-3. Using the air conditioning system and defogger
up or down.
The item can be adjusted by one level.
Trace operation: After selecting the
desired item, trace the pad surface.
The item can be adjusted by the amount
that you trace.
Trace operation cannot be used while driv-
ing.
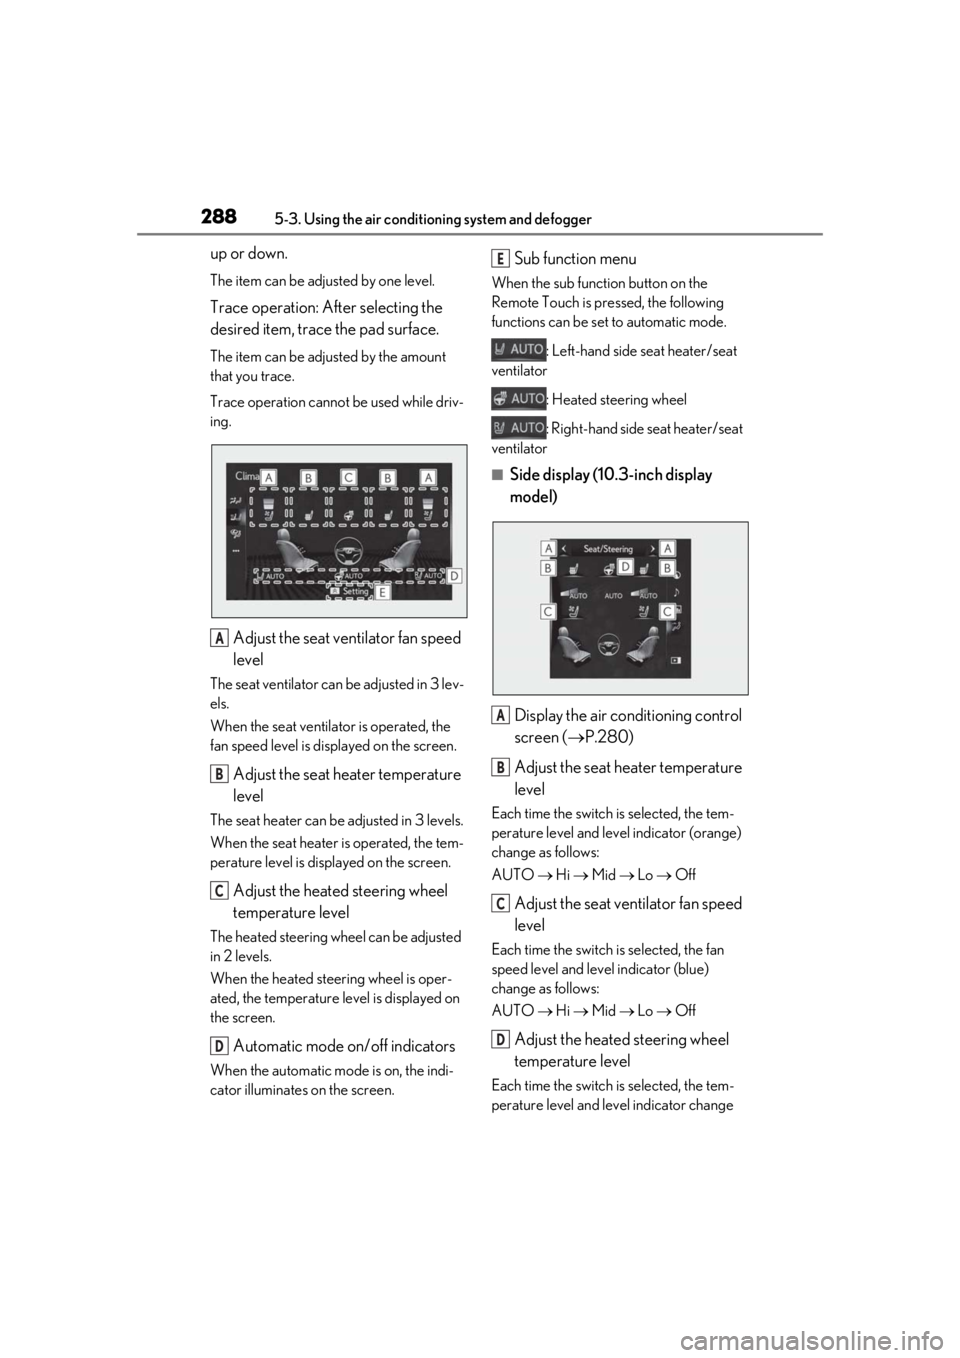
Adjust the seat ventilator fan speed
level
The seat ventilator can be adjusted in 3 lev-
els.
When the seat ventilator is operated, the
fan speed level is disp layed on the screen.
Adjust the seat heater temperature
level
The seat heater can be adjusted in 3 levels.
When the seat heater is operated, the tem-
perature level is displayed on the screen.
Adjust the heated steering wheel
temperature level
The heated steering wheel can be adjusted
in 2 levels.
When the heated steering wheel is oper-
ated, the temperature level is displayed on
the screen.
Automatic mode on/off indicators
When the automatic mode is on, the indi-
cator illuminates on the screen.
Sub function menu
When the sub function button on the
Remote Touch is pressed, the following
functions can be set to automatic mode.
: Left-hand side seat heater/seat
ventilator
: Heated steering wheel
: Right-hand side seat heater/seat
ventilator
■Side display (10. 3-inch display
model)
Display the air conditioning control
screen ( P.280)
Adjust the seat heater temperature
level
Each time the switch is selected, the tem-
perature level and level indicator (orange)
change as follows:
AUTO Hi Mid Lo Off
Adjust the seat ventilator fan speed
level
Each time the switch is selected, the fan
speed level and level indicator (blue)
change as follows:
AUTO Hi Mid Lo Off
Adjust the heated steering wheel
temperature level
Each time the switch is selected, the tem-
perature level and le vel indicator change
A
B
C
D
E
A
B
C
D
Page 324 of 476

3246-1. Maintenance and care
WARNING
●Lexus Safety System+2.0
●BSM (if equipped)
●RCTA (if equipped)
●PKSB (if equipped)NOTICE
■To prevent paint deterioration and
corrosion on the body and compo-
nents (aluminum wheels etc.)
●Wash the vehicle immediately in the
following cases:
• After driving near the sea coast
• After driving on salted roads
• If coal tar or tree sap is present on the paint surface
• If dead insects, insect droppings or bird droppings are present on the
paint surface
• After driving in an area contaminated with soot, oily smoke, mine dust, iron
powder or chemical substances
• If the vehicle becomes heavily soiled with dust or mud
• If liquids such as benzene and gasoline are spilled on the paint surface
●If the paint is chip ped or scratched,
have it repaired immediately.
●To prevent the wheels from corroding,
remove any dirt and store in a place
with low humidity when storing the
wheels.
■Cleaning the exterior lights
●Wash carefully. Do not use organic
substances or scrub with a hard brush.
This may damage the surfaces of the
lights.
●Do not apply wax to the surfaces of the
lights.
Wax may cause damage to the lenses.
■When using an automatic car wash
(vehicles with rain-sensing windshield
wipers)
Set the wiper switch to the off position.
If the wiper switch is in AUTO, the wipers
may operate and the wiper blades may
be damaged.
■When using a high pressure car wash
●When washing the vehicle, do not let
water of the high pressure washer hit
directly or the vicinity of the camera.
Due to the shock from the high pres-
sure water, it is possible the device may
not operate as normal.
●Do not bring the nozzle tip close to
boots (rubber or resin manufactured
cover), connectors or the following
parts. The parts may be damaged if
they come into contact with high-pres-
sure water.
• Traction related parts
• Steering parts
• Suspension parts
• Brake parts
●Keep the cleaning nozzle at least 11.9
in. (30 cm) away from the vehicle
body. Otherwise resin section, such as
moldings and bumpers, may be
deformed and damaged. Also, do not
continuously hold the nozzle in the
same place.
●Do not spray the lower part of the
windshield continuously. If water
enters the air conditioning system
intake located near the lower part of
the windshield, the air conditioning
system may not operate correctly.
Page 330 of 476

3306-2. Maintenance
Luggage compartment
ItemsCheck points
12-volt batteryCheck the connections.
( P.342)
Vehicle interior
ItemsCheck points
Accelerator
pedal
• The accelerator pedal
should move smoothly
(without uneven pedal
effort or catching).
Brake pedal
• Does the brake pedal move smoothly?
• Does the brake pedal have appropriate clear-
ance from the floor?
• Does the brake pedal have the correct amount
of free play?
Brakes
•The vehicle should not pull to one side when the
brakes are applied.
• The brakes should work effectively.
• The brake pedal should not feel spongy.
• The brake pedal should not get too close to the
floor when the brakes
are applied.
Head
restraints• Do the head restraints move smoothly and lock
securely?
Hybrid trans-
mission “Park”
mechanism• When parked on a slope and the shift lever is in P,
is the vehicle securely
stopped?
Indica-
tors/buzzers• Do the indicators and buzzers function prop-
erly?
Lights
• Do all the lights come on?
• Are the headlights aimed correctly?
Parking brake
• Does the parking brake switch operate nor-
mally?
• When parked on a slope and the parking brake is
on, is the vehicle
securely stopped?
Seat belts
• Do the seat belts oper-ate smoothly?
• The seat belts should not be damaged.
Seats• Do the seat controls operate properly?
Steering
wheel
• Does the steering wheel rotate smoothly?
• Does the steering wheel have the correct amount
of free play?
• There should not be any strange sounds coming
from the steering wheel.
Vehicle exterior
ItemsCheck points
Doors• Do the doors operate smoothly?
Engine hood
• Does the engine hood lock system work prop-
erly?
ItemsCheck points
Page 379 of 476

3797-1. Essential information
7
When trouble arises
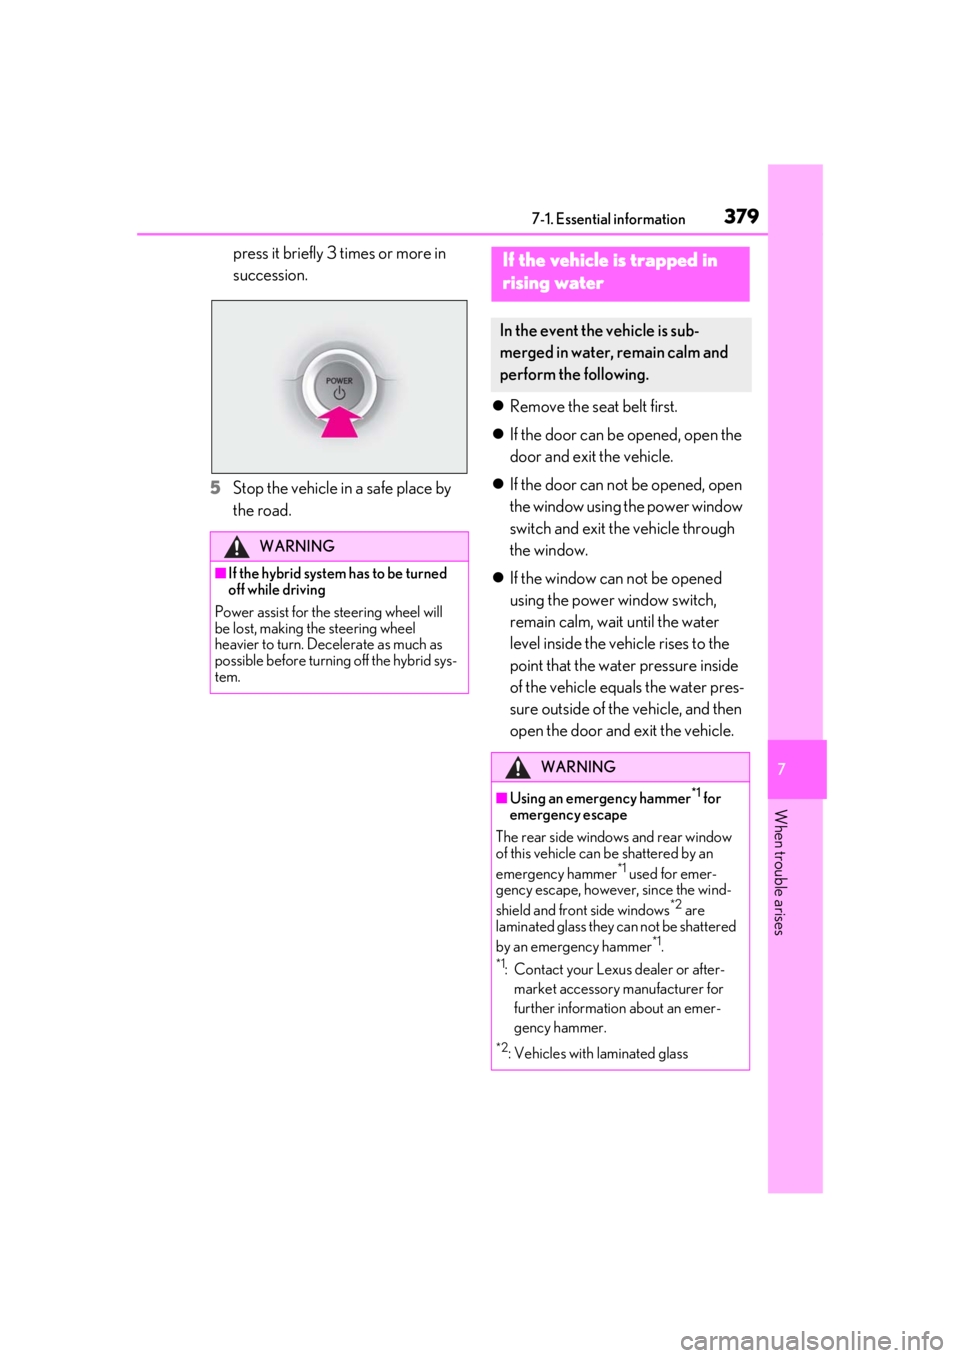
press it briefly 3 times or more in
succession.
5
Stop the vehicle in a safe place by
the road.
Remove the seat belt first.
If the door can be opened, open the
door and exit the vehicle.
If the door can not be opened, open
the window using the power window
switch and exit the vehicle through
the window.
If the window can not be opened
using the power window switch,
remain calm, wait until the water
level inside the vehicle rises to the
point that the water pressure inside
of the vehicle equals the water pres-
sure outside of the vehicle, and then
open the door and exit the vehicle.
WARNING
■If the hybrid system has to be turned
off while driving
Power assist for the steering wheel will
be lost, making the steering wheel
heavier to turn. Decelerate as much as
possible before turning off the hybrid sys-
tem.
If the vehicle is trapped in
r
ising water
In the event the vehicle is sub-
merged in water, remain calm and
perform the following.
WARNING
■Using an emergency hammer*1 for
emergency escape
The rear side windows and rear window
of this vehicle can be shattered by an
emergency hammer
*1 used for emer-
gency escape, however, since the wind-
shield and front side windows
*2 are
laminated glass they can not be shattered
by an emergency hammer
*1.
*1: Contact your Lexus dealer or after-
market accessory manufacturer for
further information about an emer-
gency hammer.
*2: Vehicles with laminated glass
Page 382 of 476

3827-2. Steps to take in an emergency
The following may indicate a problem
with your hybrid transmission. Contact
your Lexus dealer or commercial tow-
ing service before towing.
The hybrid warning message shows
on the multi-information display and
the vehicle does not move.
The vehicle makes an abnormal
sound.
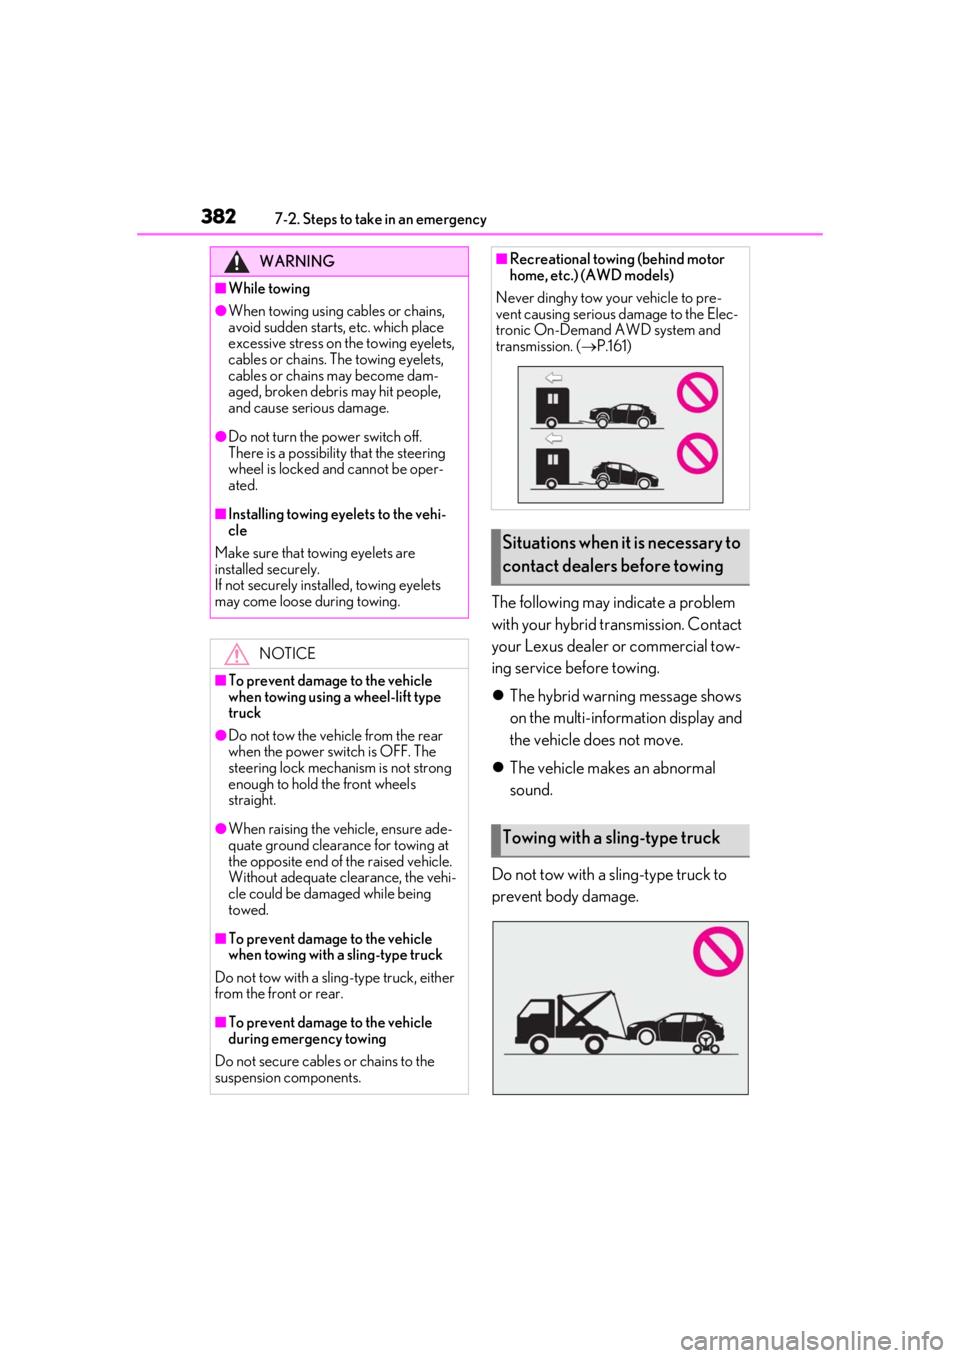
Do not tow with a sling-type truck to
prevent body damage.
WARNING
■While towing
●When towing using cables or chains,
avoid sudden starts, etc. which place
excessive stress on the towing eyelets,
cables or chains. The towing eyelets,
cables or chains may become dam-
aged, broken debris may hit people,
and cause serious damage.
●Do not turn the power switch off.
There is a possibility that the steering
wheel is locked and cannot be oper-
ated.
■Installing towing eyelets to the vehi-
cle
Make sure that towing eyelets are
installed securely.
If not securely installed, towing eyelets
may come loose during towing.
NOTICE
■To prevent damage to the vehicle
when towing using a wheel-lift type
truck
●Do not tow the vehicle from the rear
when the power switch is OFF. The
steering lock mechanism is not strong
enough to hold the front wheels
straight.
●When raising the vehicle, ensure ade-
quate ground clearance for towing at
the opposite end of the raised vehicle.
Without adequate clearance, the vehi-
cle could be damaged while being
towed.
■To prevent damage to the vehicle
when towing with a sling-type truck
Do not tow with a sling-type truck, either
from the front or rear.
■To prevent damage to the vehicle
during emergency towing
Do not secure cables or chains to the
suspension components.
■Recreational towing (behind motor
home, etc.) (AWD models)
Never dinghy tow your vehicle to pre-
vent causing serious damage to the Elec-
tronic On-Demand AWD system and
transmission. ( P.161)
Situations when it is necessary to
contact dealers before towing
Towing with a sling-type truck
Page 384 of 476

3847-2. Steps to take in an emergency
wheels, drivetrain, axles, steering and
brakes must be in good condition.
To have your vehicle towed by another
vehicle, the towing eyelet must be
installed to your vehicle. Install the tow-
ing eyelet by following the specified
procedure.
1 Take out the towing eyelet.
(P.296)
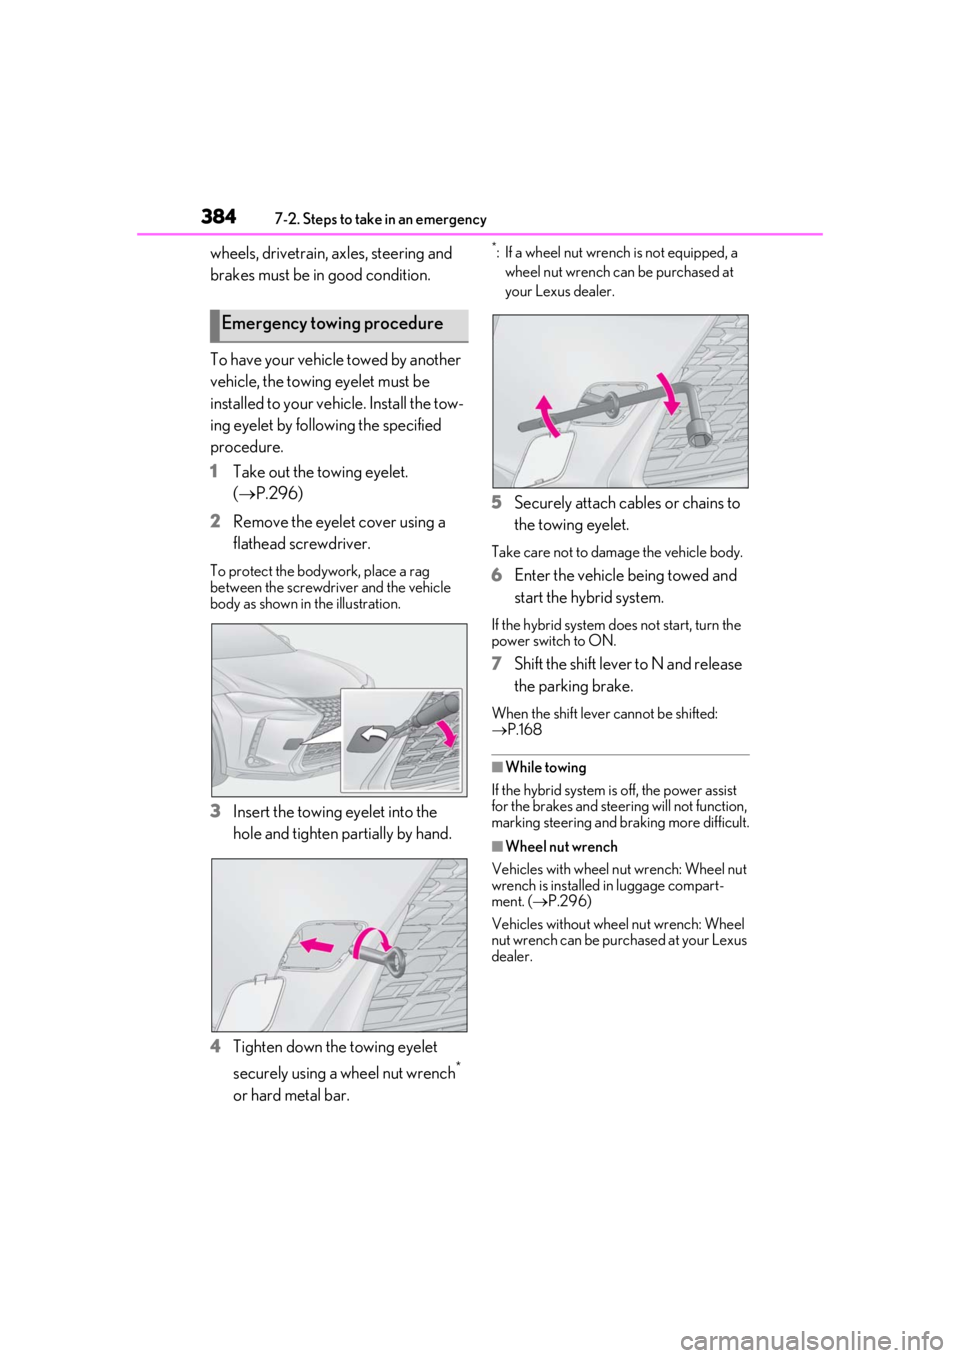
2 Remove the eyelet cover using a
flathead screwdriver.
To protect the bodywork, place a rag
between the screwdriver and the vehicle
body as shown in the illustration.
3Insert the towing eyelet into the
hole and tighten partially by hand.
4 Tighten down the towing eyelet
securely using a wheel nut wrench
*
or hard metal bar.
*: If a wheel nut wrench is not equipped, a wheel nut wrench can be purchased at
your Lexus dealer.
5 Securely attach cables or chains to
the towing eyelet.
Take care not to damage the vehicle body.
6Enter the vehicle being towed and
start the hybrid system.
If the hybrid system does not start, turn the
power switch to ON.
7Shift the shift lever to N and release
the parking brake.
When the shift lever cannot be shifted:
P.168
■While towing
If the hybrid system is off, the power assist
for the brakes and steering will not function,
marking steering and braking more difficult.
■Wheel nut wrench
Vehicles with wheel nut wrench: Wheel nut
wrench is installed in luggage compart-
ment. ( P.296)
Vehicles without wheel nut wrench: Wheel
nut wrench can be purchased at your Lexus
dealer.
Emergency towing procedure