2019 LEXUS UX250H key
[x] Cancel search: keyPage 321 of 476

321
6
6
Maintenance and care
Maintenance and care
6-1. Maintenance and careCleaning and protecting the vehi-cle exterior ................................ 322
Cleaning and protecting the vehi- cle interior ................................. 325
6-2. Maintenance Maintenance requirements .. 328
General maintenance ............. 329
Emission inspection and mainte- nance (I/M) programs .......... 331
6-3. Do-it-yourself maintenance Do-it-yourself service precautions........................................................ 333
Hood............................................... 335
Positioning a floor jack............ 336
Engine compartment............... 337
12-volt battery............................. 342
Tires ................................................ 345
Replacing the tire ...................... 355
Tire inflation pressure ............... 361
Wheels........................................... 363
Air conditioning filter...............364
Cleaning the hybrid battery (trac- tion battery) air intake vent and
filter .............................................. 365
Electronic key battery ............. 368
Checking and replacing fuses ........................................................ 370
Headlight aim.............................. 372
Light bulbs .................................... 374
Page 322 of 476

3226-1. Maintenance and care
6-1.Maintenance and care
Working from top to bottom, liber-
ally apply water to the vehicle body,
wheel wells and underside of the
vehicle to remove any dirt and dust.
Wash the vehicle body using a
sponge or soft cloth, such as a
chamois.
For hard-to-remove marks, use car
wash soap and rinse thoroughly with
water.
Wipe away any water.
Wax the vehicle when the water-
proof coating deteriorates.
If water does not bead on a clean surface,
apply wax when the vehicle body is cool.
■Self-restoring coat
The vehicle body has a self-restoring coat-
ing that is resistant to small surface
scratches caused in a car wash etc.
●The coating lasts for 5 to 8 years from
when the vehicle is delivered from the
plant.
●The restoration time differs depending on
the depth of the scratch and outside tem-
perature. The restoration time may
become shorter when the coating is
warmed by applying warm water.
●Deep scratches caused by keys, coins,
etc. cannot be restored.
●Do not use wax that contain abrasives.
■Automatic car washes
●Before washing the vehicle:
• Fold the mirrors
• Turn off the power back door (if equipped)
Start washing from the front of the vehicle.
Extend the mirrors before driving.
●Brushes used in automatic car washes
may scratch the vehicl e surface and harm
your vehicle’s paint.
●Rear spoiler may not be washable in
some automatic car washes. There may
also be an increased risk of damage to
vehicle.
■High pressure car washes
As water may enter the cabin, do not bring
the nozzle tip near the gaps around the
doors or perimeter of the windows, or spray
these areas continuously.
■Note for a smart access system with
push-button start
●If the door handle becomes wet while the
electronic key is within the effective
range, the door may lock and unlock
repeatedly. In that case, follow the follow-
ing correction procedures to wash the
vehicle:
• Place the key in a position 6 ft. (2 m) or
more separate from the vehicle while the
vehicle is being wash ed. (Take care to
ensure that the key is not stolen.)
• Set the electronic key to battery-saving mode to disable the smart access system
with push-button start. ( P.125)
●If the electronic key is inside the vehicle
and a door handle becomes wet during a
car wash, a buzzer may sound outside the
vehicle and “Key Detected in Vehicle”
may be shown on the multi-information
display. To turn off the alarm, lock all the
doors.
■Aluminum wheels
●Remove any dirt immediately by using a
neutral detergent.
●Wash detergent off with water immedi-
ately after use.
●To protect the paint from damage, make
sure to observe the following precau-
Cleaning and protecting the
vehicle exterior
Perform cleaning in a manner
appropriate to each component
and its material.
Cleaning instructions
Page 342 of 476

3426-3. Do-it-yourself maintenance
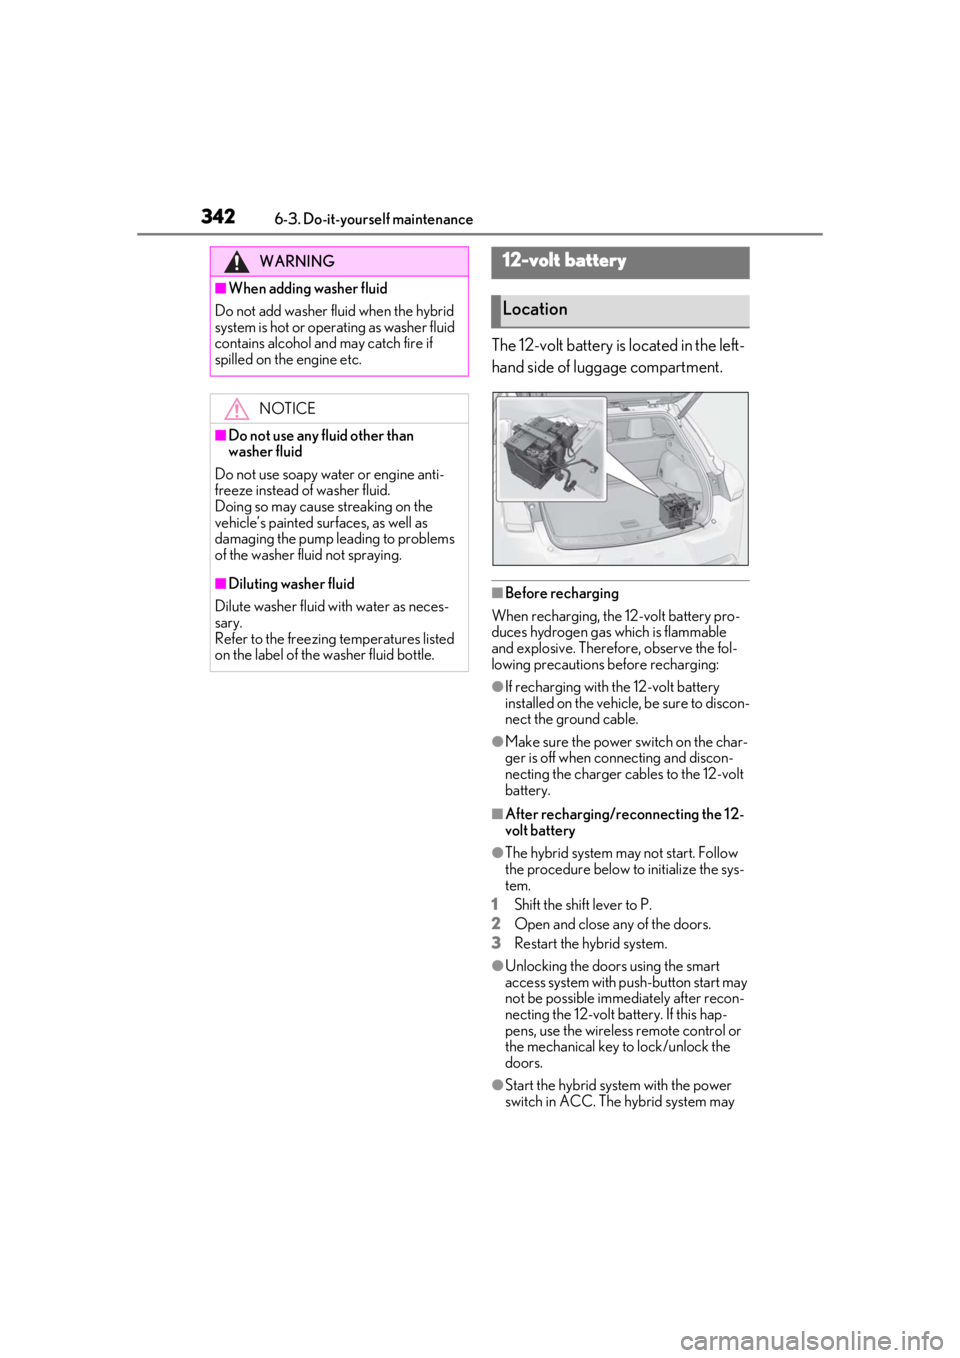
The 12-volt battery is located in the left-
hand side of luggage compartment.
■Before recharging
When recharging, the 12-volt battery pro-
duces hydrogen gas which is flammable
and explosive. Therefore, observe the fol-
lowing precautions before recharging:
●If recharging with the 12-volt battery
installed on the vehicle, be sure to discon-
nect the ground cable.
●Make sure the power switch on the char-
ger is off when connecting and discon-
necting the charger cables to the 12-volt
battery.
■After recharging/reconnecting the 12-
volt battery
●The hybrid system may not start. Follow
the procedure below to initialize the sys-
tem.
1
Shift the shift lever to P.
2
Open and close any of the doors.
3
Restart the hybrid system.
●Unlocking the doors using the smart
access system with pu sh-button start may
not be possible immediately after recon-
necting the 12-volt battery. If this hap-
pens, use the wireless remote control or
the mechanical key to lock/unlock the
doors.
●Start the hybrid system with the power
switch in ACC. The hybrid system may
WARNING
■When adding washer fluid
Do not add washer fluid when the hybrid
system is hot or operating as washer fluid
contains alcohol and may catch fire if
spilled on the engine etc.
NOTICE
■Do not use any fluid other than
washer fluid
Do not use soapy water or engine anti-
freeze instead of washer fluid.
Doing so may cause streaking on the
vehicle’s painted surfaces, as well as
damaging the pump leading to problems
of the washer fluid not spraying.
■Diluting washer fluid
Dilute washer fluid with water as neces-
sary.
Refer to the freezing temperatures listed
on the label of the washer fluid bottle.
12-volt battery
Location
Page 368 of 476

3686-3. Do-it-yourself maintenance
■If the electronic key battery is depleted
The following symptoms may occur:
●The smart access system with push-but-
ton start and wireless remote control will
not function properly.
●The operational range will be reduced.
■When the card key battery needs to be
replaced (if equipped)
The battery for the card key is available only
at Lexus dealers. Your Lexus dealer can
replace the battery for you.
Prepare the following before replacing
the battery:
Flathead screwdriver
Small flathead screwdriver
Lithium battery CR2032
■Use a CR2032 lithium battery
●Batteries can be purchased at your Lexus
dealer, local electrical appliance shops or
camera stores.
●Replace only with the same or equivalent
type recommended by the manufacturer.
●Dispose of used batteries according to
the local laws.
NOTICE
■When cleaning the air intake vent
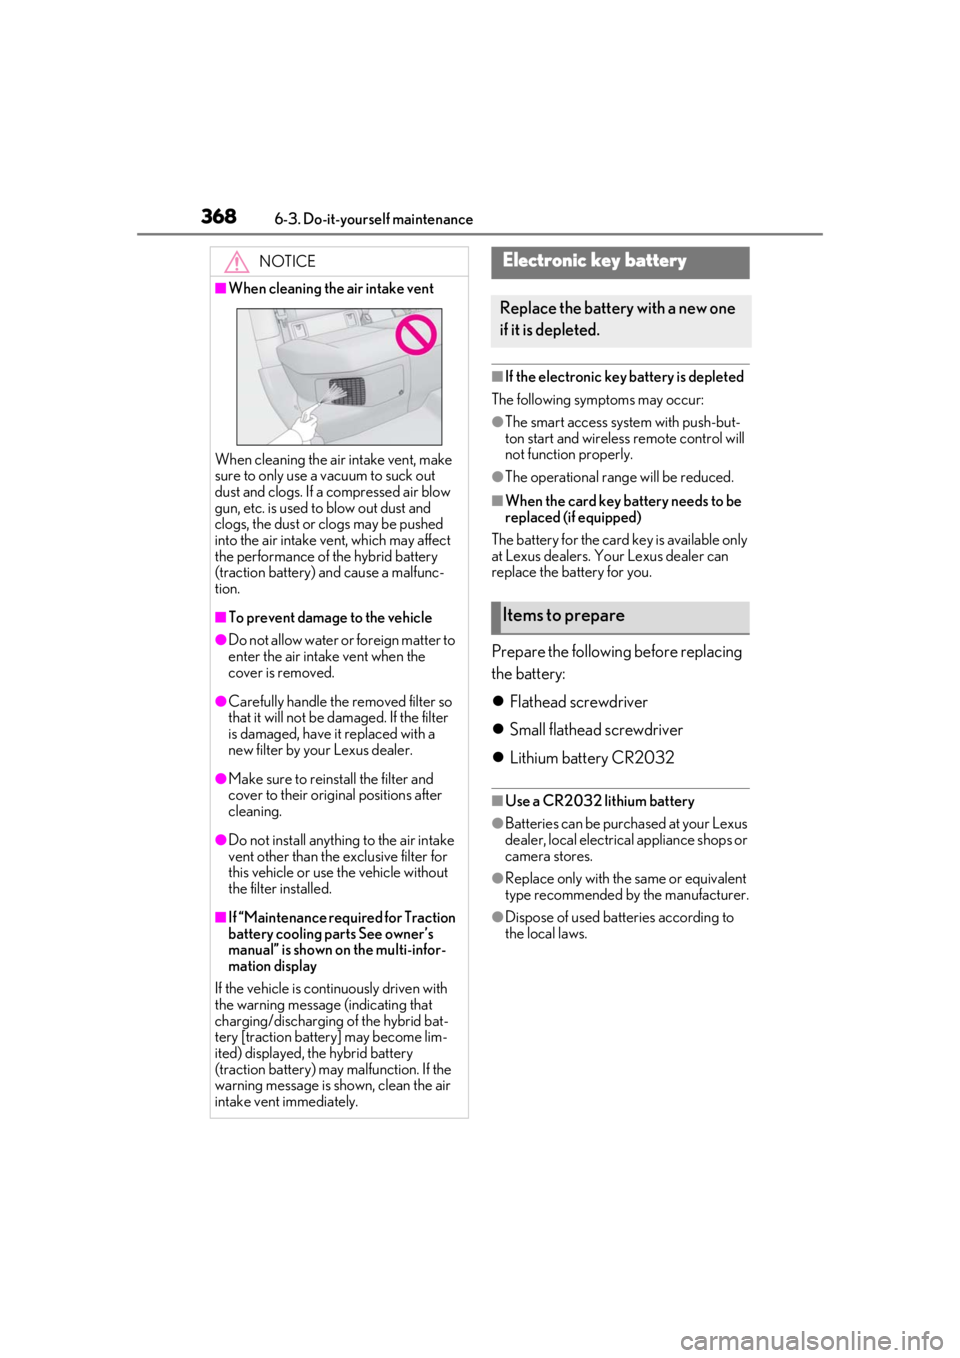
When cleaning the air intake vent, make
sure to only use a vacuum to suck out
dust and clogs. If a compressed air blow
gun, etc. is used to blow out dust and
clogs, the dust or clogs may be pushed
into the air intake ve nt, which may affect
the performance of the hybrid battery
(traction battery) and cause a malfunc-
tion.
■To prevent damage to the vehicle
●Do not allow water or foreign matter to
enter the air intake vent when the
cover is removed.
●Carefully handle the removed filter so
that it will not be damaged. If the filter
is damaged, have it replaced with a
new filter by your Lexus dealer.
●Make sure to reinstall the filter and
cover to their original positions after
cleaning.
●Do not install anything to the air intake
vent other than the exclusive filter for
this vehicle or use the vehicle without
the filter installed.
■If “Maintenance required for Traction
battery cooling parts See owner’s
manual” is shown on the multi-infor-
mation display
If the vehicle is continuously driven with
the warning message (indicating that
charging/discharging of the hybrid bat-
tery [traction battery] may become lim-
ited) displayed, the hybrid battery
(traction battery) may malfunction. If the
warning message is shown, clean the air
intake vent immediately.
Electronic key battery
Replace the battery with a new one
if it is depleted.
Items to prepare
Page 369 of 476

3696-3. Do-it-yourself maintenance
6
Maintenance and care
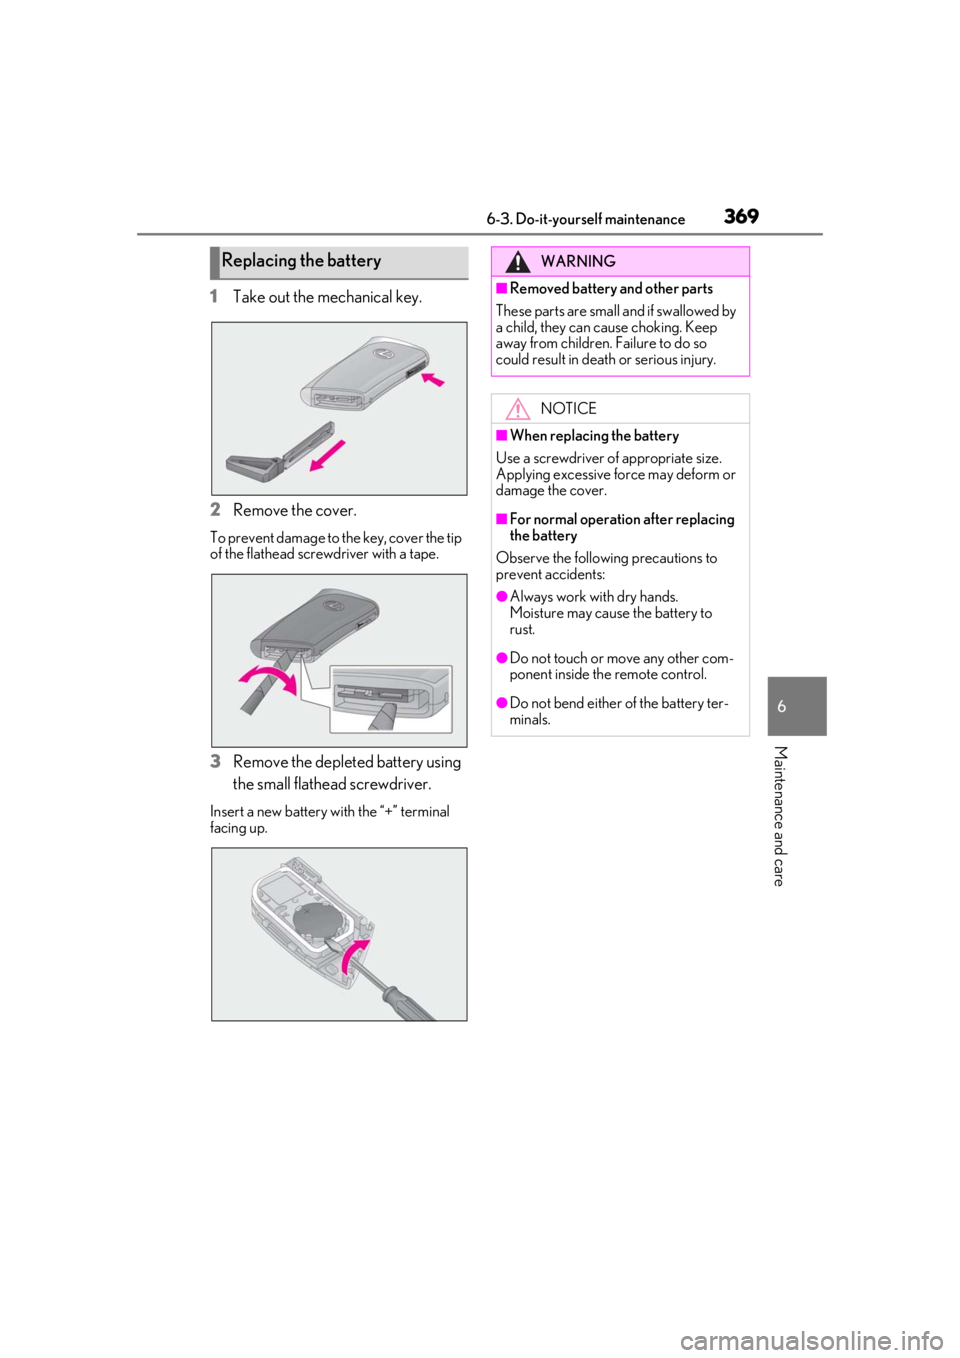
1Take out the mechanical key.
2
Remove the cover.
To prevent damage to the key, cover the tip
of the flathead screwdriver with a tape.
3Remove the depleted battery using
the small flathead screwdriver.
Insert a new battery with the “+” terminal
facing up.
Replacing the batteryWARNING
■Removed battery and other parts
These parts are small and if swallowed by
a child, they can cause choking. Keep
away from children. Failure to do so
could result in death or serious injury.
NOTICE
■When replacing the battery
Use a screwdriver of appropriate size.
Applying excessive force may deform or
damage the cover.
■For normal operation after replacing
the battery
Observe the following precautions to
prevent accidents:
●Always work with dry hands.
Moisture may cause the battery to
rust.
●Do not touch or move any other com-
ponent inside the remote control.
●Do not bend either of the battery ter-
minals.
Page 377 of 476

377
7
7
When trouble arises
When trouble arises
7-1. Essential informationEmergency flashers.................. 378
If your vehicle has to be stopped in an emergency .......................... 378
If the vehicle is trapped in rising water............................................ 379
7-2. Steps to take in an emergency If your vehicle needs to be towed......................................................... 381
If you think something is wrong ........................................................ 385
If a warning light turns on or a warning buzzer sounds ....... 386
If a warning message is displayed ........................................................ 395
If you have a flat tire.................. 399
If the hybrid system will not start ........................................................ 400
If you lose your keys ................. 402
If the fuel filler door cannot be opened........................................ 402
If the electronic key does not operate properly .................... 403
If the 12-volt battery is discharged ........................................................ 405
If your vehicle overheats ......... 410
If the vehicle becomes stuck . 413
Page 398 of 476

3987-2. Steps to take in an emergency
reset. If necessary, perform maintenance.
Please reset the message after the mainte-
nance is performed. (P.328)
*: Refer to the separa te “Scheduled Main-
tenance” or “Owner’s Manual Supple-
ment” for the maintenance interval
applicable to your vehicle.
■If “Maintenance Required Visit Your
Dealer” is displayed
Indicates that all maintenance is required to
correspond to the driven distance on the
maintenance schedule
*.
Comes on approximately 5000 miles
(8000 km) after the message has been
reset. (The indicator will not work properly
unless the message ha s been reset.) Per-
form the necessary maintenance. Please
reset the message after the maintenance is
performed. ( P.328)
*: Refer to the separa te “Scheduled Main-
tenance” or “Owner’s Manual Supple-
ment” for the maintenance interval
applicable to your vehicle.
■If “Oil Maintenance Required Soon” is
displayed
Indicates that the engine oil should be
scheduled to be changed.
Check the engine oil and change it if neces-
sary. After changing the engine oil, make
sure to reset the message. ( P.339)
■If “Oil Maintenance Required” is dis-
played
Indicates that the engine oil should be
changed.
Check and change the en gine oil, and oil fil-
ter by your Lexus deal er. After changing the
engine oil, make sure to reset the message.
( P.339)
■If a message that in dicates the need for
visiting your Lexus dealer is displayed
The system or part shown on the multi-
information display is malfunctioning. Have
the vehicle inspected by your Lexus dealer
immediately.
■If a message that indicates the need for
referring to Owner’ s Manual is dis-
played
●If any of the following messages are
shown on the multi-information display,
follow the instructions.
• “Engine Coolant Temp High” ( P.410)
• “Front Camera Unavailable” ( P.196)
• “Radar Cruise Control Unavailable” ( P.196)
●If any of the following messages are
shown on the multi-info rmation display, it
may indicate a malf unction. Have the
vehicle inspected by your Lexus dealer
immediately.
• “Access System with Elec. Key Malfunc-
tion”
• “Hybrid system malfunction”
•“Check Engine”
• “Hybrid battery system malfunction”
• “Accelerator system malfunction”
●If any of the following messages are
shown on the multi-info rmation display, it
may indicate a malfun ction. Immediately
stop the vehicle and contact your Lexus
dealer.
• “Braking Power Low”
• “Charging System Malfunction”
• “Oil Pressure Low”
●If “Low Auxiliary Battery See Owner’s
Manual” is shown
• When the display goes off after several
seconds
*:
Maintain the hybrid system operation for
more than 15 minutes and charge the 12-
volt battery.
• When the display does not go off:
Start up the hybrid system using the proce-
dures for “If the 12-volt battery is dis-
charged” ( P.405)
*: Displays for about 6 seconds
●If “Maintenance required for Traction bat-
tery cooling parts See owner’s manual” is
shown, the filter may be clogged, the air
intake vent may be blocked, or there may
be a gap in the duct. Therefore, perform
the following correction procedure.
• If the air intake vent and filter of the hybrid battery (traction battery) are dirty, per-
Page 400 of 476

4007-2. Steps to take in an emergency
One of the following may be the cause
of the problem:
The electronic key may not be func-
tioning properly. ( P.403)
There may not be sufficient fuel in
the vehicle’s tank.
Refuel the vehicle. ( P.190)
There may be a malfunction in the
immobilizer system. ( P.69)
There may be a malfunction in the
steering lock system.
The hybrid system may be malfunc-
tioning due to an electrical problem
such as electronic key battery
depletion or a blown fuse. However,
depending on the type of malfunc-
tion, an interim measure is available
to start the hybrid system.
One of the following may be the cause
NOTICE
■When replacing the tires
When removing or fitting the wheels,
tires or the tire pressure warning valve
and transmitter, contact your Lexus
dealer as the tire pr essure warning valve
and transmitter may be damaged if not
handled correctly.
■When driving over bumps
If a vehicle has a flat tire, the vehicle
height will be lower than usual. Ensure
that nothing strikes the bottom of the
vehicle.
■To avoid damaging the tire pressure
warning valves and transmitters
When a tire is repaired with liquid seal-
ants, the tire pressure warning valve and
transmitter may not operate properly. If a
liquid sealant is used , contact your Lexus
dealer or other qualified service shop as
soon as possible. Make sure to replace
the tire pressure warning valve and trans-
mitter when replacing the tire. ( P.350)
If the hybrid system will not
s
tart
Reasons for the hybrid system not
starting vary depending on the situ-
ation. Check the following and per-
form the appropriate procedure:
The hybrid system will not start
even though the correct starting
procedure is being followed.
( P.162)
The interior lights and head-
lights are dim, or the horn does
not sound or sounds at a low vol-
ume.