2019 LEXUS RC350 garage
[x] Cancel search: garagePage 223 of 390

2235-5. Using the other interior features
RC350AWD_RC350_RC300AWD_RC30
0_OM_(U)_1810
5
Interior features
transmitter for more accurate pro-
gramming.
Garage door opener motors manu-
factured after 1995 may be
equipped with rolling code protec-
tion. If this is the case, you may need
a stepladder or other sturdy, safe
device to reach the “Learn” or
“Smart” button on the garage door
opener motor.
■Programming HomeLink®
Steps 1 through 3 must be performed
within 60 seconds, otherwise the indi-
cator light will stop flashing and pro-
gramming will not be able to be
completed.
1 Press and release the HomeLink
®
button you want to program and
check that the HomeLink
® indica-
tor light flashes (orange).
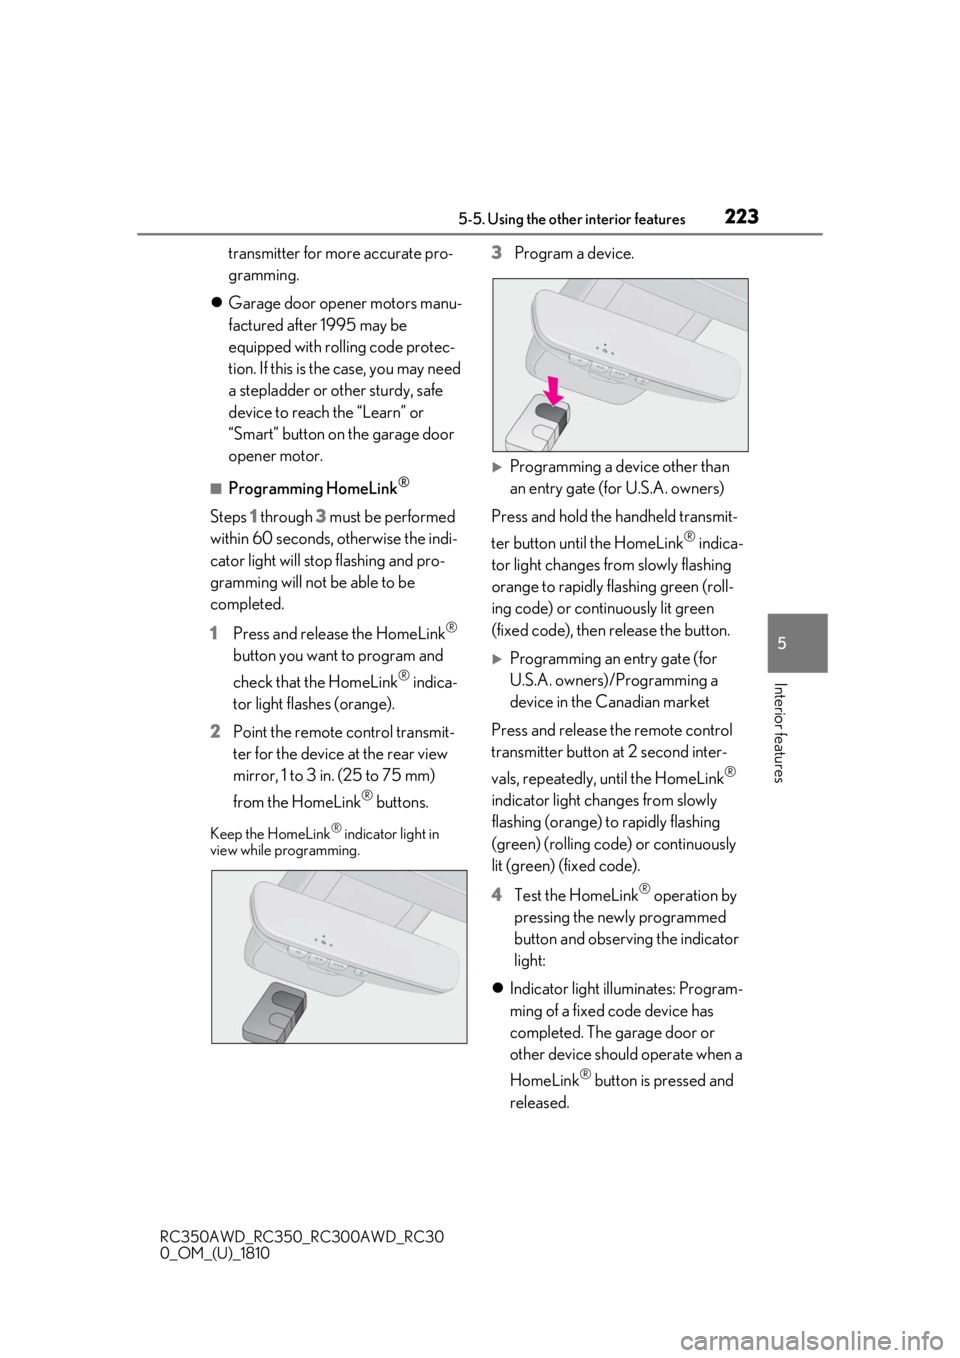
2 Point the remote control transmit-
ter for the device at the rear view
mirror, 1 to 3 in. (25 to 75 mm)
from the HomeLink
® buttons.
Keep the HomeLink® indicator light in
view while programming.
3 Program a device.
Programming a device other than
an entry gate (for U.S.A. owners)
Press and hold the handheld transmit-
ter button until the HomeLink
® indica-
tor light changes from slowly flashing
orange to rapidly flashing green (roll-
ing code) or continuously lit green
(fixed code), then release the button.
Programming an entry gate (for
U.S.A. owners)/Programming a
device in the Canadian market
Press and release the remote control
transmitter button at 2 second inter-
vals, repeatedly, until the HomeLink
®
indicator light changes from slowly
flashing (orange) to rapidly flashing
(green) (rolling code) or continuously
lit (green) (fixed code).
4 Test the HomeLink
® operation by
pressing the newly programmed
button and observing the indicator
light:
Indicator light illuminates: Program-
ming of a fixed code device has
completed. The garage door or
other device should operate when a
HomeLink
® button is pressed and
released.
Page 224 of 390

2245-5. Using the other interior features
RC350AWD_RC350_RC300AWD_RC30
0_OM_(U)_1810
Indicator light flashes rapidly: The
garage door opener motor or other
device is equipped with a rolling
code. To complete programming,
firmly press and hold the Home-
Link
® button for 2 seconds then
release it.
If the garage door or other device
does not operate, proceed to “Pro-
gramming a rolling code system”.
5 Repeat the steps above to program
another device for any of the
remaining HomeLink
® buttons.
■Programming a rolling code sys-
tem
2 or more people may be necessary to
complete rolling code programming.
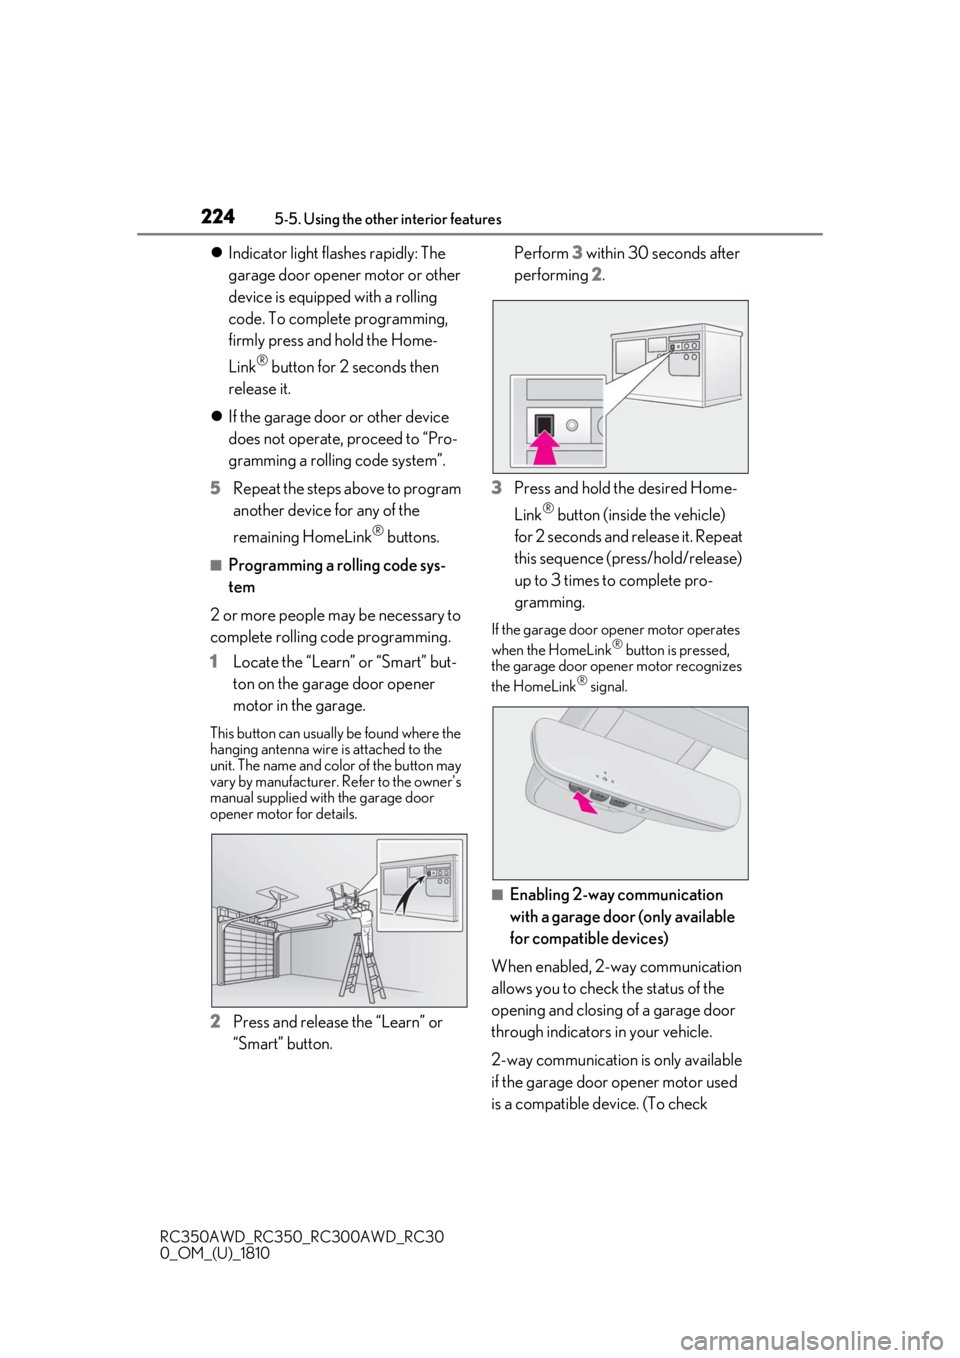
1 Locate the “Learn” or “Smart” but-
ton on the garage door opener
motor in the garage.
This button can usuall y be found where the
hanging antenna wire is attached to the
unit. The name and color of the button may
vary by manufacturer. Refer to the owner’s
manual supplied with the garage door
opener motor for details.
2 Press and release the “Learn” or
“Smart” button. Perform
3 within 30 seconds after
performing 2.
3 Press and hold the desired Home-
Link
® button (inside the vehicle)
for 2 seconds and release it. Repeat
this sequence (press/hold/release)
up to 3 times to complete pro-
gramming.
If the garage door opener motor operates
when the HomeLink® button is pressed,
the garage door opener motor recognizes
the HomeLink
® signal.
■Enabling 2-way communication
with a garage door (only available
for compatible devices)
When enabled, 2-way communication
allows you to check the status of the
opening and closing of a garage door
through indicators in your vehicle.
2-way communication is only available
if the garage door opener motor used
is a compatible device. (To check
Page 225 of 390

2255-5. Using the other interior features
RC350AWD_RC350_RC300AWD_RC30
0_OM_(U)_1810
5
Interior features
device compatibility, refer to
www.homelink.com.)
1 Within 5 seconds after program-
ming the garage door opener has
been completed, if the garage door
opener motor is trained to Home-
Link
®, both garage door operation
indicators will flash rapidly (green)
and the light on the garage door
opener motor will b link twice, indi-
cating that 2-way communication is
enabled.
If the indicators do not flash, perform 2 and
3 within the first 10 presses of the Home-
Link
® button after programming has been
completed.
2 Press a programmed HomeLink®
button to operate a garage door.
3 Within 1 minute of pressing the
HomeLink
® button, after the
garage door operation has
stopped, press the “Learn” or
“Smart” button on the garage door
opener motor. Within 5 seconds of
the establishment of 2-way com-
munication with the garage door
opener, both garage door opera-
tion indicators in the vehicle will
flash rapidly (green) and the light
on the garage door opener motor
will blink twice, indicating that
2-way communication is enabled.
■Reprogramming a single Home-
Link
® button
When the following procedure is per-
formed, buttons which already have
devices registered to them can be
overwritten: 1
With one hand, press and hold the
desired HomeLink
® button.
2 When the HomeLink
® indicator
starts flashing (orange), continue to
hold the HomeLink
® button and
perform “Programming Home-
Link
®” 1 (it takes 20 seconds for
the HomeLink
® indicator to start
flashing).
■Before programming
●Install a new battery in the transmitter.
●The battery side of the transmitter must
be pointed away from the HomeLink®.
Press the appropriate HomeLink®
button. The HomeLink
® indicator light
should turn on.
The status of the opening and closing
of a garage door is shown by the indi-
cators.
Opening
Closing
This function is only available if the garage
door opener motor used is a compatible
device. (To check device compatibility,
refer to www.homelink.com.)
Operating HomeLink®
A
B
Page 226 of 390

2265-5. Using the other interior features
RC350AWD_RC350_RC300AWD_RC30
0_OM_(U)_1810
The indicators can operate within
approximately 820 ft. (250 m) of the
garage door. However, if there are
obstructions between the garage door
and the vehicle, such as houses and
trees, feedback signals from the
garage door may not be received.
To recall the previous door operation
status, press and release either Home-
Link
® buttons and or and simultaneously. The
last recorded status will be displayed
for 3 seconds.
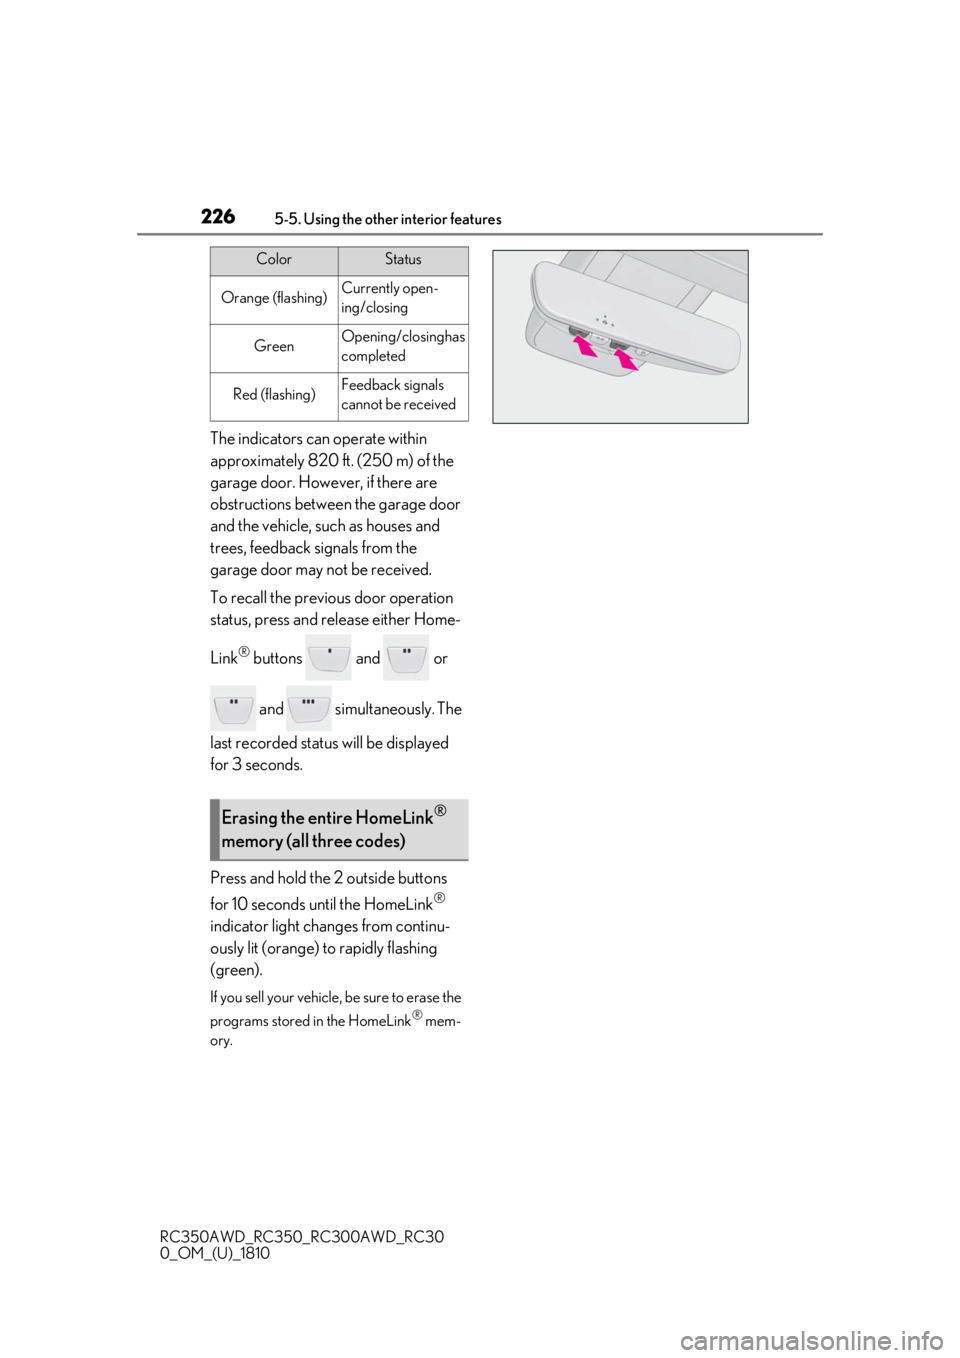
Press and hold the 2 outside buttons
for 10 seconds until the HomeLink
®
indicator light changes from continu-
ously lit (orange) to rapidly flashing
(green).
If you sell your vehicle, be sure to erase the
programs stored in the HomeLink
® mem-
ory.
ColorStatus
Orange (flashing)Currently open-
ing/closing
GreenOpening/closing has
completed
Red (flashing)Feedback signals
cannot be received
Erasing the entire HomeLink®
memory (all three codes)
Page 254 of 390

2546-3. Do-it-yourself maintenance
RC350AWD_RC350_RC300AWD_RC30
0_OM_(U)_1810
If any washer does not work or the
warning message appears on the
multi-information display, the washer
tank may be empty. Add washer fluid.
RC350/RC300 AWD
WARNING
■Chemicals in the battery
Batteries contain poisonous and corro-
sive sulfuric acid and may produce
hydrogen gas which is flammable and
explosive. To reduce the risk of death or
serious injury, take the following precau-
tions while working on or near the bat-
tery:
●Do not cause sparks by touching the
battery terminals with tools.
●Do not smoke or light a match near the
battery.
●Avoid contact with eyes, skin and
clothes.
●Never inhale or swallow electrolyte.
●Wear protective safety glasses when
working near the battery.
●Keep children away from the battery.
■Where to safely charge the battery
Always charge the battery in an open
area. Do not charge the battery in a
garage or closed room where there is
insufficient ventilation.
■How to recharge the battery
Only perform a slow charge (5 A or
less). The battery may explode if charged
at a quicker rate.
■Emergency measures regarding
electrolyte
●If electrolyte gets in your eyes
Flush your eyes with clean water for at
least 15 minutes and get immediate med-
ical attention. If possible, continue to
apply water with a sponge or cloth while
traveling to the nearest medical facility.
●If electrolyte gets on your skin
Wash the affected area thoroughly. If you
feel pain or burning, get medical atten-
tion immediately.
●If electrolyte gets on your clothes
It can soak through clothing on to your
skin. Immediately take off the clothing
and follow the procedure above if neces-
sary.
●If you accidentally swallow electrolyte
Drink a large quantity of water or milk.
Get emergency medical attention imme-
diately.
NOTICE
■When recharging the battery
Never recharge the battery while the
engine is running. Also, be sure all acces-
sories are turned off.
Adding the washer fluid
Page 341 of 390

3398-2. Customization
RC350AWD_RC350_RC300AWD_RC30
0_OM_(U)_1810
8
Vehicle specifications
8-2.Customization
■Changing by using the meter con-
trol switches
1
Press or to select .
2
Operate the switches to select a
desired item.
3
Change the setting by referring to
the message displayed on the
screen.
■Changing by using the Remote
Touch
1
Press the “MENU” button on the
Remote Touch.
2
Select “Setup” on the menu screen
and select “Vehicle”.
3
Select “Vehicle Customization”,
“LEXUS Park Assist” or “Drive
Mode Customization”. Various setting can be changed. Refer
to the list of settings that can be
changed for details.
For details on the Remote Touch, refer
to the “NAVIGATION AND MULTI-
MEDIA SYSTEM OWNER’S MAN-
UAL”.
■When customizing using the Remote
Touch
Stop the vehicle in a safe place, apply the
parking brake, and shift the shift lever to P.
Also, to prevent battery discharge, leave
the engine running while customizing the
features.
Some function settings are changed simultaneously with other functions being cus-
tomized. Contact your Lexus dealer for further details.
Settings that can be changed using the Remote Touch
Settings that can be changed using the meter control switches
Settings that can be changed by your Lexus dealer
Customizable features
Your vehicle includes a variety of
electronic features that can be per-
sonalized to your preferences. The
settings of these features can be
changed by using the meter control
switches, the Remote Touch or at
your Lexus dealer.
Customizing vehicle features
WARNING
■During customization
As the engine needs to be running
during customization, ensure that the
vehicle is parked in a place with ade-
quate ventilation. In a closed area such as
a garage, exhaust gases including harm-
ful carbon monoxide (CO) may collect
and enter the vehicle. This may lead to
death or a serious health hazard.
NOTICE
■During customization
To prevent battery discharge, ensure that
the engine is running while customizing
features.
Customizable features
A
B
C
Page 356 of 390

3548-4. Certifications
RC350AWD_RC350_RC300AWD_RC30
0_OM_(U)_1810
Blind Spot Monitor
Garage door opener
Page 378 of 390

376Alphabetical Index
RC350AWD_RC350_RC300AWD_RC30
0_OM_(U)_1810
Checking .......................................................250
Preparing and checking before winter .... 196
Engine coolant temperature gauge ....... 66
Engine immobilizer system .........................57
Engine oil Capacity .......................................................... 318
Checking ....................................................... 248
Preparing and checking before winter ....196
Warning light ............................................... 283
Engine oil maintenance data .................. 250
Engine oil pressure gauge ...........................74
Engine oil temperature gauge ...................74
Engine switch ..................................................125 Auto power off function ........................... 127
Changing the engine switch modes.. 126
If your vehicle has to be stopped in an
emergency ................................................ 274
EPS (Electric Power Steering) ................192 Warning light ............................................... 284
Event data recorder (EDR) ............................6
F
First-aid kit storage belt ..............................219
Flat tire Tire pressure warning system .............258
Vehicles with a spare tire ...................... 294
Floor mats ...........................................................22
Fluid Automatic transmission .......................... 320
Brake...................................................... 252, 321
Washer ........................................................... 254
Footwell light ...................................................215
Front passenger occupant classification system .............................................................. 36
Front position lights Wattage.......................................................... 326
Front seats Adjustment....................................................... 97
Cleaning......................................................... 235
Correct driving posture .............................23 Driving position memory ........................ 100
Head restraints............................................. 103
Memory recall function............................ 102
Power easy access system .................... 100
Seat heaters .................................................... 212
Seat position memory ..............................100
Seat ventilators .............................................. 212
Front side marker light Light switch .................................................... 136
Front turn signal lights Replacing light bulbs ................................270
Turn signal lever .......................................... 133
Wattage ..........................................................326
Fuel Capacity .......................................................... 318
Fuel gauge ........................................................ 66
Fuel pump shut off system...................... 281
Information .................................................... 327
Refueling.......................................................... 148
Type ................................................................... 318
Warning light .............................................. 286
Fuel consumption Average fuel economy .............................. 72
Current fuel consumption ........................ 72
Fuel filler door If the fuel filler door cannot be opened ....
303
Refueling.......................................................... 148
Fuel gauge ......................................................... 66
Fuel pump shut off system..........................281
Fuses ..................................................................267
G
Garage door opener ................................. 222
Gauges ............................................................... 66
Gear Position ................................................... 75
G-force................................................................74
Glove box ......................................................... 217
Glove box light ...............................................218