2019 LEXUS LS500 tow
[x] Cancel search: towPage 138 of 512

138 3-4. Adjusting the steering wheel and mirrors
LS500_OM_(U)_1810 3-4.Adjusting the steering wheel and mirrors
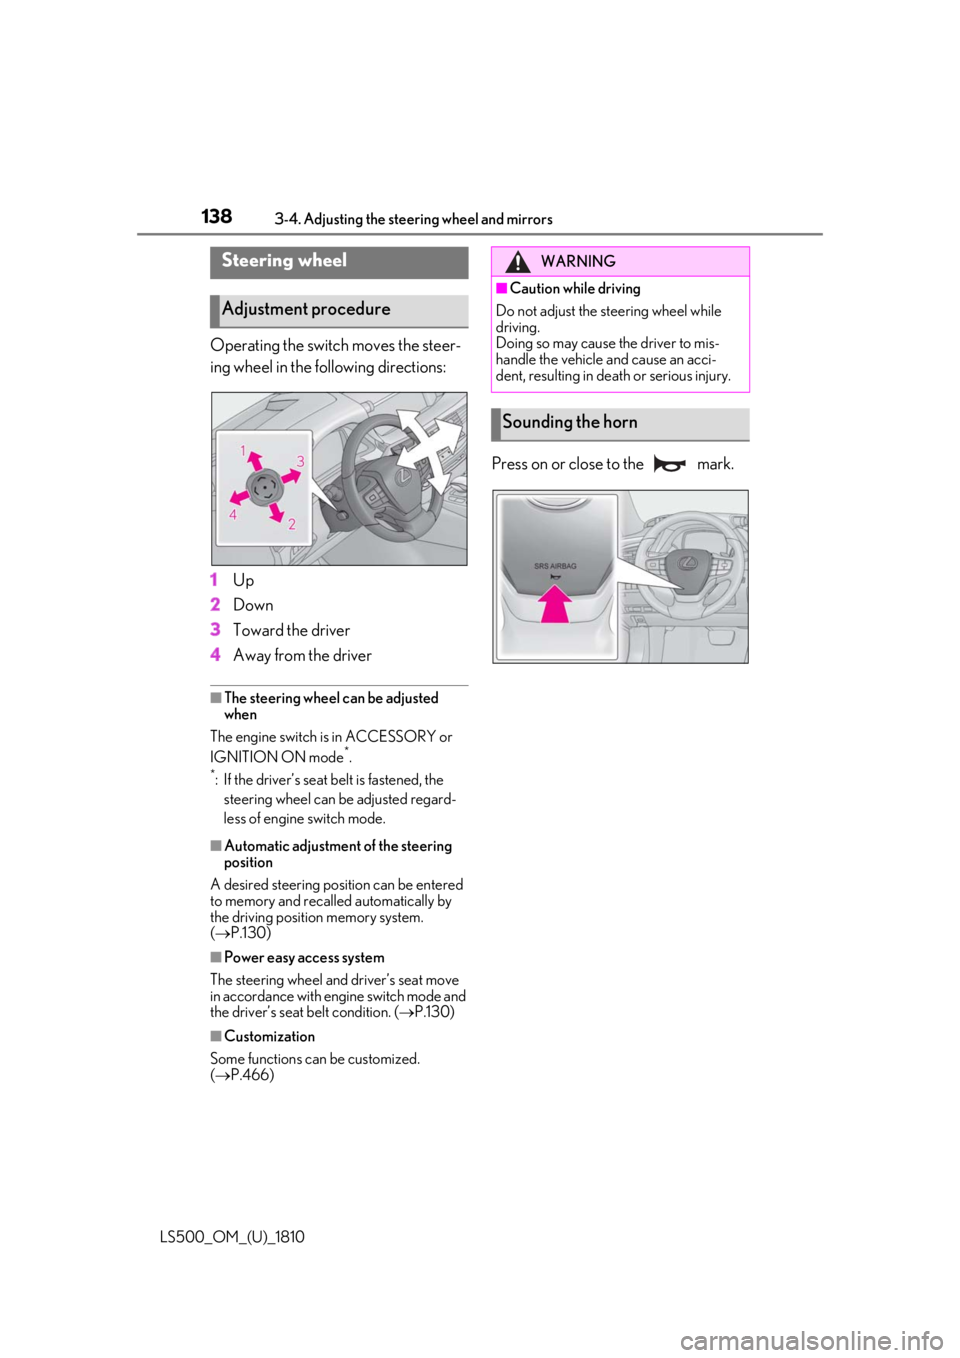
Operating the switch moves the steer-
ing wheel in the following directions:
1 Up
2 Down
3 Toward the driver
4 Away from the driver ■
The steering wheel can be adjusted
when
The engine switch is in ACCESSORY or
IGNITION ON mode *
.*
: If the driver’s seat belt is fastened, the
steering wheel can be adjusted regard-
less of engine switch mode.
■
Automatic adjustment of the steering
position
A desired steering position can be entered
to memory and recalled automatically by
the driving position memory system.
( P.130)
■
Power easy access system
The steering wheel and driver’s seat move
in accordance with engine switch mode and
the driver’s seat belt condition. ( P.130)
■
Customization
Some functions can be customized.
( P.466) Press on or close to the mark.Steering wheel
Adjustment procedure WARNING■
Caution while driving
Do not adjust the steering wheel while
driving.
Doing so may cause the driver to mis-
handle the vehicle and cause an acci-
dent, resulting in death or serious injury.
Sounding the horn
Page 141 of 512

1413-4. Adjusting the steering wheel and mirrors
LS500_OM_(U)_1810 3
Before driving nor “R”.
To set the mirror angle used when the vehi-
cle is reversing, adjust the mirror angle at a
desired position with the shift position in R.
The adjusted angle will be memorized and
the mirror will automatically tilt to the mem-
orized angle whenever the shift position is
shifted to R from next time.
The memorized downward tilt position of
the mirror is linked to the normal position
(angle adjusted with the shift position in
other than R). Therefore, if the normal posi-
tion is changed after adjustment, the tilt
position will also change.
When the normal position is changed, read-
just the angle in reversing.
■
Using the switch
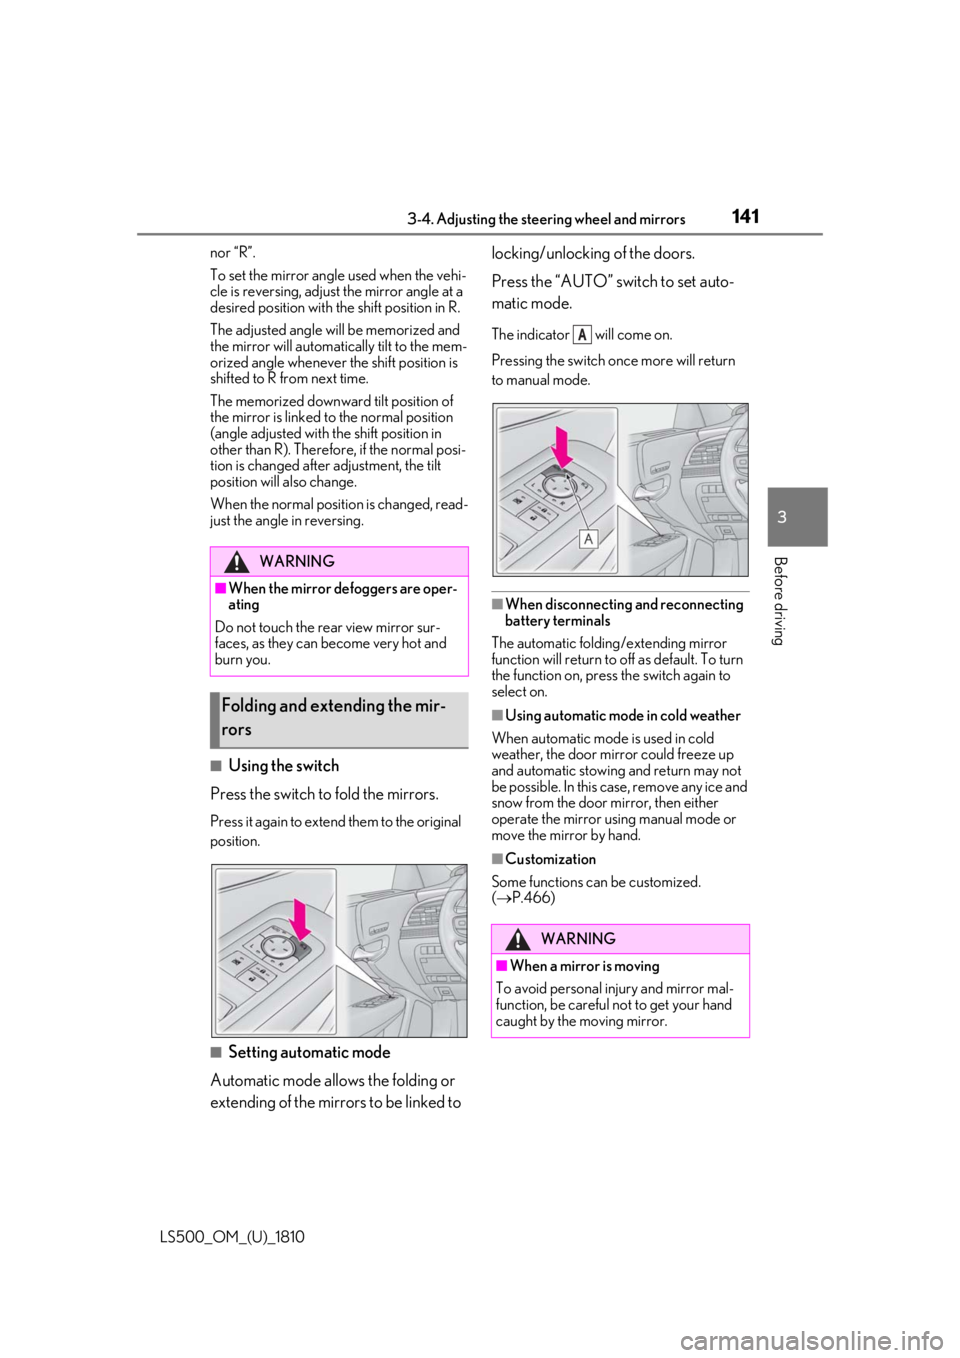
Press the switch to fold the mirrors. Press it again to extend them to the original
position.
■
Setting automatic mode
Automatic mode allows the folding or
extending of the mirrors to be linked to locking/unlocking of the doors.
Press the “AUTO” switch to set auto-
matic mode. The indicator will come on.
Pressing the switch on ce more will return
to manual mode.
■
When disconnecting and reconnecting
battery terminals
The automatic folding/extending mirror
function will return to off as default. To turn
the function on, press the switch again to
select on. ■
Using automatic mode in cold weather
When automatic mode is used in cold
weather, the door mirror could freeze up
and automatic stowing and return may not
be possible. In this case, remove any ice and
snow from the door mirror, then either
operate the mirror using manual mode or
move the mirror by hand. ■
Customization
Some functions can be customized.
( P.466)WARNING■
When the mirror defoggers are oper-
ating
Do not touch the rear view mirror sur-
faces, as they can become very hot and
burn you.
Folding and extending the mir-
rors
WARNING
■
When a mirror is moving
To avoid personal injury and mirror mal-
function, be careful not to get your hand
caught by the moving mirror. A
Page 153 of 512

153
LS500_OM_(U)_1810 4 4
Driving Driving .
4-1. Before driving
Driving the vehicle ..................... 154
Cargo and luggage ................... 160
Vehicle load limits ...................... 162
Trailer towing ............................... 163
Dinghy towing ............................. 163
4-2. Driving procedures
Engine (ignition) switch ........... 164
Automatic transmission........... 167
Turn signal lever.......................... 173
Parking brake .............................. 174
Brake Hold.................................... 177
4-3. Operating the lights and wipers
Headlight switch ......................... 179
AHB (Automatic High Beam)
......................................................... 182
Windshield wipers and washer
......................................................... 184
4-4. Refueling
Opening the fuel tank cap...... 189
4-5. Using the driving support sys-
tems
Lexus Safety System + A.......... 191
Lexus Safety System + 2.0 ..... 198
PCS (Pre-Collision System) (vehi-
cles with Lexus Safety System +
A) .................................................. 204
PCS (Pre-Collision System) (vehi-
cles with Lexus Safety System +
2.0)................................................ 215 FCTA (Front Cross Traffic Alert)
........................................................ 222
LTA (Lane Tracing Assist) .... 225
Dynamic radar cruise control with
full-speed range...................... 237
RSA (Road Sign Assist).......... 247
BSM (Blind Spot Monitor) .... 250
PKSA (Parking Support Alert)
....................................................... 255
Intuitive parking assist ............. 257
RCTA (Rear cross traffic alert)
function....................................... 263
RCD (Rear Camera Detection)
function....................................... 267
PKSB (Parking Support Brake)
....................................................... 270
Parking Support Brake function
(static objects) ......................... 276
Parking Support Brake function
(rear-crossing vehicles) ...... 282
Parking Support Brake function
(rear pedestrians) .................. 286
Driving mode select switch .. 289
Electronically modulated air sus-
pension ........................................ 291
Driving assist systems.............. 294
4-6. Driving tips
Winter driving tips .................... 300
Page 161 of 512

1614-1. Before driving
LS500_OM_(U)_1810 4
Driving gage load capacity calculated in Step
4.
(6) If your vehicle will be towing a
trailer, load from your trailer will be
transferred to your vehicle. Consult
this manual to determine how this
reduces the available cargo and lug-
gage load capacity of your vehicle.
( P.162)Lexus does not recommend towing a
trailer with your vehicle. Your vehicle is not
designed for trailer towing.
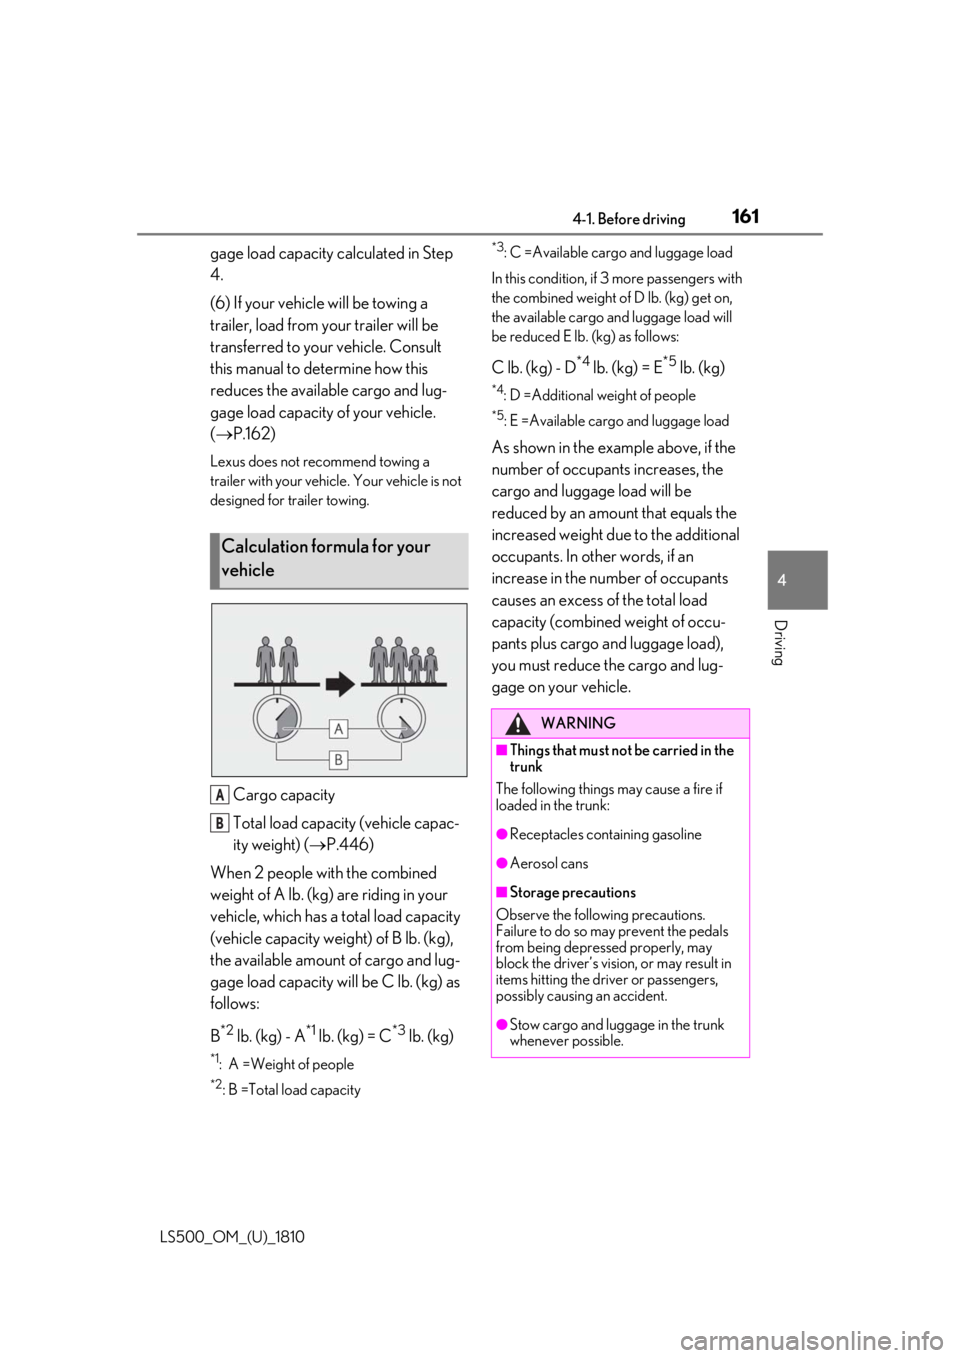
Cargo capacity
Total load capacity (vehicle capac-
ity weight) ( P.446)
When 2 people with the combined
weight of A lb. (kg) are riding in your
vehicle, which has a total load capacity
(vehicle capacity weight) of B lb. (kg),
the available amount of cargo and lug-
gage load capacity will be C lb. (kg) as
follows:
B *2
lb. (kg) - A *1
lb. (kg) = C *3
lb. (kg)*1
: A =Weight of people *2
: B =Total load capacity *3
: C =Available cargo and luggage load
In this condition, if 3 more passengers with
the combined weight of D lb. (kg) get on,
the available cargo and luggage load will
be reduced E lb. (kg) as follows:
C lb. (kg) - D *4
lb. (kg) = E *5
lb. (kg)*4
: D =Additional weight of people *5
: E =Available cargo and luggage load
As shown in the example above, if the
number of occupant s increases, the
cargo and luggage load will be
reduced by an amount that equals the
increased weight due to the additional
occupants. In other words, if an
increase in the number of occupants
causes an excess of the total load
capacity (combined weight of occu-
pants plus cargo and luggage load),
you must reduce the cargo and lug-
gage on your vehicle.Calculation formula for your
vehicle
A
B WARNING■
Things that must not be carried in the
trunk
The following things may cause a fire if
loaded in the trunk:
●
Receptacles containing gasoline
●
Aerosol cans
■
Storage precautions
Observe the following precautions.
Failure to do so may prevent the pedals
from being depressed properly, may
block the driver’s vision, or may result in
items hitting the driver or passengers,
possibly causing an accident.
●
Stow cargo and luggage in the trunk
whenever possible.
Page 162 of 512

162 4-1. Before driving
LS500_OM_(U)_1810 ■
Total load capacity and seating capacity
These details are also described on the tire
and loading information label. ( P.395)WARNING●
Do not place cargo or luggage in or on
the following locations.
• At the feet of the driver
• On the front passenger or rear seats
(when stacking items)
• On the package tray
• On the instrument panel
•On the dashboard
• In front of the Center Display ●
Secure all items in the occupant com-
partment.■
Capacity and distribution●
Do not exceed the maximum axle
weight rating or the total vehicle
weight rating.●
Even if the total load of occupant’s
weight and the cargo load is less than
the total load capacity, do not apply the
load unevenly. Improper loading may
cause deterioration of steering or
braking control which may cause
death or serious injury. Vehicle load limits Vehicle load limits include total
load capacity, seating capacity,
towing capacity and cargo capac-
ity.
Total load capacity (vehicle
capacity weight): P.446
Total load capacity means the com-
bined weight of occupants, cargo
and luggage.
Seating capacity:5 occupants
(Front 2, Rear 3)
Seating capacity means the maxi-
mum number of occupants whose
estimated average weight is 150 lb.
(68 kg) per person.
Towing capacity
Lexus does not recommend towing
a trailer with your vehicle.
Cargo capacity
Cargo capacity may increase or
decrease depending on the weight
and the number of occupants.
WARNING
■
Overloading the vehicle
Do not overload the vehicle.
It may not only cause damage to the tires,
but also degrade steering and braking
ability, resulting in an accident.
Page 163 of 512

1634-1. Before driving
LS500_OM_(U)_1810 4
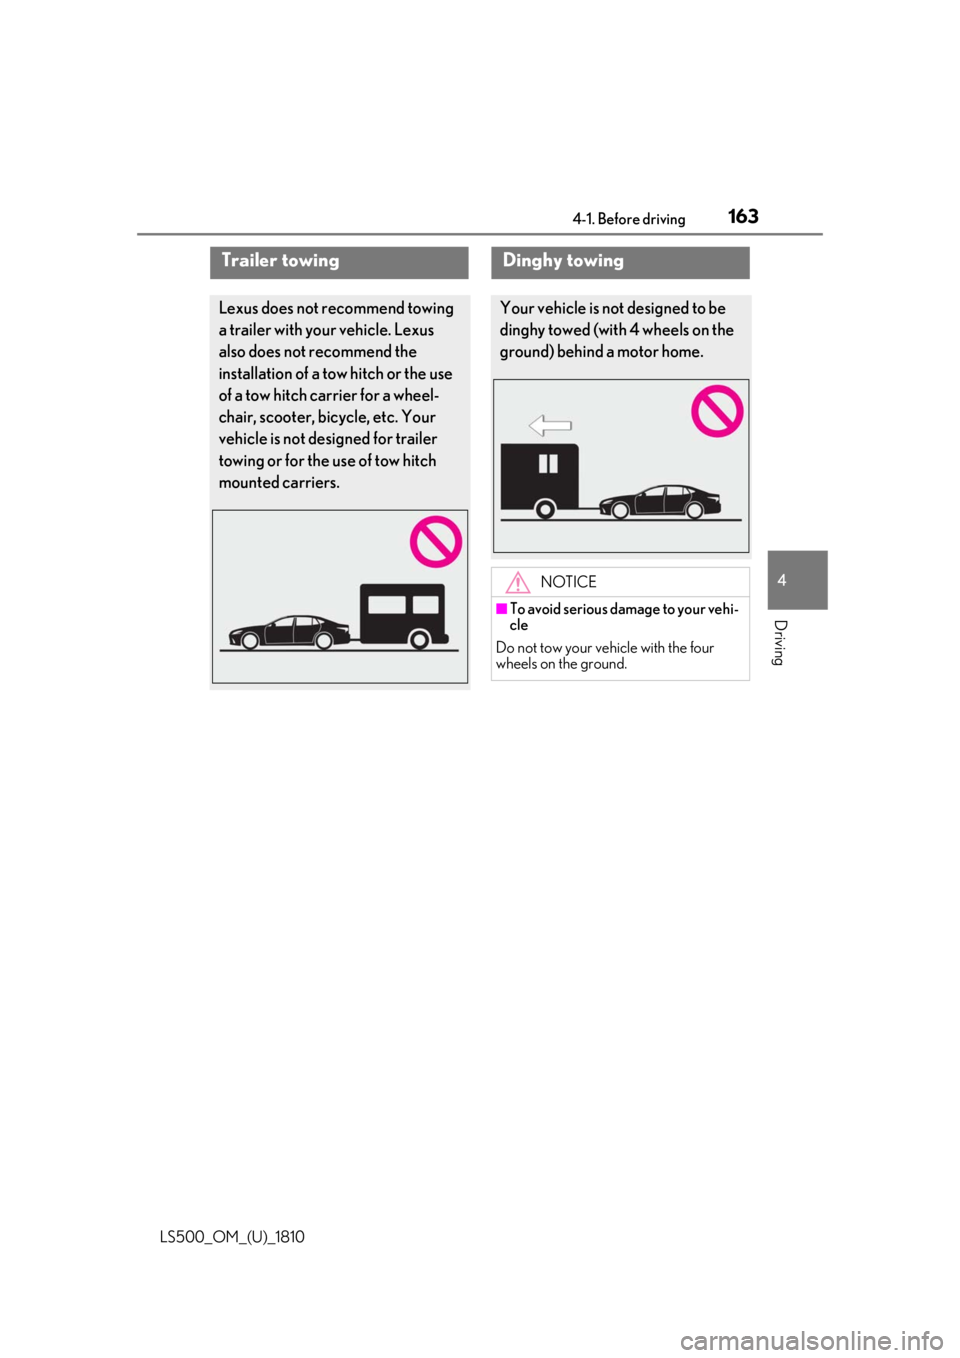
Driving Trailer towing Lexus does not recommend towing
a trailer with your vehicle. Lexus
also does not recommend the
installation of a tow hitch or the use
of a tow hitch carrier for a wheel-
chair, scooter, bicycle, etc. Your
vehicle is not desi gned for trailer
towing or for the use of tow hitch
mounted carriers. Dinghy towing Your vehicle is not designed to be
dinghy towed (with 4 wheels on the
ground) behind a motor home.
NOTICE■
To avoid serious damage to your vehi-
cle
Do not tow your vehicle with the four
wheels on the ground.
Page 169 of 512

1694-2. Driving procedures
LS500_OM_(U)_1810 4
Driving
Shift lever Operate the shift lever gently and securely
in the direction of the arrow on the shift
position indicator.
To shift to N, slide the shift lever in the
direction of the arrow and hold it.
Release the shift lever after each shifting
operation to allow it to return to its regular
position ( ).
Shifting to M is only possible when the shift
position is in D.
When shifting from P to N, D or R, from N,
D, M or R to P, from D or M to R, or from R
to D, ensure that the brake pedal is being
depressed and the vehicle is stationary.
Shift position indicator Meter display:
The current shift position is highlighted.
When any shift position other than D or M
is selected, the arrow toward M and the M
position indicator are displayed in gray.
Shift lever display:WARNING■
When driving on slippery road sur-
faces
Do not accelerate or shift the shift posi-
tion suddenly.
Sudden changes in engine braking may
cause the vehicle to spin or skid, resulting
in an accident.
NOTICE■
Situations where sh ift control system
malfunctions are possible
If any of the following situations occurs,
shift control system malfunctions are
possible.
Immediately stop the vehicle in a safe
place on level ground, apply the parking
brake, and then contact your Lexus
dealer. ●
When the warning message indicating
the shift control syst em appears on the
multi-information display.●
The display indicates that no shift posi-
tion is selected for more than a few
seconds. Shifting the shift lever
A
B
Page 181 of 512

1814-3. Operating the lights and wipers
LS500_OM_(U)_1810 4
Driving lever away from you to turn on the
high beams.Pull the lever toward you to the center
position to turn the high beams off.
2 Pull the lever toward you and
release it to flash the high beams
once.You can flash the high beams with the
headlights on or off.
AFS (Adaptive Front-lighting System)
secures excellent visibility at intersec-
tions and on curves by automatically
adjusting the direction of the light axis
of the headlights according to vehicle
speed and the degree of the tire’s angle
as controlled by steering input. AFS operates at speed s of approximately
6 mph (10 km/h) or higher.
■
Customization
Some functions can be customized.
( P.466)
When the steering wheel or turn
signal lever is operated while the
headlights are on (low beam), a cor-
nering light will turn on and light up
the direction of movement of the
vehicle. The cornering lights are
designed to ensure excellent visibil-
ity when making a turn at an inter-
section. However, when vehicle speed is more than
approximately 22 mph (35 km/h), the cor-
nering lights will not turn on. When the shift position is in R while
the headlights are on (low beam),
both cornering lights will turn on.
This is designed to enhance visibility
when parking. ■
Cornering lights
When the cornering lights are on for more
than 30 minutes, they will turn off automati-
cally.
AFS (Adaptive Front-lighting
System) (if equipped)
Cornering lights