Page 198 of 555

4111
Features of your vehicle
The rear view monitor will activate
with the ignition switch ON, engine
ON and the shift lever in the R
(Reverse) position.This system is a supplemental sys-
tem that shows the area behind the
vehicle on the audio screen while
backing up. If the vehicle is equipped
with a navigation system, then will
display the image on the navigation
screen.
This system is a supplemental sys-
tem only. It is the responsibility of
the driver to always check the
inside/outside rearview mirrors and
the area behind the vehicle before
and while backing up.
Always keep the camera lens clean. If lens is covered with for-
eign matter, the camera may not
operate normally.
REAR VIEW MONITOR (IF EQUIPPED)
OCK047403L
OCK048406N
WARNING - Backing &
using camera
Never rely solely on the rear view
monitor. You must always use
methods of viewing the area
behind you including looking
over both shoulders as well as
continuously checking all three
rear view mirrors. Due to the dif-
ficulty of ensuring that the area
behind you remains clear, always
back up slowly and stop immedi-
ately if you suspect that a per-
son, and especially a child, might
be behind you.
Page 201 of 555

Features of your vehicle
114
4
Battery saver function
The purpose of this feature is to
prevent the battery from being dis-
charged if the lights are left in the
ON position. The system automati-
cally shuts off the parking lights 30
seconds after the ignition key is
removed and the driver’s door is
opened and closed.
With this feature, the parking lights will turn off automatically if the driver
parks on the side of the road at night
and opens the driver’s side door.
If necessary, to keep the parking
lights on when the ignition key is
removed, perform the following:
1) Open the driver-side door.
2) Turn the parking lights OFF and ON again using the light switch
on the steering column.
Daytime running light
The Daytime Running Lights (DRL)
can make it easier for others to see the
front of your vehicle during the day.
DRL can be helpful in many different
driving conditions, and it is especially
helpful after dawn and before sunset.
The DRL system will turn the dedi-
cated lamp OFF when :
1.The headlight switch is on
- It includes that the headlight is onin the dark when the headlight
switch is in the auto light position.
2.The engine is off
3.Engaging the Parking Brake
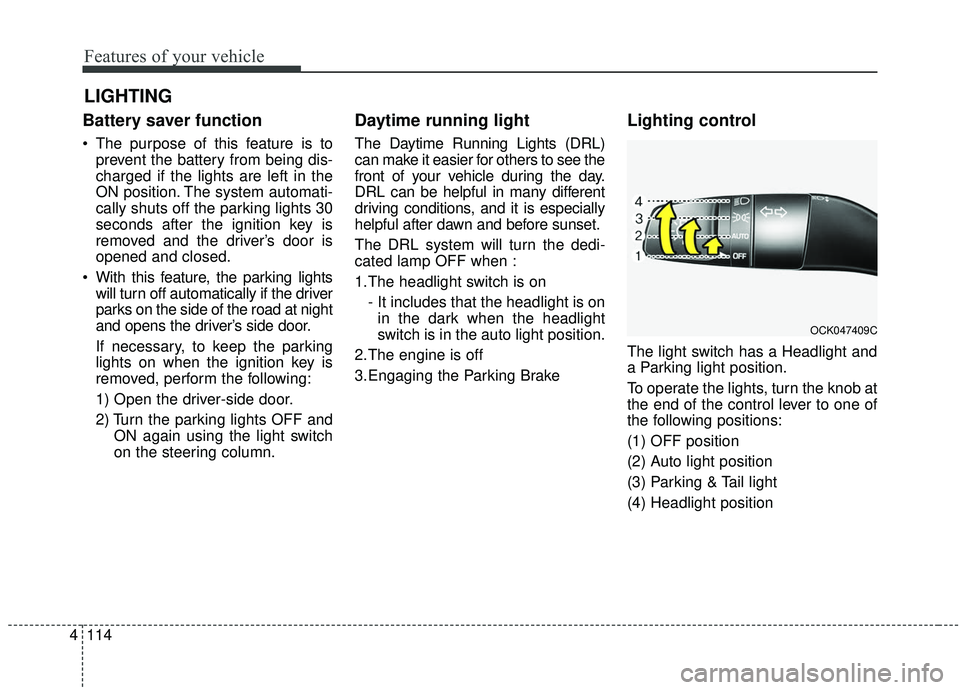
Lighting control
The light switch has a Headlight and
a Parking light position.
To operate the lights, turn the knob at
the end of the control lever to one of
the following positions:
(1) OFF position
(2) Auto light position
(3) Parking & Tail light
(4) Headlight position
LIGHTING
OCK047409C
Page 202 of 555
4115
Features of your vehicle
Parking & Tail light ( )
When the light switch is in the park-
ing light position, the tail, license and
parking lights will turn ON.
Headlight position ( )
When the light switch is in the head-
light position, the head, tail, license
lights will turn ON.
✽ ✽NOTICE
The ignition switch must be in the ON
position to turn on the headlights.
Auto light/DBL position
When the light switch is in the AUTO
light position, the taillights and head-
lights will turn ON or OFF automati-
cally depending on the amount of
light outside the vehicle.
If your vehicle is equipped with the
dynamic bending light (DBL), it will
also operate when the headlamp is
ON.
OCK047411COCK047412COCK047410C
Page 206 of 555

4119
Features of your vehicle
✽ ✽NOTICE
• Do not place any accessories,
stickers or tint on the windshield.
• Have the windshield glass replaced by an authorized dealer.
• Do not remove or damage related parts of the High Beam Assist sys-
tem.
• Be careful that water doesn’t get into the High Beam Assist unit.
• Do not place objects on the dash- board that reflect light such as
mirrors, white paper, etc. The sys-
tem may not be able to function if
sunlight is reflected.
• At times, the High Beam Assist system may not operate due to sys-
tem limitations. Always check the
road conditions for your safety.
When the system does not operate
normally, manually change
between the high beam and low
beam.
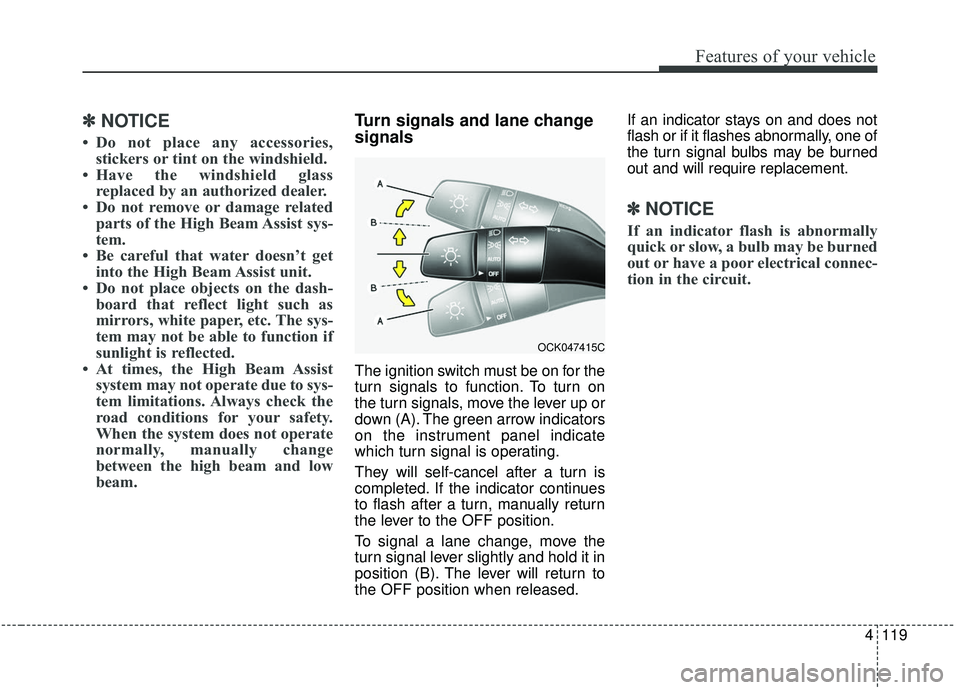
Turn signals and lane change
signals
The ignition switch must be on for the
turn signals to function. To turn on
the turn signals, move the lever up or
down (A). The green arrow indicators
on the instrument panel indicate
which turn signal is operating.
They will self-cancel after a turn is
completed. If the indicator continues
to flash after a turn, manually return
the lever to the OFF position.
To signal a lane change, move the
turn signal lever slightly and hold it in
position (B). The lever will return to
the OFF position when released. If an indicator stays on and does not
flash or if it flashes abnormally, one of
the turn signal bulbs may be burned
out and will require replacement.
✽ ✽
NOTICE
If an indicator flash is abnormally
quick or slow, a bulb may be burned
out or have a poor electrical connec-
tion in the circuit.
OCK047415C
Page 210 of 555
4123
Features of your vehicle
Auto control (if equipped)
The rain sensor (A) located on the
upper end of the windshield glass
senses the amount of rainfall and
controls the wiping cycle for the
proper interval. The more it rains, the
faster the wiper operates. When the
rain stops, the wiper stops.To vary the speed setting, turn the
speed control knob (1).
If the wiper switch is set in AUTO
mode when the ignition switch is ON,
the wiper will operate once to per-
form a self-check of the system. Set
the wiper to OFF position when the
wiper is not in use.
OCK047458N
WARNING
When the ignition switch is ON
and the windshield wiper switch
is placed in the AUTO mode,
use caution in the following sit-
uations to avoid any injury to
the hands or other parts of the
body:
Do not touch the upper end of
the windshield glass facing
the rain sensor.
Do not wipe the upper end of the windshield glass with a
damp or wet cloth.
Do not put pressure on the windshield glass.
Page 213 of 555
Features of your vehicle
126
4
Do not use the interior lights for
extended periods when the engine is
not running.
It may cause battery discharge.Automatic turn off function
(if equipped)
The interior lights automatically turn
off approximately 20 minutes after
the ignition switch is turned off, if the
lights are in the ON position.
If your vehicle is equipped with the
theft alarm system, the interior lights
automatically turn off approximately
5 seconds after the system is armed.
Room lamp
: The light stays on at all times.
INTERIOR LIGHTS
WARNING - Interior
Lights
Do not use the interior lights
when driving in the dark.
Accidents could happen
because the view may be
obscured by interior lights.
OCK047421
Page 214 of 555

4127
Features of your vehicle
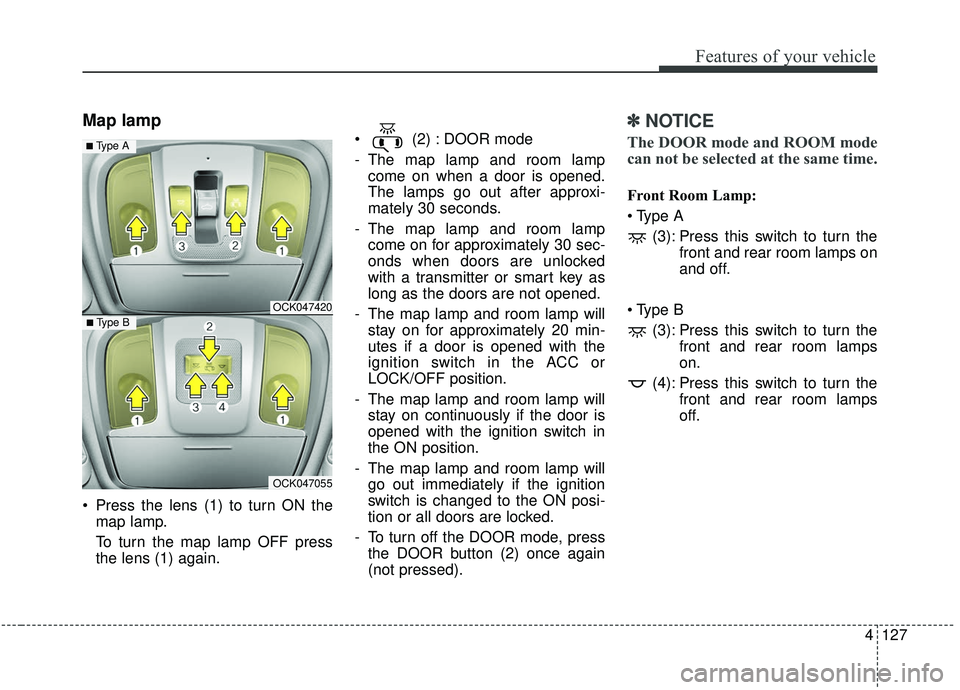
Map lamp
Press the lens (1) to turn ON themap lamp.
To turn the map lamp OFF press
the lens (1) again. (2) : DOOR mode
- The map lamp and room lamp
come on when a door is opened.
The lamps go out after approxi-
mately 30 seconds.
- The map lamp and room lamp come on for approximately 30 sec-
onds when doors are unlocked
with a transmitter or smart key as
long as the doors are not opened.
- The map lamp and room lamp will stay on for approximately 20 min-
utes if a door is opened with the
ignition switch in the ACC or
LOCK/OFF position.
- The map lamp and room lamp will stay on continuously if the door is
opened with the ignition switch in
the ON position.
- The map lamp and room lamp will go out immediately if the ignition
switch is changed to the ON posi-
tion or all doors are locked.
- To turn off the DOOR mode, press the DOOR button (2) once again
(not pressed).
✽ ✽ NOTICE
The DOOR mode and ROOM mode
can not be selected at the same time.
Front Room Lamp:
(3): Press this switch to turn the front and rear room lamps on
and off.
(3): Press this switch to turn the front and rear room lamps
on.
(4): Press this switch to turn the front and rear room lamps
off.
OCK047420
OCK047055
■ Type B
■ Type A
Page 218 of 555

4131
Features of your vehicle
If you want to defrost and defog the
front windshield, refer to “Windshield
defrosting and defogging” in this sec-
tion.
Rear window defroster
The defroster heats the window to
remove frost, fog and thin ice from
the rear window, while the engine is
running.
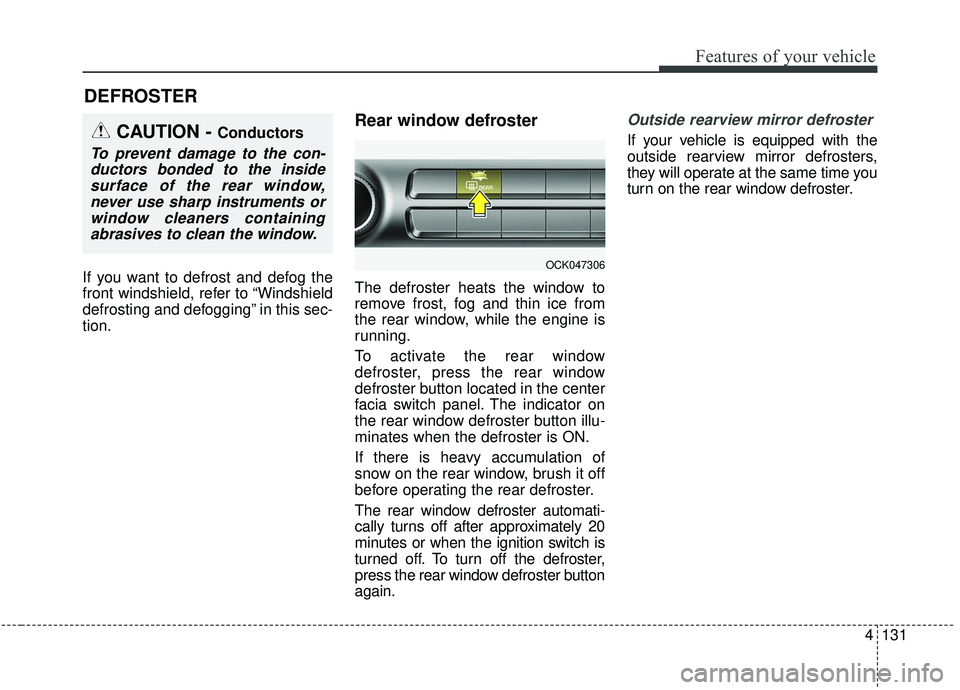
To activate the rear window
defroster, press the rear window
defroster button located in the center
facia switch panel. The indicator on
the rear window defroster button illu-
minates when the defroster is ON.
If there is heavy accumulation of
snow on the rear window, brush it off
before operating the rear defroster.
The rear window defroster automati-
cally turns off after approximately 20
minutes or when the ignition switch is
turned off. To turn off the defroster,
press the rear window defroster button
again.
Outside rearview mirror defroster
If your vehicle is equipped with the
outside rearview mirror defrosters,
they will operate at the same time you
turn on the rear window defroster.
DEFROSTER
CAUTION - Conductors
To prevent damage to the con-ductors bonded to the insidesurface of the rear window,never use sharp instruments orwindow cleaners containingabrasives to clean the window.
OCK047306