2019 KIA SPORTAGE brake
[x] Cancel search: brakePage 189 of 607
Features of your vehicle
102
4
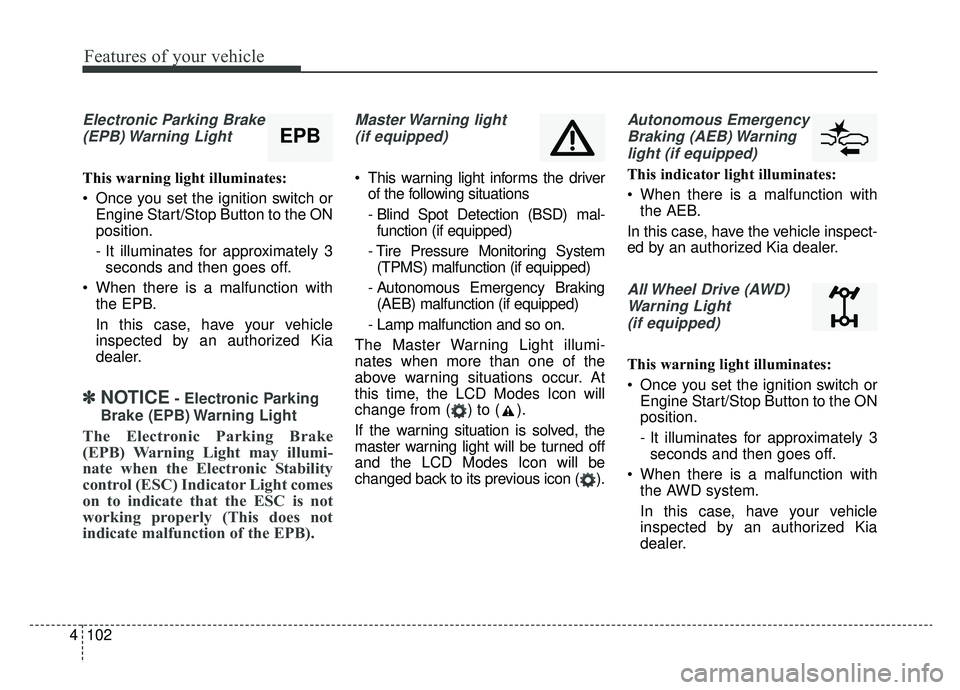
Electronic Parking Brake
(EPB) Warning Light
This warning light illuminates:
Once you set the ignition switch or Engine Start/Stop Button to the ON
position.
- It illuminates for approximately 3seconds and then goes off.
When there is a malfunction with the EPB.
In this case, have your vehicle
inspected by an authorized Kia
dealer.
✽ ✽ NOTICE- Electronic Parking
Brake (EPB) Warning Light
The Electronic Parking Brake
(EPB) Warning Light may illumi-
nate when the Electronic Stability
control (ESC) Indicator Light comes
on to indicate that the ESC is not
working properly (This does not
indicate malfunction of the EPB).
Master Warning light (if equipped)
This warning light informs the driver of the following situations
- Blind Spot Detection (BSD) mal-function (if equipped)
- Tire Pressure Monitoring System (TPMS) malfunction (if equipped)
- Autonomous Emergency Braking (AEB) malfunction (if equipped)
- Lamp malfunction and so on.
The Master Warning Light illumi-
nates when more than one of the
above warning situations occur. At
this time, the LCD Modes Icon will
change from ( ) to ( ).
If the warning situation is solved, the
master warning light will be turned off
and the LCD Modes Icon will be
changed back to its previous icon ( ).
Autonomous Emergency Braking (AEB) Warninglight (if equipped)
This indicator light illuminates:
When there is a malfunction with the AEB.
In this case, have the vehicle inspect-
ed by an authorized Kia dealer.
All Wheel Drive (AWD) Warning Light (if equipped)
This warning light illuminates:
Once you set the ignition switch or Engine Start/Stop Button to the ON
position.
- It illuminates for approximately 3seconds and then goes off.
When there is a malfunction with the AWD system.
In this case, have your vehicle
inspected by an authorized Kia
dealer.
EPB
Page 193 of 607
Features of your vehicle
106
4
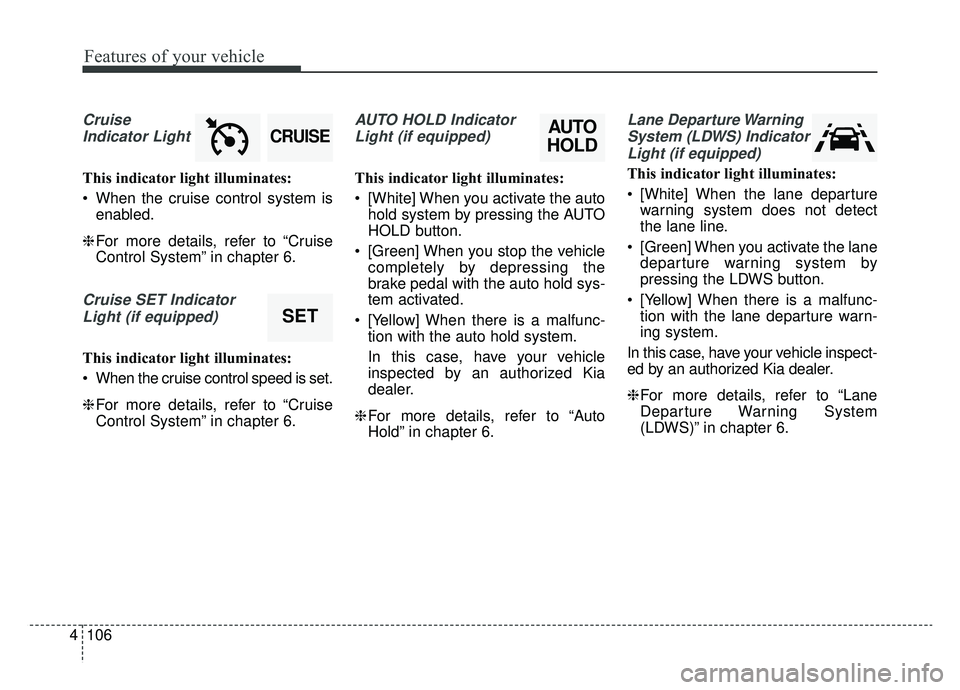
Cruise
Indicator Light
This indicator light illuminates:
When the cruise control system is enabled.
❈ For more details, refer to “Cruise
Control System” in chapter 6.
Cruise SET Indicator
Light (if equipped)
This indicator light illuminates:
When the cruise control speed is set.
❈ For more details, refer to “Cruise
Control System” in chapter 6.
AUTO HOLD Indicator
Light (if equipped)
This indicator light illuminates:
[White] When you activate the auto hold system by pressing the AUTO
HOLD button.
[Green] When you stop the vehicle completely by depressing the
brake pedal with the auto hold sys-
tem activated.
[Yellow] When there is a malfunc- tion with the auto hold system.
In this case, have your vehicle
inspected by an authorized Kia
dealer.
❈ For more details, refer to “Auto
Hold” in chapter 6.
Lane Departure Warning
System (LDWS) IndicatorLight (if equipped)
This indicator light illuminates:
[White] When the lane departure warning system does not detect
the lane line.
[Green] When you activate the lane departure warning system by
pressing the LDWS button.
[Yellow] When there is a malfunc- tion with the lane departure warn-
ing system.
In this case, have your vehicle inspect-
ed by an authorized Kia dealer.
❈ For more details, refer to “Lane
Departure Warning System
(LDWS)” in chapter 6.
AUTO
HOLD
SET
CRUISE
Page 196 of 607
4109
Features of your vehicle
This system will activate whenbacking up with the ignition switch
ON.
If the vehicle is moving at a speed
over 3 mph (5 km/h), the system
may not be activated correctly.
The sensing distance while the back-up warning system is in oper-
ation is approximately 47 in. (120
cm) at the rear bumper center
area, 23.5 in. (60 cm) at the rear
bumper both side area.
When more than two objects are sensed at the same time, the clos-
est one will be recognized first.Types of warning sound
When an object is 47 in. to 24 in.(120 cm to 61 cm) from the rear
bumper: Buzzer beeps intermit-
tently.
When an object is 24 in. to 12 in. (60 cm to 31 cm) from the rear
bumper: Buzzer beeps more fre-
quently.
When an object is within 11 in. (30 cm) of the rear bumper:
Buzzer sounds continuously.
Non-operational conditions of
rear parking assist system
The rear parking assist system
may not operate properly when:
1. Moisture is frozen to the sensor. (It will operate normally once the
moisture clears.
2. The sensor is covered with foreign matter, such as snow or water, or
the sensor cover is blocked. (It will
operate normally when the materi-
al is removed or the sensor is no
longer blocked.)
3. Driving on uneven road surfaces (unpaved roads, gravel, bumps,
gradient).
4. Objects generating excessive noise (vehicle horns, loud motor-
cycle engines, or truck air brakes)
are within range of the sensor.
5. Heavy rain or water spray exists.
6. Wireless transmitters or mobile phones are within range of the
sensor.
7. The sensor is covered with snow.
8. Trailer towing
Page 201 of 607
Features of your vehicle
114
4
✽ ✽
NOTICE
• This system can only sense objects
within the range and location of
the sensors; It can not detect
objects in other areas where sen-
sors are not installed. Also, small
or slim objects, such as poles or
objects located between sensors
may not be detected by the sen-
sors. Always visually check behind
the vehicle when backing up.
• Be sure to inform any drivers of the vehicle that may be unfamiliar
with the system regarding the sys-
tems capabilities and limitations.
Non-operational conditions of
parking assist system
Parking assist system may not
operate normally when:
1. Moisture is frozen to the sensor. (It will operate normally when mois-
ture melts.)
2. Sensor is covered with foreign matter, such as snow or water, or
the sensor cover is blocked. (It will
operate normally when the materi-
al is removed or the sensor is no
longer blocked.)
3. Sensor is stained with foreign mat- ter such as snow or water.
(Sensing range will return to nor-
mal when removed.)
4.The parking assist button is off.
There is a possibility of parking assist system malfunction when:
1. Driving on uneven road surfaces such as unpaved roads, gravel,
bumps, or gradient.
2. Objects generating excessive noise such as vehicle horns, loud
motorcycle engines, or truck air
brakes can interfere with the sen-
sor.
3. Heavy rain or water spray.
4. Wireless transmitters or mobile phones present near the sensor.
5. Sensor is covered with snow.
Page 205 of 607
Features of your vehicle
118
4
Battery saver function
The purpose of this feature is to
prevent the battery from being dis-
charged if the lights are left in the
ON position. The system automati-
cally shuts off the parking lights 30
seconds after the ignition key is
removed and the driver’s door is
opened and closed.
With this feature, the parking lights will turn off automatically if the driver
parks on the side of the road at night
and opens the driver’s side door.
If necessary, to keep the parking
lights on when the ignition key is
removed, perform the following:
1) Open the driver-side door.
2) Turn the parking lights OFF and ON again using the light switch
on the steering column.
Daytime running light
(if equipped)
The Daytime Running Lights (DRL)
can make it easier for others to see the
front of your vehicle during the day.
DRL can be helpful in many different
driving conditions, and it is especially
helpful after dawn and before sunset.
The DRL system turns OFF when:
1. The headlight switch is ON.
2. The engine is OFF.
3. The front fog light is ON.
4. Engaging the Parking Brake
Lighting control
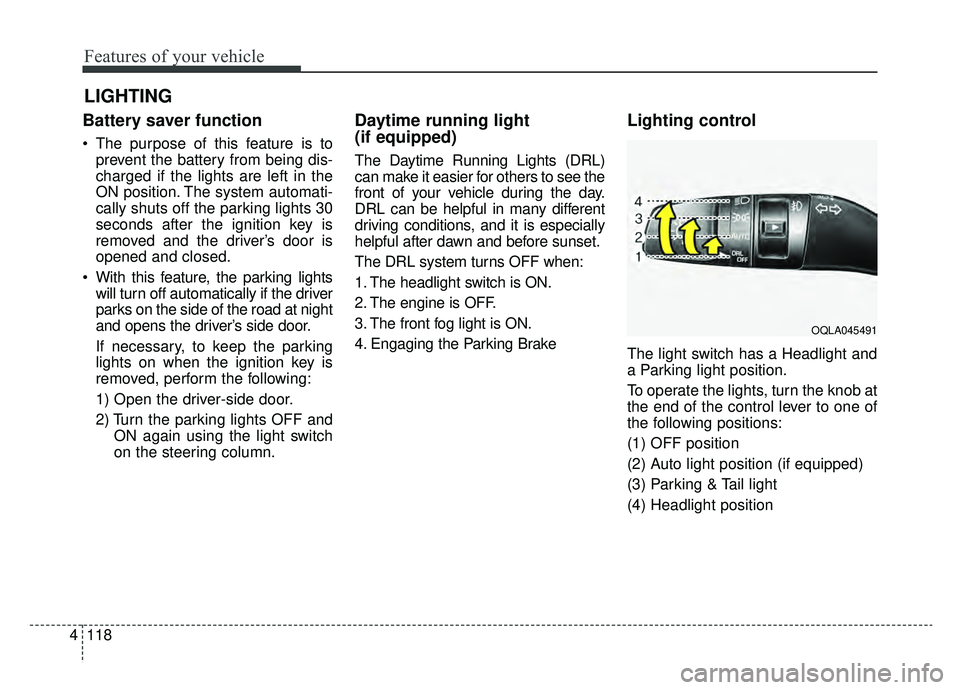
The light switch has a Headlight and
a Parking light position.
To operate the lights, turn the knob at
the end of the control lever to one of
the following positions:
(1) OFF position
(2) Auto light position (if equipped)
(3) Parking & Tail light
(4) Headlight position
LIGHTING
OQLA045491
Page 329 of 607
Driving your vehicle
Before driving . . . . . . . . . . . . . . . . . . . . . . . . . . . . . . 6-4
• Before entering vehicle . . . . . . . . . . . . . . . . . . . . . . . . . 6-4
. . . . . . . . . . . . . . . . . . . . . . . . . . 6-4
. . . . . . . . . . . . . . . . . . . . . . . . . . . . . . . . 6-4
Key positions . . . . . . . . . . . . . . . . . . . . . . . . . . . . . . . 6-6
. . . . . . . . . . . . . . . . . . . . . . 6-6
. . . . . . . . . . . . . . . . . . . . . . . . . 6-6
. . . . . . . . . . . . . . . . . . . . . . . . . . . . 6-7
ENGINE START/STOP button . . . . . . . . . . . . . . . 6-9
. . . . . . . 6-9
. . . . . . . . . . . 6-9
. . . . . . . . . . . . 6-11
Automatic transaxle . . . . . . . . . . . . . . . . . . . . . . . . 6-13
. . . . . . . . . . . . . . . . . . 6-13
. . . . . . . . . . . . . . . . . . . . . . . . 6-19
All wheel drive (AWD) . . . . . . . . . . . . . . . . . . . . . . 6-20
. . . . . . . . . . . . . . . . . . . . . . 6-21
. . . 6-22
. . . . . . . . . . . . . . . 6-23
. . . . . . . . . . . . . . . . . 6-26
Brake system . . . . . . . . . . . . . . . . . . . . . . . . . . . . . . 6-28
. . . . . . . . . . . . . . . . . . . . . . . . . . . . . . . . 6-28
. . . . . . . . . . . . . . . . 6-31
. . . . . . . . . . . . . . . . . . . . . . . . . . . . . . . . 6-38 . . . . . . . . . . . . . . . . . . . . . . . . . . . . 6-40
. . . . . . . . . . . . . . . . . . 6-42
. . . . . . . . . . . . . . . 6-44
. . . . . . . . . . . . 6-48
. . . . . . . . . . . . . . . . . . 6-49
Autonomous emergency braking (AEB) . . . . . . . 6-51
. . . . . . . . . . . . . . . . . . . 6-51
. . . . . . . . 6-54
. . . . . . . . . . . . . . . . . . . . . . . . . . . . . . 6-55
vehicle in front (front radar) . . . . . . . . . . . . . . . . . . 6-56
. . . . . . . . . . . . . . . . . . . . . . . . . . . 6-57
. . . . . . . . . . . . . . . . . . . . . . . 6-58
. . . . . . . . . . . . . . . . . . . . . . . 6-61
. . . . . . . . . . . . . . . . . 6-62
Cruise control system. . . . . . . . . . . . . . . . . . . . . . . 6-66
. . . . . . . . . . . . . . . . . . . . . 6-67
. . . . . . . . . . . . . . . . . . 6-68
. 6-68
do one of the following . . . 6-68
approximately 20 mph (30 km/h) . . . . . . . . . . . . . . 6-69
do one of the following . . 6-69
6
Page 332 of 607
Driving your vehicle
46
Before entering vehicle
• Be sure that all windows, outsidemirror(s), and outside lights are
clean.
Check the condition of the tires.
Check under the vehicle for any sign of leaks.
Be sure there are no obstacles behind you if you intend to back up.
Necessary inspections
Fluid levels, such as engine oil,
engine coolant, brake fluid, and
washer fluid should be checked on a
regular basis, at the exact interval
depending on the fluid. Further
details are provided in chapter 8,
“Maintenance”.
Before starting
Close and lock all doors.
Position the seat so that all con-trols are easily reached.
Buckle your seat belt.
Adjust the inside and outside rearview mirrors.
Be sure that all lights work.
Check all gauges.
Check the operation of warning lights when the ignition switch is
turned to the ON position.
Release the parking brake and make sure the brake warning light
goes out.
For safe operation, be sure you are
familiar with your vehicle and its
equipment.
BEFORE DRIVING
WARNING - Distracted driving
Focus on the road while driving.
The driver's primary responsi-
bility is in the safe and legal
operation of the vehicle. Use of
any handled devices, other
equipment or vehicle systems
that distract the drive should
not be used during vehicle
operation.
Page 334 of 607
Driving your vehicle
66
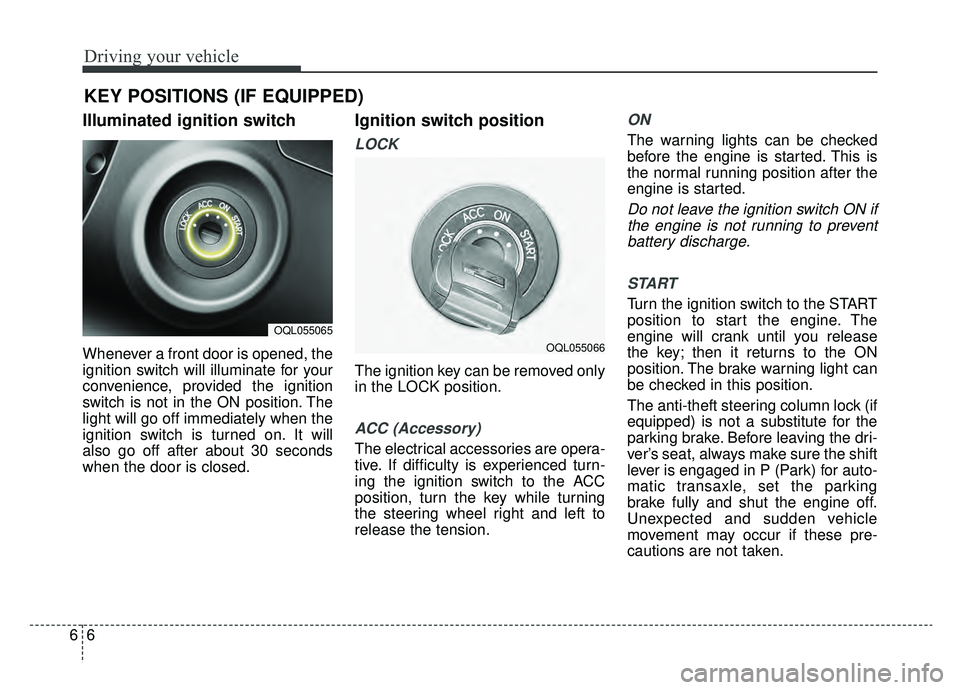
Illuminated ignition switch
Whenever a front door is opened, the
ignition switch will illuminate for your
convenience, provided the ignition
switch is not in the ON position. The
light will go off immediately when the
ignition switch is turned on. It will
also go off after about 30 seconds
when the door is closed.
Ignition switch position
LOCK
The ignition key can be removed only
in the LOCK position.
ACC (Accessory)
The electrical accessories are opera-
tive. If difficulty is experienced turn-
ing the ignition switch to the ACC
position, turn the key while turning
the steering wheel right and left to
release the tension.
ON
The warning lights can be checked
before the engine is started. This is
the normal running position after the
engine is started.
Do not leave the ignition switch ON ifthe engine is not running to preventbattery discharge.
START
Turn the ignition switch to the START
position to start the engine. The
engine will crank until you release
the key; then it returns to the ON
position. The brake warning light can
be checked in this position.
The anti-theft steering column lock (if
equipped) is not a substitute for the
parking brake. Before leaving the dri-
ver’s seat, always make sure the shift
lever is engaged in P (Park) for auto-
matic transaxle, set the parking
brake fully and shut the engine off.
Unexpected and sudden vehicle
movement may occur if these pre-
cautions are not taken.
KEY POSITIONS (IF EQUIPPED)
OQL055065
OQL055066