Page 395 of 455
737
Maintenance
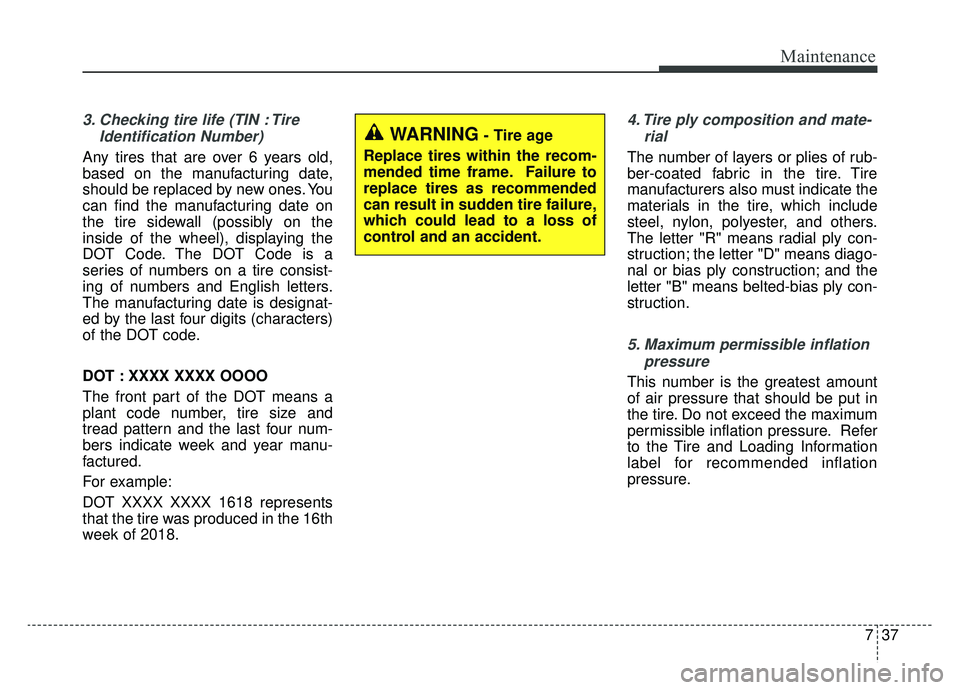
3. Checking tire life (TIN : TireIdentification Number)
Any tires that are over 6 years old,
based on the manufacturing date,
should be replaced by new ones. You
can find the manufacturing date on
the tire sidewall (possibly on the
inside of the wheel), displaying the
DOT Code. The DOT Code is a
series of numbers on a tire consist-
ing of numbers and English letters.
The manufacturing date is designat-
ed by the last four digits (characters)
of the DOT code.
DOT : XXXX XXXX OOOO
The front part of the DOT means a
plant code number, tire size and
tread pattern and the last four num-
bers indicate week and year manu-
factured.
For example:
DOT XXXX XXXX 1618 represents
that the tire was produced in the 16th
week of 2018.
4. Tire ply composition and mate-rial
The number of layers or plies of rub-
ber-coated fabric in the tire. Tire
manufacturers also must indicate the
materials in the tire, which include
steel, nylon, polyester, and others.
The letter "R" means radial ply con-
struction; the letter "D" means diago-
nal or bias ply construction; and the
letter "B" means belted-bias ply con-
struction.
5. Maximum permissible inflationpressure
This number is the greatest amount
of air pressure that should be put in
the tire. Do not exceed the maximum
permissible inflation pressure. Refer
to the Tire and Loading Information
label for recommended inflation
pressure.
WARNING- Tire age
Replace tires within the recom-
mended time frame. Failure to
replace tires as recommended
can result in sudden tire failure,
which could lead to a loss of
control and an accident.
Page 403 of 455
745
Maintenance
FUSES
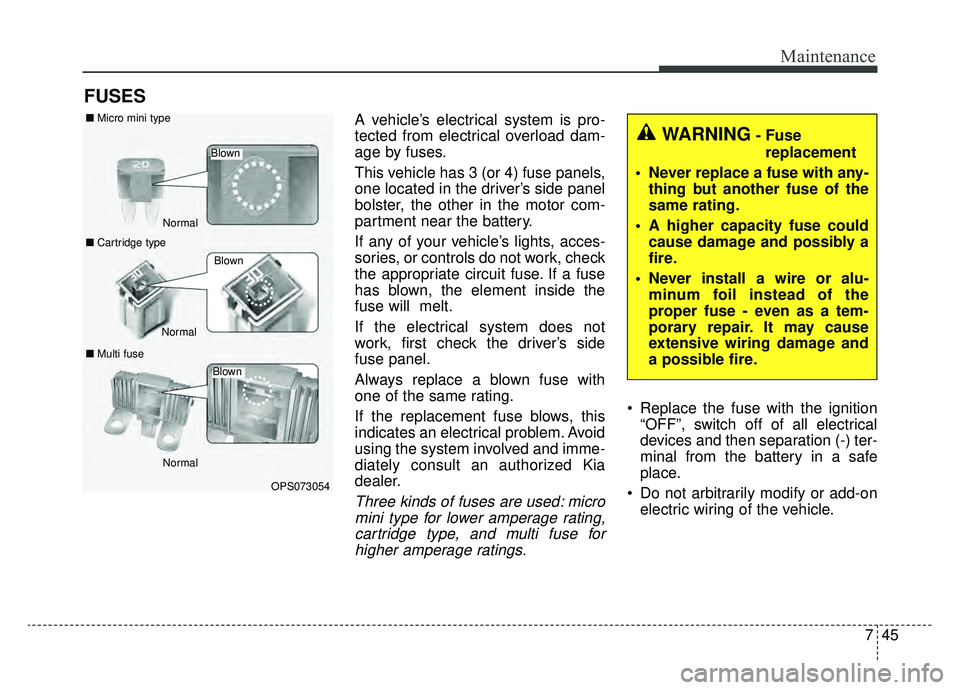
A vehicle’s electrical system is pro-
tected from electrical overload dam-
age by fuses.
This vehicle has 3 (or 4) fuse panels,
one located in the driver’s side panel
bolster, the other in the motor com-
partment near the battery.
If any of your vehicle’s lights, acces-
sories, or controls do not work, check
the appropriate circuit fuse. If a fuse
has blown, the element inside the
fuse will melt.
If the electrical system does not
work, first check the driver’s side
fuse panel.
Always replace a blown fuse with
one of the same rating.
If the replacement fuse blows, this
indicates an electrical problem. Avoid
using the system involved and imme-
diately consult an authorized Kia
dealer.
Three kinds of fuses are used: micromini type for lower amperage rating,cartridge type, and multi fuse forhigher amperage ratings.
Replace the fuse with the ignition “OFF”, switch off of all electrical
devices and then separation (-) ter-
minal from the battery in a safe
place.
Do not arbitrarily modify or add-on electric wiring of the vehicle.
WARNING- Fuse
replacement
Never replace a fuse with any- thing but another fuse of the
same rating.
A higher capacity fuse could cause damage and possibly a
fire.
Never install a wire or alu- minum foil instead of the
proper fuse - even as a tem-
porary repair. It may cause
extensive wiring damage and
a possible fire.
OPS073054
Normal
Normal
■
Micro mini type
■ Cartridge type
■ Multi fuse
Blown
Blown
Normal
Blown
Page 404 of 455
Maintenance
46
7
✽ ✽
NOTICE
The actual fuse/relay panel label
may differ depending on equip-
ment/options.
CAUTION - Fuse
Replacement
Do not use a screwdriver or anyother metal object to removefuses because it may cause ashort circuit and damage thesystem.
CAUTION - Fuse
Replacement
Do not input any other objectsexcept fuses or relays intofuse/relay terminals such as adriver or wiring. It may causecontact failure and system mal-function.
WARNING- Fuse fire
Do not remove fuses, relays and
terminals fastened with bolts or
nuts. The fuses, relays and ter-
minals may be fastened incom-
pletely, and it may cause a pos-
sible fire. If fuses, relays and
terminals fastened with bolts or
nuts are blown, we recommend
that you consult with an author-
ized Kia dealer.WARNING- Electrical Fire
Always ensure replacements fuses and relays are securely
fastened when installed.
Failure to do so can result in a
vehicle fire.
We recommend that you do not remove fuses, relays and termi-
nals that are fastened with
bolts or nuts. If they are not
completely re-installed, such
looseness may cause electrical
arcing and a possible fire. If
fuses, relays and terminals fas-
tened with bolts or nuts need
replacement, consult with an
authorized Kia dealer.
Page 415 of 455
757
Maintenance
LIGHT BULBS
Use only the bulbs of the specifiedwattage.
If you don’t have necessary tools, the correct bulbs and the expertise,
consult an authorized Kia dealer. In
many cases, it is difficult to replace
vehicle light bulbs because other
parts of the vehicle must be
removed before you can get to the
bulb. This is especially true if you
have to remove the headlight
assembly to get to the bulb(s).
Removing/installing the headlight
assembly can result in damage to
the vehicle.
Do not install additional bulb or LED. If you install additional bulbs
or LEDs, the lamps may not oper-
ate properly and there may be
problems in the fuse box or electric
wiring system.
WARNING - Lights
Prior to working on the light,
firmly apply the parking brake,
ensure that the ignition switch
is turned to the LOCK position
and turn off the lights to avoid
sudden movement of the vehi-
cle and burning your fingers or
receiving an electric shock.
CAUTION- Light
replacement
Be sure to replace the burned-out bulb with one of the samewattage rating. Otherwise, itmay cause damage to the fuseor electric wiring system.
Page 416 of 455
Maintenance
58
7
Front light replacement
(1) Headlight (High)
(2) Headlight (Low)
(3) Front position light/
Daytime running light
(if equipped)
(4) Front turn signal
(5) Front side marker light
(6) Front fog light (if equipped) If the headlight aiming adjustment is
necessary after the headlight
assembly is reinstalled, consult an
authorized Kia dealer.
OPSE074016
OHD076046
WARNING- Halogen
bulbs
Handle halogen bulbs with care.
Halogen bulbs contain pres- surized gas that will produce
flying pieces of glass if bro-
ken.
Page 424 of 455
Maintenance
66
7
Interior light bulb replacement
1. Using a flat-blade screwdriver,
gently pry the lens from the interi-
or light housing.
2. Remove the bulb by pulling it straight out.
3. Install a new bulb in the socket.
4. Align the lens tabs with the interior light housing notches and snap
the lens into place.
Map lamp
Room lamp
Glove box lamp
Luggage lamp
Vanity mirror lamp
OPS073041/OPS073042/OPS073043/ OPS073044/OXM079041
WARNING- Interior lights
Prior to working on the Interior
Lights, ensure that the “OFF”
button is depressed to avoid
burning your fingers or receiv-
ing an electric shock.
CAUTION
Be careful not to dirty or dam- age the lens, lens tab, and plas-tic housings.
Page 425 of 455
767
Maintenance
APPEARANCE CARE
Exterior care
Exterior general caution
It is very important to follow the label
directions when using any chemical
cleaner or polish. Read all warning
and caution statements that appear
on the label.
Finish maintenance
Washing
To help protect your vehicle’s finish
from rust and deterioration, wash it
thoroughly and frequently at least once
a month with lukewarm or cold water.
If you use your vehicle for off-road
driving, you should wash it after each
off-road trip. Pay special attention to
the removal of any accumulation of
salt, dirt, mud, and other foreign mate-
rials. Make sure the drain holes in the
lower edges of the doors and rocker
panels are kept clear and clean.
Insects, tar, tree sap, bird droppings,
industrial pollution and similar
deposits can damage your vehicle’s
finish if not removed immediately.Even prompt washing with plain
water may not completely remove all
these deposits. A mild soap, safe for
use on painted surfaces, may be
used.
After washing, rinse the vehicle thor-
oughly with lukewarm or cold water.
Do not allow soap to dry on the fin-
ish.
After washing the vehicle, test the
brakes while driving slowly to see if
they have been affected by water. If
braking performance is impaired, dry
the brakes by applying them lightly
while maintaining a slow forward
speed.
CAUTION
Do not use strong soap, chem-
ical detergents or hot water,and do not wash the vehicle indirect sunlight or when thebody of the vehicle is warm.
Be careful when washing the side windows of your vehicle.Especially, with high-pressurewater. Water may leak throughthe windows and wet the inte-rior.
To prevent damage to the plastic parts and lamps, donot clean with chemical sol-vents or strong detergents.
Page 426 of 455
Maintenance
68
7
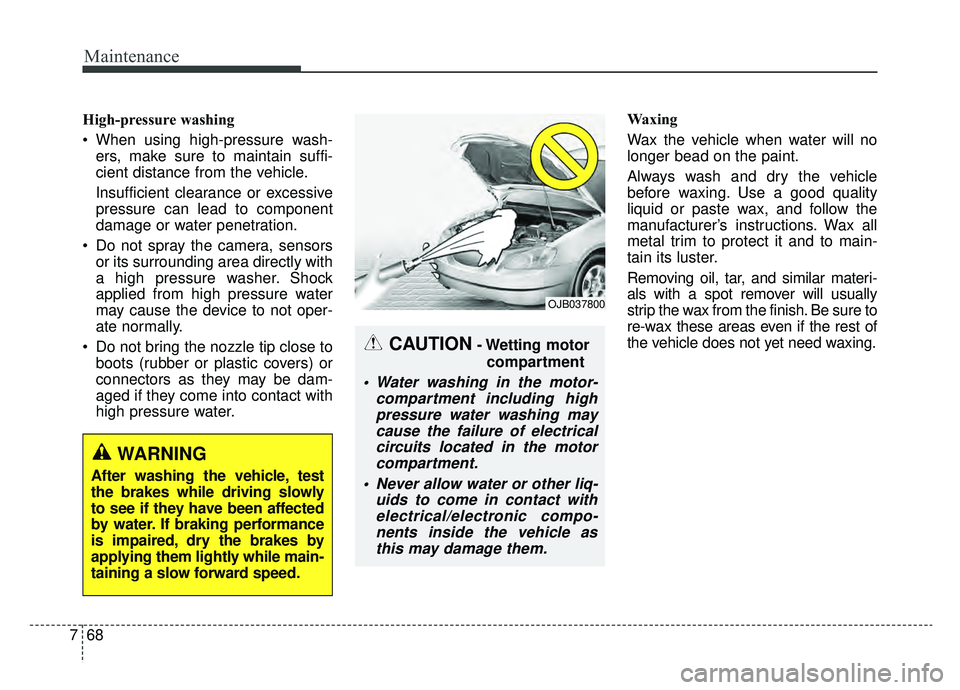
High-pressure washing
When using high-pressure wash-
ers, make sure to maintain suffi-
cient distance from the vehicle.
Insufficient clearance or excessive
pressure can lead to component
damage or water penetration.
Do not spray the camera, sensors or its surrounding area directly with
a high pressure washer. Shock
applied from high pressure water
may cause the device to not oper-
ate normally.
Do not bring the nozzle tip close to boots (rubber or plastic covers) or
connectors as they may be dam-
aged if they come into contact with
high pressure water. Waxing
Wax the vehicle when water will no
longer bead on the paint.
Always wash and dry the vehicle
before waxing. Use a good quality
liquid or paste wax, and follow the
manufacturer’s instructions. Wax all
metal trim to protect it and to main-
tain its luster.
Removing oil, tar, and similar materi-
als with a spot remover will usually
strip the wax from the finish. Be sure to
re-wax these areas even if the rest of
the vehicle does not yet need waxing.
CAUTION- Wetting motor
compartment
Water washing in the motor- compartment including highpressure water washing maycause the failure of electricalcircuits located in the motorcompartment.
Never allow water or other liq- uids to come in contact withelectrical/electronic compo-nents inside the vehicle asthis may damage them.
OJB037800
WARNING
After washing the vehicle, test
the brakes while driving slowly
to see if they have been affected
by water. If braking performance
is impaired, dry the brakes by
applying them lightly while main-
taining a slow forward speed.