2019 KIA SEDONA instrument cluster
[x] Cancel search: instrument clusterPage 15 of 593

INSTRUMENT PANEL OVERVIEW
25
Your vehicle at a glance
1. Electronic parking brake (EPB) ON/OFF button ....................................5-24
2. Driver’s front air bag ............................3-75
3. Horn.....................................................4-73
4. Instrument cluster ................................4-89
5. Wiper and washer control lever .........4-145
6. Ignition switch ........................................5-7 Engine start/stop button ......................5-10
7. Cruise control button ...........................5-59 Smart cruise control button .................5-63
8. Audio .................................................4-210
9. Hazard warning flasher .........................6-2
10. Climate control system.........4-152, 4-168
11. Shift lever...........................................5-14
12. Seat warmer ....................................4-196 Air ventilation seat ...........................4-197
13. Steering wheel warmer ON/OFF button ..................................4-72
14. Active ECO button .............................5-82 Drive mode button .............................5-83
15. Parking distance warning ON/OFF button ................................4-129
16. 360° camera monitoring system......4-134
17. Center console storage box ............4-193
18. Sunglasses holder ...........................4-194
19. USB charger ....................................4-201
20. Power outlet.....................................4-198
21. AC inverter ......................................4-199
22. Glove box ........................................4-193
23. Passenger's front air bag ..................3-75
24. Auto hold ON/OFF button..................5-30
OYP018004N
❈ The actual instrument panel in the vehicle may differ from the illustration
Page 106 of 593

Fuel filler lid . . . . . . . . . . . . . . . . . . . . . . . . . . . . . . 4-60
• Opening the fuel filler lid . . . . . . . . . . . . . . . . . . . . . . 4-60
• Closing the fuel filler lid . . . . . . . . . . . . . . . . . . . . . . . 4-60
• Emergency fuel filler lid release . . . . . . . . . . . . . . . . 4-63
Sunroof . . . . . . . . . . . . . . . . . . . . . . . . . . . . . . . . . . 4-64\
• Sliding the sunroof . . . . . . . . . . . . . . . . . . . . . . . . . . . 4-65
• Tilting the sunroof (for front sunroof) . . . . . . . . . . . 4-67
• Sunshade. . . . . . . . . . . . . . . . . . . . . . . . . . . . . . . . \
. . . . 4-67
• Resetting the sunroof . . . . . . . . . . . . . . . . . . . . . . . . . 4-68
• Rear sunroof lock . . . . . . . . . . . . . . . . . . . . . . . . . . . . 4-68
• Sunroof open warning. . . . . . . . . . . . . . . . . . . . . . . . . 4-69
Steering wheel . . . . . . . . . . . . . . . . . . . . . . . . . . . . . 4-70
• Power steering . . . . . . . . . . . . . . . . . . . . . . . . . . . . . . . 4-70
• Electric power steering . . . . . . . . . . . . . . . . . . . . . . . . 4-70
• Tilt and telescopic steering . . . . . . . . . . . . . . . . . . . . . 4-71
• Heated steering wheel . . . . . . . . . . . . . . . . . . . . . . . . . 4-72
• Horn . . . . . . . . . . . . . . . . . . . . . . . . . . . . . . . . . . . . \
. . . 4-73
Mirrors . . . . . . . . . . . . . . . . . . . . . . . . . . . . . . . . . . 4-74\
• Inside rearview mirror . . . . . . . . . . . . . . . . . . . . . . . . 4-74
• Outside rearview mirror. . . . . . . . . . . . . . . . . . . . . . . 4-84
Instrument cluster . . . . . . . . . . . . . . . . . . . . . . . . . 4-89
• Instrument cluster control . . . . . . . . . . . . . . . . . . . . . 4-90
• LCD display control . . . . . . . . . . . . . . . . . . . . . . . . . . 4-90
• Gauges . . . . . . . . . . . . . . . . . . . . . . . . . . . . . . . . . . . . \
. 4-91
• Transaxle Shift Indicator . . . . . . . . . . . . . . . . . . . . . . 4-94
LCD display . . . . . . . . . . . . . . . . . . . . . . . . . . . . . . 4-95
• LCD modes. . . . . . . . . . . . . . . . . . . . . . . . . . . . . . . . . . 4-95\
Trip modes (Trip computer) . . . . . . . . . . . . . . . . . 4-96
• Trip modes . . . . . . . . . . . . . . . . . . . . . . . . . . . . . . . . . . 4-96\
• Fuel economy . . . . . . . . . . . . . . . . . . . . . . . . . . . . . . . . 4-96
• Accumulated driving information mode . . . . . . . . . . 4-98
• One time driving information mode . . . . . . . . . . . . . 4-98
• Digital speedometer . . . . . . . . . . . . . . . . . . . . . . . . . . . 4-99
• Smart shift . . . . . . . . . . . . . . . . . . . . . . . . . . . . . . . . . . 4-99\
• Turn by turn mode . . . . . . . . . . . . . . . . . . . . . . . . . . . 4-99
• Assist mode. . . . . . . . . . . . . . . . . . . . . . . . . . . . . . . . . 4-100
• Distance to empty . . . . . . . . . . . . . . . . . . . . . . . . . . . 4-102
• User settings mode. . . . . . . . . . . . . . . . . . . . . . . . . . . 4-103
• Warning messages . . . . . . . . . . . . . . . . . . . . . . . . . . . 4-107
Warning and indicator lights . . . . . . . . . . . . . . . 4-113
• Warning lights . . . . . . . . . . . . . . . . . . . . . . . . . . . . . . 4-113
• Indicator lights. . . . . . . . . . . . . . . . . . . . . . . . . . . . . . 4-120
Parking distance warning-reverse . . . . . . . . . . . 4-125
• Operation of the parking distance warning-reverse . 4-125
• Non-operational conditions of the parking distance
warning-reverse . . . . . . . . . . . . . . . . . . . . . . . . . . . . 4-126
• Parking distance warning-reverse precautions . . . 4-127
• Self-diagnosis . . . . . . . . . . . . . . . . . . . . . . . . . . . . . . . 4-128
4
Page 175 of 593

471
Features of your vehicle
✽ ✽NOTICE
The following symptoms may occur
during normal vehicle operation:
• The steering effort is high immedi-
ately after turning the ignition
switch on. This happens as the sys-
tem performs the EPS system
diagnostics. When the diagnostics
is completed, the steering wheel
will return to its normal condition.
• A click noise may be heard from the EPS relay after the ignition
switch is turned to the ON or
LOCK position.
• Motor noise may be heard when the vehicle is at a stop or at a low
driving speed.
• The steering effort increases if the steering wheel is rotated continu-
ously when the vehicle is not in
motion. However, after a few min-
utes, it will return to its normal
conditions.
• When you operate the steering wheel in low temperature, abnor-
mal noise could occur. If tempera-
ture rises, the noise will disappear.
This is a normal condition.
If the Electric Power Steering System
does not operate normally, the warn-
ing light will illuminate on the instru-
ment cluster. The steering wheel may
become difficult to control or operate
abnormally. Take your vehicle to an
authorized Kia dealer and have the
vehicle checked as soon as possible.Tilt and telescopic steering
Tilt and telescopic steering allows
you to adjust the steering wheel
before you drive. You can also raise it
to give your legs more room when
you exit and enter the vehicle.
The steering wheel should be posi-
tioned so that it is comfortable for
you to drive, while permitting you to
see the instrument panel warning
lights and gauges.
WARNING
Never adjust the angle of the
steering wheel while driving.
You may lose steering control
and cause severe personal
injury, death or accidents.
Page 193 of 593

489
Features of your vehicle
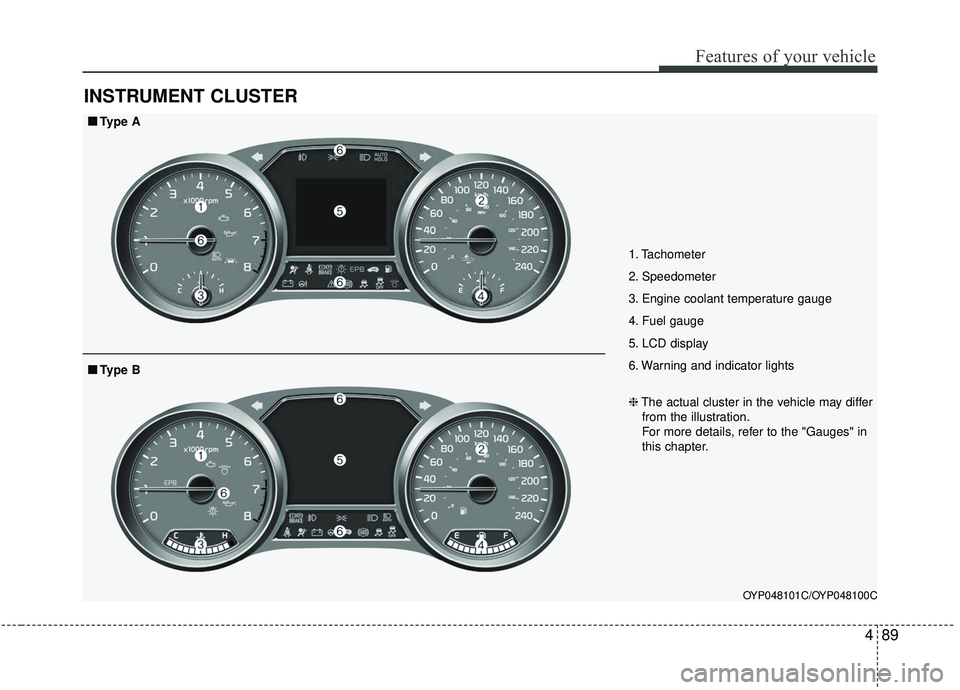
INSTRUMENT CLUSTER
1. Tachometer
2. Speedometer
3. Engine coolant temperature gauge
4. Fuel gauge
5. LCD display
6. Warning and indicator lights
OYP048101C/OYP048100C
■ ■Type A
❈The actual cluster in the vehicle may differ
from the illustration.
For more details, refer to the "Gauges" in
this chapter.
■ ■ Type B
Page 194 of 593

Features of your vehicle
90
4
Instrument Cluster Control
Adjusting Instrument Cluster
Illumination
The brightness of the instrument
panel illumination is changed by
pressing the illumination control button
(“+” or “-”) when the ignition switch or
Engine Start/Stop button is ON, or the
tale lights are turned on. If you hold the illumination control
button (“+” or “-”), the brightness will
be changed continuously.
If the brightness reaches to the maximum or minimum level, an
alarm will sound.
LCD Display Control
The LCD display modes can be
changed by using the control buttons
on the steering wheel.OYP044059K
OYP048381N
OYP048060N
Page 306 of 593

Features of your vehicle
202
4
The wireless charging system is
designed for one smart phone
equipped with QI per single usage
only. Please refer to the smart phone
accessory cover or the smart phone
manufacturer homepage to check
whether your smart phone supports
QI function.Wireless smart phone charging
1. Remove any object on the smart
phone charging pad including the
smart key. If there is any foreign
object on the pad other than a
smart phone, the wireless charging
function may not operate properly.
2. Place the smart phone on the cen- ter of the wireless charging pad.
3. The indicator light will change to orange once the wireless charging
begins. After the charging is com-
plete, the orange light will change
to green.
4. You can choose to turn the wireless charging function to either ON or
OFF by selecting the USM on the
instrument cluster. (Please refer to
“Instrument Cluster” for details).
CAUTION
-
Metal in Wireless Charging
System
If any metallic object such ascoins is located between thewireless charging system andthe smart phone, the chargingmay be disrupted. Also, themetallic object may heat up andpotentially damage the chargingsystem. If there is any metallicobject between the smart phoneand the charging pad, immedi-ately remove the smart phone.Remove the metallic object afterit has cooled down.
CAUTION
-
Liquid in Wireless Smart
Phone Charger
To prevent liquid from damag-ing the wireless smart phonecharging system in your vehi-cle, securely close the traycover when charging yourphone.
Page 354 of 593

Driving your vehicle
40
5
✽ ✽
NOTICE
• When operating the vehicle on a
dynamometer, ensure that the
ESC is turned off (ESC OFF light
illuminated). If the ESC is left on,
it may prevent the vehicle speed
from increasing, and result in false
diagnosis.
• Turning the ESC off does not affect ABS or brake system opera-
tion.
Vehicle stability management
(VSM) (if equipped)
This system provides further
enhancements to vehicle stability
and steering responses when a vehi-
cle is driving on a slippery road or a
vehicle detects changes in coeffi-
cient of friction between right wheels
and left wheels when braking.
VSM operation
When the VSM is in operation, ESC
indicator light ( ) blinks.
When the vehicle stability manage-
ment is operating properly, you can
feel a slight pulsation in the vehicle
and/or abnormal steering responses
(EPS). This is only the effect of brake
and EPS control and indicates noth-
ing unusual.
The VSM does not operate when:
Driving on bank road such as gra-
dient or incline
Driving in reverse
ESC OFF indicator light ( ) remains on the instrument cluster
EPS indicator light remains on the instrument cluster
WARNING- Tire/
Wheel size
When replacing tires and
wheels, make sure they are the
same size as the original tires
and wheels installed. Driving
with varying tire or wheel sizes
may diminish any supplemental
safety benefits of the VSM sys-
tem.
Page 359 of 593

545
Driving your vehicle
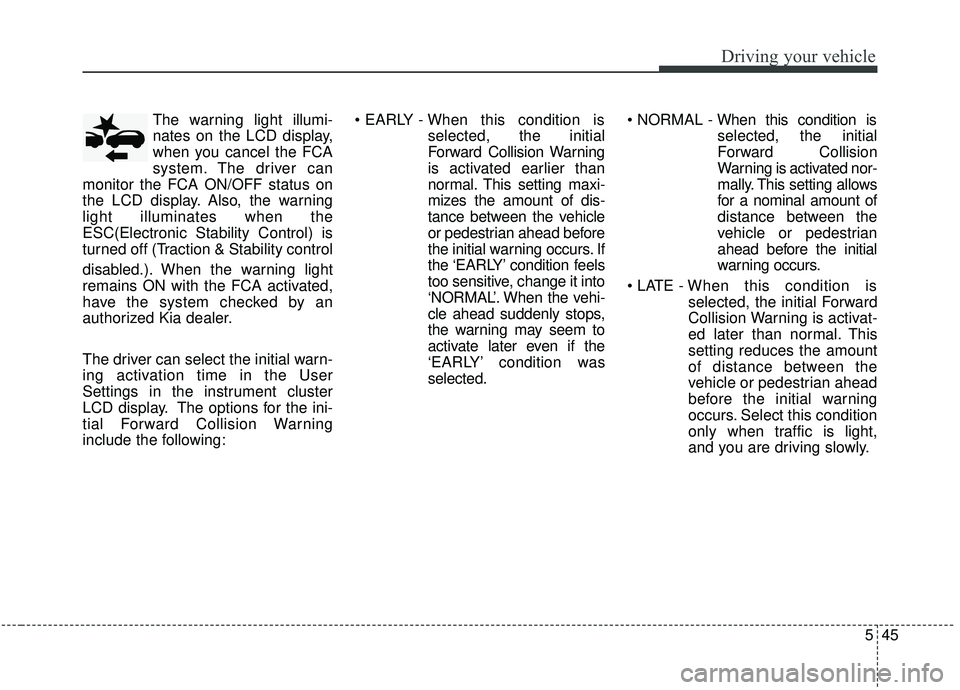
The warning light illumi-
nates on the LCD display,
when you cancel the FCA
system. The driver can
monitor the FCA ON/OFF status on
the LCD display. Also, the warning
light illuminates when the
ESC(Electronic Stability Control) is
turned off (Traction & Stability control
disabled.). When the warning light
remains ON with the FCA activated,
have the system checked by an
authorized Kia dealer.
The driver can select the initial warn-
ing activation time in the User
Settings in the instrument cluster
LCD display. The options for the ini-
tial Forward Collision Warning
include the following:
selected, the initial
Forward Collision Warning
is activated earlier than
normal. This setting maxi-
mizes the amount of dis-
tance between the vehicle
or pedestrian ahead before
the initial warning occurs. If
the ‘EARLY’ condition feels
too sensitive, change it into
‘NORMAL’. When the vehi-
cle ahead suddenly stops,
the warning may seem to
activate later even if the
‘EARLY’ condition was
selected.
selected, the initial
Forward Collision
Warning is activated nor-
mally. This setting allows
for a nominal amount of
distance between the
vehicle or pedestrian
ahead before the initial
warning occurs.
selected, the initial Forward
Collision Warning is activat-
ed later than normal. This
setting reduces the amount
of distance between the
vehicle or pedestrian ahead
before the initial warning
occurs. Select this condition
only when traffic is light,
and you are driving slowly.