2019 KIA SEDONA ECU
[x] Cancel search: ECUPage 460 of 593
617
What to do in an emergency
10. To install the wheel, hold it on thestuds, put the wheel nuts on the
studs and tighten them finger
tight. Jiggle the tire to be sure it is
completely seated, then tighten
the nuts as much as possible
with your fingers again.
11. Insert the wrench into the jack and lower the vehicle to the
ground by turning the wheel nut
wrench counterclockwise.
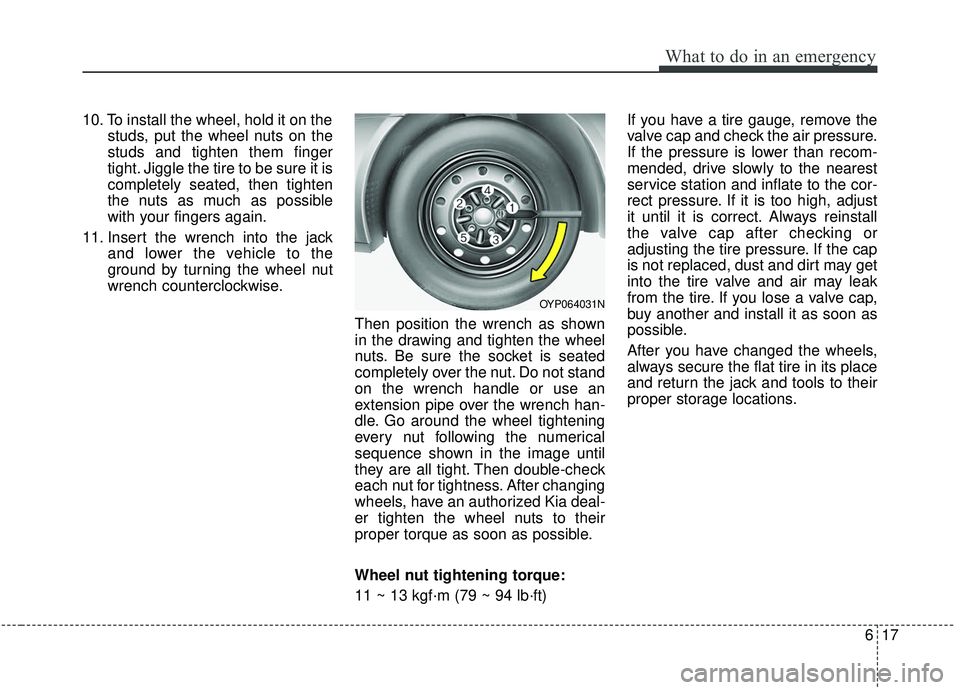
Then position the wrench as shown
in the drawing and tighten the wheel
nuts. Be sure the socket is seated
completely over the nut. Do not stand
on the wrench handle or use an
extension pipe over the wrench han-
dle. Go around the wheel tightening
every nut following the numerical
sequence shown in the image until
they are all tight. Then double-check
each nut for tightness. After changing
wheels, have an authorized Kia deal-
er tighten the wheel nuts to their
proper torque as soon as possible.
Wheel nut tightening torque:
11 ~ 13 kgf·m (79 ~ 94 lb·ft) If you have a tire gauge, remove the
valve cap and check the air pressure.
If the pressure is lower than recom-
mended, drive slowly to the nearest
service station and inflate to the cor-
rect pressure. If it is too high, adjust
it until it is correct. Always reinstall
the valve cap after checking or
adjusting the tire pressure. If the cap
is not replaced, dust and dirt may get
into the tire valve and air may leak
from the tire. If you lose a valve cap,
buy another and install it as soon as
possible.
After you have changed the wheels,
always secure the flat tire in its place
and return the jack and tools to their
proper storage locations.
OYP064031N
Page 461 of 593
What to do in an emergency
18
6
Note that most lug nuts do not have
metric threads. Be sure to use
extreme care in checking for thread
style before installing aftermarket lug
nuts or wheels. If in doubt, consult an
authorized Kia dealer. To prevent the jack, wheel lug nut
wrench and spare tire from rattling
while the vehicle is in motion, store
them properly.
Check the inflation pressures as
soon as possible after installing the
spare tire. Adjust it to the specified
pressure, if necessary. Refer to
“Tires and wheels” in section 8.
Important - use of compact spare
tire (if equipped)
Your vehicle is equipped with a com-
pact spare tire. This compact spare
tire takes up less space than a regu-
lar-size tire. This tire is smaller than a
conventional tire and is designed for
temporary use only.
You should drive carefully when the compact spare is in use. The
compact spare should be replaced
by the proper conventional tire and
rim at the first opportunity.
The operation of this vehicle is not recommended with more than one
compact spare tire in use at the
same time.
CAUTION- Reusing lug
nuts
Make certain during wheelremoval that the same nuts thatwere removed are reinstalled -or, if replaced, that nuts withmetric threads and the samechamfer configuration are used.Your vehicle has metric threadson the wheel studs and nuts.Installation of a non-metricthread nut on a metric stud willnot secure the wheel to the hubproperly and will damage thestud so that it must be replaced.
WARNING- Wheel studs
If the studs are damaged, they
may lose their ability to retain
the wheel. This could lead to the
loss of the wheel and a collision
resulting in serious injuries.
Page 465 of 593

What to do in an emergency
22
6
When towing your vehicle in an
emergency without wheel dollies :
1. Set the ignition switch in the ACC
position.
2. Place the transaxle shift lever in N (Neutral).
3. Release the parking brake.Removable towing hook (front)
(if equipped)
1.Remove the towing hook from the tool case.
2.Remove the hole cover pressing the lower part of the cover on the
front bumper.
3.Install the towing hook by turning it clockwise into the hole until it is
fully secured.
4.Remove the towing hook and install the cover after use.
CAUTION - Towing gear
position
Failure to place the transaxleshift lever in N (Neutral) maycause internal damage to thetransaxle.
CAUTION - Towing
• Do not tow the vehicle back- wards with the front wheels onthe ground as this may causedamage to the vehicle.
Do not tow with sling-type equipment. Use wheel lift orflatbed equipment.
OYP064026N
OYP044260N
OYP068009N
Page 466 of 593
623
What to do in an emergency
Emergency towing
If towing is necessary, we recom-
mend you to have it done by an
authorized Kia dealer or a com-
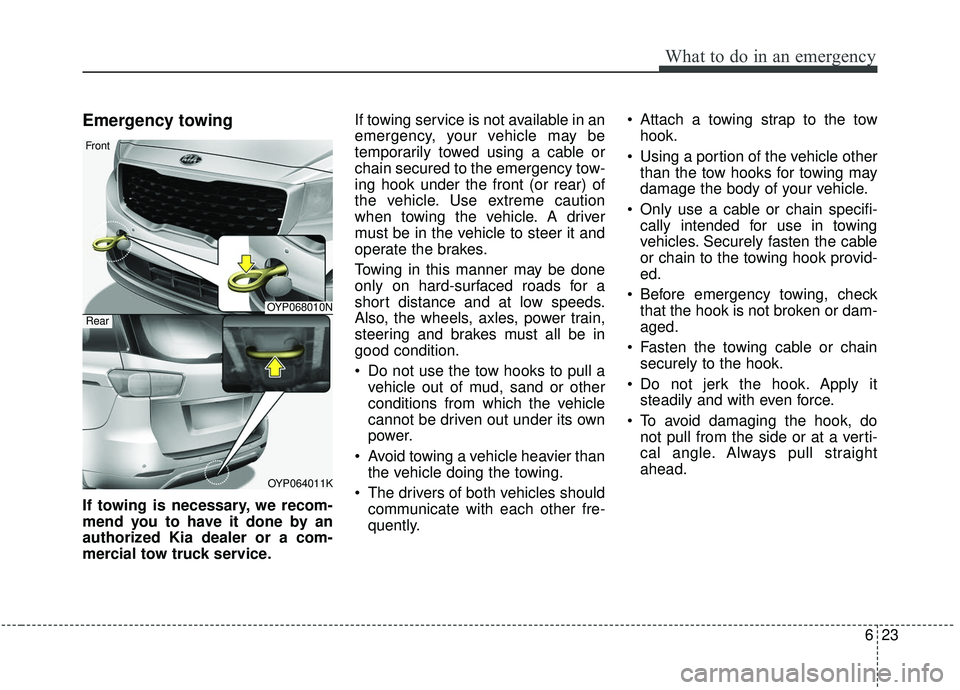
mercial tow truck service.If towing service is not available in an
emergency, your vehicle may be
temporarily towed using a cable or
chain secured to the emergency tow-
ing hook under the front (or rear) of
the vehicle. Use extreme caution
when towing the vehicle. A driver
must be in the vehicle to steer it and
operate the brakes.
Towing in this manner may be done
only on hard-surfaced roads for a
short distance and at low speeds.
Also, the wheels, axles, power train,
steering and brakes must all be in
good condition.
Do not use the tow hooks to pull a
vehicle out of mud, sand or other
conditions from which the vehicle
cannot be driven out under its own
power.
Avoid towing a vehicle heavier than the vehicle doing the towing.
The drivers of both vehicles should communicate with each other fre-
quently. Attach a towing strap to the tow
hook.
Using a portion of the vehicle other than the tow hooks for towing may
damage the body of your vehicle.
Only use a cable or chain specifi- cally intended for use in towing
vehicles. Securely fasten the cable
or chain to the towing hook provid-
ed.
Before emergency towing, check that the hook is not broken or dam-
aged.
Fasten the towing cable or chain securely to the hook.
Do not jerk the hook. Apply it steadily and with even force.
To avoid damaging the hook, do not pull from the side or at a verti-
cal angle. Always pull straight
ahead.
OYP068010N
OYP064011K
Front
Rear
Page 483 of 593

Maintenance
16
7
Vacuum crankcase ventilation
hoses
Inspect the surface of hoses for evi-
dence of heat and/or mechanical
damage. Hard and brittle rubber,
cracking, tears, cuts, abrasions, and
excessive swelling indicate deterio-
ration.
Pay particular attention to the hose
surfaces nearest to high heat sources,
such as the exhaust manifold.
Inspect the hose routing to assure
that the hoses do not come in con-
tact with any heat source, sharp
edges or moving component which
might cause heat damage or
mechanical wear. Inspect all hose
connections, such as clamps and
couplings, to make sure they are
secure, and that no leaks are pres-
ent. Hoses should be replaced
immediately if there is any evidence
of deterioration or damage.
Air cleaner filter
A Genuine Kia air cleaner filter is
recommended when the filter is
replaced.
Spark plugs
Make sure to install new spark plugs
of the correct heat range.
Valve clearance
Inspect for excessive valve noise
and/or engine vibration and adjust if
necessary. An authorized Kia dealer
should perform this procedure.
Cooling system
Check cooling system components,
such as radiator, coolant reservoir,
hoses and connections for leakage
and damage. Replace any damaged
parts.
Coolant
The coolant should be changed at
the intervals specified in the mainte-
nance schedule.
Page 494 of 593
727
Maintenance
WASHER FLUID
Checking the washer fluid
level
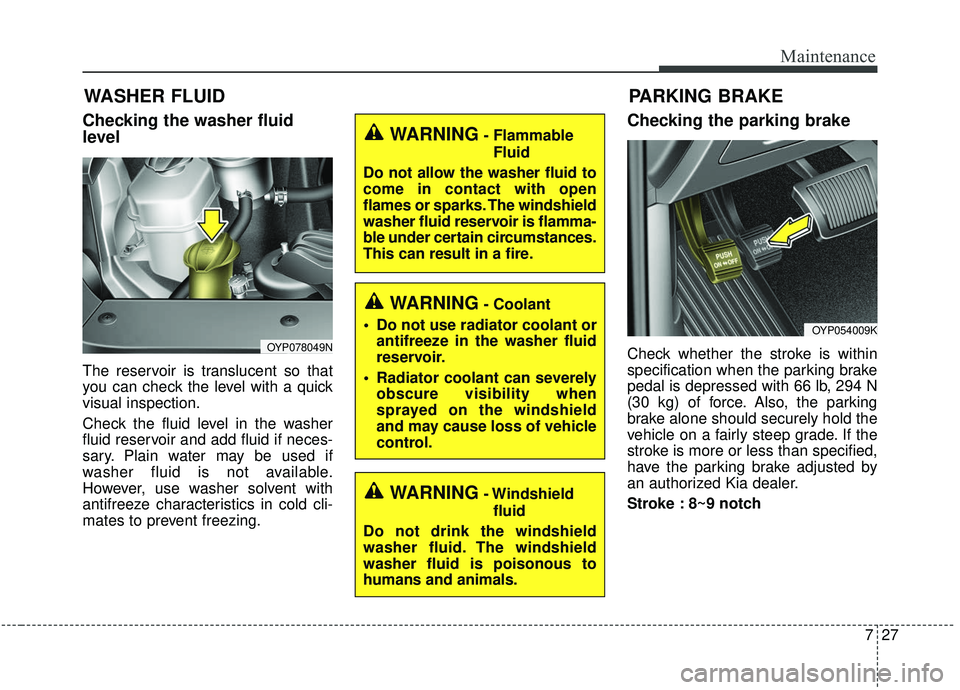
The reservoir is translucent so that
you can check the level with a quick
visual inspection.
Check the fluid level in the washer
fluid reservoir and add fluid if neces-
sary. Plain water may be used if
washer fluid is not available.
However, use washer solvent with
antifreeze characteristics in cold cli-
mates to prevent freezing.
Checking the parking brake
Check whether the stroke is within
specification when the parking brake
pedal is depressed with 66 lb, 294 N
(30 kg) of force. Also, the parking
brake alone should securely hold the
vehicle on a fairly steep grade. If the
stroke is more or less than specified,
have the parking brake adjusted by
an authorized Kia dealer.
Stroke : 8~9 notchOYP078049N
OYP054009K
PARKING BRAKE
WARNING- FlammableFluid
Do not allow the washer fluid to
come in contact with open
flames or sparks. The windshield
washer fluid reservoir is flamma-
ble under certain circumstances.
This can result in a fire.
WARNING- Windshield fluid
Do not drink the windshield
washer fluid. The windshield
washer fluid is poisonous to
humans and animals.
WARNING- Coolant
Do not use radiator coolant or antifreeze in the washer fluid
reservoir.
Radiator coolant can severely obscure visibility when
sprayed on the windshield
and may cause loss of vehicle
control.
Page 503 of 593
Maintenance
36
7
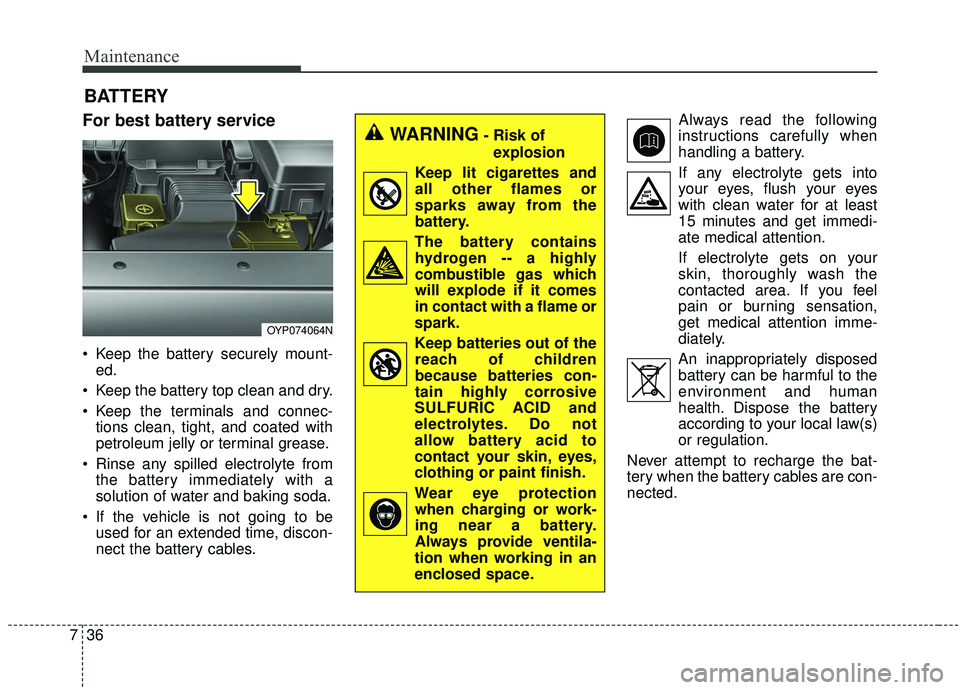
BATTERY
For best battery service
Keep the battery securely mount-
ed.
Keep the battery top clean and dry.
Keep the terminals and connec- tions clean, tight, and coated with
petroleum jelly or terminal grease.
Rinse any spilled electrolyte from the battery immediately with a
solution of water and baking soda.
If the vehicle is not going to be used for an extended time, discon-
nect the battery cables. Always read the following
instructions carefully when
handling a battery.
If any electrolyte gets into your eyes, flush your eyes
with clean water for at least
15 minutes and get immedi-
ate medical attention.
If electrolyte gets on your
skin, thoroughly wash the
contacted area. If you feel
pain or burning sensation,
get medical attention imme-
diately.
An inappropriately disposed battery can be harmful to the
environment and human
health. Dispose the battery
according to your local law(s)
or regulation.
Never attempt to recharge the bat-
tery when the battery cables are con-
nected.
OYP074064N
WARNING- Risk of explosion
Keep lit cigarettes and
all other flames or
sparks away from the
battery.
The battery contains hydrogen -- a highly
combustible gas which
will explode if it comes
in contact with a flame or
spark.
Keep batteries out of the reach of children
because batteries con-
tain highly corrosive
SULFURIC ACID and
electrolytes. Do not
allow battery acid to
contact your skin, eyes,
clothing or paint finish.
Wear eye protection when charging or work-
ing near a battery.
Always provide ventila-
tion when working in an
enclosed space.
Page 521 of 593

Maintenance
54
7
✽ ✽
NOTICE
• When replacing a fuse, turn the
ignition “OFF” and turn off
switches of all electrical devices
then remove battery (-) terminal.
• The actual fuse/relay panel label may differ from equipped items.
CAUTION
Do not use a screwdriver or any
other metal object to removefuses because it may cause ashort circuit and damage thesystem.
WARNING- Electrical Fire
Always ensure replacements
fuses and relays are securely
fastened when installed. Failure
to do so can result in a vehicle
fire.
CAUTION
When replacing a blown fuse or relay, make sure the newfuse or relay fits tightly intothe clips. Failure to tightlyinstall the fuse or relay maycause damage to the wiringand electric systems.
Do not remove fuses, relays and terminals fastened withbolts or nuts. The fuses, relaysand terminals may not be fas-tened correctly which maycause vehicle damage.
CAUTION
Do not input any other objects except fuses or relays intofuse/relay terminals such as ascrewdriver or wiring. It maycause contact failure and sys-tem malfunction.
Do not plug in screwdrivers or aftermarket wiring into the ter-minal originally designed forfuse and relays only. The elec-trical system and wiring of thevehicle interior may be dam-aged or burned due to contactfailure.
If you directly connect the wire on the taillight or replacethe bulb which is over the reg-ulated capacity to install trail-ers etc., the inner junctionblock can get burned.