Page 331 of 593

This is the normal forward driving
position. The transmission will auto-
matically shift through a 8-gear
sequence, providing the best fuel
economy and power.
For ex")
517
Driving your vehicle
D (Drive)
This is the normal forward driving
position. The transmission will auto-
matically shift through a 8-gear
sequence, providing the best fuel
economy and power.
For extra power when passing anoth-
er vehicle or climbing grades,
depress the accelerator fully, at which
time the transmission will automati-
cally downshift to the next lower gear.Sports mode
Whether the vehicle is stationary or
in motion, sports mode is selected by
pushing the shift lever from the D
(Drive) position into the manual gate.
To return to D (Drive) range opera-
tion, push the shift lever back into the
main gate.In sports mode, moving the shift
lever backwards and forwards will
allow you to make gearshifts rapidly.
In contrast to a manual transmission,
the sports mode allows gearshifts
with the accelerator pedal
depressed.
Up (+) : Push the lever forward once
to shift up one gear.
Down (-) : Pull the lever backwards once to shift down one
gear.
In sports mode, the driver must execute upshifts in accordance
with road conditions, taking care to
keep the engine speed below the
red zone.
In sports mode, only the 8 forward gears can be selected. To reverse
or park the vehicle, move the shift
lever to the R (Reverse) or P (Park)
position as required.
OYP058008N
Sports
mode
+ +
+ +
( (
( (
U U
U U
P P
P P
) )
) )
- -
- -
( (
( (
D D
D D
O O
O O
W W
W W
N N
N N
) )
) )
Page 332 of 593

Driving your vehicle
18
5
In sports mode, downshifts are
made automatically when the vehi-
cle slows down. When the vehicle
stops, 1st gear is automatically
selected.
In sports mode, when the engine rpm approaches the red zone shift
points are varied to upshift auto-
matically.
To maintain the required levels of vehicle performance and safety,
the system may not execute cer-
tain gearshifts when the shift lever
is operated.
When driving on a slippery road, push the shift lever forward into the
+(up) position. This causes the
transmission to shift into the 2nd
gear which is better for smooth
driving on a slippery road. Push
the shift lever to the -(down) side to
shift back to the 1st gear.Shift lock system
For your safety, the automatic trans-
mission has a shift lock system
which prevents shifting the transmis-
sion from P (Park) into R (Reverse)
unless the brake pedal is depressed.
To shift the transmission from P
(Park) into R (Reverse):
1.Depress and hold the brake pedal.
2.Start the engine or turn the ignitionswitch to the ON position.
3.Move the shift lever.
If the brake pedal is repeatedly
depressed and released with the shift
lever in the P (Park) position, a chat-
tering noise near the shift lever may
be heard. It is a normal condition.WARNING- Shifting from park
Always fully depress the brake
pedal before and while shifting
out of the P (Park) position into
another position to avoid inad-
vertent motion of the vehicle
which could injure persons in
or around the vehicle.
Page 430 of 593

Driving your vehicle
116
5
Trailer brakes
If your trailer is equipped with a brak-
ing system, make sure it conforms to
your state’s regulations and that it is
properly installed and operating cor-
rectly.
If your trailer weight exceeds the
maximum allowed weight without
trailer brakes, then the trailer will also
require its own brakes as well. Be
sure to read and follow the instruc-
tions for the trailer brakes so you’ll be
able to install, adjust and maintain
them properly.
Don’t tap into or modify your vehi-
cle's brake system.
Driving with a trailer
Towing a trailer requires a certain
amount of experience. Before setting
out for the open road, you must get to
know your trailer. Acquaint yourself
with the feel of handling and braking
with the added weight of the trailer.
And always keep in mind that the
vehicle you are driving is now a good
deal longer and not nearly so respon-
sive as your vehicle is by itself.
Before you start, check the trailer
hitch and platform, safety chains,
electrical connector(s), lights, tires
and mirror adjustment. If the trailer
has electric brakes, start your vehicle
and trailer moving and then apply the
trailer brake controller by hand to be
sure the brakes are working. This lets
you check your electrical connection
at the same time.
During your trip, check occasionally
to be sure that the load is secure,
and that the lights and any trailer
brakes are still working.WARNING- Trailer brakes
Do not use a trailer with its own
brakes unless you are absolute-
ly certain that you have proper-
ly set up the brake system. This
is not a task for amateurs. Use
an experienced, competent
trailer shop for this work.
Page 442 of 593
Driving your vehicle
128
5
WARNING- Loose cargo
Do not travel with unsecured
blunt objects in the passenger
compartment of your vehicle
(e.g. suit cases or unsecured
child seats). These items may
strike occupant during a sud-
den stop or crash.
Page 447 of 593
 or P")
What to do in an emergency
46
IF THE ENGINE WILL NOT START
If engine doesn't turn over or
turns over slowly
1.If your vehicle has an automatictransaxle, be sure the shift lever is
in N (Neutral) or P (Park) and the
emergency brake is set.
2.Check the battery connections to be sure they are clean and tight.
3.Turn on the interior light. If the light dims or goes out when you operate
the starter, the battery is dis-
charged.
4.Check the starter connections to be sure they are securely tight-
ened.
5.Do not push or pull the vehicle to start it. See instructions for "Jump
starting".
If engine turns over normally
but does not start
1.Check the fuel level.
2.With the ignition switch in theLOCK position, check all connec-
tors at the ignition coils and spark
plugs. Reconnect any that may be
disconnected or loose.
3.Check the fuel line in the engine compartment.
4.If the engine still does not start, call an authorized Kia dealer or seek
other qualified assistance.
WARNING- Push /
Pull start
Do not push or pull the vehicle
to start it. Push or pull starting
may cause the catalytic con-
verter to overload and create a
fire hazard.
Page 452 of 593
 Jack")
69
What to do in an emergency
IF YOU HAVE A FLAT TIRE
Jack and tools
The jack and wheel lug nut wrench
are stored in the luggage compart-
ment.
Remove the panel indicated in the
illustration.
(1) Jack
(2) Wheel lug nut wrench(Jack handle)
Jacking instructions
The jack is provided for emergency
tire changing only.
To prevent the jack from “rattling”
while the vehicle is in motion, store it
properly.
Follow jacking instructions to reduce
the possibility of personal injury. Always move the vehicle complete-
ly off the road and onto the shoul-
der before trying to change a tire.
The jack should be used on a firm
level ground. If you cannot find a
firm, level place off the road, call a
towing service company for assis-
tance.
Be sure to use the correct front and rear jacking positions on the vehi-
cle; never use the bumpers or any
other part of the vehicle for jack
support.
Do not allow anyone to remain in the vehicle while it is on the jack.
Make sure any children present are in a secure place away from
the road and from the vehicle to be
raised with the jack.
WARNING- Changing tires
Never attempt vehicle repairs in
the traffic lanes of a public road
or highway.
OYP064029N
WARNING- Tire Jack
Do not place any portion of your
body under a vehicle that is only
supported by a jack since the
vehicle can easily roll off the
jack. Use vehicle support stands.
Page 455 of 593
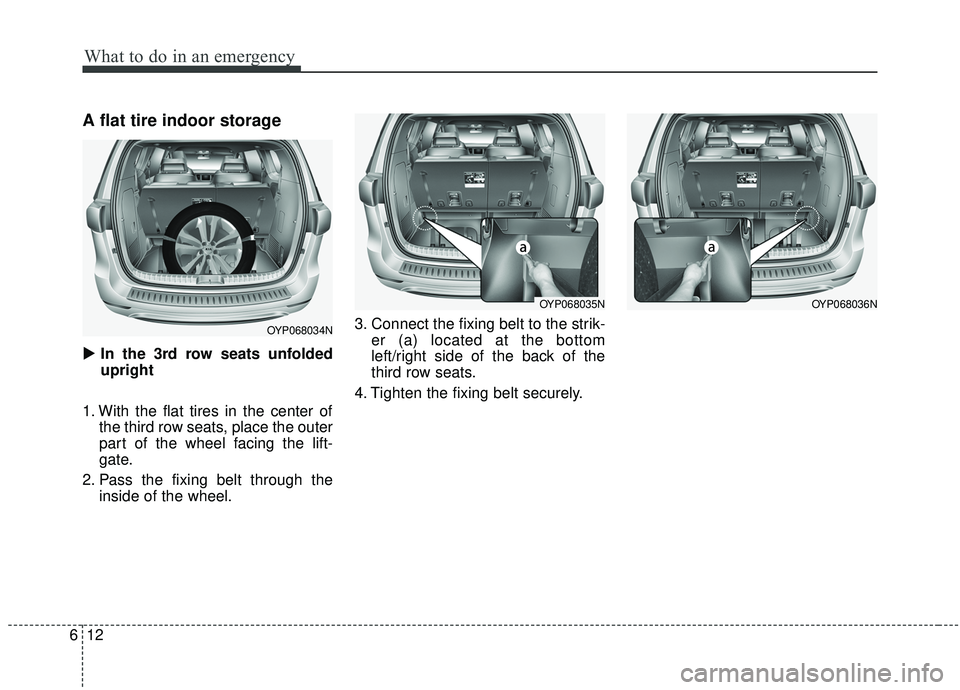
What to do in an emergency
12
6
A flat tire indoor storage
� In the 3rd row seats unfolded
upright
1. With the flat tires in the center of the third row seats, place the outer
part of the wheel facing the lift-
gate.
2. Pass the fixing belt through the inside of the wheel. 3. Connect the fixing belt to the strik-
er (a) located at the bottom
left/right side of the back of the
third row seats.
4. Tighten the fixing belt securely.
OYP068034N
OYP068035NOYP068036N
Page 456 of 593
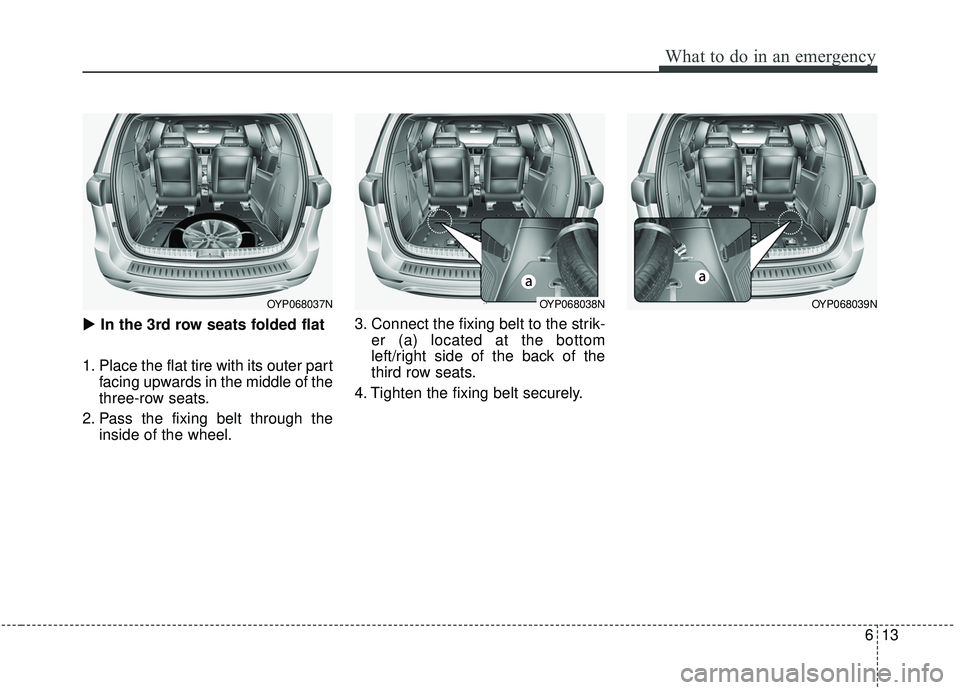
613
What to do in an emergency
�In the 3rd row seats folded flat
1. Place the flat tire with its outer part facing upwards in the middle of the
three-row seats.
2. Pass the fixing belt through the inside of the wheel. 3. Connect the fixing belt to the strik-
er (a) located at the bottom
left/right side of the back of the
third row seats.
4. Tighten the fixing belt securely.
OYP068037NOYP068038NOYP068039N
. These items may
stri")