Page 153 of 593
449
Features of your vehicle
Make sure you close the liftgate
before driving your vehicle.
Make sure there are no people or
objects around the liftgate before
opening or closing the liftgate. Make
sure objects in the liftgate do not
come out when opening the liftgate
on a slope. It may cause serious
injury. Make sure to deactivate the
Smart Liftgate when washing your
vehicle. Otherwise, the liftgate may
open inadvertently. The key should
be kept out of reach of children.
Children may inadvertently open the
Smart Liftgate while playing around
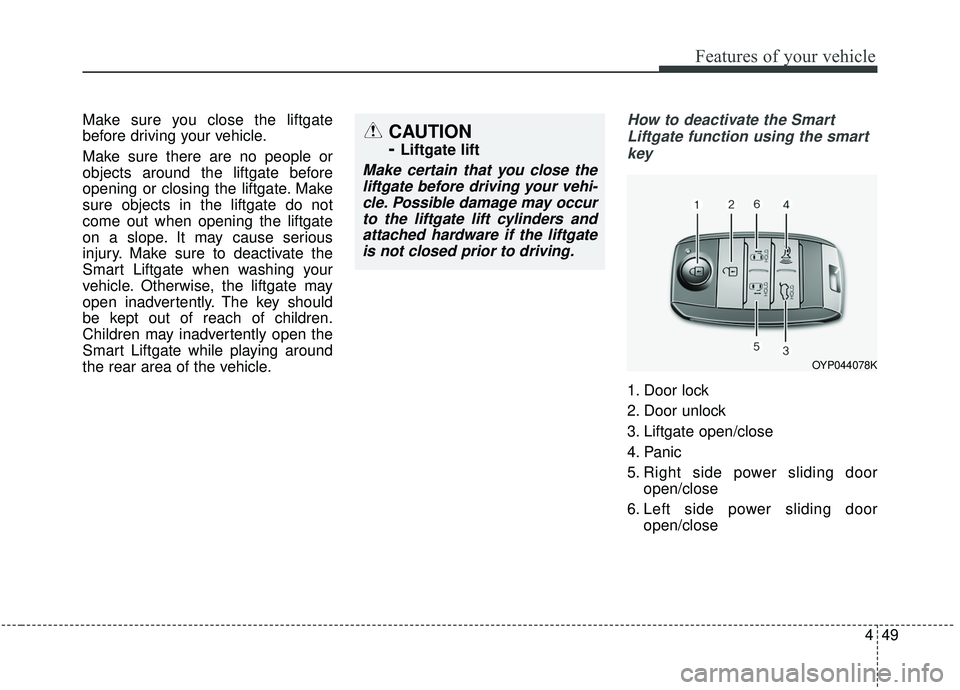
the rear area of the vehicle.How to deactivate the SmartLiftgate function using the smartkey
1. Door lock
2. Door unlock
3. Liftgate open/close
4. Panic
5. Right side power sliding door open/close
6. Left side power sliding door open/close
OYP044078K
CAUTION
-
Liftgate lift
Make certain that you close theliftgate before driving your vehi-cle. Possible damage may occurto the liftgate lift cylinders andattached hardware if the liftgateis not closed prior to driving.
Page 154 of 593
Features of your vehicle
50
4
If you press any button of the smart
key during the Detect and Alert
stage, the Smart Liftgate function will
be deactivated.
Make sure to be aware of how to
deactivate the Smart Liftgate func-
tion for emergency situations.✽ ✽
NOTICE
• If you press the door unlock but-
ton (2), the Smart Liftgate func-
tion will be deactivated temporar-
ily. But, if you do not open any
door for 30 seconds, the smart lift-
gate function will be activated
again.
• If you press the liftgate open but- ton (3) for more than 1 second, the
liftgate opens.
• If you press the door lock button (1) or liftgate open button (3)
when the Smart Liftgate function
is not in the Detect and Alert stage,
the smart liftgate function will not
be deactivated.
• In case you have deactivated the Smart Liftgate function by press-
ing the smart key button and
opened a door, the smart liftgate
function can be activated again by
closing and locking all doors.
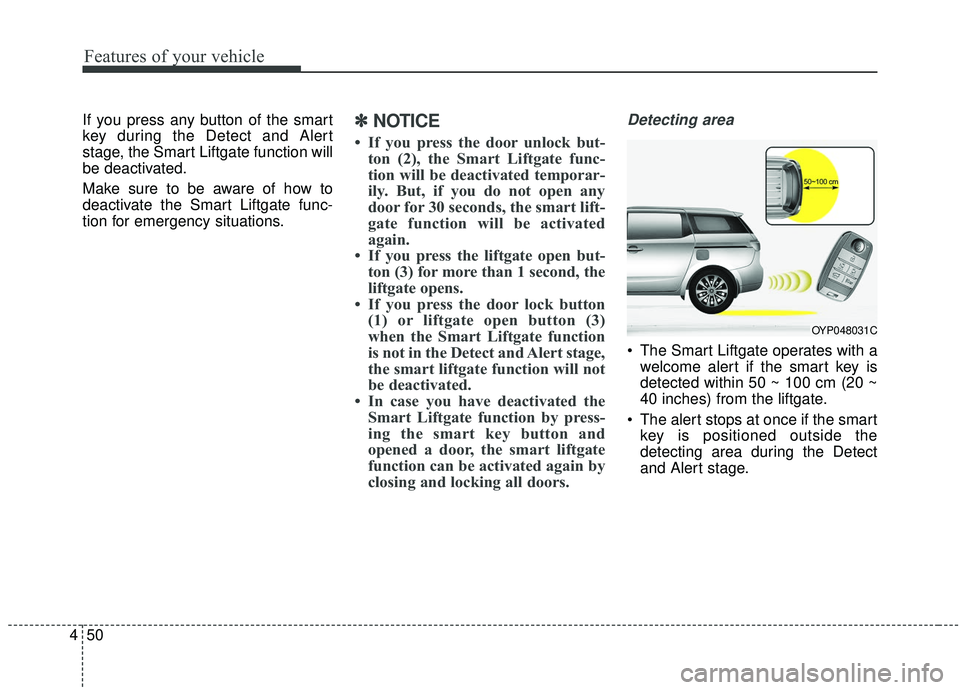
Detecting area
The Smart Liftgate operates with a
welcome alert if the smart key is
detected within 50 ~ 100 cm (20 ~
40 inches) from the liftgate.
The alert stops at once if the smart key is positioned outside the
detecting area during the Detect
and Alert stage.
OYP048031C
Page 156 of 593
Features of your vehicle
52
4
(1) Driver’s door power window
switch
(2) Front passenger’s door power window switch
(3) Rear door (left) power window switch
(4) Rear door (right) power window switch
(5) Window opening and closing
(6) Automatic power window up/down* (Driver's and
Passenger's window)
(7) Power window and rear sunroof* lock switch
* if equipped
In cold and wet climates, power win-
dows may not work properly due to
freezing conditions.
WINDOWS
OYP048032N
Page 157 of 593
453
Features of your vehicle
Power windows
The ignition switch must be in the ON
position for power windows to operate.
Each door has a power window
switch that controls the door's win-
dow. The driver has a power window
lock button which can block the oper-
ation of rear passenger windows.
The power windows can be operated
for approximately 30 seconds after
the ignition key is removed or turned
to the ACC or LOCK (or OFF) posi-
tion. However, if the front doors are
opened, the power windows cannot
be operated even within the 30 sec-
ond period.
If the window cannot be close
because it is blocked by objects,
remove the objects and close the
window.
✽ ✽NOTICE
While driving with the rear windows
down or with the sunroof (if
equipped) in an open (or partially
open) position, your vehicle may
demonstrate a wind buffeting or
pulsation noise. This noise is a nor-
mal occurrence and can be reduced
or eliminated by taking the follow-
ing actions. If the noise occurs with
one or both of the rear windows
down, partially lower both front
windows approximately 2.5 cm (1
in.) If you experience the noise with
the sunroof open, slightly reduce the
size of the sunroof opening.
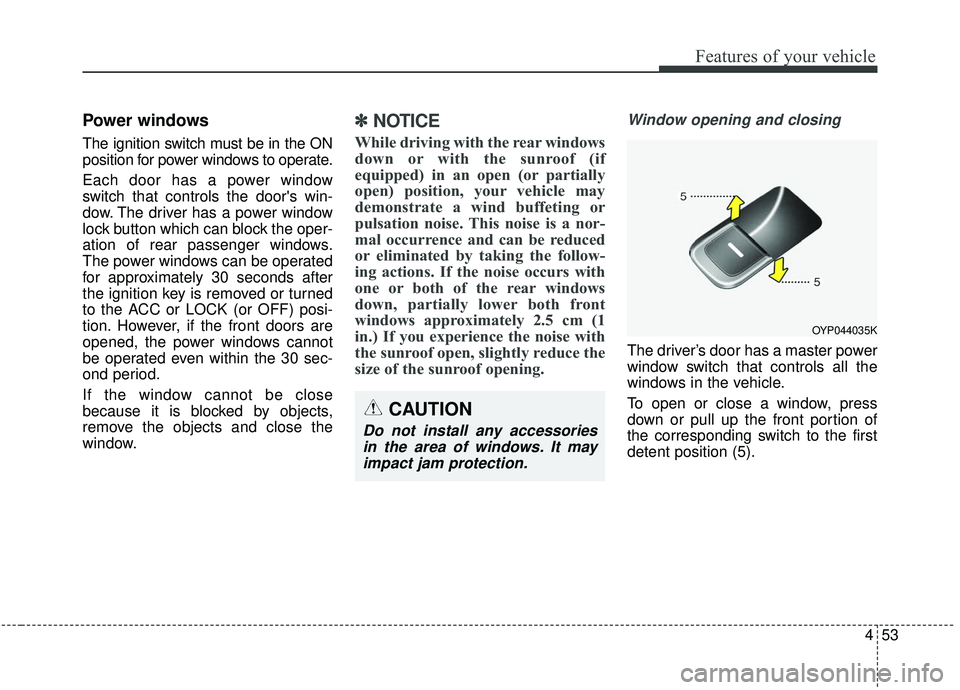
Window opening and closing
The driver’s door has a master power
window switch that controls all the
windows in the vehicle.
To open or close a window, press
down or pull up the front portion of
the corresponding switch to the first
detent position (5).
OYP044035K
CAUTION
Do not install any accessories
in the area of windows. It mayimpact jam protection.
Page 159 of 593
455
Features of your vehicle
And if the power window switch is
pulled up continuously again within 5
seconds after the window is lowered
by the automatic window reversal
feature, the automatic window rever-
sal will not operate.
The automatic reverse feature for the
driver’s window is only active when
the “auto up” feature is used by fully
pulling up the switch. The automatic
reverse feature will not operate if the
window is raised using the halfway
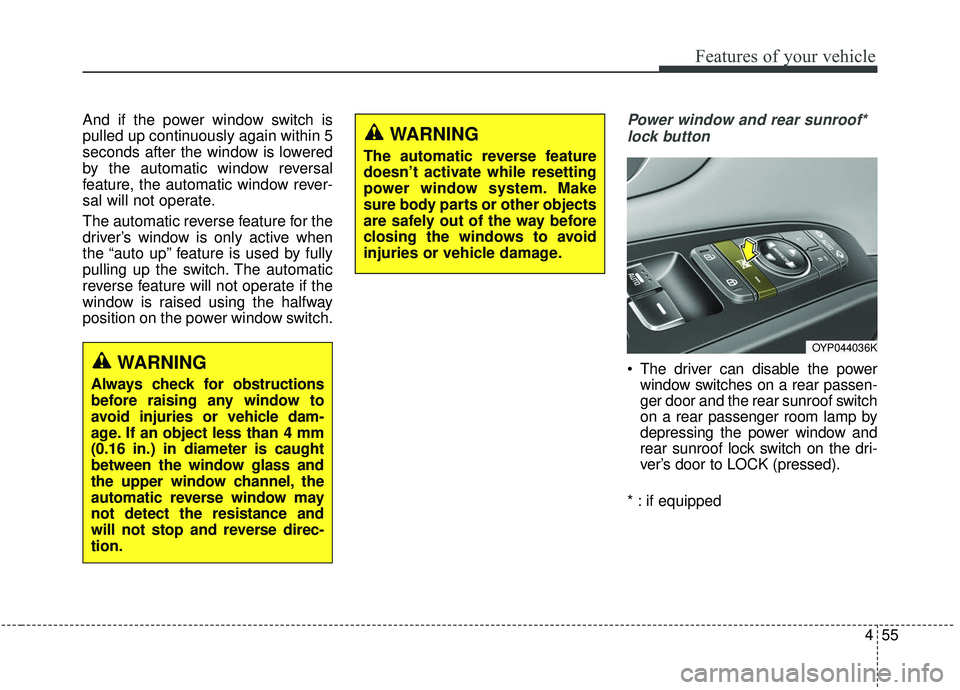
position on the power window switch.Power window and rear sunroof*lock button
The driver can disable the power window switches on a rear passen-
ger door and the rear sunroof switch
on a rear passenger room lamp by
depressing the power window and
rear sunroof lock switch on the dri-
ver’s door to LOCK (pressed).
* : if equipped
WARNING
The automatic reverse feature
doesn’t activate while resetting
power window system. Make
sure body parts or other objects
are safely out of the way before
closing the windows to avoid
injuries or vehicle damage.
WARNING
Always check for obstructions
before raising any window to
avoid injuries or vehicle dam-
age. If an object less than 4 mm
(0.16 in.) in diameter is caught
between the window glass and
the upper window channel, the
automatic reverse window may
not detect the resistance and
will not stop and reverse direc-
tion.
OYP044036K
Page 160 of 593

Features of your vehicle
56
4
When the power window and rear
sunroof lock switch is pressed:
The driver's master control can
operate all the power windows.
The front passenger's control can operate the front passen-
ger's power window.
The rear passenger's control cannot operate the rear passen-
ger's power window.
The rear sunroof control cannot operate the rear sunroof. But
The front master sunroof control
can operate both front and rear
sunroofs (if equipped). Always double check to make sure
all arms, hands, head and other
obstructions are safely out of the way
before closing a window.CAUTION- Opening/clos-
ing Window
To prevent possible damage tothe power window system, donot open or close two windowsor more at the same time. Thiswill also ensure the longevity ofthe fuse.
WARNING- Power win-
dows
Do not allow children to play with the power windows. Keep
the power window lock button
(on the driver's door) in the
LOCK (pressed) position.
Do not extend a face or arms outside through the window
opening while driving.
Page 168 of 593
Features of your vehicle
64
4
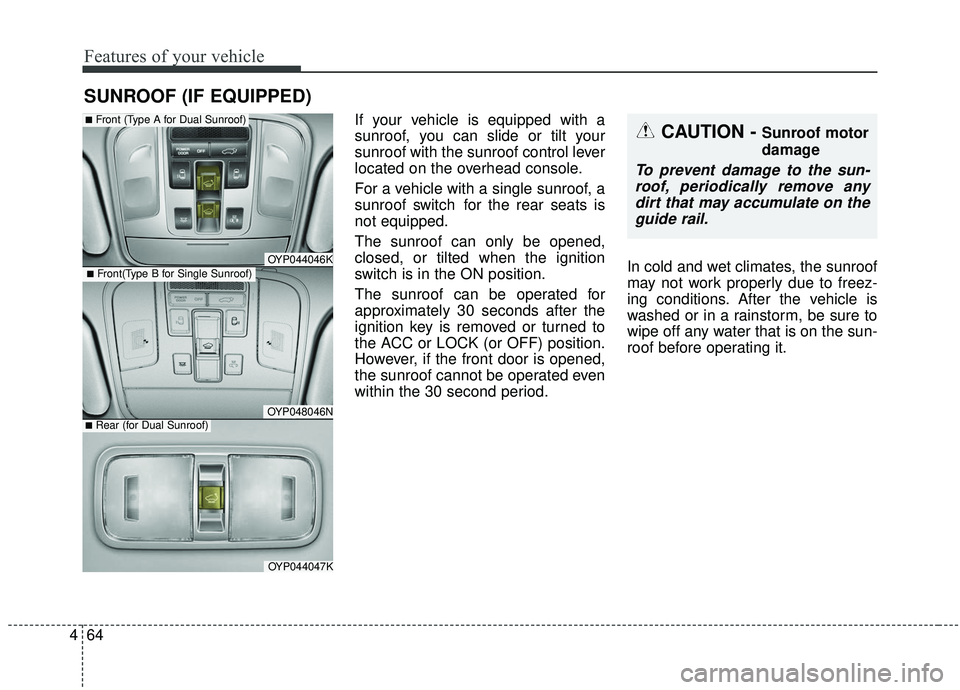
If your vehicle is equipped with a
sunroof, you can slide or tilt your
sunroof with the sunroof control lever
located on the overhead console.
For a vehicle with a single sunroof, a
sunroof switch for the rear seats is
not equipped.
The sunroof can only be opened,
closed, or tilted when the ignition
switch is in the ON position.
The sunroof can be operated for
approximately 30 seconds after the
ignition key is removed or turned to
the ACC or LOCK (or OFF) position.
However, if the front door is opened,
the sunroof cannot be operated even
within the 30 second period. In cold and wet climates, the sunroof
may not work properly due to freez-
ing conditions. After the vehicle is
washed or in a rainstorm, be sure to
wipe off any water that is on the sun-
roof before operating it.
SUNROOF (IF EQUIPPED)
CAUTION - Sunroof motor
damage
To prevent damage to the sun-
roof, periodically remove anydirt that may accumulate on theguide rail.
OYP044046K
OYP048046N
■Front (Type A for Dual Sunroof)
OYP044047K
■Rear (for Dual Sunroof)
■Front(Type B for Single Sunroof)
Page 183 of 593
479
Features of your vehicle
There are some conditions that can
cause changes to the vehicle mag-
nets, such as installing a ski rack or
a CB antenna. Body repair work on
the vehicle can also cause changes
to the vehicle's magnetic field. In
these situations, the compass will
need to be re-calibrated to quickly
correct for these changes. To re-cali-
brate the compass:
1. Press and hold the button formore than 6 seconds. When the
compass memory is cleared, a "C"
will appear in the display.
2. To calibrate the compass, drive the vehicle in 2 complete circles at
less than 8 km/h (5 mph). Integrated HomeLink®Wireless
Control System
The HomeLink
®Wireless Control
System provides a convenient way to
replace up to three hand-held radio-
frequency (RF) transmitters with a
single built-in device. This innovative
feature will learn the radio frequency
codes of most current transmitters to
operate devices such as gate opera-
tors, garage door openers, entry
door locks, security systems, even
home lighting. Both standard and
rolling code-equipped transmitters
can be programmed by following the
outlined procedures. Additional
HomeLink
®information can be found
at: www.homelink.com or by calling
1-800-355-3515.
❈ HomeLink
®is a registered trade-
mark of Johnson Controls, Inc. Retain the original transmitter of the
RF device you are programming for
use in other vehicles as well as for
future HomeLink
®programming. It is
also suggested that upon the sale of
the vehicle, the programmed
HomeLink
®buttons be erased for
security purposes.