Page 5 of 593
Introduction
21
HOW TO USE THIS MANUAL
We want to help you get the greatest
possible driving pleasure from your
vehicle. Your Owner’s Manual can
assist you in many ways. We strong-
ly recommend that you read the
entire manual. In order to minimize
the chance of death or injury, you
must read the WARNING and CAU-
TION sections in the manual.
Illustrations complement the words
in this manual to best explain how to
enjoy your vehicle. By reading your
manual, you will learn about fea-
tures, important safety information,
and driving tips under various road
conditions.
The general layout of the manual is
provided in the Table of Contents.
Use the index when looking for a
specific area or subject; it has an
alphabetical listing of all information
in your manual.
Sections: This manual has eight sec-
tions plus an index. Each section
begins with a brief list of contents so
you can tell at a glance if that section
has the information you want.You will find various WARNINGs,
CAUTIONs, and NOTICEs in this
manual. These WARNINGs were pre-
pared to enhance your personal safe-
ty. You should carefully read and follow
ALL procedures and recommenda-
tions provided in these WARNINGs,
CAUTIONs and NOTICEs.
✽ ✽
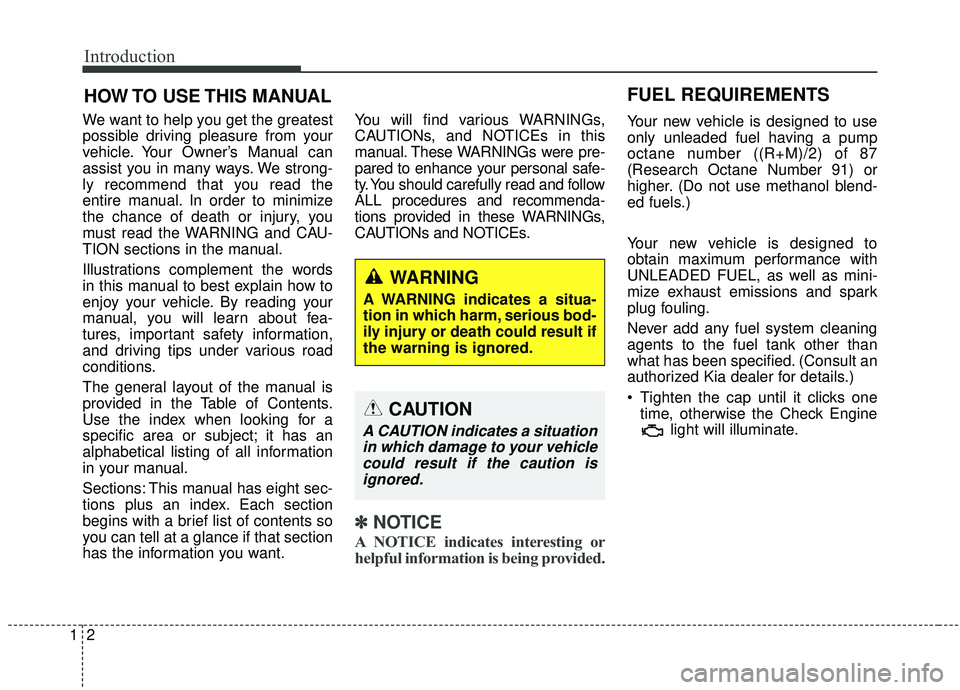
NOTICE
A NOTICE indicates interesting or
helpful information is being provided.
Your new vehicle is designed to use
only unleaded fuel having a pump
octane number ((R+M)/2) of 87
(Research Octane Number 91) or
higher. (Do not use methanol blend-
ed fuels.)
Your new vehicle is designed to
obtain maximum performance with
UNLEADED FUEL, as well as mini-
mize exhaust emissions and spark
plug fouling.
Never add any fuel system cleaning
agents to the fuel tank other than
what has been specified. (Consult an
authorized Kia dealer for details.)
Tighten the cap until it clicks one
time, otherwise the Check Engine light will illuminate.
WARNING
A WARNING indicates a situa-
tion in which harm, serious bod-
ily injury or death could result if
the warning is ignored.
CAUTION
A CAUTION indicates a situationin which damage to your vehiclecould result if the caution isignored.
FUEL REQUIREMENTS
Page 23 of 593
37
Safety features of your vehicle
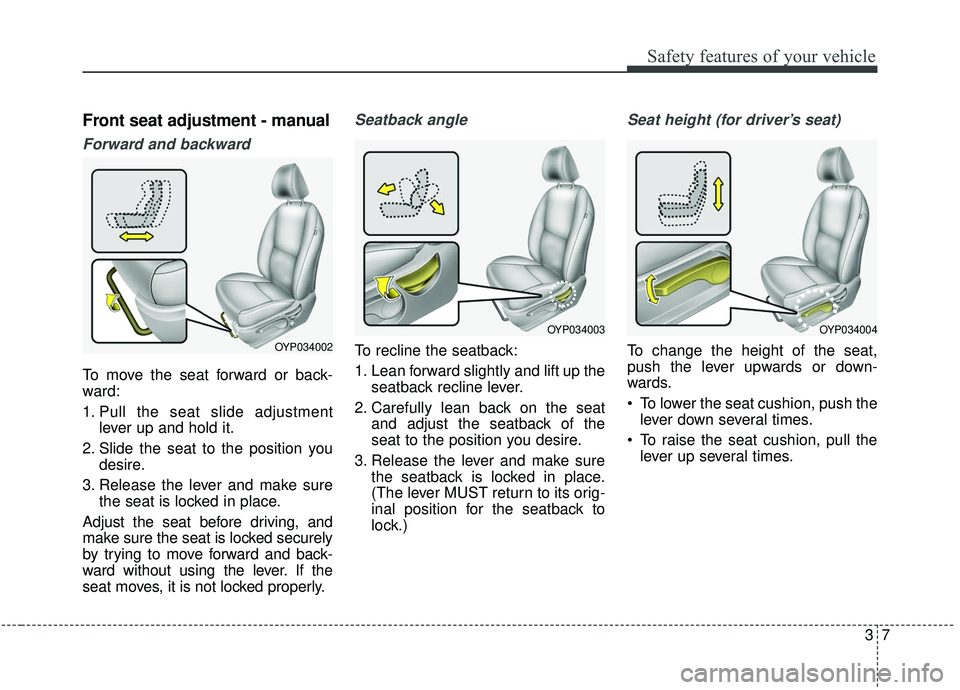
Front seat adjustment - manual
Forward and backward
To move the seat forward or back-
ward:
1. Pull the seat slide adjustmentlever up and hold it.
2. Slide the seat to the position you desire.
3. Release the lever and make sure the seat is locked in place.
Adjust the seat before driving, and
make sure the seat is locked securely
by trying to move forward and back-
ward without using the lever. If the
seat moves, it is not locked properly.
Seatback angle
To recline the seatback:
1. Lean forward slightly and lift up the seatback recline lever.
2. Carefully lean back on the seat and adjust the seatback of the
seat to the position you desire.
3. Release the lever and make sure the seatback is locked in place.
(The lever MUST return to its orig-
inal position for the seatback to
lock.)
Seat height (for driver’s seat)
To change the height of the seat,
push the lever upwards or down-
wards.
To lower the seat cushion, push thelever down several times.
To raise the seat cushion, pull the lever up several times.OYP034002
OYP034004OYP034003
Page 39 of 593
323
Safety features of your vehicle
3. Lower the headrest to the lowestposition.
4. Slide the seat to the farthest rear- ward.
5. Fold the seat back by pull up the recline strap. 6. Pull the removal strap and lift the
rear portion of the seat cushion. 7. Pull up the catch release lever
under the front of the seat cushion
while reclining the folded seat
rearward slightly to release the
front catches from the anchors.
8. Remove the entire seat from the floor.
OYP034221NOYP034223NOYP034227N
Page 52 of 593
Safety features of your vehicle
36
3
No modifications or additions
should be made by the user which
will either prevent the seat belt
adjusting devices from operating to
remove slack, or prevent the seat
belt assembly from being adjusted
to remove slack.
When you fasten the seat belt, be careful not to latch the seat belt in
buckles of other seat. It's very dan-
gerous and you may not be pro-
tected by the seat belt properly.
Do not unfasten the seat belt and do not fasten and unfasten the seat
belt repeatedly while driving. This
could result in loss of control, and
an accident causing death, serious
injury, or property damage.
When fastening the seat belt, make sure that the seat belt does
not pass over objects that are hard
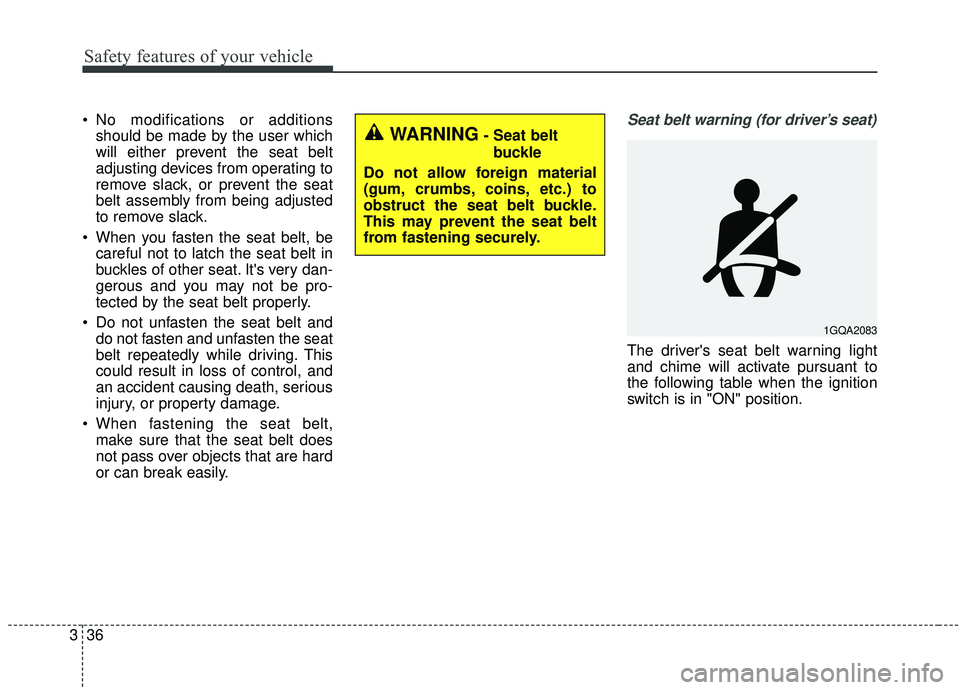
or can break easily.Seat belt warning (for driver’s seat)
The driver's seat belt warning light
and chime will activate pursuant to
the following table when the ignition
switch is in "ON" position.
1GQA2083
WARNING- Seat belt
buckle
Do not allow foreign material
(gum, crumbs, coins, etc.) to
obstruct the seat belt buckle.
This may prevent the seat belt
from fastening securely.
Page 53 of 593
337
Safety features of your vehicle
*1Warning pattern repeats 11 times with
an interval of 24 seconds. If the driver's
seat belt is buckled, the light will stop
within 6 seconds and chime will stop
immediately.
*
2The light will stop within 6 seconds and
chime will stop immediately.
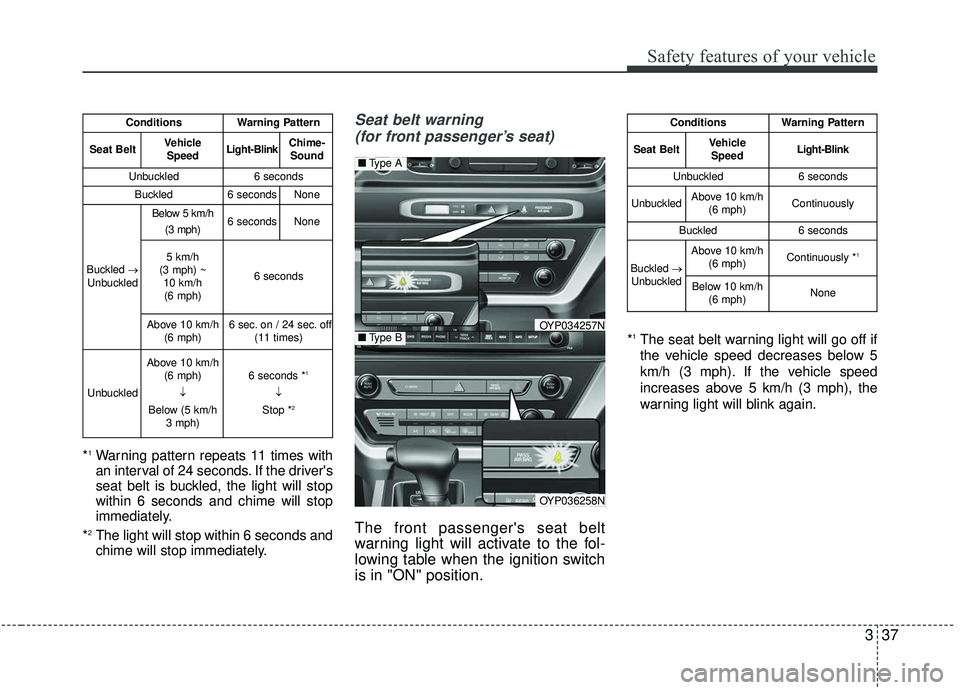
Seat belt warning (for front passenger’s seat)
The front passenger's seat belt
warning light will activate to the fol-
lowing table when the ignition switch
is in "ON" position.
*1The seat belt warning light will go off if
the vehicle speed decreases below 5
km/h (3 mph). If the vehicle speed
increases above 5 km/h (3 mph), the
warning light will blink again.
ConditionsWarning Pattern
Seat BeltVehicle
SpeedLight-BlinkChime-Sound
Unbuckled6 seconds
Buckled6 secondsNone
Buckled →
Unbuckled
Below 5 km/h
(3 mph)6 secondsNone
5 km/h
(3 mph) ~ 10 km/h(6 mph)
6 seconds
Above 10 km/h (6 mph)6 sec. on / 24 sec. off (11 times)
Unbuckled
Above 10 km/h(6 mph)
↓
Below (5 km/h 3 mph)6 seconds *1
↓
Stop *2
ConditionsWarning Pattern
Seat BeltVehicle SpeedLight-Blink
Unbuckled6 seconds
UnbuckledAbove 10 km/h (6 mph)Continuously
Buckled6 seconds
Buckled →
Unbuckled
Above 10 km/h (6 mph)Continuously *1
Below 10 km/h(6 mph)None
OYP036258N
OYP034257N
■Type A
■Type B
Page 54 of 593
Safety features of your vehicle
38
3
You can find the front passenger's
seat belt warning light on the cen-
ter fascia panel.
Although the front passenger seat is not occupied, the seat belt warn-
ing light will blink for 6 seconds.
The seat belt warning light can blink when a briefcase or purse is
placed on the front passenger
seat.
Riding in an improper position
adversely affects the front passen-
ger's seat belt warning system. It is
important for the driver to instruct the
passenger as to the proper seating
instructions as contained in this
manual.Seat belt - Driver's 3-point system with emergency locking retractor
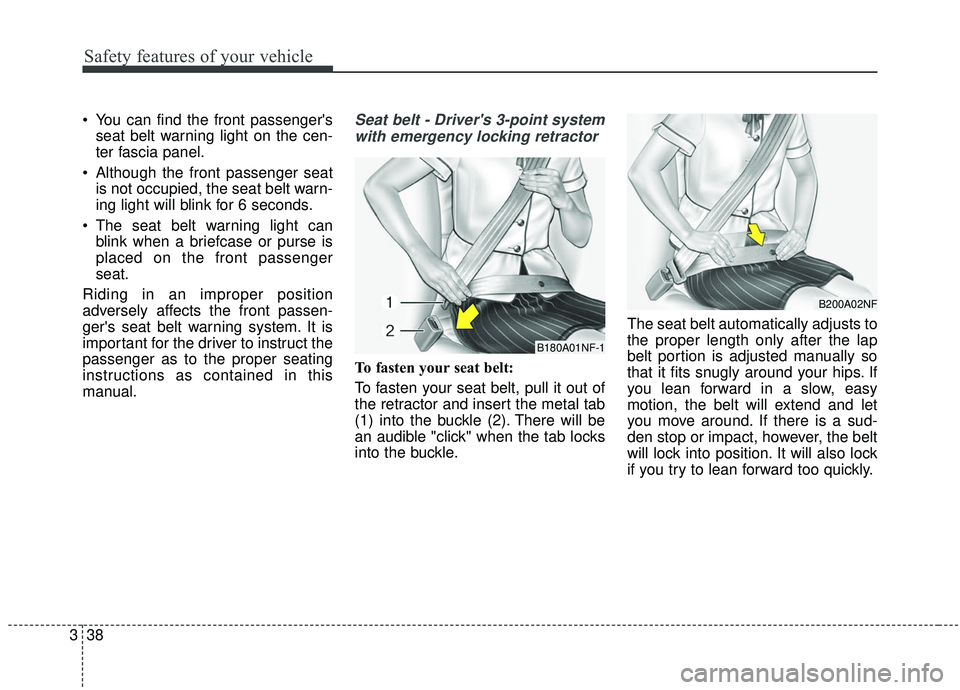
To fasten your seat belt:
To fasten your seat belt, pull it out of
the retractor and insert the metal tab
(1) into the buckle (2). There will be
an audible "click" when the tab locks
into the buckle. The seat belt automatically adjusts to
the proper length only after the lap
belt portion is adjusted manually so
that it fits snugly around your hips. If
you lean forward in a slow, easy
motion, the belt will extend and let
you move around. If there is a sud-
den stop or impact, however, the belt
will lock into position. It will also lock
if you try to lean forward too quickly.
B180A01NF-1
B200A02NF
Page 63 of 593
347
Safety features of your vehicle
When the vehicle stops suddenly, or
if the occupant tries to lean forward
too quickly, the seat belt retractor
may lock into position. In certain
frontal collisions, the pre-tensioner
will activate and pull the seat belt into
tighter contact against the occu-
pant's body.
(1) Retractor PretensionerThe purpose of the retractor pre-tensioner is to make sure that the
shoulder belts fit in tightly against
the occupant's upper body in cer-
tain frontal collisions.
(2) EFD (Emergency Fastening Device)
The purpose of the EFD is tomake sure that the pelvis belts fit
in tightly against the occupant's
lower body in certain frontal colli-
sions. If the system senses excessive ten-
sion on the driver or passenger's
seat belt when the pre-tensioner sys-
tem activates, the load limiter inside
the retractor pre-tensioner will release
some of the pressure on the affected
seat belt.
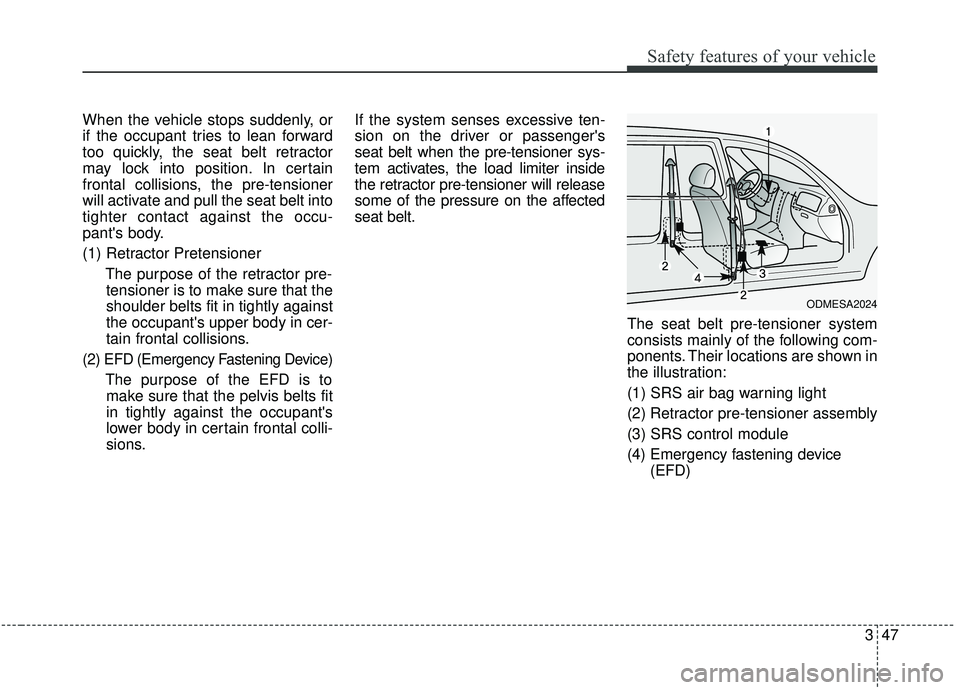
The seat belt pre-tensioner system
consists mainly of the following com-
ponents. Their locations are shown in
the illustration:
(1) SRS air bag warning light
(2) Retractor pre-tensioner assembly
(3) SRS control module
(4) Emergency fastening device(EFD)
ODMESA2024
Page 64 of 593

Safety features of your vehicle
48
3
✽ ✽
NOTICE
• Both the driver's and front pas-
senger's seat belt pre-tensioner
system may be activated not only
in certain frontal collision but also
in certain side collision or rollover,
if the vehicle is equipped with a
side or curtain air bag.
• Because the sensor that activates the SRS air bag is connected with
the pre-tensioner seat belt, the
SRS air bag warning light on
the instrument panel will illumi-
nate for approximately 6 seconds
after the ignition switch has been
turned to the ON position, and
then it should turn off.
If the pre-tensioner seat belt system
are not working properly, this warn-
ing light will illuminate even if there is
no malfunction of the SRS air bag. If
the SRS air bag warning light does
not illuminate when the ignition
switch is turned ON, or if it remains
illuminated after illuminating for
approximately 6 seconds, or if it illu-
minates while the vehicle is being
driven, have an authorized Kia deal-
er inspect the pre-tensioner seat belt
and SRS air bag system as soon as
possible.
WARNING - Skin Irritation
Wash all exposed skin areas
thoroughly after an accident in
which the pre-tensioner seat
belts were activated. The fine
dust from the pre-tensioner
activation may cause skin irrita-
tion and should not be breathed
for prolonged periods.