Page 465 of 593
What to do in an emergency
22
6
When towing your vehicle in an
emergency without wheel dollies :
1. Set the ignition switch in the ACC
position.
2. Place the transaxle shift lever in N (Neutral).
3. Release the parking brake.Removable towing hook (front)
(if equipped)
1.Remove the towing hook from the tool case.
2.Remove the hole cover pressing the lower part of the cover on the
front bumper.
3.Install the towing hook by turning it clockwise into the hole until it is
fully secured.
4.Remove the towing hook and install the cover after use.
CAUTION - Towing gear
position
Failure to place the transaxleshift lever in N (Neutral) maycause internal damage to thetransaxle.
CAUTION - Towing
• Do not tow the vehicle back- wards with the front wheels onthe ground as this may causedamage to the vehicle.
Do not tow with sling-type equipment. Use wheel lift orflatbed equipment.
OYP064026N
OYP044260N
OYP068009N
Page 467 of 593

What to do in an emergency
24
6
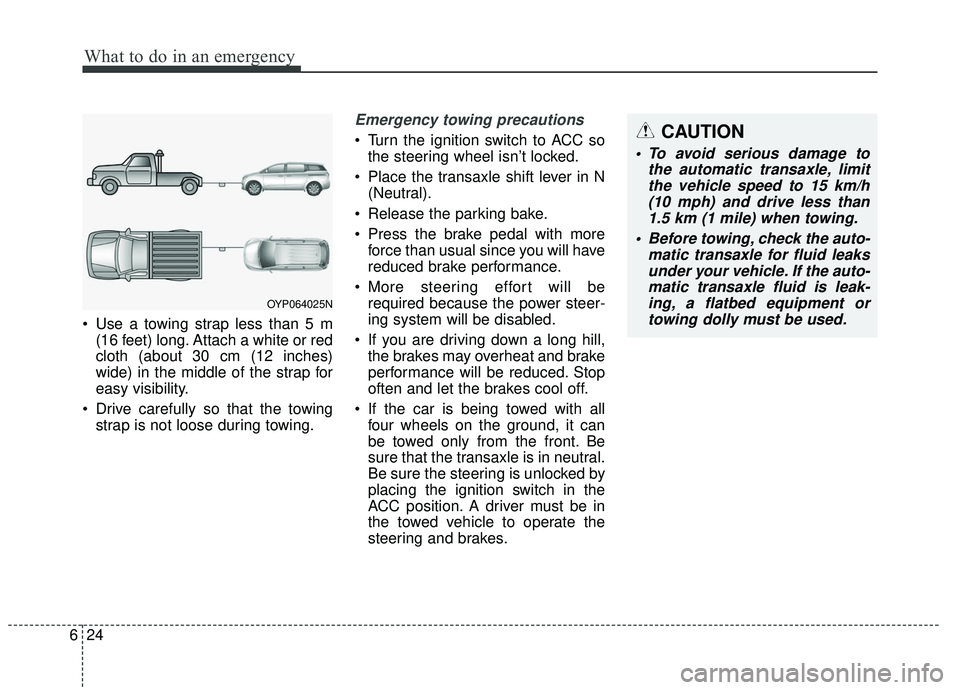
Use a towing strap less than 5 m
(16 feet) long. Attach a white or red
cloth (about 30 cm (12 inches)
wide) in the middle of the strap for
easy visibility.
Drive carefully so that the towing strap is not loose during towing.
Emergency towing precautions
Turn the ignition switch to ACC sothe steering wheel isn’t locked.
Place the transaxle shift lever in N (Neutral).
Release the parking bake.
Press the brake pedal with more force than usual since you will have
reduced brake performance.
More steering effort will be required because the power steer-
ing system will be disabled.
If you are driving down a long hill, the brakes may overheat and brake
performance will be reduced. Stop
often and let the brakes cool off.
If the car is being towed with all four wheels on the ground, it can
be towed only from the front. Be
sure that the transaxle is in neutral.
Be sure the steering is unlocked by
placing the ignition switch in the
ACC position. A driver must be in
the towed vehicle to operate the
steering and brakes.
OYP064025N
CAUTION
To avoid serious damage to the automatic transaxle, limitthe vehicle speed to 15 km/h(10 mph) and drive less than1.5 km (1 mile) when towing.
Before towing, check the auto- matic transaxle for fluid leaksunder your vehicle. If the auto-matic transaxle fluid is leak-ing, a flatbed equipment ortowing dolly must be used.
Page 521 of 593

Maintenance
54
7
✽ ✽
NOTICE
• When replacing a fuse, turn the
ignition “OFF” and turn off
switches of all electrical devices
then remove battery (-) terminal.
• The actual fuse/relay panel label may differ from equipped items.
CAUTION
Do not use a screwdriver or any
other metal object to removefuses because it may cause ashort circuit and damage thesystem.
WARNING- Electrical Fire
Always ensure replacements
fuses and relays are securely
fastened when installed. Failure
to do so can result in a vehicle
fire.
CAUTION
When replacing a blown fuse or relay, make sure the newfuse or relay fits tightly intothe clips. Failure to tightlyinstall the fuse or relay maycause damage to the wiringand electric systems.
Do not remove fuses, relays and terminals fastened withbolts or nuts. The fuses, relaysand terminals may not be fas-tened correctly which maycause vehicle damage.
CAUTION
Do not input any other objects except fuses or relays intofuse/relay terminals such as ascrewdriver or wiring. It maycause contact failure and sys-tem malfunction.
Do not plug in screwdrivers or aftermarket wiring into the ter-minal originally designed forfuse and relays only. The elec-trical system and wiring of thevehicle interior may be dam-aged or burned due to contactfailure.
If you directly connect the wire on the taillight or replacethe bulb which is over the reg-ulated capacity to install trail-ers etc., the inner junctionblock can get burned.
Page 522 of 593

755
Maintenance
✽ ✽NOTICE- Remodeling
Prohibited
Do not rewire your vehicle in any
way as doing so may affect the per-
formance of several safety features
in your vehicle. Rewiring your vehi-
cle may also void your warranty and
cause you to be responsible for any
subsequent vehicle damage which
may result.
✽ ✽ NOTICE- Window tinting pre-
caution
Window tint (especially metallic
film) might cause communication
errors or poor radio reception, and
malfunctioning automatic lighting
system due to reflections from the
mirror tint inside the vehicle. The
solution used might also leak into
the electronic components, causing
malfunctions or damage.
Inner panel fuse replacement
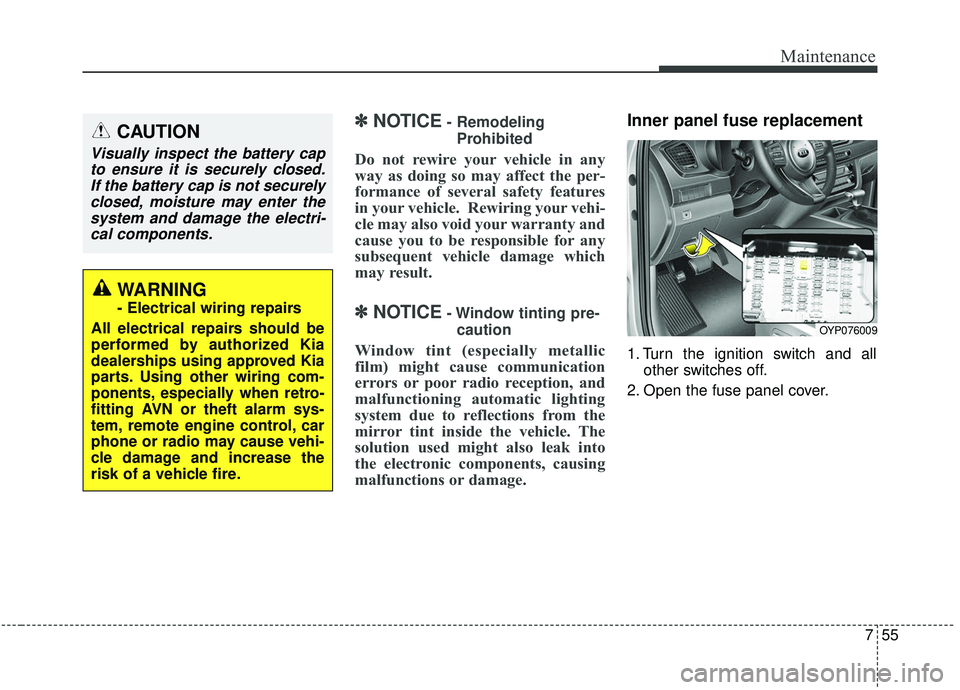
1. Turn the ignition switch and all other switches off.
2. Open the fuse panel cover.
CAUTION
Visually inspect the battery cap to ensure it is securely closed.If the battery cap is not securelyclosed, moisture may enter thesystem and damage the electri-cal components.
WARNING
- Electrical wiring repairs
All electrical repairs should be
performed by authorized Kia
dealerships using approved Kia
parts. Using other wiring com-
ponents, especially when retro-
fitting AVN or theft alarm sys-
tem, remote engine control, car
phone or radio may cause vehi-
cle damage and increase the
risk of a vehicle fire.
OYP076009
Page 524 of 593

757
Maintenance
✽ ✽NOTICE
• Set all switches to ON before driv-
ing.
• If the vehicle is going to be unused for over 1 month, set all switches
to OFF to prevent the batteries
from draining.
Engine compartment fuse
replacement
1. Turn the ignition switch and all
other switches off.
2. Remove the fuse panel cover by pressing the tab and pulling the
cover up. When the blade type
fuse is disconnected, remove it by
using the clip designed for chang-
ing fuses located in the engine
compartment fuse box. Upon
removal, securely insert reserve
fuse of the same rating. 3. Check the removed fuse; replace it
if it is blown. To remove or insert
the fuse, use the fuse puller in the
engine compartment fuse panel.
4. Push in a new fuse of the same rating, and make sure it fits tightly
in the clips. If it fits loosely, consult
an authorized Kia dealer.
OYP074012N
CAUTION - Fuse Panel
Covers
The contact points of theswitches may wear out withexcessive use. Please refrainfrom excessive use of theswitches (except for long-termparking for over 1 month).
CAUTION
Always securely install the fusepanel cover in the engine com-partment to protect againstelectrical failure which mayoccur from water contact.Listen for the audible clickingsound to ensure fuse panelcover is securely fastened.
Page 530 of 593
![KIA SEDONA 2019 Owners Manual 763
Maintenance
Engine compartment fuse panel
Fuse Name Fuse ratingCircuit Protected ]
COOLING FAN 80A Cooling Fan Unit ABS1 40A ESC Module, Multipurpose Check Connector
ABS2 40A ESC Module
INVERTER KIA SEDONA 2019 Owners Manual 763
Maintenance
Engine compartment fuse panel
Fuse Name Fuse ratingCircuit Protected ]
COOLING FAN 80A Cooling Fan Unit ABS1 40A ESC Module, Multipurpose Check Connector
ABS2 40A ESC Module
INVERTER](/manual-img/2/40442/w960_40442-529.png)
763
Maintenance
Engine compartment fuse panel
Fuse Name Fuse ratingCircuit Protected ]
COOLING FAN 80A Cooling Fan Unit ABS1 40A ESC Module, Multipurpose Check Connector
ABS2 40A ESC Module
INVERTER 30A AC Inverter Unit
H/LAMP HI 10A H/LAMP HI Solenoid
EPB1 15A EPB Unit
EPB2 15A EPB Unit
TCU 15A Transmission Unit
P/SEAT (PASS) 30A Passenger Manual Switch B+4 50A Smart Junction Block (IPS Control Module, IPS3, IPS4, IPS5, IPS6, Fuse - MODULE7)
POWER TAIL GATE 40A Power Tail Gate Module
B+2 50ASmart Junction Block (Leak Current Autocut Device, Fuse - P/SEAT DRV, P/WDW RH), Seat Heater
Rear, Interior Lamp, Multimedia, Memory
IG1 40A With Smart Key : PDM1/2 Relay, W/O Smart Key : Ignition Switch
IG2 40A Start Relay, With Smart Key : PDM3 Relay, W/O Smart Key : Ignition Switch,
B+1 50A Smart Junction Block (IPS Control Module, Fuse - P/WDW LH, S/HEATER FRT, DR LOCK)
BLOWER 40A Blower Relay
TRAILER 30A Trailer Power Outlet
B+5 50ASmart Junction Block (Motor Driver, Power Outlet Relay, Fuse - S/ROOF FRT, S/ROOF RR, BRAKE
SWITCH, SMART KEY1, SMART KEY3, AMP), Power Outlet1, Power Outlet2
PSD1 40A Power Sliding Door Module
PSD2 40A Power Sliding Door Module
B+3 50A Smart Junction Block (IPS Control Module, IPS1, IPS2)
MDPS 125A MDPS Unit (Rack)
BLOWER RR 40A Blower RR Relay
Page 531 of 593

Maintenance
64
7
Fuse Name Fuse rating Circuit Protected
SENSOR (B+) 10A Battery Sensor
B/ALARM HORN 15A B/Alarm Horn Relay FUEL LID 10A Fuel Lid Relay DEICER 15A Deicer Relay
DRL 10A DRL Relay
FUEL PUMP 15A Fuel Pump Relay HORN 15A Horn Relay
WIPER 25A Front Wiper (Low) Relay
ECU3 30A Engine Control Relay, Fuse - ECU1
FUEL HEATER 30A -
REAR HEATED 40A Rear Heated Relay SENSOR5 10A - TCU 10A Transmission Range Switch
MDPS 10A MDPS Unit (Rack)
DCU 10A -
B/UP LAMP 10A Audio, A/V & Navigation Head Unit, Rear Combination Lamp (IN) LH/RH, Electro Chromic \
Mirror A/CON 7.5A Rear A/C Control Switch, A/C Control Module
ECU1 15A PCM ABS3 7.5A ESC Module, Steering Angle Sensor
SENSOR4 10A Fuel Pump Relay ECU2 20A ECU Unit
SENSOR1 15A Oxygen Sensor #1/#2/#3/#4, PCM, E/R Junction Box (Cooling Fan1 Relay)
SENSOR2 10A PCM, Canister Close Valve, Variable Intake Solenoid Valve #1/#2, Purge Control Solenoid Valve, Oil Control
Valve #1/#2 (Intake), Oil Control Valve #1/#2 (Exhaust)
SENSOR3 10A PCM, Injector
IGN COIL 20A Ignition Coil #1~#6, Condensor #1/#2 ECU3 20A ECU Unit
Page 532 of 593

765
Maintenance
LIGHT BULBS
Bulb replacement precaution
Please keep extra bulbs on hand
with appropriate wattage ratings in
case of emergencies.
Refer to “Bulb Wattage” in chapter 8.
When changing lamps, first turn off
the engine at a safe place, firmly
apply the parking brake and detach
the battery’s negative (-) terminal.
Use only bulbs of the specifiedwattage. net-work failure
The headlamp, taillight, and fog light
may light up when the head lamp
switch is turned ON, and not light up
when the taillight or for light switch is
turned ON. This may be cause by
network failure or vehicle electrical
control system malfunction. If there is
a problem, we recommend the sys-
tem be serviced by an authorized Kia
dealer.
trical control system stabilization
A normally functioning lamp may
flicker momentarily. This momentary
occurrence is due to stabilization
function of the vehicle's electrical on
control system. If the lamp soon
returns to normal, the vehicle does
not require service.
However, if the lamp goes out after
the momentary flickering, or the flick-
ering continues, we recommend the
system be serviced by an authorized
Kia dealer.
WARNING- Working on the lights
Prior to working on the light,
firmly apply the parking brake,
ensure that the ignition switch
is turned to the LOCK position
and turn off the lights to avoid
sudden movement of the vehi-
cle and burning your fingers or
receiving an electric shock.
CAUTION -Light replace-
ment
Be sure to replace the burned- out bulb with one of the samewattage rating. Otherwise, itmay cause damage to the fuseor electric wiring system.
CAUTION -Headlamp
Lens
To prevent damage, do notclean the headlamp lens withchemical solvents or strongdetergents.