Page 437 of 503
865
Maintenance
Fuse NameFuse ratingCircuit Protected
SPARE320ASpare
A/BAG IND7.5AInstrument Cluster
CLUSTER7.5AInstrument Cluster
MDPS7.5AMDPS (Motor Driven Power Steering) Unit
AUDIO20AAudio, Audio/Video & Navigation Head Unit
ROOM LP10ARoom Lamp Relay, Glove Box Lamp, Air Conditioner Control Module, SLM (Seat Belt & Lighting Module),
BCM (Body Control Module), Auto Light & Photo Sensor, TPMS (Tire Pressure Monitoring System) Unit,
Instrument Cluster, Data Link Connector, Room Lamp, Trunk Room Lamp
SC CAN (ENG) 8.qxp 7/18/2018 5:34 PM Page 65
Page 455 of 503
883
Maintenance
Stop and tail lamp bulb
replacement (for 5 door)
1. Open the trunk lid.
2. Loosen the light assembly retain-ing screws with a cross-tip screw-
driver. 3. Remove the rear combination
lamp assembly from the body of
the vehicle.
4. Disconnect the rear combination lamp connector. 5. Remove the socket from the
assembly by turning the socket
counterclockwise until the tabs on
the socket align with the slots on
the assembly.
6. Remove the bulb from the socket by pressing it in and rotating it counter-
clockwise until the tabs on the bulb
align with the slots in the socket.
Pull the bulb out of the socket.
7. Insert a new bulb by inserting it into the socket and rotating it until
it locks into place.
OYB076061
OYB076060
OYB076062
SC CAN (ENG) 8.qxp 7/18/2018 5:36 PM Page 83
Page 456 of 503
Maintenance
84
8
8. Install the socket in the assembly
by aligning the tabs on the socket
with the slots in the assembly.
Push the socket into the assembly
and turn the socket clockwise.
9. Install the rear combination lamp assembly to the body of the vehi-
cle.Rear turn signal lamp bulb
replacement (for 5 door)
1. Open the trunk lid.
2. Loosen the light assembly retain-ing screws with a cross-tip screw-
driver. 3. Remove the rear combination
lamp assembly from the body of
the vehicle.
4. Disconnect the rear combination lamp connector.
OYB076060
OYB076061
SC CAN (ENG) 8.qxp 7/18/2018 5:36 PM Page 84
Page 462 of 503
Maintenance
90
8
Rear turn signal lamp bulb
replacement (for 4 door)
1. Open the trunk lid.
2. Remove the service cover by
pulling out the service cover. 3. Remove the socket from the
assembly by turning the socket
counterclockwise until the tabs on
the socket align with the slots on
the assembly.
4. Remove the bulb from the socket by pressing it in and rotating it
counterclockwise until the tabs on
the bulb align with the slots in the
socket. Pull the bulb out of the
socket.
5. Insert a new bulb by inserting it into the socket and rotating it until
it locks into place. 6. Install the socket in the assembly
by aligning the tabs on the socket
with the slots in the assembly.
Push the socket into the assembly
and turn the socket clockwise.
7. Install the service cover.
OSC077031N
OSC077030N
SC CAN (ENG) 8.qxp 7/18/2018 5:36 PM Page 90
Page 463 of 503
891
Maintenance
Stop and tail lamp / Side mark-
er (Bulb type) replacement
(for 4 door)
1. Open the trunk lid.
2. Remove the service cover bypulling out the service cover. 3. Remove the socket from the
assembly by turning the socket
counterclockwise until the tabs on
the socket align with the slots on
the assembly.
4. Remove the bulb from the socket by pressing it in and rotating it
counterclockwise until the tabs on
the bulb align with the slots in the
socket. Pull the bulb out of the
socket.
5. Insert a new bulb by inserting it into the socket and rotating it until
it locks into place. 6. Install the socket in the assembly
by aligning the tabs on the socket
with the slots in the assembly.
Push the socket into the assembly
and turn the socket clockwise.
7. Install the service cover.
OSC077030N
OSC077032N
SC CAN (ENG) 8.qxp 7/18/2018 5:36 PM Page 91
Page 464 of 503

Maintenance
92
8
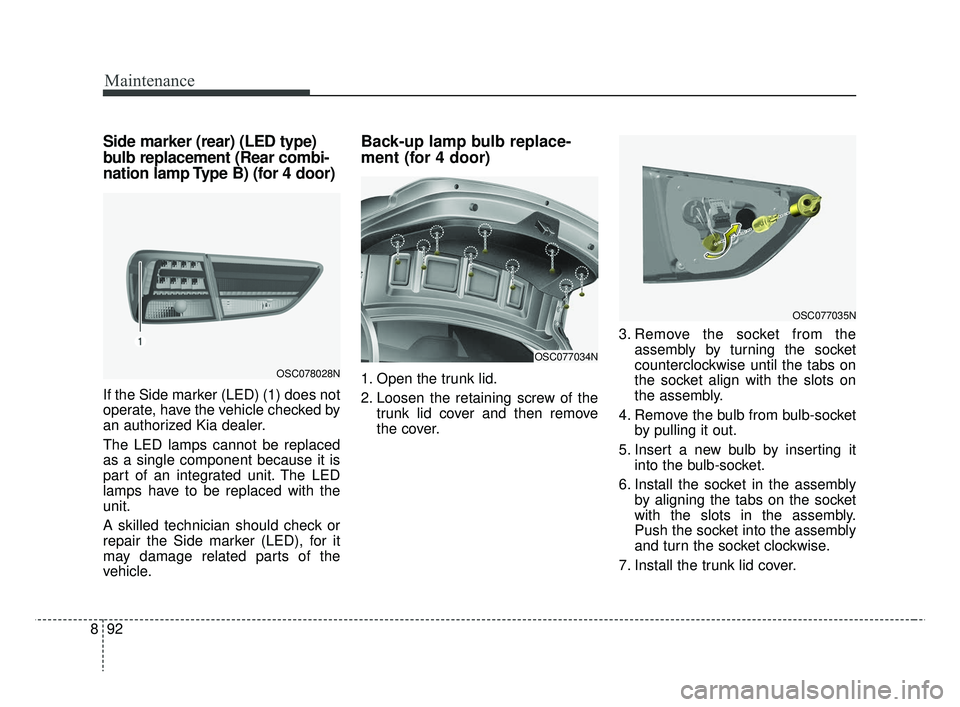
Side marker (rear) (LED type)
bulb replacement (Rear combi-
nation lamp Type B) (for 4 door)
If the Side marker (LED) (1) does not
operate, have the vehicle checked by
an authorized Kia dealer.
The LED lamps cannot be replaced
as a single component because it is
part of an integrated unit. The LED
lamps have to be replaced with the
unit.
A skilled technician should check or
repair the Side marker (LED), for it
may damage related parts of the
vehicle.
Back-up lamp bulb replace-
ment (for 4 door)
1. Open the trunk lid.
2. Loosen the retaining screw of the
trunk lid cover and then remove
the cover. 3. Remove the socket from the
assembly by turning the socket
counterclockwise until the tabs on
the socket align with the slots on
the assembly.
4. Remove the bulb from bulb-socket by pulling it out.
5. Insert a new bulb by inserting it into the bulb-socket.
6. Install the socket in the assembly by aligning the tabs on the socket
with the slots in the assembly.
Push the socket into the assembly
and turn the socket clockwise.
7. Install the trunk lid cover.
OSC077034N
OSC077035N
OSC078028N
SC CAN (ENG) 8.qxp 7/18/2018 5:37 PM Page 92
Page 465 of 503
893
Maintenance
Tail lamp (Bulb type) bulb
replacement (for 4 door)
1. Open the trunk lid.
2. Loosen the retaining screw of thetrunk lid cover and then remove
the cover. 3. Remove the socket from the
assembly by turning the socket
counterclockwise until the tabs on
the socket align with the slots on
the assembly.
4. Remove the bulb from the socket by pressing it in and rotating it
counterclockwise until the tabs on
the bulb align with the slots in the
socket. Pull the bulb out of the
socket.
5. Insert a new bulb by inserting it into the socket and rotating it until
it locks into place. 6. Install the socket in the assembly
by aligning the tabs on the socket
with the slots in the assembly.
Push the socket into the assembly
and turn the socket clockwise.
7. Install the trunk lid cover.
OSC077036N
OSC077034N
SC CAN (ENG) 8.qxp 7/18/2018 5:37 PM Page 93
Page 466 of 503

Maintenance
94
8
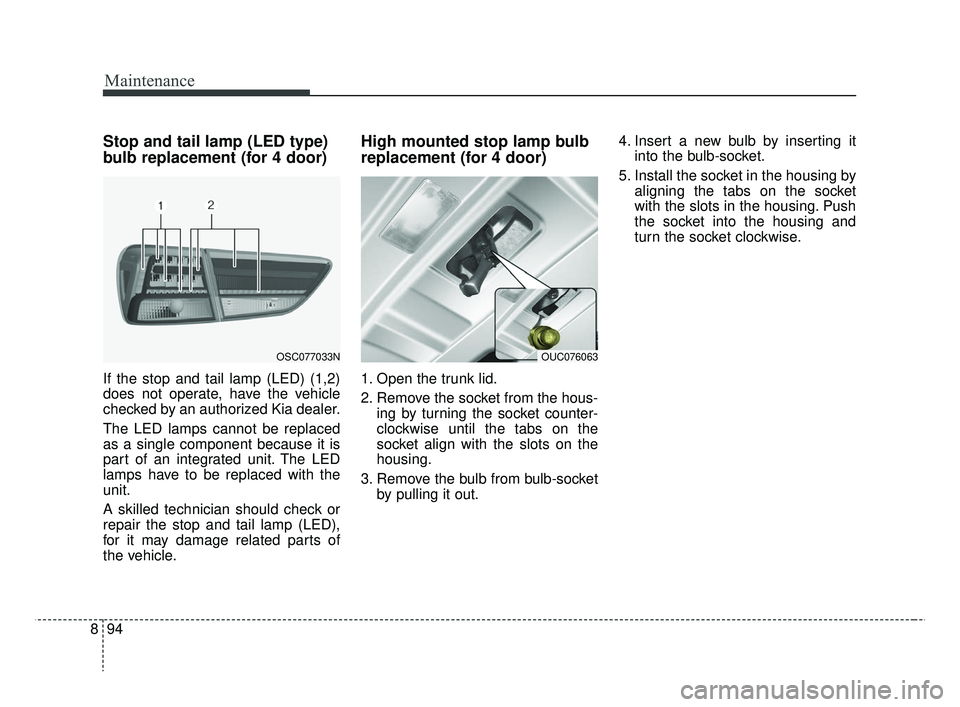
Stop and tail lamp (LED type)
bulb replacement (for 4 door)
If the stop and tail lamp (LED) (1,2)
does not operate, have the vehicle
checked by an authorized Kia dealer.
The LED lamps cannot be replaced
as a single component because it is
part of an integrated unit. The LED
lamps have to be replaced with the
unit.
A skilled technician should check or
repair the stop and tail lamp (LED),
for it may damage related parts of
the vehicle.
High mounted stop lamp bulb
replacement (for 4 door)
1. Open the trunk lid.
2. Remove the socket from the hous-
ing by turning the socket counter-
clockwise until the tabs on the
socket align with the slots on the
housing.
3. Remove the bulb from bulb-socket by pulling it out. 4. Insert a new bulb by inserting it
into the bulb-socket.
5. Install the socket in the housing by aligning the tabs on the socket
with the slots in the housing. Push
the socket into the housing and
turn the socket clockwise.
OUC076063OSC077033N
SC CAN (ENG) 8.qxp 7/18/2018 5:37 PM Page 94