2019 KIA K900 reset
[x] Cancel search: resetPage 94 of 580

Features of your vehicle
Smart key . . . . . . . . . . . . . . . . . . . . . . . . . . . . . . . . . 4-4
• Record your key number . . . . . . . . . . . . . . . . . . . . . . . 4-4
• Smart key functions . . . . . . . . . . . . . . . . . . . . . . . . . . . 4-4
• Remote keyless entry system operations . . . . . . . . . . . 4-7
• Transmitter precautions . . . . . . . . . . . . . . . . . . . . . . . . 4-9
• Battery replacement . . . . . . . . . . . . . . . . . . . . . . . . . . 4-10
• Mechanical key operations . . . . . . . . . . . . . . . . . . . . . 4-11
• Immobilizer system . . . . . . . . . . . . . . . . . . . . . . . . . . . 4-12
Theft-alarm system . . . . . . . . . . . . . . . . . . . . . . . . 4-14
• Armed stage . . . . . . . . . . . . . . . . . . . . . . . . . . . . . . . . . 4-14
• Theft-alarm stage . . . . . . . . . . . . . . . . . . . . . . . . . . . . 4-15
• Disarmed stage. . . . . . . . . . . . . . . . . . . . . . . . . . . . . . . 4-15
Door locks . . . . . . . . . . . . . . . . . . . . . . . . . . . . . . . . 4-17
• Operating door locks from outside the vehicle. . . . . 4-17
• Operating door locks from inside the vehicle . . . . . . 4-18
• Door lock/unlock features. . . . . . . . . . . . . . . . . . . . . . 4-20
• Auto door lock/unlock feature . . . . . . . . . . . . . . . . . . 4-20
• Child-protector rear door lock. . . . . . . . . . . . . . . . . . 4-21
Trunk . . . . . . . . . . . . . . . . . . . . . . . . . . . . . . . . . . . . \
4-23
• Non-power trunk . . . . . . . . . . . . . . . . . . . . . . . . . . . . . 4-23
• Power trunk . . . . . . . . . . . . . . . . . . . . . . . . . . . . . . . . . 4-25
Smart trunk . . . . . . . . . . . . . . . . . . . . . . . . . . . . . . 4-32
• Emergency trunk safety release . . . . . . . . . . . . . . . . . 4-36
Windows . . . . . . . . . . . . . . . . . . . . . . . . . . . . . . . . . 4-37
• Power windows . . . . . . . . . . . . . . . . . . . . . . . . . . . . . . 4-38
Hood. . . . . . . . . . . . . . . . . . . . . . . . . . . . . . . . . . . . \
. 4-42
• Opening the hood . . . . . . . . . . . . . . . . . . . . . . . . . . . . 4-42
• Closing the hood . . . . . . . . . . . . . . . . . . . . . . . . . . . . . 4-43
Fuel filler lid . . . . . . . . . . . . . . . . . . . . . . . . . . . . . . 4-44
• Opening the fuel filler lid . . . . . . . . . . . . . . . . . . . . . . 4-44
• Closing the fuel filler lid . . . . . . . . . . . . . . . . . . . . . . . 4-44
• Emergency fuel filler lid release . . . . . . . . . . . . . . . . 4-45
Sunroof . . . . . . . . . . . . . . . . . . . . . . . . . . . . . . . . . . 4-48\
• Sunroof open warning. . . . . . . . . . . . . . . . . . . . . . . . . 4-49
• Sunshade. . . . . . . . . . . . . . . . . . . . . . . . . . . . . . . . \
. . . . 4-50
• Sliding the sunroof . . . . . . . . . . . . . . . . . . . . . . . . . . . 4-50
• Tilting the sunroof . . . . . . . . . . . . . . . . . . . . . . . . . . . . 4-52
• Resetting the sunroof . . . . . . . . . . . . . . . . . . . . . . . . . 4-52
Steering wheel . . . . . . . . . . . . . . . . . . . . . . . . . . . . . 4-54
• Electric Power Steering (EPS) . . . . . . . . . . . . . . . . . . 4-54
• Tilt and telescopic steering . . . . . . . . . . . . . . . . . . . . . 4-55
• Heated steering wheel . . . . . . . . . . . . . . . . . . . . . . . . . 4-56
• Horn . . . . . . . . . . . . . . . . . . . . . . . . . . . . . . . . . . . . \
. . . 4-57
Mirrors . . . . . . . . . . . . . . . . . . . . . . . . . . . . . . . . . . 4-58\
• Inside rearview mirror . . . . . . . . . . . . . . . . . . . . . . . . 4-58
• Outside rearview mirror. . . . . . . . . . . . . . . . . . . . . . . 4-66
Instrument cluster . . . . . . . . . . . . . . . . . . . . . . . . . 4-69
• Instrument cluster control . . . . . . . . . . . . . . . . . . . . . 4-70
• LCD window control . . . . . . . . . . . . . . . . . . . . . . . . . . 4-70
4
Page 123 of 580

Features of your vehicle
30
4
However, if the resistance is weak
such as from an object that is thin or
soft, or the trunk is near the latched
position, the automatic stop and rever-
sal may not detect the resistance.
If the automatic reversal feature oper-
ates continuously more than twice
during opening or closing operation,
the power trunk may stop at that posi-
tion. At this time, close the trunk man-
ually and operate the trunk automati-
cally again.How to reset the power trunk
If the battery has been discharged or
disconnected, or if the related fuse
has been replaced or disconnected,
for the power trunk to operate nor-
mally, reset the power trunk as fol-
lows:
1.Put the shift lever in P (Park).
2. While Pressing the trunk close
button, press the trunk handle
switch for more than 3 seconds.
(the chime will sound)
3. Close the trunk manually.
If the power trunk does not work
properly after the above procedure,
have the system checked by an
authorized K900 Kia dealer.
✽ ✽ NOTICE
If the power trunk does not operate
normally, check again if the trans-
mission position is in right position.
WARNING
To prevent serious injury and
damage take the following pre-
cautions when operating the
power trunk:
• Keep all faces, hands, arms,
body parts and other objects
away from the path of the
power trunk.
Do not intentionally place any body parts or objects in the
path of the power trunk to
make sure the automatic stop
and reversal operates.
Do not allow children to play with the power trunk.
Page 132 of 580

439
Features of your vehicle
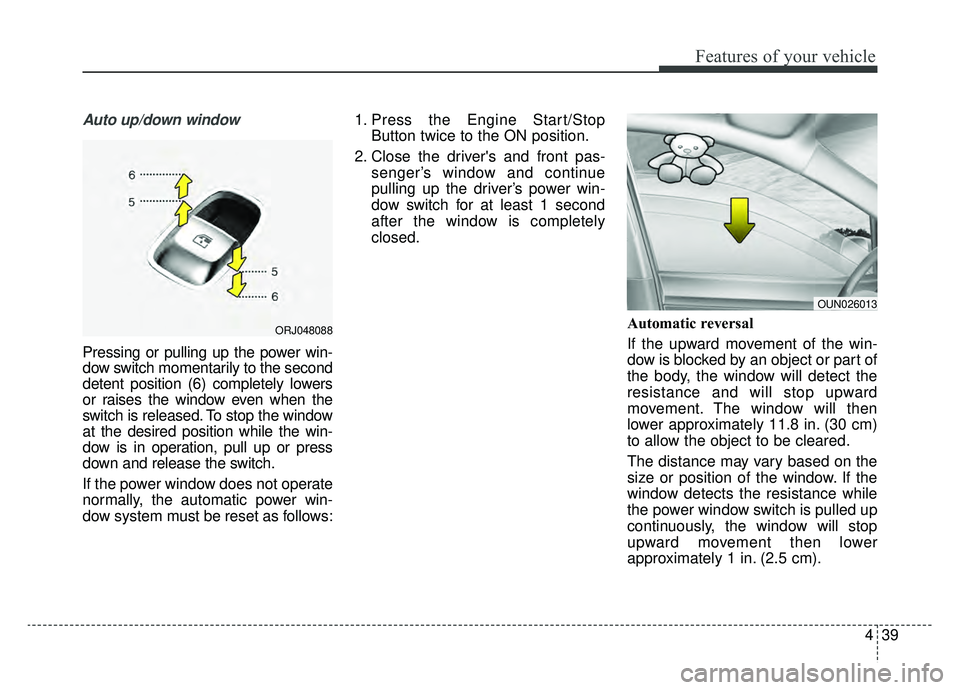
Auto up/down window
Pressing or pulling up the power win-
dow switch momentarily to the second
detent position (6) completely lowers
or raises the window even when the
switch is released. To stop the window
at the desired position while the win-
dow is in operation, pull up or press
down and release the switch.
If the power window does not operate
normally, the automatic power win-
dow system must be reset as follows:1. Press the Engine Start/Stop
Button twice to the ON position.
2. Close the driver's and front pas- senger’s window and continue
pulling up the driver’s power win-
dow switch for at least 1 second
after the window is completely
closed.
Automatic reversal
If the upward movement of the win-
dow is blocked by an object or part of
the body, the window will detect the
resistance and will stop upward
movement. The window will then
lower approximately 11.8 in. (30 cm)
to allow the object to be cleared.
The distance may vary based on the
size or position of the window. If the
window detects the resistance while
the power window switch is pulled up
continuously, the window will stop
upward movement then lower
approximately 1 in. (2.5 cm).
OUN026013
ORJ048088
Page 133 of 580

Features of your vehicle
40
4
If the power window switch is pulled
up continuously again within 5 sec-
onds after the window is lowered by
the automatic window reversal fea-
ture, the automatic window reversal
will not operate.
The automatic reverse feature for the
driver’s and front passenger’s win-
dow is only active when the “auto up”
feature is used by fully pulling up the
switch. The automatic reverse fea-
ture will not operate if the window is
raised using the halfway position on
the power window switch.Power window lock button
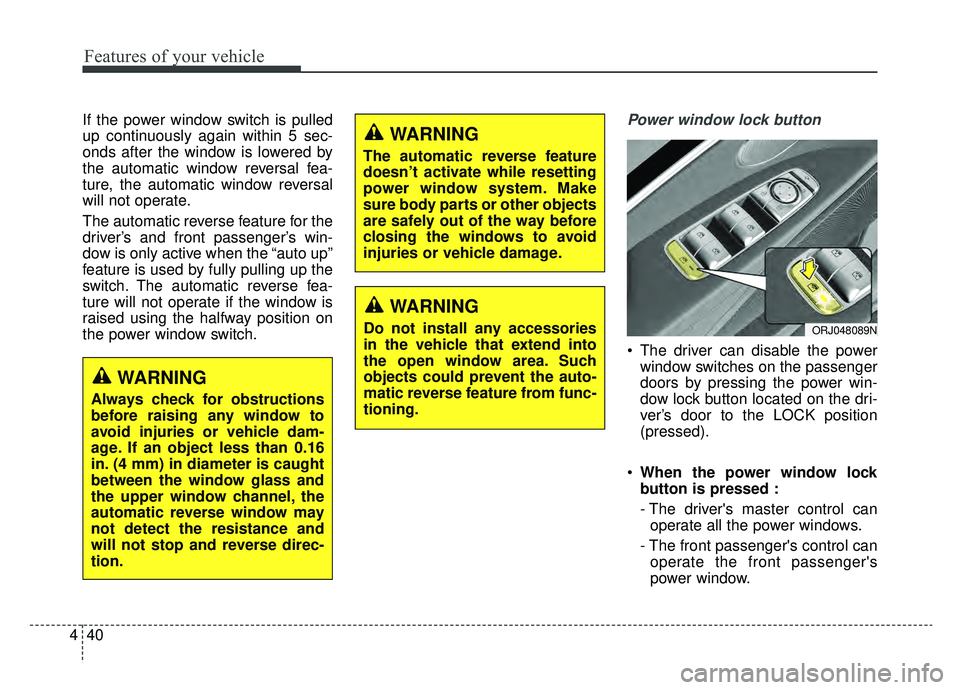
The driver can disable the power
window switches on the passenger
doors by pressing the power win-
dow lock button located on the dri-
ver’s door to the LOCK position
(pressed).
When the power window lock
button is pressed :
- The driver's master control can
operate all the power windows.
- The front passenger's control can operate the front passenger's
power window.
ORJ048089N
WARNING
Always check for obstructions
before raising any window to
avoid injuries or vehicle dam-
age. If an object less than 0.16
in. (4 mm) in diameter is caught
between the window glass and
the upper window channel, the
automatic reverse window may
not detect the resistance and
will not stop and reverse direc-
tion.
WARNING
The automatic reverse feature
doesn’t activate while resetting
power window system. Make
sure body parts or other objects
are safely out of the way before
closing the windows to avoid
injuries or vehicle damage.
WARNING
Do not install any accessories
in the vehicle that extend into
the open window area. Such
objects could prevent the auto-
matic reverse feature from func-
tioning.
Page 145 of 580

Features of your vehicle
52
4
✽ ✽
NOTICE
If you drive with the sunroof opened
right after a vehicle wash or rain,
water may get inside the vehicle.
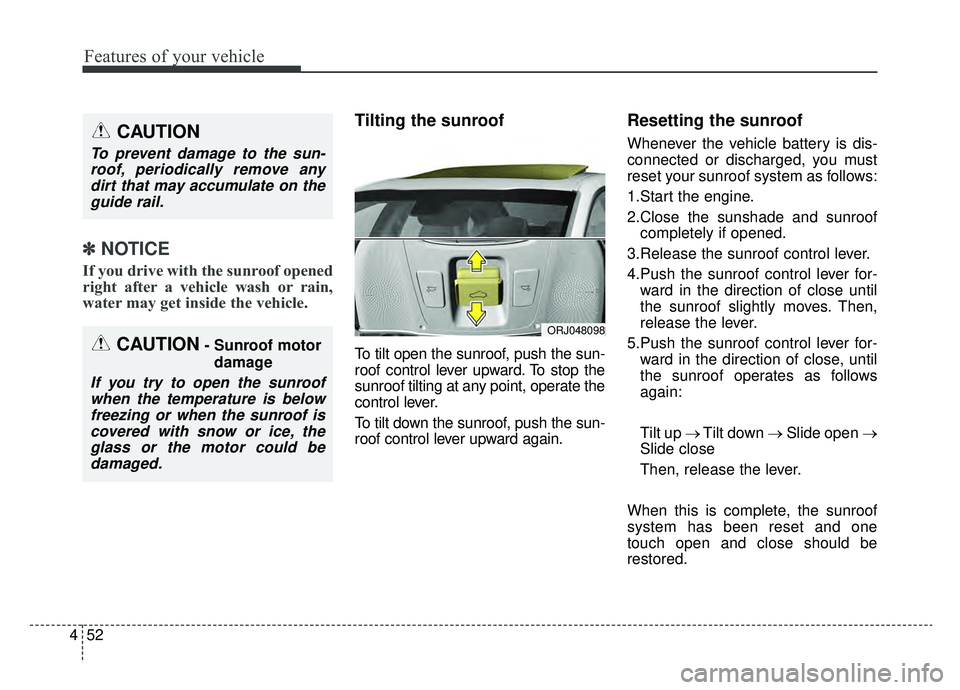
Tilting the sunroof
To tilt open the sunroof, push the sun-
roof control lever upward. To stop the
sunroof tilting at any point, operate the
control lever.
To tilt down the sunroof, push the sun-
roof control lever upward again.
Resetting the sunroof
Whenever the vehicle battery is dis-
connected or discharged, you must
reset your sunroof system as follows:
1.Start the engine.
2.Close the sunshade and sunroof
completely if opened.
3.Release the sunroof control lever.
4.Push the sunroof control lever for- ward in the direction of close until
the sunroof slightly moves. Then,
release the lever.
5.Push the sunroof control lever for- ward in the direction of close, until
the sunroof operates as follows
again:
Tilt up → Tilt down → Slide open →
Slide close
Then, release the lever.
When this is complete, the sunroof
system has been reset and one
touch open and close should be
restored.CAUTION
To prevent damage to the sun- roof, periodically remove anydirt that may accumulate on theguide rail.
CAUTION- Sunroof motor
damage
If you try to open the sunroofwhen the temperature is belowfreezing or when the sunroof iscovered with snow or ice, theglass or the motor could bedamaged.
ORJ048098
Page 146 of 580

453
Features of your vehicle
✽ ✽NOTICE
If the Resetting the Sunroof proce-
dure is not correctly followed, the
sunroof may not operate properly.
Page 163 of 580

Features of your vehicle
70
4
Instrument Cluster Control
Adjusting Instrument Cluster
Illumination
The brightness of the instrument
panel illumination is changed by
pressing the illumination control button
(“+” or “-”) when the Engine Start/Stop
button is ON, or the taillights are
turned on. If you hold the illumination control
button (“+” or “-”), the brightness
will be changed continuously.
If the brightness reaches to the maximum or minimum level, an
alarm will sound.
LCD Window Control
The LCD Window modes can be
changed by using the control buttons
on the steering wheel.
(1) : MODE button for changing modes
(2) / : MO VE scroll switch for
selecting the items
(3) OK : SET/RESET button for set- ting the items or resetting
the items
❈ For the LCD modes, refer to “LCD
Windows” in this chapter.ORJ048408
ORJ048409L
ORJ048124L
ORJ048125N
■Type A
■Type B
Page 169 of 580

Features of your vehicle
76
4
Over view
LCD windows show the following
information to drivers.
- Trip information
- LCD modes
- Warning messages
Trip information (Trip computer)
The trip computer is a microcomput-
er-controlled driver information sys-
tem that displays information related
to driving.
✽ ✽
NOTICE
Some driving information stored in
the trip computer (for example
Average Fuel Economy) resets if the
battery is disconnected.
Trip Modes
LCD WINDOWS (IF EQUIPPED)
ORJ048173N
ORJ048174N
■ Type A
■Type B
Accumulated Info
Digital speedometer
Drive Info
TRIP
Drive Mode